Film cameras
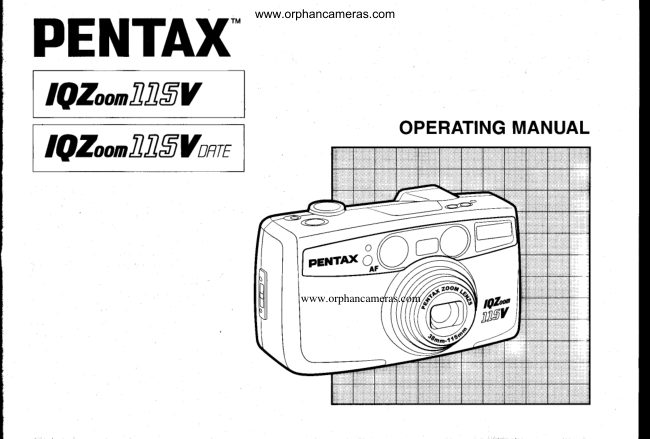
Pentax IQZoom 115V / 115V date User manual
User manual for Pentax IQZoom 115V / 115V date. 33 pages in English. Read the original PDF, download or print a copy without registration.
33 pagesEnglish2.5 MB PDF
Loading your manual…Open PDF directly
Document details
- Brand
- Pentax
- Model / document
- Pentax IQZoom 115V / 115V date
- Document type
- User manual
- Language
- English
- Pages
- 33
- File size
- 2.5 MB
- Category
- Film cameras
- Document date
- Not specified in catalog
Search available document text
Find a term, then jump to its page in the original PDF. Image-only pages may not be searchable; check the PDF for exact wording and diagrams.
Page 2 · Read text
www.orphancameras.com

Congratulationson your purchase of the   lcon indications used in this manual
PENTAX lQzooil,lnlflYand welcome to the
                                               Operationaldirection                 -world of Pentaxzoom compactphotography!
Yourcompact,lightweightcamerais a great                                             Automaticoperation                      {rrrrf
companionto preserveyour favoritememo-
ries.                                            Attention                                                                                                         I
. Please read this manual carefully before   Lamp lighted                            _._.11,_,'l'.
 operatingthe camera to take consistently
 superiorpictures.                     Lamp blinking
o Pay special attentionto the cautions and
 notes in this OperatingManual. Pictures    Correct                       o and illustrationsshown herein may differ                                                   lncorrect from the camera'sactualappearance.               X
.lllustrationsin this operatingmanual are
 the DATEMODEL.
View original page 2Page 3 · Read text
TABLE OF CONTENTS        www.orphancameras.com

Namesof workingparts ........          ..........2  TAKING BETTER PHOTOGRAPHS
LCD panel                        .....................3Howto selectexposure,AF and Flashmodes ...24
Forsafeuse of yourcamera .............................41. Automode                       ...............25
Precautionsfor your camera              ...........5     2. Auto mode/red-eyereductionf|ash...............25
Precautionsfor batteryusage              .........6     3. Auto mode/daylight-sync(FlashON)............26
                                                     4. Takingpicturesat a slow shutterspeed ......27
PREPARATIONSBEFORETAKING            C StowShutterSpeedwith Flash-OFF......27
PHOTOGRAPHS                @ Slow-Speed-Syncwith red-eye
Strapattachment                        ..........'.7      reductionf|ash..........       ..............27
Installing/Replacingbattery                      Self-timerphotography...........,..        ....28
Batteryexhaustionwarning              .............I     lnfinity-landscapeshooting           ............29
Datemodel...............        .......................9Practicalshootingguide             ................30
Mainswitchand batterycheck              ......11   Troubleshooting........          .....................31
Holdingthe camera                      .....12   Specifications............        ....................32
Operating38-115mmzoomlens .....................13   Warrantypolicy                        ............34

TAKING PHOTOGRAPHS
Filmloading.............           ......................14
ViewfinderdisplaysandGreenlampindications.... 17
Takingpictures                        .............18
Focus-lockshooting                       ......20
Hard-To-AutofocusSubjects            ...........21
Unloadingfilm ..........         .....................22
View original page 3Page 5 · Read text
www.orphancameras.comtCD panel

O Strap lug (p.7)
O Httainswitch (p.9)
O Shutterreleasebutton(p.9)
@ LCo panel
@ Flash mode button(P.20)
(G)Setf-timer/AFi nfi nity-landscape   button(p.20)                 vO Mid-rollrewindbutton(P.21)  L                       v@ Built-inflash
(o Viewfinderwindow                       v@ Zoom lens
O Autofocuswindow
(D Setf-timerlamp (p.23)
(D Ligntsensorwindow (P.22)
(E Back cover releaselever(p.16)
(D Viewfindereyepiece(D Zoom lever(p.15)      r@IT
(D fitm informationwindow      O Flash ON             (@Batteryexhaustionwarning
@ Batterychambercover(p.14)    (O Exposurecounter      O Red-eyereductionflash
@ tripod socket             O self-timer              mode
@ Bact<cover           @ tntinity-tandscapemode  @ Slow shutterspeed mode
(D Green lamp              O Arrow mark          O FlashOFF
View original page 5
Page 6 · Read text
www.orphancameras.comPRECAUTIONSFOR BATTERYUSAGE

Other precautions                             Precautions for battery usage
. The temperaturerange at which this camera      . Misuse of a batterycan cause hazardssuch as
 functionsproperlyis 50"C to - 10"C (122"F lo     leakage,overheating,explosions,etc. The bat-
 14"F).                                             tery shouldbe insertedwith the "+" and "-" sides
. To maintainoptimum performance,it is recom-     facingcorrectly.
 mendedthat the camerabe inspectedeveryone       . Nevertry to disassemble,short or rechargethe
  or two years.lf the camerahas not been usedfor      battery.Also do not dispose of the battery in a
 an extendedperiod,or is being preparedfor an       fire, as it may explode.
  important photographicsession, it  is recom-      . Batt€ry performancemay be temporarily hin-
 mendedthat you have the camera inspectedor     dered in low temperatures,but will recoverin
  test shoot with it.                            normaltemperatures.
. The PENTAX warranty provided only for the       . Keep a spare battery on hand for replacement
  repair of defects in materialsor workmanship.    conveniencewhen shootingoutdoorsor while
 Damage of any kind cannot be repairedat free     traveling.
  of charge under the term of the warranty.lf the       . When the camera is in a bag, make sure the
  difficultyis causedas a direct resultof the prod-    main switch is OFF position.Otherwise,battery
  uct being used in conditionsas out lined in the     power may be wasted if the shutterreleasebut-
 other operationcontraryto the instructionsout-     ton is accidentallypushed.
  linedin this manual,chargeswill be assessedor       . Be sure to keep the battery out of the reach of
 a repairquotationwill be provided.                 children.
View original page 6
Page 7 · Read text
www.orphancameras.com$TRAF                                                                                     i,,ij:t)li:i,il                            ryCHMENT                      .
                                                         Fit the strap on the cameraas illustrated.
                                     Use the illustratedpart of the strapfor openingthe
                                                batterychamber cover,adjustingthe data on the
                                        Date model,or pushingthe mid-rollrewindbuttonPREPARATIONSBEFORE.:...,::..
                               :',1            to rewinda film beforeexposingall frames.TAKINGPHOTOGRAPHS .r,:,,,,i:t:

Fiit  optiffi u'#               peffd-dbfid6"V6U"'gfiould                 "familiarizeyourself with certain funda-
mentalsbeforetakingany pictures.
View original page 7Page 8 · Read text
INSTALLING/ REPLACINGBATTERYwww.orphancameras.com
BATTERYEXHAUSTIONWARNING Use one 3V lithium battery (GR-123Aor DL-l23A)
                                                                                       . On the DATE MODEL, the data is initialized
                                       when the batterychambercoveris opened.After
                                            openingthe battery chamber cover,correctthe
                                                  data. See page 9.
                                     .?
                        o                               F

Ensurethat the power is off before replacingthe   BATTERYEXHAUSTIONWARNING                                   When the batteryis nearlyexhausted,the batterybattery.
                                        symbol(s     ) appearson the LCD panelto warn
1. Open the batterychambercover by pullingthe    you. Replacethe battery as soon as possible.
                                  When (E     ) startsblinking,no operationscan be  cover lock in the directionof the arrow with the                                             performed.  strapclamp'sprotrusion.
2. Insert one lithium battery (CR123A or the
  equivalent)with the plus/minus(+l-) sides    Battery life (using 24-exposurefilm rolls):                                           Approx.15 rollswhen 50% of the time uses flash  matching the indicationsin the battery com-                                              (usingthe CR123Abatteryand underPentaxtest-  partment.
                                                  ing conditions).Actual battery life/performance3. Close the battery chamber cover. Ensure that                                    may vary drasticallydependingon usageof Power  the cover is lockedwith a click.
.  lf the battery is loaded correctly,the zoom lens   Zoom, Flashand externalconditionssuch as tem-                                              peratureand freshnessof the battery. moves slightlyand the motor operatesfor a few
 seconds.
I
View original page 8Page 10 · Read text
www.orphancameras.com

Operational precautions
. As you releasethe shutter,the bar( - ) mark on
 the display blinks for a few seconds, indicating
 the data has been imprinted.
.  lf there is a white or yellow object in the corner
  of the picturewhere the data is imprinted,the
 data may be difficultto read.When composing
 your photographs,try to avoid brightlycolored
 subjectsin that corner.


1 0
View original page 10
Page 11 · Read text
MAIN SWITCHAND BATTEREYwww.orphancameras.comCHECK
                                    t


    MAIN SWITCH                        BATTERYCHECK
    Push the main switch button to switch ON. The    After.you turn the main switchON, the lens slight-
     lens extendsslightlyand the LCD panelis now on.     ly extendsand the lens cover opens.
    To switchOFE push the main switchbuttonagain.
                                                                                                 . See page 8, when the battery exhaustionsym-
         .  lf the camera is ON and left unused for over 3      bol (rz    ) appearson the LCD panel.
      minutes,the lens automaticallyretractsand the
      power is turned off to save the battery.
         . Use one 3V lithiumbattery,type CR123Aor the
       equivalent.Do not removethe batterybeforeit is
      exhausted.lf the batteryis removed,the data on
      the DATEMODELis initialized.


I
I
                                                                                      1 1
View original page 11Page 12 · Read text
HOLDINGTHE CAMERA     www.orphancameras.com


1. Keepthe cameraas still as possibleand steady    Note:
    it against your face. Depress the shutter      . Do not hold the zoom lens because it moves
  release button gently. (lf too much force is     back and forth whilein ooeration.
  applied,the camerais likelyto shake,and the
   picture will be blurred.) Try to brace your
  elbowsagainsta stable,stationaryobjectsuch
  as a wall.
2. When using the flash with the camera posi-
  tioned vertically,hold the camera so that the
   flash is abovethe lens.
3. Make sure not to obstruct the autofocuswin-
  dow, lens, light sensor window or the built-in
  flashwith your fingers,hair or otherobject.

1 2
View original page 12Page 14 · Read text
www.orphancameras.comFILM LOADING.


    I     :     :  :  :     :  :  :  :  :      t  :  t   :  t       :  :    I    :     l
TAKING"p HOTOGHApl{ g'' " t                                          ":i'i,:t,i:
After' feeding this o  Gretifig'ffianual,'you                                                                                  i
should be familiar with the functions
availableon the camera, and you're ready                            I\+

                                       Ensurethe main switchis ON beforeloadingthe
                                                    film.

                                                     1. Slide the back cover releaseleverdown in the
                                                    directionof the arrow to open the back cover.
View original page 14Page 15 · Read text
www.orphancameras.com

                                                                                                    '4--.-'a

                                                                tt
                                                                             I

2. Place the film cartridgein the film chamberby    Notes:
   fittingits flat side on the top of the rewindshaft       .  lf there is dirt on the film detector(O, the film
   first and then slidethe top end of the film car-     cannot be wound properly.
   tridgeintothe camera.                                             . Ensurethe film is taut as illustratedon the illus-
3. Pullthe film leaderout far enoughfrom the car-      tration below.Take up any slack in the film by
   tridgeto reachthe take-upspool.Align the tip     pushingit back into the cartridge.
   of the film with the film leader end mark O
    lr  FlLMl.  Make sure the film is placed betweenthe top            ,/---\/                                     /
  and bottomguides properly.
4. Close the back cover.The film automatically     L-LE-r-         LIEj-  advancesto the first frame.         r,olilq rel
                                        X Slack No!     Q Flat Yes!

                                                                                  1 5
View original page 15Page 16 · Read text
www.orphancameras.com

                       a                    Automatic film speed setting
                                              This camera is designedto use DX-codedfilms
                                                 with ISO ratingat 100 and 400.When any of these
                                                  films are loaded,the properfilm speed is auto-
 +_           +-                    maticallyset for the camera.
 rd/      t \N)  rilt  n  \t{)   Notes:       ,,I                                                                                       . Use of negativecolor film (print film) is recom-           u   i fi               tr                                        mended.
                                                                                       . Non-DXcoded film cannot be used. lf non-DX
                                         coded film is used, the camera set the film
                                         speedto ISO 100.
                                                                                       . A film with ISO 400 film speed is recommended5. ( ,  ) appears in the exposure counter on the
  LCD panel when the film is loaded properly.        to get less image blur and to cover more photo-
6. lf ( 0 ) appearsin the exposurecounteron the     graphicsituations.
  LCD panel,it means that the film is not loaded
   properly.
   ln this case, open the back cover and load the
   film once again.
.  lf the mainswitchis turnedOFF when the film is
 loadedproperly,the number of exposureon the
 LCD panelwill remainon for approx.5 seconds.
o lf the mainswitchis turnedOFF when the film is
 not loaded properly, ( 0  )  in the exposure
 counteron the LCD panel disappearsinstantly.
1 6
View original page 16Page 20 · Read text
FOCUS-LOCKSHOOTING   www.orphancameras.com


lf you shoot without positioningthe autofocus    1. Focus on the subjectwith the autofocusframe
frame (i  I ) on the main subject as illustrated      ( r I ).
above,only the foregroundwill be in focus.When    2. When the shutter releasebutton is depressed
the main subjectis off the autofocusframe in the      halfwaydown,the greenlamplightsup and the
center of the viewfinder,use the focus-locktech-      exposureand focus are temporarilylocked.
nique.(Focuslock is the functionto lock focus.)


20
View original page 20
Page 21 · Read text
www.orphancameras.com

                                     HARD.TO.AUTOFOCUS.SUBJ ECTS
                                              The autofocussystemis highlyprecise,but notI'                                                        perfect.Some subjectsmay not focus as you
                                                        wish. In this case, use the focus-locktech-l^                                                    nique.Subjectswhich may fool the autofocus
                                               systeminclude:

                                                            a) Black or very dark objects, which don't
                                                                   reflectmuch light.
                                                          b) Subjectswith horizontallines, complexor
                                                            detailedpatterns.
                                                               c) Flickeringlightsourcessuch as neon signs,        3. While depressingthe shutter release button                                                      fluorescentlamps, TV images, sunlight         halfway,re-aim the camera or recomposethe                                                 comingthroughtrees,etc.and subjectsillu-          picture,then releasethe shutter.                                                     minatedby these light sources.
                                                            d) Glossyand reflectivesurfacelike glass,mir-       Note:
            . You can cancel focus lock simply by liftingyout          ror, car bodies,etc.                                                            e) Fast movingsubjects.         finger from the shutterreleasebutton.                                                                                                      f ) Water jets, water surface, smoke, flame,
                                                             fireworks,etc., which have no distinct or
                                                        consistentform,or a subjectin mist.


                                                                              21
View original page 21Page 22 · Read text
UNLOADINGFILM             www.orphancameras.com
 r{@rrt{@r

       ,
  @
   F

1. Rewindingthe film                              2. Unloadingfilm
After you have exposedthe last frame of the roll,    Open the back cover, and remove the film car-
the lens retractsand the film rewindsautomatically.  tridgefrom the chamberby pullingthe top out first
Then,the motorstops,and (0) blinksfor approx.   with your finger.
5 seconds to indicate that the film has been
rewoundcompletely.                           Notes:
And the powerwill turn OFF automatically.                . Never open the back cover until the whole film
.  lf you turn the main switch ON before removing      roll is rewoundcompletely.
 the film, (0) blinksand the shuttercannot be       . A 24-exposureroll of film takes about 20 sec-
 released.                                onds to be rewound.
                                                                                       . The shuttermay be releasedone or two frames
                                          even after the specifiednumber of frames have
                                        been used up as indicatedby the number of
                                             shotsshownon the film cartridge.lf this occurs,
                                              these extra frames may be lost in processing.
View original page 22Page 23 · Read text
www.orphancameras.com


      you wish to unloada film beforeexposingall the       . When rewindis completed,the motorstops,andi*  Rewindinglf         the film in mid-roll                                   . The lens retractsand then film rewindingstarts.
     frames,push the mid-rollrewindbuttonwith the     (C ) blinksfor 5 seconds,indicatingthat the back
     protrusionpart of the strap clamp.                 cover may be openedsafely.
rc


}                                                                       23
View original page 23Page 24 · Read text
www.orphancameras.comrAKrNGBErrERpHorocRApH$                       lPx^trs1HfilE$x3*u**,
Turn the power on by depressing the main switch button.
To set various exposure modes, depress the flash mode button O.
The mode selectionwill change each time that the flash mode buttonis depressed.
      Y                      +'t'--rl-                    tF---T-\
          r*[ I    ,l*|trl      I      rl      rJ*Hl:^1----Iil*nl,.tJ-  +                ._f*[
              ill3o*no*   illS,,",no*   3ll,1,nn,-.rn.P[5'#Ft   P[S'3i,"'
                   Red-eye           Red-eye            Red-eye                                 Red-eye
                     reduction OFF      reduction ON        reduction OFF                              reduction ON
  U.r L                         TothesetSelf-timvariouserlAFshootinginfinity-landscapemodes, depressbutton O.
                                                                                                                                                                                           I@9  6: o                                       VI   I      .l    l----l]\sr    f--tl                                                  -J                                +[          | l*1      t'---'        I'lA                                                            \-J
                                                         Single-Frame      Self-Timer       Infinity-Landscape
                                                        Shooting         Shooting        shooting
                                                                              . For normaluse,use the Single-FrameShootingMode.
Red-Eye Reduction Flash Function
To reducethe red-eyephenomenonin the picture,depressthe flash mode button until ( @ ) appears.
With this mode, the self-timerlamp lights up for approx. 1 secondjust beforethe flash is dischargedto
reducethe appearanceof the red-eyeeffect.To cancelthis mode, depressthe flash mode buttonto set
to auto mode.
24
View original page 24Page 25 · Read text
1. AUTO MODE              www.orphancameras.com2. AUTO MODE, , red-eye                                                                 reducrion ftash


Turn the main switchON to set this mode.         Depressthe Flash mode buttonuntil ( @ ) appears
In this mode,the cameracontrolsexposuresauto-   on the LCD panel.
maticallyfor brightand dark conditionwith auto-   Same as 1. Auto mode,with automaticflash emis-
maticflash emission.                            sion and the red-eyereductionflash.


                       25
View original page 25Page 26 · Read text
$. AUTO MODEI DAYLTGHT-SYNCwww.orphancameras.com(FLASH ON}
   d.ur
Depressthe Flash mode button to set the arrow
markon the LCD panelto (t  ).
In this mode,the flash will dischargein both dark
and bright conditions.When a portrait is taken
withthe subjectin a backlightsituation,the frontof
the subjectmay be cast in shadow.In such a case,   Without Daylight-Sync
use the Daylight-syncshootingmode (Flash-ON)
within the flash effectiverange to take pictures.
This will ensure that a subject is well exposed
withoutany shadow.When you wish to discharge
the flash as a fill-in,use this mode.In this mode,
the flash will alwaysdischarge.

Note:
. Make sure you'rewithinthe flash effectiverange
 even when you use the built-inflash as a fill-in
  flash in daylight.

                                            With Daylight-Sync

26
View original page 26Page 27 · Read text
4. TAKINGPICTURESAT A SLOWwww.orphancameras.comSHUTTERSPEED
  Wr\R4  ,f-"\           €F-llrr
   C Slow Shutter Speed with Flash-OFF     @ Slow-Speed-Sync with red-eye-reduction
    Depressthe Flash mode buttonto set the arrow       flash
    markon the LCD panelto (@ ) (F ).             Depressthe Flash mode button to set the arrow
      In this mode,the flashdoes not discharge,and a   mark on the LCD panelto (t  ), (F), and (o   )
     picture is taken at a slow shutter speed up to    appearson the LCD panel.r}approx.2 seconds.Use it in places where flash      It is possibleto photographsubjects and back-
    photographyis prohibited,such as in theatersand    ground in a balancedway by using the flash to
    museums.Furthermore,this mode is also useful   properly expose the foreground subject and a
      for a natural existing light effect in low ambient   slow-speedto exposethe low light background.
     photography.
                                                    Notes:
                                                                                                . When shooting in low light, the shutter speed
                                                     gets slower,and camera shake is likely to blur
                                                  your picture.Use of a tripodis recommended.
                                                                                                . Make sure you are within the flash effective
                                                 range even when you use the flash as a fill-in
                                                        flash in daylight.See page 19.


                                                                        273m
View original page 27From the M. Butkus archive. Original publisher and archive notices are retained.
Check the model and edition against your equipment.
PDF verified 2026-10-10.