Film cameras
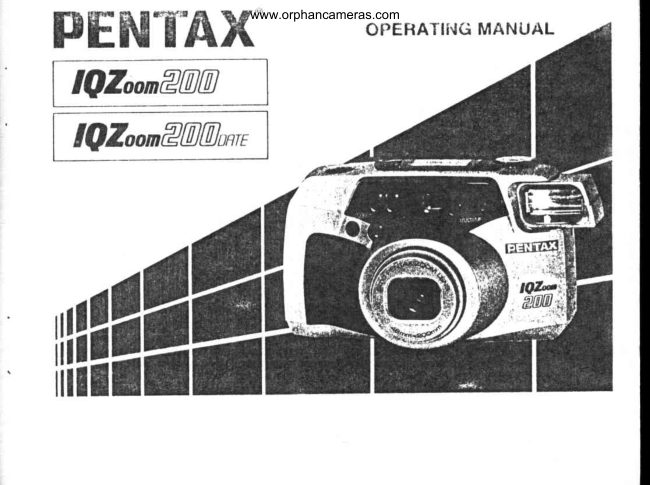
Pentax IQZoom 200 / IQZoom 200 date User manual
User manual for Pentax IQZoom 200 / IQZoom 200 date. 57 pages in English. Read the original PDF, download or print a copy without registration.
57 pagesEnglish2.0 MB PDF
Loading your manual…Open PDF directly
Document details
- Brand
- Pentax
- Model / document
- Pentax IQZoom 200 / IQZoom 200 date
- Document type
- User manual
- Language
- English
- Pages
- 57
- File size
- 2.0 MB
- Category
- Film cameras
- Document date
- Not specified in catalog
Search available document text
Find a term, then jump to its page in the original PDF. Image-only pages may not be searchable; check the PDF for exact wording and diagrams.
Page 2 · Read text
www.orphancameras.com


  Congratulations on  your  purchase of  the    Icon indicationsused in this manual
PENTAX  IQ Zoom 200 and welcome to  the
world  of Pcntax zoom cornpact photographyt         on directionYour compact, light wcight camera is a great      **;                F;;*""companion to preserveyour favorite memories.                                                      a t i c o p e r a t i o n                 tr !.r  +o Pleaseread this rnanual carefully before operat-   Iort".n"-,'."o.r"u
  ing the carnerato take consistentlysuperiorpic-          on                                                                                t  lures.                  F"'",*o Pay special attention to the cautions and noles
   in this Operating Manual. Picturesand illustra-     L a m o l ii gghht teedd                                                                               I  tions shown hcrein may differ from the cam-
  era's       actual appearance.                                               briil':9_l i n k i n gr  lllustrations                 in this operating manual are the  f_Lemn
  DAI'E MODE,T,.                        corr..,                            (                                                         I
                                                                                                              t                     F:"a';'l        )x-
                                              The name of lhe camera's working parts are listed
                                                 on the front and back flaps of this rnanual. Kecp
                                                          the flaps unfolded  for quick  reference whitc read-
                                                          ing the manual.
View original page 2Page 4 · Read text
www.orphancameras.com


OUTLINtr OF trASIC OPERATIONS


();xn  the  back  covcr   Load the film and closc   'I'hc filrn will automati-  Switch  orr powcr by the
(see page l2).             the  back  cover   (see   cally  advance  to  the   nrain switch/nrodc dial
                      page l3).                            l'irst  franre  (see  page   (scc page 8).
                                       r4).


                                                                                                                                                                                                                                         ,    ^fouryd                    I
   !fl                   qJ-l-     /--rl*
  i@;r                            /ffi\d
Frame your subject and  Focus on your subject  Depress thc shutter re-  When  thc  film  is  fin-
operate thc zoom  lever   (see page 20).             leaie  button.  In  dark   ished, the camera  wilt
to  compose  the  shot                              conditions,   thc   flash   automalically rewincl  it
(see page  I l).                                                   will   discharge   aulo-   (scc page 24).
                                                       matically (sce pagc 23).
View original page 4Page 5 · Read text
www.orphancameras.com
FOR SAItlt USE OI-,'YOUR CAMERA

Although we have carefully designed  this ccmero  for safe operation. please be gure to follow  precautions
given  in thit page.
 A wrnrurruc  This mark indicates precautions that  if not followed, coutd result in se-
                       rious injury to the operator.
 A  crut,on     This mark indicates precautions that,   if not followed, courd resurt  in
                   minor or medium injury to the operator or damage to the equipment.
    l!\ wanrurruo              A
  o The elcctric  eircuits Inside the camers contain      o I)o not"nt,rroruuse the flash neer tnyonets eyes, as it may
    high voltage working  parts. Never  attempt  to        hurt them. Be particulady  careful  with the flash
    disasscmble the camera yourself.                    around  infants.
  o Never  touch  inlernal  parts  of  the camera   if     o Never  try  to disassemble, short  or recharge  thc
    lhcy bccomc exposcd from dropping  lhe cam-        battery. Also, do not dispose of the battery  in
    era or frrr some other reoson, as there is dangcr          fire, as it may expleidc.
     of elcctric shock.                                                       r Remove the batlcry  from  the cnmera immedl-
    . Wrapping the strap around your ncck  is dan-       ately  if   it becomcs hot or bcgin to smoke.  lle
    gcrous. I\lake sure that small childrcn do not        careful not to burn yourself during removal.
    get the strap caught around thcir neck.
  o lle  sure to store  battery  out  of  the reach  of
    childrcn. Seck medical assistance immediately
       if uccidcntally swallowed.
View original page 5Page 7 · Read text
www.orphancameras.com
                                PRI'CAUTIONS FOR BAT'TERY


()lhcr precnrrlions                                   Misuse of a battcry can cause hazards such as                                                                                                                             'l'heo The tcmpcrature range at which  this camcra        lcakage, overhcating, cxplosions, etc.       bat-
   functions propcrly  is ittT    to - l0 "C  ( 122'Ir to        tcry should be insertcd with the ''f     ' and   '     "
     t 4 " F).                                                      sirlcs facing corrcclly.
o To maintain optimum performance,  it is recom-       Nevcr  try to disassemble, short or rcchargc thc
  mendcd  that the camera be inspectcd every one        battcry. Also do not disp<xe of the battery in a
   or two years. If lhe camera has  rtol been used          firc, as it nray explodcd.
    frrr an exlended 1^-riod, or  is being prepared  for          lfattcry  perlormancc  nray be temporarily  hin-
   arr imryrrtanl photograplric scssion, it  is recom-       dcred in krw lernlrcralurcs, but  will  recovcr  in
   nrenrlctl that you havc thc camera inspcctcd or       normal lcmpcratrrrcs.
   tcst'I'he shoot with  it.                                Kecp a spare batlery on hand  for replacemenlo      PllNl'AX   warranty provided only  for the       convcrricnce whcn shouting outdoors or whlle
   rcpair of clefccts in nraterials or workmanship.         travclins.
  Damage of any kind  canrrot be repaired at  lro      Whcn  the camcra  is in a bag, make sure the
  chargc under thc tcrm  of thc warranly.   lf  the      main switch./nrodc dial is sct at the OFF  posi-
   difficulty  is causcd as a dircct rcsult of the prod-         tion. ()thcrwisc, battcry power nray bc wastccl if
   uct being uscd in cortditions as out lincd in the        the  shutter  release  button    is  accidcntally
  othcr opcration contrary t<l tlrc inslruclions out-       pushed.
   lirrcd in lhis manual, chargcs will be assessedor
  a rcpair quotation  will bc provided.
LCI)   ( l.iquid-crystal display)
o Whcn thc LCD  is cxposecl to high tenlpcralures
  ovcr about 60 "C,  it ntay blacken, but when the
  tcrnperature normalizes,   it  will  r€turn  to  nor-
  ma l.
o  'I'he LCD may  also slow down  in responsc lo
  lowcr tcnrperalures, but this is a normal cltarac-
   tcristic of arr LCD.
View original page 7Page 8 · Read text
www.orphancameras.com
PRACTICAL SIIOOTING GUIDE


     Taking a picture through a window."                                     """""p'37
     Focusingon a particular sglt.                                        """""""""p'38
View original page 8Page 9 · Read text
www.orphancameras.com


l-r-l
       Taking picturcsof peoptein varioussituationsLIJ
View original page 9Page 11 · Read text
www.orphancameras.comE tt' G
                                                                   -aI     I  \LY
                  GLT   STRAP ATTACI{MENT


  PREPARATIONS
   BEFORI' TAKTNG
  PHOTOGRAPHS
    For  optimum  perform.
    rnce you should familiar-
     izc yourself with certain
    fundamentals before tsk-
    lng eny photographs.


                                                       l  l   i  '
i J ' l r ; r r 1   ,     f , . t , l  _ ) , ri    { r         :             Fit__thestrap on the camcra using the following procedures.
                                                            I                                        t'ass                                         the strap thr'ugh  the honps and the cti'mp    ir,-o*n in il-                                      lustration l.                                               ""
                              2 Pass the  * marked strap end through the camerarsstrap lug as                             shown in illustration 2.
View original page 11Page 13 · Read text
www.orphancameras.comCy     BA'rIERY cHECK


When the power turns ON,  the lens extends     Battery check
slightly for opening the lens cover and the flash     After you set the main switch/mode dial to the
slides out.                                         position other than OI.F, the lens slightly ex-
                                                tends and the lens cov€r opens. You are now
r When the power turns OFF,  the lens and    ready to shoot.
  flash retract.
r When the flash is pushed into  the camera    o See page ^46 when the battery exhaustion
  manually, the shutter cannot be releasedeven      syrnbol (   !  ) appearson the LCf) panel.
    if the power is ON.                                                      .  Ilattery pcrformance may be  telnporarily  'l-her       lens cover automatically opens and      hinderedin low temperature,but will recover
  closeswhen the main switch/mode dial is set        in normal tcrnpcratures.
  to the ()N and OI.F positon. Never attempt
  to operr the lens cover manually.
View original page 13Page 15 · Read text
www.orphancameras.com
@             48-2oommzooM LENS
      "PERA'uNG


       VV    AA            When you move the zoom lever to the right  ( |  ), the
                                                      lerrs moves towards the 2(X)nrnrtelephoto setting arrd
                                           frames the subject more closcly. Whcn you move the
                                   zoom lever to tlre Ieft (lll),  the lens movestowarclsthe
                                48mm sctting. When the lens zooms to the dcsireclset-
                                                       ting, rclcasethe zo<lm lever and depressthe shutter re-
                                             leasebutton fully to take picturcs.


                                                                               1 l
View original page 15Page 16 · Read text
www.orphancameras.com
                           toADINc(ilrif,lli,Hi:;,[.)                         ffinrM


TAKING PHOTOGRAPIIS

After  rending this  lnstruction manual you
should be famitier wlth the functions svaileble
on the camers' and youtre rcady to insert the
film.

                                                                                                           I  Slide the back cover relcase lever down  in the
                                                               dircction of lhe arrow to open the buck as illus-
                                                                truted.
View original page 16Page 17 · Read text
www.orphancameras.com


2 Place the film  cartridge  in the film chamber by      Notes:
   fitting  its flst side on the top of the rewind shaft     o  lf there is dirt on the film detector O,  film can-
   first and ihen slide the top end of  the  film  car-        not be wound  pr<lJrerly.
   tridge  into the camera.                                                           .  Ensure thc'fakcfilm  is laut as illustrated on the illus-3  I'ull  the film leadcr out far enough from thc car'         tration.      up any slack in the film by push-
   tridge to reach the take-up sprxrl. Align the tip of         irrg it back inlo thc cartridgc.
  the film with the film leader end mark O.           o   lf the end of the film lcader is extremcly  bent,
4  After  the back cover  is closed, the  film  auto-         straightcn   it or cut  off the bcnt portion.
   mutically  rdvances  to the  first frame.


                                             Z Slsck Not                        / -)Flat Yest
                                                                            t3
View original page 17Page 19 · Read text
www.orphancameras.coms
6g-      or"l'uRADJu s'rNIENr             AUT0lvtATtCIrCDIILUMINAT0R


     Turn ON the power. Aim the camera toward a     In low light situations,the illuminatorof the LCI)
      bright subjcct. While lookirrg through the vicw-    pancl lights up when any one of the button /'1, lal,
       firrdcr, rotate the diopter adjustmcnt dial to the     or (e is depresscdor the main switch/modc dial is
      right or lcft until the AF frame appears in the     turned.
     sharpestfocus.
                                                                                     r   If you wish to use the LCD panel illuminator
          . Be sure to adjust thc diopter before use.           any othcr time, dcprcssany of thesebuttons for
                                                       longer than 2 seconds.


                                                                                t5
View original page 19Page 21 · Read text
www.orphancameras.com


Close dlstance compensetion frnme
When the distance to the srthjt:ct becomescloser,
lhe picture area is automatically changed and
comprensated.Compose tlte scene within   this
frame.

Standard format                                 Panorama format
View original page 21
Page 23 · Read text
www.orphancameras.com
          rNDrcArroNS@,AMP

                                                                                    (  t  ) neA lamP (!'lash status) :
                                       Whcn the flaslris readyto dischargc,it will light
                                                      up. Wlrerr the flash is being chargcd,it will blink.
                                                                                    ( A)  Infinity-landscapclamp:
                                       When the Infinity-l,andscapeMode is set, it will               f             l                        light up.
                                                    Shooting range for standard and panoramaformat
                                                         piclurcs
                                          2(X)mm l.2m(3.9ft) to inl'inity
    Whcn you dcorcss thc slrutter release button half'      48nln  0.8m(2.6ft)to infinitY
     way do-wn, thc lamp ((  ;),  (   |  ) and/or (A)   liehts
     up or blinks as shown above.                    Focus aid illuminator
                                                             In l<lw light situltions and,/or hard-to-autofrrtrs
         ( ())  Green lamp (Focus status)  :                   subjects,the red light is automaticallyprojectcdto
    When the subject is in fo,cus,it  will  light up to in-     assistthe autofocussystcm when thc shutter re-
      dicatc that you can take the picture; when thc strb-    lcascbutton is dcpresscdhalfway down.
      ject  is not  in  focus,  it  will  blink,  indicating  that
     you cannot take the picture bccause the camera-
      io-subjcct distarrce is too close or  is a  hard-to-
      autofocus  subject. Sce Page 40.
         r Thc autofocus frame also blinks when  the sub-
         ject  is difficult   to autofcrcus.

                                                                                t9
View original page 23Page 24 · Read text
www.orphancameras.com
@             PH'T'GRAPHY
      "RDINARY
            ffi


            I  Set the  mairr  switch  / morlc mode  dial  to  the     2  Aftcr  zoomlng  the  lcns and  composing  your
        (W)   pnsition.                                       $cene, focus on lhe subjcct with autofocus frume.
                                              t1


    20
View original page 24Page 25 · Read text
www.orphancameras.com


                                                                           'l-his
                                                      camera uscs thc  five-Jxrint AF  syslcm  to
                                                                fr^-us orr thc  subjcct.  Ilvcn    if  thc  subjcct  is
                                                                slightly off lhc ccnlr:r <lf lhc AI; frarnc, thc suh-
                                                                      jcct  will casily trc br<.rughtirrto focus.                                                                                       'l'o
                                                            focus on a particulur spot in ttre Af:  framc,
                                                               sclcct the Spot AIr Mule.  Sec pagc 38.
                                                                                            If thc autolircus wirrtkrw is dirty, the aulofocus
                                                        rnay nol [urrction properly.
                                                                                                         lf yclu wislr to liruus cln :rn<lthcr subjcct, lift yrlur
                                                                      liltge r lronr llrc shrrltcr relcasc brrllon arrrl dc-
                                                        prcss thc strutter buttorr hall'way down again.

3 Checking the lamp indication
   l)cpress  the  shutter  rclcsse  button   halfway
  down. Whcn  thc subjcct  is infocus,  the  grecn
  Inmp will  light up.

 + The green lamp blinks when the camera  is not
  ablc to obtairr proper focus for onc of  the  fol-
  lowing rcasons.

OThe  subjcct is too close. Extend lhe camcra-to-
  subject-distance until the green lanrp is lit con-
  tinuously.
G)The subject  is difficult   to autofocus.  See page
  ,lo.

                                                                                  2l
View original page 25Page 26 · Read text
www.orphancameras.com


                                                Notes:
                                                                                           .  Wtt"n  the shtrtter is released, the  self-timer
                                                  larnp mtlmetrtrrrilyliglrts up to indicatcthat a
                                                                                           .  !ill"-.iti"tt"roiclttrc  ltas bccttcunrrotlitkclt.bc rcleascdwhile thc lens is
                                                            zoclltritrg.


.l Shooting
   il"pi".t   rt e shutter retease'I'hcbutton fully, and the            will be releesed.     film automatically
   "ft,itiu.advancesto the next frame.


22
View original page 26Page 29 · Read text
www.orphancameras.com


                   Rewinding s film  in mid'roll
                                    If vou wiCh ro unload  a  lilm  beforc  exJrosing all
                     th6 franrcs, push the mid-roll  rewind button  with
                     the protrusion part of the strap clamp; thc le ns re-
                       tracts and thcn  film  rewilrclirtg starts. When  re-
                           *in,t    it complcted,  the motor  stops, and   ( 0   )
                       blinks,  indicating  that  the back  covcr may  be
                   opcned safcly.

                                        . Do not dcpress the button  with an objcct having
                      a sharp tiP.


                                            26
View original page 29Page 32 · Read text
www.orphancameras.com                                                                                  F
DAYLIGHT.SYNC SHOOTTNG
                                                                                                                                                                                                                                                                                                               i.i
                               Set the nreln                                                                                                          F,
                                switch / mode
                                     dial   at   the
                                                 ( I  ) positionl.
                                                 (  f  )  appesrs
                            on  the  t.CI)
                                panel.
ln this mode, llte flash will dischargc in both dark
and bright condilions. Whcn a prrtrait  is taken
with the suhject in a backlight siluation, the front
of the subject may be cast in shadow.  In such a
cuse, us€  lhe  Daylight-Sync   Shooting  Mode
(Flash-ON mode) within  the flash-cffective range                                              Without Daylight-Syncto tlke  picturcs. This  will errsure that a picturc  is
well exposed without any shadow. Whcn y<lu wish
to  discharge  thc  flash, usc  this  nrodc.  In  this
mode, the flash will always discharge.

Note*
o Make sure that the red lamp  in the viewfinder
   is  lit when  the  shutter  release button   is de-
  prcssed halfway down  before shooting. The rcd
  lamp blinking  indicutes that  the flash  is being
  chargcd.
.  Make  sure you're  within  the  flash  effective
  rnnge even whcn you use the built-  in flash as a
    llll-irr flash in daylight. See page 23.
                                              With Daylight-Sync
28
View original page 32Page 33 · Read text
www.orphancameras.com

TAKING PICTURES AT A SLOW SITUTTER SPEED


                            Slow  Shutter                                       s^low-Spced-
                          Speed (F.lash-                                  Sync Shooting
                                           ol,'F')                                                                                ( I,'lash-On)
                                Sct the msin                                        Sct  thc  main
                                 switch / mode                                        switch  / modc
                                     dial   to   the                                             dial    lo   the
                            (O  ) position.                                                                ( Fl  ) position.
( €))  appears on the LCI)  panel.                                    (   I    ) appear on the LCI)  pancl.
In lhis m<-rde,the flash docs not discharge, and a      In this rnode, it  is ;xrssihlc io photograph subjccts
picture  is takcn  at  a slow  shuttcr  specd up  to      alrd background ilr a balanccd way (as sho*'rt in
approx 2 seconds. Use  it in placcs whcrc  flash pho-      thc photo) by using the flash  to propcrly  cxlrusc
tography  is prohibitcd,  such as  in  thcaters arrd     ihe foreground  srrlrjcct and u slow-spccd to exlpse
muscunls. Furthcrnrore,  this  lntlde  is also uscftrl     thc low liglrt background.
frrr a nalural cxisting  light  cffect  in low ambicnt
photography.                                            Notcs:
                                                     o Whcn shooting in krw  light,  thc  shrrttcr spccd
                                                          gcls slowcr, atttl catttcra shakc is likcly  ttl blur
                                                        your pic:turc. [Jsc <lf a tripod  is rccontnrcndcd.
                                                                                         r Makc  sure y()u arc within   tlrc  f'lash cffcctivc
                                                    rangc cvcn whcn ytttt usc tlrc l'lash as a  fill-in
                                                                 l'lash irr rlaylight. Scc pagc 2-1.


With Slow-Speed-Synchro                                                 29
View original page 33From the M. Butkus archive. Original publisher and archive notices are retained.
Check the model and edition against your equipment.
PDF verified 2026-10-10.