Film cameras
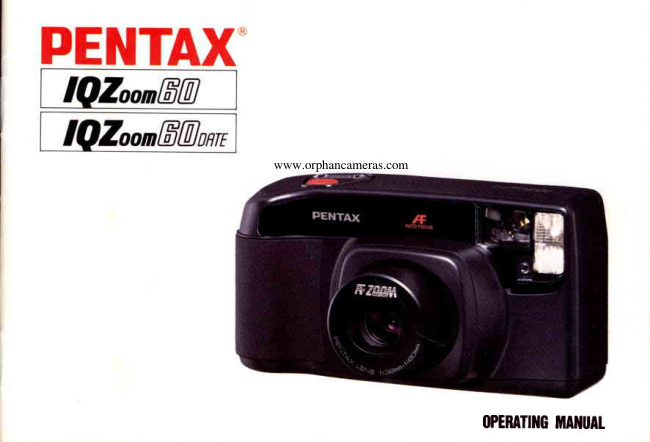
Pentax IQZoom 60 / IQZoom 60 date User manual
User manual for Pentax IQZoom 60 / IQZoom 60 date. 33 pages in English. Read the original PDF, download or print a copy without registration.
33 pagesEnglish2.5 MB PDF
Loading your manual…Open PDF directly
Document details
- Brand
- Pentax
- Model / document
- Pentax IQZoom 60 / IQZoom 60 date
- Document type
- User manual
- Language
- English
- Pages
- 33
- File size
- 2.5 MB
- Category
- Film cameras
- Document date
- Not specified in catalog
Search available document text
Find a term, then jump to its page in the original PDF. Image-only pages may not be searchable; check the PDF for exact wording and diagrams.
Page 2 · Read text
,:,                     CONTENTS
Welcometo the world of Pentaxzoom      Batteryinsertionandcheck               4
compact photography! Your compact,
lightweight camerais a greatcompanio;    il'frn"fl:?";;;;;;;;;;;;;;;;;;;;;;;;;;  :.:...,,3
to take along anytime, anywhere to pre-     Green/redtampsand modeswitchbutton .........11
serve the best of your memories.With the ,".,,,, Operating38 - 60mm zoomlens              ....12
buift-in 38                  - 60mm zoom lens, it gives      J:nlnn ordinarypictures             ....'..'...........13
you freedomto framean imagethe"way                                                  [f,'*["J?fllliLL...:...:...::.::::.....::..:...::......'",]
you like it -  from a breath-takingland-     Taking.""ro(ctose-up)pictures           ....18
scape to a family portrait, and even ?     Focus-lockshooting(FL)...........      ........20                                                                  ','idetailedclose-up.And the built-in auto      Fittingstrap;softcase          """"""""""" 22
flash helpsyou capturenight and indoor     B^ulterv"""""'                    """"""""" 24                                       model                   """""""""" 25sceneswith clarity and biilliance.Since . ,.  91,t^t
most of the operations- from filt"h;;:
dling to focus and exposurecontrols-       Specifications.............               ....30
are automatiC,you can have great piC-    Warrantypolicy                          ..'..'........32
tureswithoutthe work.
Before you start using the camera,read
this operatingmanual very carefully to
learn how to take flawlesspicturesall
the time.
View original page 2
Page 3 · Read text
MAIN SWITCH, MODE SWITCH BUTTON AND LCD PANEL'S DISPLAYS
4dtlluyt'=t   H
(D Uain switch: For the ordinary shooting, set it    o Daylight-syncmark: Indicatesthat the flash
   at  [  | ], and at  I V   ] for the macro shooting.                  f ires automatically regardlessof the subject's
O MoAe switch button: For switching the flash          brightness.
    to the ordinary-shooting (alsoauto-flash) or                            o Film-transport mark: Indicatesthe f ilm is
   daylight-syncf lash mode.                         advancingor being rewound.
O Exposure counter/Focal-lengthindication:                            o Cartridge mark: Indicatesthe film is loaded.   lndicatesthe number of the f ramesexposed
                                                        Battery mark: Indicateshow good the battery is.  and the focal length of the lens in use.       o
O Macro mark: Indicatesyou are taking a close-
   up pictu re.
O Ordinary-shootingmark: Indicatesthe camera
    is set in the ordinary-shootingmode in which
   the flash automatically f ires when the subject
    is dark.
View original page 3Page 6 · Read text
BATTERY INSERTION AND CHECK


Inserting the battery                            X Battery check
o Before doing this, make sure the f ilm is not        When the battery mark  I a     ] appearsin the LCD
loadedin the camera,and that the main switch        panel as you turn the main switch on by setting
is turned off .                                                                         it at  [  | ] , tne batteri is alive.
1. Open the battery-chambercover by sliding it
    in the direction of the arrow.
2.  lnsertany one of the following 6V lithium
   batteriesinto the chamber with its contact
   side down. Closethe cover by slidingit back        o As you set the main switch at  [  | I , the lens
    in placewhile pressingit'                         cover automatically opens and the lens extends
                                                         s l i g h t l y .
 g'fiiii'ttir'                                ' :           ':':t:tt::::!:::::::':'1!:t:!:t'!':\    r The lenscover also automaticallyclosesas you
         a l-$1's d',t'                                                        set the switch at  [  | ] . Do not open or close it  PanasoniclNationalCR-P2                                  m a n u a l l y .
View original page 6Page 7 · Read text
Battery capacity                             When the battery is exhausted
                                                 Since the data-recordingunit and the exposuree   E:       indicatesthe battery is alive.
                                                   counter work properly even if the battery is
      *                                           exhausted,do not remove the battery f rom
@ {z::,                                             the camera until you replace it with a new one.
        .l_Y         l inAi"atesthe battery voltage is going           lf you replacethe battery during shooting, about
                                                         four frames of the film may be wound and(U E:        I down.                                                      the exposure counter may return to the first
    J                                            frame. Also, the date display may changeto
@  dj:       indicatesthe battery is dead.            tA1     I    | ) . Shoulrlthese happen,adjust them
    (f lickering)                                      before you start shooting.
                                              The shutter cannot be releasedin the following
                                                                case{i:
Replacing the battery                                o When the battery is not loaded,when it is
Before shooting, be sure to check which battery       exhausted,or when it is not properly loaded.
mark appearsin the LCD panel.When the @ mark     o When the main switch is off.
appears,you must replacethe battery immediately,    o When the camera-to-subjectdistance is less
but even when the @ or @ mark appears,you        than one meter (3.3 ft.) in the ordinary shooting.
had better replace it as soon as possible.Since                r When the flash is being charged,and when
the data-imprinting unit is also powered by this         the f lash'srecycle time gets extremely long.
battery, do not fail to adjust the data-display
after replacingthe battery.
                      ,j
View original page 7Page 8 · Read text
F I L M


        D X F I L M


                                                         o o o o o o o o o - i l } - l


This camera is designedto use DX-coded film with      o  lf non-DX film is loadedby mistake,the f ilm
an ISO rating from 50 to 1600, and when such film    speed is automatically set to ISO 100, no matter
is loaded, its film speed is automatically set in         what the film speedis.
the camera.                                        o Use hiqh-speedfilm with an ISO rating of 1000,
                                               1600, etc. for shooting indoorsor in a dimly-lit
o When buying DX f ilm, make sure the package       place.
bearsthe "DX" mark or that the cartridge has
a DX-information panel.
View original page 8Page 9 · Read text
FILM LOADING


1 . Open the back cover by sliding the back cover             . Be sure to load or unload the film in a shady
   releaselever in the direction of the arrow-           spot, or shieldthe cameraand f ilm from direct
   (Turn the main switch off.)                        sunlightwith your body. While doing this, take
2. Placethe film cartridge into the film ihamber       care not to put dust, stains,etc. on the lens.
   by first f itting its flat side on the top of the
   rewind shaft.
                                           X Do not bend these DX-information pins, and
                                                keep them free from dirt, dust or scratches.
                                                                                                                                                          {id
View original page 9Page 10 · Read text
3.  Pull the film leaderout far enough to reach        o Make sure the film is taut as illustrated. lf there
   the film rollert!. Align the tip with the film          is any slack left in the film, take it up by pushing
   leader end mark O.                                the film back into the cartridge.
                                                   o  lf the f ilm leaderend is extremely bent, straighten
o Make sure the film perforations properfy engage         it or cut off the bent portion.
the sprocket teeth O.
o Also make sure the film is properly placed
between the guide rails O.
View original page 10Page 11 · Read text
4,  Cfose the back cover. The letters " L d "               5. As you turn the main switch on by setting it
   (Loading)will then appearin the LCD panel.           at  [  | ], the film automaticallyadvancesto
                                                         the first frame, making the exposure counter
                                                        indicate"1"  in the LCD panel.


o  lf "icf  " (Loading) indication does not appear in     o Whereverthe main switch is set, the film
the LCD panel, or when the exposure counter does     automatically advancesto the first frame.
not indicate "1" even with the main switch turned     o When the main switch is set at  I  I ], the f ilm
on  [  | ] , the film is not properly loaded in the         advancesto the first f rame even if you press
camera. Reload the film.                              the shutter button.
View original page 11Page 13 · Read text
;      GREEN/RED LAMPS AND MODE SWITCH BUTTON


                                                           rt  ( .7)                                                        -;rs
                                                                                                                                     ,                iu  i--GE-l


     As you press the shutter button half-way, the          o When the green lamp flickers in the ordinary or
     lamp O and (O shown above glow or  f licker.        macro shooting, it indicatesthe subject is too close
                                                                    to the camera. Adjust the camera-to-subject
    O  Green lamp                                                       distanceso that the green lamp glows,and then
       When it glows, you can take a picture.             releasethe shutter. (When the distance is extremely
       When it flickers, you cannot.                       short, the green lamp may not flicker.)
    O  Red tamp                               @ Moae switch butron
       When it glows, flash is ready to fire.                   This button is for switching the flash to
       When it flickers, flash is being charged.                the ordinary-shootingor daylight-syncf lash
                                                    mode. As you set the main switch at  [  |  ] to
                                                                  turn  it on, the camera is set in the ordinary-
                                                         shootingmode I A    ]  in which the f tash
                                                           automaticallyfires when the subjectis dark.
                                                            Usually,take a picture in this flash mode. Refer
                                                                     to pages14 - 16 on flash photography.
                                                                                               11
View original page 13Page 14 · Read text
OPERATING 38 * 60mm ZOOM LENS


                    7/              \\


                                                                              60mm

As you turn the main switch on by setting  it at   [  | ], and press
the zoom button's    [   |     ]  , the lens is set for 60mm  tele
photography. As you also press the zoom button's    I  f ll   ]  , the
lens is set for 3$mm wide-angle photography.  Release your
f inger off the zoom button when the composition  you desire is
obtained, and release the shutter.


o As you press the zoom button,  the focal length of the lens is
i n d i c a t e d  i n  t h e L C D p a n e l . ( A l s o w i t h a s l i g h t p r e s s u r e o n
the shutter button.)
o W h e n  t h e m a i n s w i t c h   i s s e t a t   [   |  ] ,  t h e   l e n s i s s e t a t  t h e 3 8 m m
focal length.

1 ' )
View original page 14Page 15 · Read text
TAKf NG ORDINARY PICTUHES (shooting range: one meterl3*3 ft. to o"l


 1.  After composing by operating the zoom button,       2.  As you press the shutter button  half-way and
    b r i n g  t h e a u t o f o c u s  f r a m e   I O   ] o n  t h e m a i n            the subject is focused on, the green lamp glows.
    part of vour subject.                                                                   lf the subject is closer than one meter (3.3 ft.),
                                                                the green lamp  f lickers and the shutter cannot
                                                          be released. Make the camera-to-subject
                                                            distance a little longer.
                                                                     3.  As you press the shutter button  all the way
o B e s u r e t o  t u r n  t h e m a i n s w i t c h o n b y s e t t i n g  i t          down, the shutter will be released to take
a t  I l ] .                                                         a picture. (After the shutter release, the  f ilm
o U s u a l l y , t h e  f l a s h i s s e t a t  t h e o r d i n a r y - s h o o t i n g           automatically advances to the next  f rame.)
 t A     I p o s i t i o n . W h e n  t h e s u b j e c t  i s d a r k ,  t h e  f l a s h
is set to  f ire automatically.  (Tl're red lamp glows.)         o When the green lamp  f lickers, the   [ $    I macro
o  lf you wish to change the subject you have           mark also flickers in the LCD panef and warns
focused to another, repress the shutter button.          you that the subject is too close.
                                                                                    1 3
View original page 15Page 17 · Read text
Opeiational precautions           "  '"
o To take a f ine flash photo, shoot the subject in
the f lash-effectiverange.
o The flash recycle time is about three seconds
with a fresh battery. lf  it takes more than f ive
secondsfor the flash to be ready, the battery is
exhausted,and it should be replaced.
oTaking a portrait in color can cause"red eye,"
those red dots in the eyes, becausethe f lash light
entersthe eyes and reflects back to the lens from
the retina of the eye. This red-eyedegreecan be
minimized by the following methods:
 e  Uake the room bright enough to be able to
     read books and make the pupils smaller.
 @  Vtatcethe camera-to-subjectdistance shorter,
    and shoot with the lenson the wide-angleside.
View original page 17Page 18 · Read text
Compensated
                                                t
                                 $


Daylight sync flash  I  il:   I
As you pressthe mode switch button and let
the symbol  I  il:  ] appear in the LCD panel,           o Pressthe shutter button half-way, make sure
the f lash f ires even if the subject is bright, serving      the red lamp glows, and releasethe shutter.
as daylight sync (fill-in) f lastr.When taking           The flickering red lamp indicatesflash charging.
a portrait in the back-lightedsituation or in the        o When also using the flash as an auxiliary light
shade of trees, the subject often results in under'         in the daytime, shoot the subject within the flash'
exposure becausethe meter mainly measures           effective range.
the bright background. The daylight sync f lash        o  lf you turn the main switch off and then on
helps you expose the subject and background          while the "daylight sync f lash" symbol  I  il'   ]  is on
properly.                                              display, the flash will be switched to the ordinary-
                                                     shooting mode  I rA   ] .


1 6
View original page 18Page 19 · Read text
U N L O A D I N G F I L M

            I

 I


       1. When you reach the end of the roll, the camera      2. Open the back cover and remove the cartridge
           will automaticallystart rewindingthe f ilm.            from the chamberby pulling its top with your
         While the rewind is taking place, the exposure           fingertip as shown.
         counter calculatesbackward. When the rewind
            is over, the motor stops, and as illustrated,
         the indications disappear.


      o  lt takes about 25 secondsfor the 24-exposure
       film to be rewound into the cartridge.                o The entire roll of film includingthe leaderend isII    o Never open the back cover until the rewind         always rewound into the cartridge to avoid light
        is over.                                            leakage.
                                                                                         1 7
View original page 19Page 20 · Read text
)ila:
lti
!il:t ? TAKING MACRO (CLOSE-UP) PICTURES (Range: 0.54 - one meter/l.8  -  3.3 ft.)
llta
iqs


                                                                                                       *

                                                                                                                                                                                                                                                                                 L{I


                                                             1. Set the main switch at the macro index  [ $   ]
                                                     as shown. To cancel the macro mode, just
                                                           return the switch to the original position.
 This shooting mode is to take close-upsof small
 flowers, insects,etc. When the lens is set for this
 mode, the area surrounding the picture area frame
 turns green.When shooting the subject about 0.6
 meters (1.97 ft.) away" compose within the                                                    o The macro symbol  I r?  ] appears in the LCD parallax-correctionframe. When the subject is
 one meter (3.3 ft.) to infinity away, the lens is         panel.
 automatically switched to 60mm (telephoto)          o Since the autofocus f rame is off the center of                                                      the picture area in the macro shooting or close- photograohy.
                                                 range photography, use the focus-lock technique
                                                  describedelsewhere.

 1 B
View original page 20Page 21 · Read text
a r t  r
                      't@      @D                                                                                                                      //-:\                         tEEE'I   ln)    wz


     2. The macro shooting range is f rom 0.54 meters     When shooting the subject one meter (3.3 ft)  -
        (1.8 ft.) to one meter (3.3 ft.). Make sure            E dW?Y
        the green lamp glows by pressingthe shutter       Even when the camera is set in the macro mode,
       button half-way, and releasethe shutter.          you can still shoot a distant subject (one meter/
                                                        3.3 ft. -  infinity away) with the zoom lensset at
                                                          the 60mm telephoto position. Take a picture after
                                                  making sure the green lamp glows by pressing
                                                          the shutter button half-way.

                                                       o When you wish to changethe subject you have
    o When the camera-to-subjectdistance is not          focused for another, repressthe shutter button.
    proper, the green lamp flickers as a warning, but        o When shooting the subject one meter -  inf inityr note that  it just glows when the distance is           away, the macro symbol  I r?  I Oisappears,as you
    extremely short.                                   pressthe shutter button half-way.
                                                                                        1 9
View original page 21Page 22 · Read text
FOCUS.LOCK SHOOTING (FL}


lf you shoot without  placing the autofocus             1 . When taking a picture of two persons,for
f r a m e  t O    l o n    t h e m a i n p a r t o f  t h e p i c t u r e a s           example,first bring the autofocus f rame t O  ]
shown above, only the background  will be in  f ocus.       on one of the two.
When the main subject of your picture  is off the        2. As you pressthe shutter button half-way,
autofocus  f rame in the center of the viewf inder,           the green lamp on the lefthand side of the
use the focus-lock technique.                            viewf inder eyepieceglows, and focus and
                                               exposure are temPorarilYlocked.


20
View original page 22Page 23 · Read text
Hard -to-autofocus subjects
                                             The autofocus system of this camera is highly
                                                      precise,but like many other autofocus cameras,
                                                      the system is not almighty and may not properly
                                                   focus on certain subjects. In such a case,use the
                                                   focus-locktechniqueon a subject near and
                                                    equidistantfrom the actual one. The subjectswhich
                                                    are hard to autofocus are:

                                                            1. Black objects like hair, etc. which are hard to
                                                                 ref lect light (inf rared).
                                                             2. Wire netting, latticework, iron exercise-bar,etc.
3. While pressingthe shutter button half-way,          3.  Flickering light sourcessuch as neon signs,
   reaim the camera or recomposethe picture,            fluorescentlamps,TV images,sunlight coming
   and releasethe shutter.                             through the trees,etc., or any subject illuminated
                                                    by these light sources.
                                                             4.  Glass,mirrors, car bodies, etc. which are glossy
                                                and reflective.
                                                             5. Fast-movingobjectp like trains.
                                                             6. Water jets, surface of water, smoke, f lame,
                                                          fireworks, etc. which are formless.


o You can cancel the focus lock by just releasing
your finger off the shutter button.
                                                                                    21
View original page 23Page 25 · Read text
3. To convert it into a neck strap, G) move the
           belt ring to the other end of the strap, and
      @ pull the strap out f rom the small ring.        When putting the camera into the soft case, be sure
                                                                     to turn the main switch off. Passthe strap throughr#       4. To reconvert it into a wrist strap, pull the belt       the hole on top of the case,as shown.
           ring out from the small ring, and move the belt
I          ring to the other end of the strap.


                                                                                     23
View original page 25Page 26 · Read text
BATTERY
                                                                                                                      ....'.,,i ,-   -.    -                          -.;.ii.ij.-

Precautionson batteries                         LCp  ( Liquid-crystal disPlaY)
o The misuseof battery causeshazardssuch as         o When the LCD is exposedto a high temperature
leakage,heating,explosions,etc. The battery            of about 6O'C, it may blacken, but when the                                                                    i
should be insertedwith the (+) or (-) side facing       temperature falls, it will return to normal.
correctlY.                                          o The LCD may also slow down in responseat
o Never try to break up or rechargethe battery, or      lower temperatures,but  it is one of the LCD's                               a.-
throw the used-upone into  f ire as it may explode.      characteristics, not a defect.o The battery may lower its performance                                                                       f
temporarily in low temperatures,though it differs
from one type to another.                             Battery life (with 24-exposure film)
o Keep sparebatterieson hand for convenience
when shooting outdoors or traveling.                 Normal photography        Approx. 125 rolls
o When keepingthe camera in a bag, make sure
the main switch is off; otherwise, the battery         When normal photography
power may be consumed by accidentally pushing       and flash one made on       Approx. 30 rolls                                                   50-50 basisthe shutter button.
                                              (CR-P2 battery used; based on our own test
                                                   conditions)


 24    %0\,w
View original page 26From the M. Butkus archive. Original publisher and archive notices are retained.
Check the model and edition against your equipment.
PDF verified 2026-10-10.