Film cameras
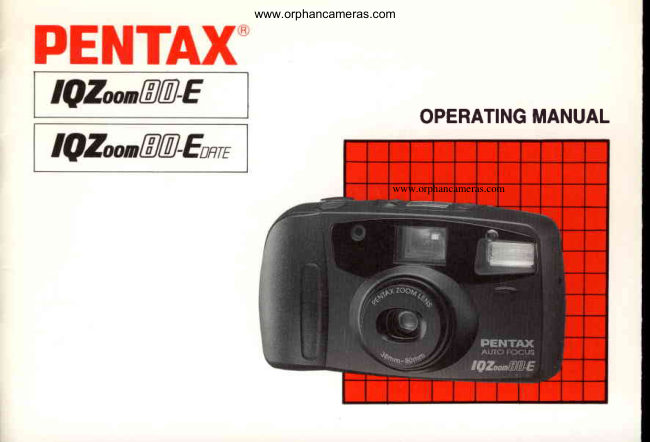
Pentax IQZoom 80-E / IQZoom 80-E date User manual
User manual for Pentax IQZoom 80-E / IQZoom 80-E date. 42 pages in English. Read the original PDF, download or print a copy without registration.
42 pagesEnglish2.6 MB PDF
Loading your manual…Open PDF directly
Document details
- Brand
- Pentax
- Model / document
- Pentax IQZoom 80-E / IQZoom 80-E date
- Document type
- User manual
- Language
- English
- Pages
- 42
- File size
- 2.6 MB
- Category
- Film cameras
- Document date
- Not specified in catalog
Search available document text
Find a term, then jump to its page in the original PDF. Image-only pages may not be searchable; check the PDF for exact wording and diagrams.
Page 3 · Read text
www.orphancameras.com


Congratulations on  your  purchase of  the    Icon indications used in this manual
PENTAX IQ Zoom 80'E and welcome to the                                                   .-world of Pentax zoom compact photography!    Operationdirection
Your compact, light weight camera is a great
companionto preserveyour favorite memories.    Automatic operation                    f  rrrrI
Its built-in 38-80mmlens givesyou the freedom
to frame everything from  breathtaking land-                                           Attention                                                                                    t 1scapesto family portraits, even detailed close-
ups. The built-in auto flash helps you capture
subjects in dimly-lit  palces or photograph in-     L a m p  l i g h t e d
door sceneswith clarity and brilliance. Since
most of the operation - including film loading,     L a m p b l i n k i n g
film speed setting, winding/rewinding,   focus
and exposurecontrol - are automatic, you can     Correcttake great pictures effortlessly.              o
                                                                                        I ncorrect                             X
o Pleaseread this manual carefully before op    The name of the camera's working parts are
   erating the camera to take consistentlysupe-    listed on the front and back flaps of this man-
   rior pictures.                                       ual. Keep the flaps unfolded for quick refer-
o Pay special attention to the cautions and    ence while reading the manual.
  noies in this Operating Manual. Pictures and
   illustrations used in this manual may differ
  from the camera's actual appearance.
o lllustrations in this operating manual are the
  DATE MODEL.
View original page 3Page 4 · Read text
www.orphancameras.com
OUTLINE OF BASIC OPERATIONS


Open  the  back  cover  Load the film and close  The film  will  automati-   Push the main  switch
(see page 10).            the  back  cover   (see   callv  advance  to  the   button   to  switch  on
                    page 11).                         firsi  frame  (see  page  power (see page 6).
                                                          12).                                    It4i


Frame your subject and  Focus on your  subject  Depress the shutter  re-  When  the  film   is  fin-operate  the  zooming   (see page 14).            lease button.  In  dark   ished, the camera  will      tI
lever  to  compose  the                               conditions,   the   flash   automaticallv  rewind   itshot (see page 9).                                               will   discharge   auto-   (see page18).ffir
                                                         matically  (see page 14).
View original page 4Page 7 · Read text
www.orphancameras.com
FOR SAFE USE OF YOUR CAMERA                                       ,i

Although  we have carefully  designed  this camera  for safe operation,  please be sure to follow  precautions
given on this page.
                       This mark indicates precautions  that,   if not followed,  could result in se- Awenr'rtnc
                         rious injury  to the operator.
                      This mark  indicates  precautions  that,   if not followed,  could  result  in ,/i\ crunon                    minor or medium injury to the operator or damage to the equipment.
  A  wARNING               A  cAUnoN
  o The electronic circuits inside the camera     o Do not use the flash near anyone's eyes, as
    contain high voltage working parts. Never           it may hurt them. Be particularly careful with
    attempt to disassemble the camera your-      the flash around infants.
     self .                                         o Never try to disassemble, short or recharge
  o Never touch internal parts of the camera if       the battery. Also, do not dispose of the bat-
    they become exposed from dropping the       tery in fire, as it may explode.
   camera or for some other reason. as there         . Remove the batteries from the camera im-
     is danger of electric shock.                    mediately  if they become hot  or begin to
     . Wrapping the strap around your neck  is     smoke. Be careful not to burn yourself dur-
    dangerous. Make sure that small children      ing removal.
    do not get the strap caught around their
    neck.
  o Do not look directly at the sun through the
    camera. as viewing  the sun  for an  ex-
    tended period may damage your eyes.
     . Be sure to store batteries out of the reach
     of children. Seek medical assistance im-
    mediately if accidentally swallowed.
View original page 7Page 8 · Read text
www.orphancameras.com      PRECAUTIONS  FOR YOUR CAMERA

!        Precautionso Do not usewhenthe takingcamerapictureswhere  it may come in     o water,Dirt, mud,etc., sand,penetratingmoisture,the toxicinsidegas,of thewater,camerasalt
            contact with rain or water because the camera is      may cause damage  or  render   it  inoperable.
            not weather resistant. Should the camera get     Damage of any kind will not be repaired under
           wet from rain or splashing water, wipe  it off im-        the terms of the warranty and charges may be
            mediately with a dry soft cloth.                      assessed. Therefore.  handle  the camera  with
         o Do not drop the camera or allow  it to hit a solid        great care.
              object.  If the camera suffers a severe shock or
            impact, take  it to a Pentax service center for in-     Precautions  for ptuper care
            spection.                                      o IJse a blower and lens brush to remove dust'ac-
         o Condensation on the interior or the exterior of       cumulated on the lens or the viewfinder  win-
            the camera may be extremely  harmful  to  the      dow.
          camera mechanism as it may cause rust and/or      o Never use solvents such as paint  thinner,  alco-
             corrosion. Furthermore,   if the camera is taken        hol or benzine to clean the camera. To  clean
            from warm temperature to a subfreezing one or       the external camera surfaces, - but not glass sur-
             vice versa, the formation  of icelets may cause       faces; using a dry or silicone  -treated cloth  is
          damage. In such a case, put the camera into a      recommended.
           case or plastic bag so that any changes in tem-
            perature  will  be as gradual as possible. After
            temperature difference  is minimized,  the cam-
            era may be removed from the bag.
View original page 8Page 9 · Read text
www.orphancameras.com
                            PRECAUTIONS FOR BATTERY

Precautions  for storage                               Precautions for battery
.  Avoid  leaving the camera for extended periods     o Misuse of a battery can cause hazards such as
   in places where temperature and humidity  are       leakage, overheating,  explosions, etc. The bat-
  hieh such as in a car.                                   tery should be inserted with the "+D and "-"
o Dd not store the camera in a closet with moth-        sides facine correctly.
   balls or in a case where chemicals are handled.     o Never try [o disasseinble, short or recharge the
   Store it in a place with good  air  circulation  to        battery. Also do not dispose of the battery in a
  prevent fungus growth.                                            fire, as it may exploded.
                                                o Battery perf6rmahce may be temporarily  hin-
Other precautions                                    dered in low temperatures, but will recover   in
o The temperature range-at which^thi-s camera       normal temperatures.
   functioni  properly  is 5o"C to  - 10"C (122"F  to         . Keep a spart battery on hand  for replacement
   14'F).                                            convenience when shooting outdoors  or while
o To maintain optimum performance,  it is recom-         traveling.
  mended that the camera be inspected every one    o Keep the battery out of the reach of children.
   or two years. If the camera has not been used         . Wh6n the camera is in a bag, make sure the
   for an extended period, or is being prepared for       main switch  is  off;  otherwise,  battery  power
  an important  photographic  session, it  is recom-      may be wasted  if the shutter release button  is
  mended that you have the camera inspected or        accidentally pushed.
   test shoot with   it.
 o Repairs made necessory due  to  the  camera
   being subjected to any of the conditions warned
   about in this precautions section, or any other
   precaution or warning  throughout  this operat-
   ing manual, are not covered under the terms of
   the warranty and charges may be assessed.


 4
View original page 9Page 10 · Read text
www.orphancameras.com     ATTACHMENT                           JUSTRAP

                          :;:::.:l:''       l,      ..,::;:;;:::i,;FrW6,,:;ffi       Fit the strap on the camera as illustrated. Use
                                                                        ;    the illustrated part of the strap for opening the       PREPARATIONS BEFORE            battery chamber cover, adjusting the data on
       TAKINC PHOTOGRAPHS            the Date model, or pushing the mid-roll rewind
                                                       button to rewind a film before exposingall the
              For optimum performance you should  fa-        frames.
                 miliarize  yourself  with  certain  fundamen.
&           tals before taking any photographs.


Fl


I
View original page 10Page 11 · Read text
www.orphancameras.comj/\,^I\swrrcH


                                              When  not  in  use. ensure that  the camera  is                                                             switched  off.                             I
                                                               IJse one 3V lithium  battery, type CR123A  or
                                                                 the equivalent. Do not remove the battery be-
                                                                     fore  it is exhausted. If  the battery  is removed,
                                                                 the data on the DATE MODEL   is initialized.
                                                     The lens cover automatically  opens and closes
                                                 when the main switch is turned on and off. Do
                                                                 not attempt to open the lens cover manually.


      Main  Switch
     To switch on, push the main switch  button. The
       lens extends slightly to 38mm and the LCD panel
        is now on. To switch  off, push the main switch
      button again.
View original page 11Page 13 · Read text
-Jt-                               www.orphancameras.com
Gf    How ro HoLD THE cAMBRA


      Hold the camera as still as possible and steady    Notes:
           it againstyour face. Depressthe shutter release   o Do not hold the zoom lens becauseit moves
      bution gently. (If too much force is applied,the     back and forth while in oPeration.
      camerals litely to shake, and the picture will    o Make sure not to obstruct the autofocus win-
     be blurred.)   lf  possible, brace your body      dow,lens, light sensorwindow or the built-in
       against a stable, itationary  object such as a       flash with your fingers, hair or other object.
        w-all.When using the flash with the camera po-
       sitioned verticalfu, hold the camera so that the
       flash is above the lens.
View original page 13Page 14 · Read text
'PERATTNG38-8ommwww.orphancameras.comzoo*L'rysA


     Vw    AA
                                 When you move the zooming lever to the right  (  |  ),
                                              the lens moves towards the telephoto side. When you
                                   move the zooming lever to the left  ( ffl   ), the lens
                                     moves towards the wide angle side.

                                              Note:
                                         o The shutter cannot be released while the lens  is
                                           zooming.
                                         o Do not apply force to the zoom lens; do not place the
                                         camera with lens facing downward.
View original page 14Page 15 · Read text
www.orphancameras.com
                                                .'7     FILM LOADING


TAKING PHOTOGRAPHS

After   reading  this  instruction  manual  you
should he familiar  with  the functions  available
on the camera, and youore ready to insert the
film.


                                                      1. Open the back cover as illustrated.
                                                                                     . Ensure the power is off before loading the
                                                             film.


 10
View original page 15Page 16 · Read text
www.orphancameras.com

              )N

2.Place the film cartridge in the film chamber    Notes:
  by fitting its flat side on top of the rewind    o Ensure the film  is placed properly between
  shaft first and then top end into the camera.      the film guides.
3. Pull the film leader out far enough from the    o  If there is dirt on the film detector (D, film
  cartridge to reach the take-up spool. Align      cannot be wound properly.
  the tip of the film with the film leader end    o Ensure the film is taut as illustrated on the il-
  mark O.                                            lustration to the left. Take up any slack in
4. Closethe back cover. The film automaticallv      the film by pushing it back into the cartridge.
  advancesto the first frame.                  o If the end of the film  leader is extremelv
                                                   bent, straightenit or cut off the bent portion.


     X Slack No  I          OFlat Yes !                                      11
View original page 16Page 17 · Read text
www.orphancameras.com

 E                  a
                                              Fihn and Film Speed Setting.                                                                                                             j                                          o use a DX-coded film with ISO rating from
                                           25 to 1600. When any of these films are
                                                  loaded, the proper film speed is automati-                                o                                                          cally set for the camera.  f---    ' I                       tr a        o Non-DX coded films cannot be used. If non                          L                              oo         DX-coded film is used, the camera automati-
                                                      :                 cally set the film speedto ISO 25.                                          o A  film  with ISO 400 film speed is recom-    j t _ti                                       mended to get less image blur and to cover
                                        more of photographic situations.                                                                  I                                          o LJsehigh-speedfilms with ISO 800 or higher
5. When  [  | ] appearsin the exposure counter      mainly for shooting indoors or in dimlyJit
  on the LCD  panel, the film_ automatically      conditions.
  stopswinding. Ensure that L i I apearson the    o LJseof negative color film  (print film)  is rec-
 LCD panel.                            ommended.
6. If   I E ]  blint<son the LCD panel, it means
  that the film  is not properly loaded. Reload
  the film again.
o When the main switch is turned OFF, the
  number of frames or  I E ] indication will re-
  main for 5 secondson the LCD panel.


1 2
View original page 17Page 18 · Read text
www.orphancameras.com
.27    VIEWFINDER DISPLAYS AND LAMP INDICATIONS

    VIEWFINDER DISPLAYS         LAMP INDICATIONS
                                              When you depressthe shutter release
                                                             button halfway down, the green lamp
                                                                          in the viewfinder lights up or blinkq
                                              When the subject is in focus and the   f                                                   4                        ( " )                                       the flash is fully charged, the green
                                                     lamp will  light up to indicate that
                                                       you can take the picture.
                                                Lighting up:   t                                                                                     If  either the camera-to-subject dis-
     OAutofocus frame                                      tance is less than lm  or the flash is       Center this frame over thelsubject.                    being charged, the green lamp will
                                                                    blink and you cannot release the
     OClose distance compensationframe                        shutter.
     When  the camera-to-subject dis-
       tance is lessthan 1m, composethe                    o While the lamp is blinking, you
      scenewithin this frame.                               cannot releasethe shutter.
                                                       o Ensure  that  the  lamp   is    lit
     @picture area                            Blinking:            continously before taking pictures.
     When  taking a normal  picture,                    o When the flash is being charged,
      compose the  scene within   this                                            t   t    I  on  the LCD  panel also
       frame.                                                           blinks.

                                                                          13
View original page 18Page 20 · Read text
www.orphancameras.com


                                                Automatic Ftash Emission
                                   When the shutter release button  is depressed
                                             halfway down in low light, the flash ii auto-
                                                  matically charged and the lamp-appearin the view-
                                                                      {il{"r   light up and  I  I  ]  will       on the
                                      T.CD panel indicating the flash is ieady to dis-
                                              charge.
                                          o The automatic flash emission is automati-
                                                        cally set when the main switch is turned on.
                                          o When the built-in flash automatically dis-
                                               charges,the camera uses a shutter speed of
3. Shooting                                     approx. l,/+s  sec.when the ISo400-film  is  Fully depressthe shutter releasebutton.          used.
Note:                                       Red-eye Reduction Flash Function
o When the shutter is released,the self-timer    This camera incorporates a red-eye reduction
  lamp momentarily lights up to indicate that    function-which lights up the self-timer lamp for  a picture has been taken.                                                    lpprox. 1 secondbefore the flash is dischaiged.
                                             For setting the red-eye reduction flash finc-
Flash effective ranges (Nega-color film used)       tion, see page 20.
  iil-----t-to     r00      200      400
               0.6 -                3.8m                         0.6 - 5.4m                                   0.6- 7.7m 3 8 mm 1 1 1 1 ;                         (2.0-17.7ft)                                       (2.0-25.3ft)                     12.sft)                 :2.0-
 8 0 m m1 1 ;    (2.0-6.6ft)0.6 - 2.0m (2.0-9.2ft)0.6 - 2.8m (2.0-12.Btt)0.6 - 3.9m
                                                                      15
View original page 20Page 21 · Read text
&Focus    LocKsHoorrNcwww.orphancameras.com
                                               i1                          tr;;-1
                                           1                                  L_::;i.J                                                   I
                                                     1
          If you shoot without positioning the autofocus     1. Focus on the subject with  the autofocus
     frame  t  t]    ] on the main subject as shown     frame t  tl   l.
     above, only the background will be in focus.    2. When the shutter releasebutton is depressed    When the main subject is off  the autofocus      halfway down, the green lamp in the view-    1
     frame in the center of the viewfinder, use the       finder lights up and the exposure and focus
      focus-lock technique. (Focus lock is the func-      are temporarily locked.
       tion to lock focus-on an off-center subject.)


     16
View original page 21Page 22 · Read text
www.orphancameras.com


                                        HARD.TO-AUTOFOCUS SUBJECTS
                                                The aut-ofocussystem is highly precise, but
                                                           not perfect. Some subjects may nbt focus as
                                                  you wish. In  this case, use the focuslock
                                                      technique on another subject near the actual
                                                one and equidistant from the lens. Subjects
                                                     which may fool the autofocus system- in-
                                                          clude:
                                                              a) Black or very dark objects,which don't re-
          3. While holding the shutter release button          flect much light (and therefore don't re-
           halfway, re-aim the camera or recomposethe          flect infrared autofocus beams.)
            picture, then release the shutter by depress-     b) Wire netting, latticework,  iron exercise-
           ing the shutter releasebutton all the wav.          bars. etc.
                                                                  c) Flickering  light  sources such as neon
        Note:                                                  signs, fluorescent lamps, TV images, sun-
        o You can releasethe focus lock simply by lift-          light coming through trees, etc. and sub-
           ing your finger from the shutter releasebut-                                                                 jgcts illuminated by theselight sources.                                                                _.           ton.                                              d) Glossy and reflectjve surfaEeshke glass,
I
                                                                 mirror, car bodies,etc.
                                                            e) Fast-moving objects, like trains or auto-
                                                       mobiles in motion.
                                                                                        f) Water jets, water surface, smoke, flame,
                                                               fireworks, etc. which have no distinct or
                                                            consistentform, or a subject in mist.
                                                                            1 7
View original page 22Page 23 · Read text
www.orphancameras.com
&UNtoADINGFItM(Removethefilmfromthecanenintn,*n,aio,nyos#vo*##x*rill.l'-*
                                                                                                       II                            I


       1. Rewinding the film                                2. Unloading the fihn
       After you have exposed the last frame of the    To unload the film, open the back cover, and
        roll, the lens retractsand the film rewinds auto-   remove the cartridge from the chamber by pull-
       matically. After  rewinding, the motor stops,    ing the top out first  .
     and I C ] blinks as shown to indicate that the
       film has been rewound.                         Notes:
                                                o Never open the back cover until the whole
           .   [ 0 ] blinks for approx. 5 sec. after the whole       film roll is rewound.
          film roll is rewound.                       o The shutter may be releaseda frame or two
      o A}4-exposure roll of film takes about 20 sec-     even after the specified number of frames
       onds to be rewound.                         have been used up as indicated by the num-
      o The entire roll  of  film  including the film       ber of shots shown on the film  cartridge.  If
        leader is always rewound into the cartridge        this occurs, these extra frames may be lost in                                                             IJ         to prevent any part of the film being exposed      processing.
         to lieht.
      1 8
View original page 23Page 24 · Read text
www.orphancameras.com


Rewinding a film in mid-roll                   The lens retracts and then film rewinding
If you wish to unload a film before exposingall       starts.
the frames, push the mid-roll rewind button     When rewind is completed, the motor stops
with the protrusion part of the strap clamp.       and  [ 0  ]  blinks, indicating that the back
                                                cover may be opened safely.


                                                                      1 9
View original page 24Page 26 · Read text
www.orphancameras.com
      DAYLIGHT-SYNC   SHOOTING

                                Depressthe mode
                                   button  until  the
                                                                t   t   I symbolap-
                                  pears on the LCD
                                     panel. The  flash
                                               will discharge in
         both dark and bright conditions. When a por-
            trait  is taken with the subject in a backlight
           situation, the front of the subject may be cast in
        shadow. In such a case,use the Daylight-Sync
         Shooting mode (Flash-ON mode) within the
           flash-effective range to take pictures. This will
         ensure that a picture is well exposed without    Without Daylight-Syncti*  any shadow. When you wish to discharge the
           flash. use this mode. In this mode. the flash will
        always discharge.

         Note:
        o Make sure you're within the flash effective
          range even when you use the built- in flash as
          a fill-in flash in daylight. Seepage 15.


                                                    With Daylight-Sync
View original page 26From the M. Butkus archive. Original publisher and archive notices are retained.
Check the model and edition against your equipment.
PDF verified 2026-10-10.