Film cameras
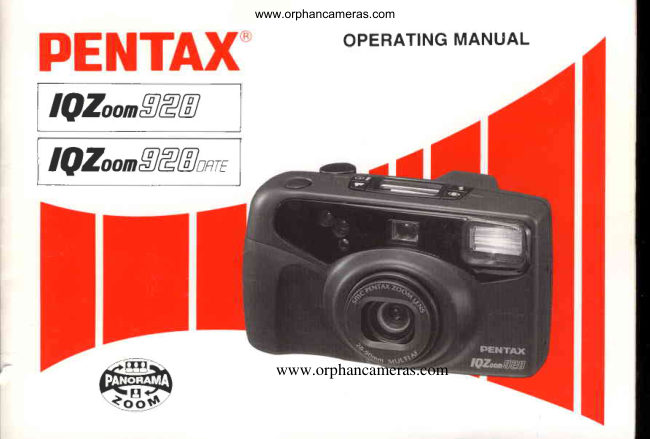
Pentax IQZoom 928 / IQZoom 928 date User manual
User manual for Pentax IQZoom 928 / IQZoom 928 date. 54 pages in English. Read the original PDF, download or print a copy without registration.
54 pagesEnglish3.9 MB PDF
Loading your manual…Open PDF directly
Document details
- Brand
- Pentax
- Model / document
- Pentax IQZoom 928 / IQZoom 928 date
- Document type
- User manual
- Language
- English
- Pages
- 54
- File size
- 3.9 MB
- Category
- Film cameras
- Document date
- Not specified in catalog
Search available document text
Find a term, then jump to its page in the original PDF. Image-only pages may not be searchable; check the PDF for exact wording and diagrams.
Page 1 · Read text
www.orphancameras.com
                       OPERATINGMANUAL
Itoz,*gea-J
 IQZoorJEE,,-,


                             www.orphancameras.com
  .@
View original page 1Page 2 · Read text
www.orphancameras.com


Congratulations   on  your  purchase   of  the     Icon indicators used in this manual
PENTAX   IQ Zoom 928 and welcome  to the
world  of Pentax zoom compact photography!
Your  compact,  light  weight camera  is a great      Operation direction                <r
companion to preserve your favorite memories.
Its  built-in  28-90mm zoom lens gives you the       Automatic  operation             fuuf
freedom to frame everything from breathtaking
landscapes to family portraits, even detailed clo-
se-ups. The built-in  auto flash helps you capture       Attention
subjects  in   dimly-lit   places  or  photograph
indoor       scenes               with  clarity  and brilliance.                                          Also     Lamp lighted                           -:.;i-,'l'.included          are panorama/standard                                   format  mid-
roll switching  capability  and a wireless remote
control  feature. Since most  of the operations-     Lamp blinking
including  film loading, film speed setting, wind-
ing/rewinding,  focus and exposure control-are      Correct
automatic,  you  can  take  great  pictures   ef-                     ofortlessly. The DATE  model makes  it easy toremember the dates when you took pictures.           Incorrect         X
o Please read this manual carefully before ope-     The  names  of  the  camera's  working   parts  are
  rating the camera to help you take consistenly       listed on the  front  and back  flaps  of this manual.
  superior pictures.                               Keep   the   flaps  unfolded    for  quick   reference
r Pay special attention to the cautions and notes      while  reading  the manual.
   in this Operating Manual.  Pictures and illus-
  trations shown herein may  differ  from  the
  camera's actual appearance.
View original page 2
Page 3 · Read text
www.orphancameras.com
OUTLINE OF BASIC OPERATIONS
                                 o


 9p..t    the  back   cover   Load  the  film  and  close  The  film   will  automati-   Push the Main  Switch
 (see page  12).              the   back   cover    (see   callv   advance    to   the  button   to  switch  on
                            p a g e  l3 ).                            firsl   frame   (see  page  power (see page 7).
                                                                                   I 3 ) .
                  A                             o
                                                            T-- _---t
                             l-15;-l     I r                               l-Drl - l     lrr
Frame  your  subject  and  Focus on your  subject  Depress the shutter re-  When  the film  is frn-
operate    the   zooming   (see page lB).           lease button.  In  dark   ished, the camera  will
lever   to  compose   the                                 conditiors, the flash will   automaticallv    rewind
shot (see page-10).                                discharge automatically     it (see page 20).
                                               (see page l9).
View original page 3Page 5 · Read text
TABLE OF CONTENTS    www.orphancameras.com

. Na mes o f w o r k i n g  p a r t s   .....' .""""""Fla p s      TAKING BETTER PHOTOGRAPHS
o Introduction    """"                  'Front  foldout     How  to select modes
o Outline   of basic operations  """'Inside    cover       /Red-eye reduction flash mode ...."""""22
o C a u t i o n s                                        " . ' " " " " " ' 2         Daylight-synchro shooting              """"'24
r P ra c t ic a l s h o o t i n g g u i d e .."""""""""""' 4           Taking pictures at slow shutter speeds ..:....25
                                                Slow-shutter-speed-synchphotography  ..'."' 25
PRDPARATIONS BEFORE TAKING     Bulb shooting                          """"'26
PHOTOGRAPHS                            Bulb-synchro shooting                     ""'26
l. S t ra p a t t a c h m e n t                """""""""6           Self-timer shooting             """""""""27
2. Ma in  s w i t c h                                  .........7     Using a wirelessremote control ................28
3. Battery  check                              """"8       Multi-exposureshooting """""""""""""32
4. How  to hold  the carnera                 """"'9        Infinity-landscape shooting             """"33
5. Operating  the 28-90mm zoom lens  """"'10       Spot AF shooting                          ""'34
                                         Easy pic. shooting                 " """"""""'35
TAKING PHOTOGRAPHS                 Focus-lock shooting            """""""""36
 l . U s a b l ef i l m  " " " "                             " " " " 1 1     Exposurecompensation""""""""""*""'38
2. Film loading                       """"12      Panoramic format picture             """"'39
3. Viewfirnder displays and shooting ranges"'14    DATE MODEL                            ......42
4. Lamp indications                    """15
5. Ordinary photography ""  """"""""""'     16  MAINTENANCE CONSIDERATIONS
6. Diopter adjustment              """""""    17    Battery exhaustion warning             """44
7. Taking pictures             """""""""'lB          Installing/Replacing the battery  """""""'45
B. Unloading the film                        ".''20     Taking care of your camera """"""""""'46
                                                 Trouble shooting                        """48
                                                Specifications"""""'               """""""50
                                               Warranty policy                         """52
                                    LCD panel                         """"""'55
View original page 5Page 6 · Read text
www.orphancameras.com
PRACTICAL SHOOTING GUIDE


             Focusing

       Focusing on a particular spot of the subject                       p.34
       Taking a picture of distant landscapescenery                     p.33
       Taking a picture of a subject through a window                    p.33


             Flash photography

       Taking a picture in low light situations """'                         p.16
        Minimizing the picture of red-eye effect                             p.22
        Taking  a picture  of people whose face is cast                         p.24
        Taking  a picture  of people with  night scenery                        p.26


             Zooming     t
                     subject
View original page 6Page 8 · Read text
|                               t - -
      - -                                www.orphancameras.com
      STRAPATTACHMENT  AT
                           dTdd   i    t: :::!,)fyw                                                        Fit  the strap  on the camera  as illustrated.  When
                                                |;-ta,:
                                                                        attaching    the  Remote   Control   Holder    to  the
                                                                              strap,  first remove  the Wireless  Remote  Control     PREPARATIONSBEFORE,ilJ
      TAKING PHOTOGRAPHS       fromstrap thethroughRemotetheControlRemote Holder,ControlthenHolderpass theas
                                                                                     illuslrated.   Use  the  tab on the clamp  (see  illus-
            For optimum  performance  you  should           tration)    to depress  the ADJUST    button  and  to
             familiarize    yourself   with   certain        open  the  battery  chamber   cover.
           fundamentals   before   taking   any
            photographs.                                                                              .  To  prevent   the  camera  from  swaying   a  lot
                                                                           while  walking,   adjust  the  strap  so the camera
                                                                               rides  above  your  waist.

         Remote Control Holder (Option)
View original page 8Page 9 · Read text
MATNS*IT.H        www.orphancameras.comZ/


   Main Switch                                      The  lens cover  automatically   opens and  closes
    To  switch  on, push the Main  Switch  button.       when  the  main  switch   is turned  on  and   off.
    The lens extends slightly  to the wide-angle 28        Never  attempt   to open  the  lens cover manua-
   mm setting and the LCD  panel is on. To switch          llv.
      o{f, push the main switch button  again. When
     not  in use, ensure that  the camera  is switched
       off.
     o IJse one 3V lithium battery, type CRl23A  or
        the  equivalent. Do  not remove the  battery
       before  it  is exhausted, since it  is used by the
       date function on the DATE  model  to keep
       constant track of time.
View original page 9Page 11 · Read text
How ro H'LD rHE 'AMERAwww.orphancameras.comd/


    When shooting, hold the camera securely with     Caution:
     both hands. Keep the camera as still as possible,    Do not hold the zoom lens because it moves back
     and gently depress the shutter release button.  (If     and forth while  in operation.
      too much force is applied, the camera is likely to
     shake, and the piclure  will be blurred.)  Try  to     Note:
     brace your elbows against your body, or support     o Make  sure  not  to  obstruct  the  autofocus
      yourself and the camera against a stable, station-       window, lens, light sensor window or the bui-
      ary object, such as a wall.                                        It-in  flash with  your  fingers, hair  or  other
    When using the flash with the camera positioned        object.
       vertically,  hold the camera so that the flash is
     above the lens.
View original page 11Page 13 · Read text
www.orphancameras.com                           jF                           rs{BLE FILTI

    ,9i:r;i, ira:ir";rl:,'1l:'11:'t4iilffi.W!.1,;i:|ltila.i{:tg,,    ffA,    i,|i,#ffi
  TAKTNGPHOTOGRAPHS.t'ii    DX FILM            Perforations  Film cartridse

  After  reading  this instruction  manual you                                                                                     i i J o o o o o o o o o o
  should be familiar with the functions available
  on the camera, and you're ready to insert the
  film.

                                               DX mark                                                                                           'j                                                            lISO rating)
Notes:
o When buying DX-coded films, ensurethat the    Automatic  film speed setting                  *DX"  package bears the       mark.                      This  camera   is designed  to use DX-coded    films
o Non-DX  coded film cannot be used.                with  ISO  ratings  from  25 to 3200. When  any  of
. LJsehigh-speed film with an ISO rating of 800      these  filrns  are  loaded,  the  proper   film  speed  is
  or higher mainly  for shooting indoors in dim-      automatically   set for the camera.
   ly-lit conditions.
o A  film  with ISO400  film speed is recomme-
  nded to get less image blur and to cover more
  photographic situations.


                                                                                     Ir
View original page 13Page 14 · Read text
FILM LOADING (Ensurethewww.orphancameras.compowerisonn#ili#iii"dit[fiilt


I  Slide the back cover release lever down in the    Notes:
  direction of the arrow to open the back cover     o Ensure the  film  is placed properly  between
  as illustrated.                                         the guide rails @.
2 Place the film  cartridge  in the film chamber     o  If  tliere  is dirt on the film  detector @, film
  by  fitting   its  flat  side on top  of the rewind       cannot be wound properly.
  shaft first and then slide the top end into the
  camera.
3 Pull the film  leader out far enoush from the
  cartridge to reach the take-up tpoot Q. Align
  the  tip  of the film  with  the film  leader end
  mark O.                                    '-rtr     @WI--   aE_r
                                                          x Slack  NO!       O Flat    YES!
1 2
View original page 14Page 15 · Read text
www.orphancameras.com


                                                5 When  "  I  " appears in the exposure counter
                                                on the LCD  panel,  the  film  automatically
                                                      stops winding.  Thg  indication  appears  as
                                             shown above.  If  (  , ) does not appear on the
                                        LCD  panel,  it  indicates that  the film  is not
                                                      properly  loaded.  If  this occurs, reload the
4  After  the back  cover  is closed,  the  film  auto-          film.
   matically   advances  to  the  first  frame.                           If   ( g ) ttint  s on the LCD panel, it means the
o Even    if no  film   is loaded,  the motor  operates          film  is not properly loaded.
   for  a second  or  two   after  the  back  cover   is     o The exposure counter indication  will remain
   closed.                                         on even if the main switch  is turned  off.


o Ensure the filrn is taut as illustrated on the previous page. Take up any slack in the film by pushing
    it back into the cartridge.
o  If the end of the filnr leader is extremely bent, straighten  it or cut off the bent portion.


                                                                              1 3
View original page 15Page 16 · Read text
www.orphancameras.com
      VIEWFINDER DISPLAYS AII{D SHOOTING RAI{GESA/
     Ordinary  photography
   o                                  SwitchFirst, switchbutton.on power by depressing the Main
   o             @    OQrdinaryA.rtofocus photographyframe        (standard format)
                                                    Focus on the subject  with  this frame.
                             @ Clor.  distance  compensation   frame.
                                           When  the camera-to-subiect   distance  is between  0.58
                                      m   ( t.gft)  and    I m  (g.gft),  compose  the scene within
                                                                      this frame.
                                                  (O Pi.t.rre  area
                                            When   taking  a normal   picture,   cornpose  the  scene
                                                                within   this frame.
                                         lanoramic  format picture
     Panoramic  format  picture                (O Artofocus   frame
                                                      _ Focus on the subject  with   this frame.
                             @ Pi.tnre  area
                                            When  taking  panoramic   format  pictures,  compose  the
                                                    scene within   this frame.
                                                     Autofocus   is referred  to as "AF".
                                        Shooting ranges (effectiVe camera-to-subj ect dis-
                                           tance)
                                                      o The  ordinary   setting  and  panoramic  mode  allow  a
                                                        shooting  range from"oo   (infinity).to   0.58m   (f .gft).
                                                      o Subjects  closer than  0.58m  (l.9ft)  cannot  be focused
                                                              properly.

     1 4
View original page 16Page 18 · Read text
www.orphancameras.com
   ORDINARY PHOTOGRAPHY


When  the  power   is switched  on by  depressing       When   the   built-in    flash  automatically     dis-
the main  switch  button,  the camera  automati-          charges,  the  camera  uses a shutter  speed  in
cally  selects the Auto  and Single-Frame   Shoot-         the range from  approx.    I /30th  (28mm)   to   | /
ing modes  and  the exposure  counter  indication         45th sec. (90mm)  when ISOl00   film  is used.
remalns  on  as shown  above.  These  modes  are
used  for  taking  ordinary   pictures.  The   built-in
flash will  discharge  automatically   when  the sub-
ject  is poorly  illuminated   or  in a backlight   situ-
atron.

o When  the LCD  panel  display   is different  from
   the  one shown  above  (which   indicates   that
   other  modes  are  set),  switching  power  OFF
  and  then ON  restores  the  Auto  and  Single-
  Frame  Shooting  modes.
1 6
View original page 18
Page 19 · Read text
/n'                             www.orphancameras.com     DIOPTERADJUSTMENT'Y
      rli


     Aim  the camera  toward  a bright  subject. While
      looking  through  the viewfinder,   adjust  the diop-
       ter by  turning  the diopter  adjustment   dial  until
      the AF  frame  appears  clearest.


                                                                                  1 7
View original page 19Page 20 · Read text
www.orphancameras.com   TAKING  PICTURES   Shooting distanee: O58rn,(l.gft).qa(infinity)


I Composing the scene                     2 Checking the lamp indication
After  zooming   the  lens  and  composing   your      Depress   the   shutter   release  button   halfway
scene, focus on  the  subject  with   the  autofocus      down.  When  the  subject   is  in  focus,  the  green
frame  in the center  of the viewfinder.                lamp  will  light  up.  If  the subject  is closer than
                                                      0.58 meter  (l.9ft),  the green lamp  will  blink  to
o This camera  uses multi-beam  AF  to focus the      warn  you.  In  this  case, extend  the  camera-to-
   lens on  the  subject.  Even    if  the  subject   is      subject  distance  until  the green lamp   is  lit  con-
   slightly   off  the AF  frame,  the  subject   will       tinuously.
   easily be brought   into  focus.
.  To focus on a particular  spgt in the AF  frame,      o When  the red lamp  lights  up,   it indicates  that
  select the AFipot   mode.-(See page 34.)              the  built-in   flash  will  discharge.  Ensure  that
o When  the power   is turned  on, the multibeam         you  are within  the flash  effective  range before
  AF mode  is automaticallv   set.                         *hooting.  (S..  page  19.)


1 8
View original page 20Page 22 · Read text
tttt                              (Remove the film from the camera in the shade or use your body to                                  www.orphancameras.com


                       I '.,i,,.,,
                           -                          _____;._...           r'&e'.

      I Rewinding the film                       2 Unloading the film
    After  you have exposed  the  last frame  of the  roll,      To  unload   the  film,  open  the  back  cover,  and
    the  lens retracts  and  the  film  rewinds  automati-       remove  the  cartridge  from  the chamber  by  pull-
    cally.  Then,  the motor  stops, and   ( 0  )  blinks  as      ing  the  top  out  first  with  your  finger.
   shown   to  indicate   that   the  film  has  been  re-
   wound.                                   Notes :
                                                            o The  shutter  may  be released  a frame  or  two
   o A  24-exposure    roll   of  film   takes  about   20        even after  the specified  number   of frames have
     seconds  to be rewound.                               been  used up  as indicated   by  the number   of
   o During    rewinding,     the   exposure    counter          shots shown on the film  canister.   If  this occurs,
      counts  frame  numbers   in reverse.                       these extra  frames may  be  lost  in the process-
   o The   entire    roll   of  film   including    the   film             irg.
      leader  is always  rewound   into  the  cartridge   to      o Never  open  the  back  cover   until   the  whole
      prevent  any  part  of the  film  being  exposed  to           film   roll   is rewound.
        light.
  20
View original page 22Page 23 · Read text
www.orphancameras.com


Rewinding a film  in mid-roll                   2 While  depressing the drive mode button, de-
If you wish to unload a film before exposingall       press the shutter release button. Film rewind-
the  frames,   follow   the  procedures    described         ing starts. When a roll of film  is rewound to its
below.                                                end, the motor stops and  ( C ) Utint<s,indicat-
                                                          ing that the back cover may be opened safely.
 I  Turn  the main  switch ON  and  hold down  the
   drive  button   for more  than  3 seconds.   ( f:O    )
  appears  and   (           )  starts  blinking   on  the
  LCD   panel,  indicating    that  the  mid-roll    film
   rewinding  mode  has been  set.


                                                                     21
View original page 23Page 24 · Read text
(HOW TO SELECT MODES/RED-EYE                                 www.orphancameras.com
TAKING BETTER PHOTOGRAPHS  inpucrloN FLAsHMoDE)      ..

To set various exposure modes, depress the Mode Button @.
                                     -
                        Daylight-      Slow-Shutter   Slow-speed-                   Bulb-sync
                    Sync        speeo         sync
                                     (Flash-OFF)    photography                                             .lJ l-[-_-]*l-;1_J-@-l*[T-_]*l-Ol*[     t
    I    llTllsllsllellel
                                                                                                                                                                                t
                                                         . To set various required modes,depressthe button Q, @ and/
                                   o. @.                                                                  i                                e For normal use, set the Auto and Single-Frame modes as shown                        rl,
                                 on the  left. When  the power  is switched  on, the Auto  and
                                  Single-Frame Shooting modes are automatically set.


Red-EyeReduction Flash Function
To reducethe red-eyephenomenonin the picture, depressthe red-eyereduction flash button (O) O.
With   this mode,  the  flash  discharges  two  consecutive   times,  reducing   the appearance   of the  red-eye
effect. To  cancel  the mode,  depress  the  red-eye  reduction   button   again.


22
View original page 24Page 25 · Read text
www.orphancameras.comr  :  :  l


To set various shooting modes, depress the Drive Button €).


     Single-Frame    Self-Timer    Remotecontrol  Multi-Exposure
      shooting        shooting       shooting       Shooting

                                                                          depressed  after  the  shutter   is                                                           and                                           O                                                                                           if thebutton                              or                              shooting  mode,                        and.fo  In      any exposure                                                                     9    ":.                                                                        respectively.                                     modes                                                                       will  return                     and                              Single-Frarne   released,                  ih.  Anto
o Holding  down  the  Drive  B*utton  €)  for more  than  three  seconds  sets the  mid-roll   rewinding  mode
   (S e e p a g e 2 1 . ) .
.  Hotailrg-down    the Red-eye  reduction   flash  buttott  O  fot more  than  two  seconds sets the Exposure
  compensation mode  (See page 38).
To set various focusing modes, depress the Landscape/Easy Pic. Mode Button @.
   *[f*F!*F-l
      Autofocus        Infinity-            Spot AF       Easy Pic. shooting
      shooting        landscape          shootins
                       shooting                                              23
View original page 25Page 26 · Read text
www.orphancameras.com
DAYLIGHT-SYNCHRO SHOOTINIG


                             Depress  the Mode
                                Button    until   the
                                           (t)   symbol app-
                                ears on  the LCD
                                  panel.  The   flash
                                           will   discharge    in
                                both    dark   and
bright  conditions. When  a portrait   is taken  with
the subject  in a backlight   situation,  the  front  of
the  subject  may  be  cast  in shadow.   In  such  a
case, use the  Daylight-Synchro-             Shooting  mode
(Flash-ON   mode)    within    the   flash-effective
range  to  take  pictures.  This   will  ensure  that  a
picture    is  well  exposed  without   any  shadow.      Without  Daylight-Sync
When  you  wish  to discharge  the  flash, use this
mode.  In  this mode.  the  flash  will  alwavs  dis-
charge.
Notes :
o Ensure  that  the red lamp on the left-hand  side
   of  the  viewfit'rder   is  lit when  the  shutter   re-
   lease button   is depressed halfway  down  before
   shooting.  A  red lamp  blinking   indicates  that
   the  flash  is being  charged.
o Ensure  you're  within   the  flash  effective  range
  even when you use.the  built-in   flash as a fill-in
   flash  in daylight.  (S.e page  19).
                                                 With Daylight-Sync
24
View original page 26From the M. Butkus archive. Original publisher and archive notices are retained.
Check the model and edition against your equipment.
PDF verified 2026-10-10.