Film cameras
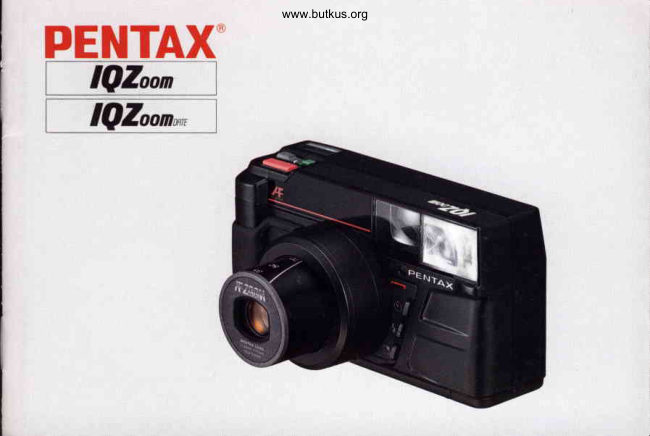
Pentax IQZoom User manual
User manual for Pentax IQZoom. 32 pages in English. Read the original PDF, download or print a copy without registration.
32 pagesEnglish3.0 MB PDF
Loading your manual…Open PDF directly
Document details
- Brand
- Pentax
- Model / document
- Pentax IQZoom
- Document type
- User manual
- Language
- English
- Pages
- 32
- File size
- 3.0 MB
- Category
- Film cameras
- Document date
- Not specified in catalog
Search available document text
Find a term, then jump to its page in the original PDF. Image-only pages may not be searchable; check the PDF for exact wording and diagrams.
Page 3 · Read text
Main switch and LCD window's displays     www.butkus.org


                                                                                                                .t;:1i:;j:.ji                                            CAUTIONS                                               r!;,:i:fi:
                                                       o This camera is powered by one 6V lithium
                                                          battery (BR-P2 or D L-223A), or four "AAA:'
                                                        size alkaline batteries.The Ni-Cd battery is
                   lr.                                     not compatible.                        .J
                         F I L M                                    o The lens protector automatically opens or
                                                      closes by turning the main switch on or off .
o Main switch: To operatethe camera,turn this        Do not open it manually.                                                                                                              I When film is not in the camera,f tashdod$,   switch on by setting it as shown above.
o Macro-focus-setbutton: When shooting in the           not  f ire, nor does the cartridge mark appear                                                                     in the LCD window, nor does the macro  macro mode, align the main switch with the
    1! mark while pushing this macro-focus-set           function work.                                                 The shutter cannot be releasedif or when:   button.
o Battery mark: This mark lights up when the                        .  the battery is not  in the camera or  it is
   battery gets weak.                                       incorrectly inserted in the chamber, or  it is
                                                                                                                                                   :i :o Cartridgemark: When f ilm is loaded into the          exhausted.               ,  ,        .r
                                                       o the main switch is off.                                , :  cameraand the back cover is closed,this mark
                                                       o you shoot a subjct more than one meter   appears,and it also flickerswhen the f ilm
   rewindingis completed.                                t3.3  ft.) away, with  the lens set in the
o Film-transportmark: This indicatesthe f ilm          macro mode.                                                       o the lens is in the zooming action.    ,         l    is beingwound,or rewound.      www.orphancameras.com
o Exposurecounter: This indicateshow many            o the flash is being charged, or the recycle
   pictures were taken.                                  time becomesmuch longer than usual.
                                                                                                              I  the film  is being rewound, and the film
                                                       rewind has just been completed.      .r;,;,,,,:i;;1;:r;
View original page 3Page 4 · Read text
www.butkus.org


Thank you  very much for choosing    CONTENTS
the world's first fully automatic35mm       Battery insertion and check                  ..........2-3
leaf-shuttercamerato integratea macro-      F i 1 m . . . . . . . . . . .                                                        . . . . . . . 4
to-telephotopower zoom, zoom finder      Loadingfilm  ...........                           ......5-7
and zoom flash.The camera'sauto-focus,    Cameraholding                            ....................8
auto-exposure, auto-film-speed-setting,   Operating35 - 70mm Zoom lens ...........................9
auto-film-loading,auto-winding, auto-      Taking generalpictures             ................10-11
rewinding and auto-flashcontrols will      U n l o a d i n gf i | m . . . . . . . . . . .                                     . . . . . .1 2
certainly help you enjoy  fine photo-       Effective picture-taking range....              ........13
graphy with  memorable results just       Taking close-uppictures (Macro shooting)... 14-15
easily and flawlessly.Moreover,if you       Flashphotography........          .................16-17                                               Focus-lockshooting                     ..18-19
own the DATE model,you will always     E xposure com pensation......................................,,,.20
be able to rememberwhen you took       Self-timer                                            ......21
all the pictures.                                                                  f Q Zoom DATE                          .......22-25
Needlessto  szy, your camera is a so-      Strap and soft case.....                              ......26
phisticated,precisioninstrumentbuilt to        Battery                                                .........27
give long-lasting,reliableservice,and will       Taki ng care of you r camera..............................28-29
serveyou well if you treat it right, with        Specifications'....'.......          ..................30-31
proper handling and reasonable'-care.   Warranty policy                              ..............32

Please read this manual carefully to
familiarizeyourselfwith all the features
and functions   it has to offer.    :ii,',i,i;.i,:iii;i..,:i:,,,:,
View original page 4
Page 5 · Read text
BATTERY INSERTION AND CHECK    www.butkus.org


This camera is powered by one 6V lithium battery     1 . Open the battery-chambercover by pushing and
pack (Panasonic/NationalBR-P2 or Duracell               raising it in the direction of the arrow. To insert
DL-223Al-, or four "AAA"-size alkaline batteries.          the lithium battery, open the inside cover as well.
                                                      2.  lnsert the lithium battery pack into the chamber
o Manganesebatteriescan also be used, but they            correctly as indicated on the inside cover, and
have far lesspower than the lithium or alkaline            close the two covers.
batteries.                                            3. When inserting the alkaline batteries,make sure
                                                                 their (+) and (-) sidesare correctly placed as
                                                         indicated on the inside cover.
View original page 5Page 6 · Read text
www.butkus.org


1. Battery check                                            2.  Battery replacement
As you turn the main switch on, the lens slightly               lf the battery mark in the LCD window is lit up
extends,and the lens protector opens. lf they           while you are operating the main switch, the zoom
do not, the battery is exhausted,or it is not              lever, or the shutter-releasebutton, the battery
properly loaded.                                                 is becoming exhausted,and it should be replaced
                                                       with a new one. When the battery power is getting
                                                       low, reachingthe limit of use, the battery mark is
                                                                                              lit up, then flickers, and the shutter cannot be
                                                     released.When the battery is completely exhausted,
   'd6"jil6i"i;'ffidilcJ                                 the battery mark does not even appear.
   era which  is operating; otherwise  it may
   malfunction.
View original page 6Page 7 · Read text
www.butkus.org        F I L M


     D X F I L M
                                                                        Film cartridge


                                                            O O O 0 0 O 0 O O O O O O


                                                                            DX-information panel

       This camera is designedto use DX-coded f ilm with       o  lf non-DX film is loadedby mistake,the f ilm
      an ISO rating f rom 50 to 1600, and when such film     speed is automatically set to ISO 100, no matter
         is loaded, its f ilm speed is automatically set in the      what the f ilm speedis.
      camera.                                            o When buying DX film, make sure the package
                                                        bearsthe "DX" mark or that the catridge has
                                                           a DX-information panel.
tl                                                          o Specialf ilms like 35mm Instant.Reversal
fi.                                                         Film cannot be used.
                                                           o  lf a wide-anglepicture is taken in a very bright
                                                        place outdoors using high*peed f ilm, it tends to
                                                      be overexposed.Use such f ilm indoors or in
                                                           a dark place.
View original page 7Page 8 · Read text
LOADING FILM                        www.butkus.org


     Always load or unload f ilm in a shady spot, or            2. As illustrated,place the film cartridge in the
      shield the camera and film from direct sunlight               film chamber by f irst fitting its f lat side on the
      with your body.                                            top of the rewind shaft.
                                                          o Take care not to put dust, stains or scratcheson
       1. Open the back cover by sliding the back cover               t h e l e n sw h i l e l o a d i n gt h e f i l m .
         releaselever in the direction of the arrow.
                                                X  Always keep the DX-lnformation pins free
                                                             from scratches,dirt or dust.
J
View original page 8Page 9 · Read text
www.butkus.org


                                                                                 Slack


                             e : e €


3.  Pull the film leaderout far enough to reach the      o Make sure the film is taut as shown above; if
   O film roller.                                      slack, it may not be loaded properly'

o Align the end of the film leaderwith the O
film leaderend mark.
o Make sure the film perforations engagethe G)
sprocket teeth ProperlY.
o Also make sure the film is properly placed
between the O guide rails.


6
View original page 9Page 10 · Read text
www.butkus.org


                                        qfrE,gE E
                                         A*         ._           ,nor     /     rirs


4. Close the back cover, and the f ilm will                 5. The cartridge mark appearsin the LCD window,
   automatically be wound and advancedto the          and the film-transport mark flickers as the film
       f irst frame. (Even without film in the camera,             is wound. When the exposure counter is set to
   the motor will work for about one or two                "1," the film winding stops automatically,with
   secondsas you close the back cover.)                   the LCD window showing as above.

                                                      Caution: Even when you wish to remove
                                                         the film from the camera before taking the
                                                                           first  picture, take  the  normal rewinding
r  lf neither exposure counter nor cartridge mark          procedures described on page 12, withoutappearsin the LCD window, probably the film has                                                   manually removing the film leaderfrom thenot properly been set in the camera; in such a case,                                                        take-up spool.reloadthe f ilm.
View original page 10Page 11 · Read text
CAMERA HOLDING                   www.butkus.org


It is important to hold the camera properly in          a secure posture. Brace the elbow of the arm
order to take blur-free photos. Practiceholding         supporting the camera againstyour body. Always
and operating the camera before insertingyour         pressthe shutter button gently, When taking f lash
first roll of  f ilm.                                       pictures with the camera held vertically, be sure to
The illustrationsshow the basic holding              keep the flash head on the upper side. Do not hold
positions. No matter which position you use, be         the zoom lens while shooting becauseit moves
sure to grip the camera steadily with both hands,       back and forth.
hold the camera gently againstthe face in a f ixed
position, and relax the rest of your body in
8
View original page 11
Page 12 · Read text
OPERATING 35 - 70mm ZOOM LENS    www.butkus.org

                                 35mm


                                 70mmAs you turn the main switch on, the zoom lens
automatically moves to be set at the wide-angle
(35mm) position. As you slide the zoom lever
toward "T"  (telephoto side), the lens moves to
the 70mm telephoto side, enablingyou to take
a picture of a distant object on a large scale,On the
contrary, as.you slide the zoom lever toward "W"
(wide-angleside), the lens returns to the wide-angle
side. While looking through the viewf inder, keep
sliding the lever to either side until your desired
composition is made, and then releasethe shutter.
o The shutter cannot be releasedwhen the lens is
in the zooming action.
View original page 12Page 14 · Read text
www.butkus.org

                                    2


When shooting, be sure to turn the main switch on.         camera-to-subjectdistance is too short. Make
                                                         the distancea little longer.
1. Compose the picture by sliding the zoom lever,      o When the red lamp lights up, the camera is
   and bring the autofocus spot O on the main part    automatically switched to flash photography.
    of your subject.
o Be careful not to block the autofocus windows,        3. As you depressthe shutter button further, the
lens, light-sensorwindow, and f lash head with               shutter will be released,and the f ilm will be
your f ingers,hair, etc. while you are shooting.             automatically advancedto the next frame.
                                                    o When you changethe subject to shoot, release
2. When the green lamp next to the viewf inder         your finger from the shutter button, and redepress
   eyepiecelights up with a slight pressureon the       the shutter button.
   shutter button, you are ready to take a picture.
      lf the green lamp flickers, it warns that the
View original page 14Page 15 · Read text
U N L O A D I N G F I L M                     www.butkus.org

                                                           3


                                                                                                                                                              (O)lVIEE|    <>           tf,vdr   "m   ffi


                                                                                  @


1. Severalsecondsafter you shot the last frame of        2. Open the back cover, and remove the film
   the roll, the motor is automatically activated to          cartridge from the chamber by pulling its top
   start rewindingthe f ilm. While the f ilm rewind is        portion with your finger as shown.
   taking place,the f ilm-transportmark in the LCD      3.   lf you wish to rewind the film in midroll, push
   window flickers, and simultaneouslythe                the auxiliary rewind button with your fingernail,
   exposure counter is automatically reset.When         and the motor will be activated to start rewinding
   the rewind is over, the motor stops and the             the f ilm; you can then releaseyour fingernail
   cartridge mark f lickers.                             from the button. When the rewind is over, the
                                                    motor stops.
o  lt takes about 35 secondsto rewind a roll of
24-exposurefilm.
o Never open the back cover until the motor stops.


1 2
View original page 15Page 16 · Read text
E FFECTIVE PICTURE.TAKING RANGE www.butkus.org


                             General-picture shooting

                                           More than one meter  (3.3 feet) awav
                                              Macro shooting
                                                           -                                                           Up to 0.6 - one meter (2 -  3.3 feet) awav


o Take general pictures in the range from one
meter (3.3 feet) to inf inity (*).
o Take close-up pictures of the subject which is
0.6 - one meter (2 -  3.3 feet) away.
o The lens does not focus on the subject which is
lessthan 0.6 meters (2 feet) away from the camera.
View original page 16Page 17 · Read text
TAKING CLOSE-UPPICTURES {MACRO www.butkus.orgSHOOTING)
                                                                                                                      I


                                                                     1. Align the main switch with the macro-focus
                                                             index while pushing the macro-focus-setbutton,
                                                     and the lenswill move forward and automatically
     When the lens is set for macro shooting, the area         be set for macro shooting. To cancel the macro
       surroundingthe picture-areaframe in the viewf inder        setting,return the main switch to the ON-
       turns green, indicating that you are ready to shoot         position.
         in the macro mode.


       o When the camera-to-subjectdistance is near 0.6        o In this type of photography, the autofocus spot
       meters (2 feetl , the picture area slightly moves.        does not position in the center of the picture area,
       Therefore, use the area within the reddotted line       so pleaseuse the focus-lock technique (pages
llr     as a guide.                                      18 -  19) and shoot after making a composition.

       1 4
View original page 17Page 18 · Read text
www.butkus.org


2. The effective camera-to-subjectdistance is 0.6 -
   one meter (2 * 3.3 feet). Depressthe shutter
   button half-way, then make sure the green
   lamp is lit, and releasethe shutter.

o  lf the green lamp flickers, it is a warning that
the camera-to-subjectdistance is too short or too
long. Bring the subject or your camera within
the effective range, and releasethe shutter.
o  lf your subject is more than one meter (3.3 feet)
away, the green lamp f lickers and at the same time
the shutter cannot be released(only when f ilm is
in the camera).

                                                                                    1 5
View original page 18Page 19 · Read text
FLASH PHOTOGRAPHY                www.butkus.org

                             2


                                                                                                Er.rrA><.-
 (ls       r                 ,C      '*
                             F L          lil
             rutA><    -J                 /--_2                   t


As you depressthe shutter button half-way in a dark    1 . As you depressthe shutter button half-way,
or dimly-lit place, the camera is automatically              the red lamp next to the viewfinder eyepiece
switched to flash photography. For the flash-             beginsto flicker, indicating the flash is being
effective range,refer to the table on the next page.        charged.
When taking a picture of a person in the shade of        2. When the red lamp has stopped flickering,
trees in the daytime, or in the dusk, you can use           redepressthe shutter button half-wa'y, and after
this camera'sf lash as a supplementary light.              making sure the red lamp lights up (which
                                                          indicatesthe f lash is ready), releasethe shutter.
                                               The f lash will start chargingfor the next shot.
o When the daylight-syncflash is used as a supple-      3. When making daylight-syncflash (f ill-in flash),                                                              Imentary light, the effect of flash differs more or           depressthe shutter button half-way while
less,dependingon how bright the availablelight           pushing the daylight-syncbutton  (   t   ), then
is or how long the camera-to-subjectdistance is.         make sure the red lamp lights up, and f inally
                                                       releasethe shutter.
1 6
View original page 19Page 21 · Read text
eocuitioe:f',ifi do+1,ilf[,'f'F'[;         www.butkus.org


Warning: lf you take a picture without the auto-        1 . When taking a picture of two persons,for
focus spot O on the main part of your subject            example, first bring the autofocus spot O on
as shown above, only the background will be in           one of the two.
focus. You can avoid the diff iculty by using the         2. As you depressthe shutter button half-w?Y,
focus-lock technique.                                     the green lamp next to the viewf inder eyepiece
                                                                      will light up, and the focus and exposurewill be
                                                        temporarily locked.

                                                    o As long as you keep depressingthe shutter button
                                                           hatf-way with the green lamp lit up, the focus and
                                                      the exposure memory will stay locked, and they
                                                                    will be cancelledas soon as you releaseyour f inger
                                                  from the shutter button.

1 8
View original page 21Page 22 · Read text
www.butkus.org


                                                Hard -to-autofocus su bjects
                                            The autofocus system of this camera is highly
                                                      precise,but like many other autofocus cameras,
                                                      the system is not almighty and may not properly
                                                   focus on certain subjects.In such a case,use the
                                                     focus-lock technique on a subject near and
                                                      equidistant from the actual one. The subjectswhich
                                                    are hard to autofocus are:

                                                            1. Black objects like hair, etc. which are hard to
                                                                 reflect light (inf rared).
                                                             2. Wire netting, latticework, iron exercise-bar,etc.
                                                            3.  Flickeringlight sourcessuch as neon signs,
3. While keeping the shutter button depressed           fluorescentlamps,TV images,sunlight coming
   half-way, reaim the camera to compose your           through the trees, etc., or any subject illuminated
   picture as shown above, and finally depress           by these light sources.
   the shutter button completely.                        4. Glass,mirrors, car bodies, etc. which are glossy
                                                and reflective.
o During the focus-lockoperation,you cannot           5. Fast-movingobjects like trains.
zoom the subiect. To do it, you must releaseyour       6. Water jets, surface of water, smoke, f lame,
f inger f rom the shutter button.                            fireworks, etc. which are formless.


                                                                                                1 9
View original page 22Page 23 · Read text
EXPOSURE COMPENSATION           www.butkus.org


lf you take a picture of a personwith the sunshine      Uncompensated  t                          Compensated J
behind, or the bright sky or snow scenein the
background,the face tends to be underexposed,
looking so dark. To avoid this, releasethe shutter
while keepingthe exposure-'compensationbutton E
depressed.The face will then be properly exposed
and look bright.
When shooting in a dimly-lit place,the exposure
compensationmay not be successfuleven if you
depressthe compensationbutton. In such a case,do
the daylight-syncf lash photography as described
on page 16.


20
View original page 23
Page 25 · Read text
www.butkus.org
IQZoorrrnnr


                                             The lQ Zoom DATE  is made to record the dates up
                                                             to the year 20Og on the pictures. The date and time
                                               were set when the battery for the dating unit was
                                                          installed in the factory, so you will have to adjust
                                             them in your country.
View original page 25From the M. Butkus archive. Original publisher and archive notices are retained.
Check the model and edition against your equipment.
PDF verified 2026-10-10.