Camera accessories
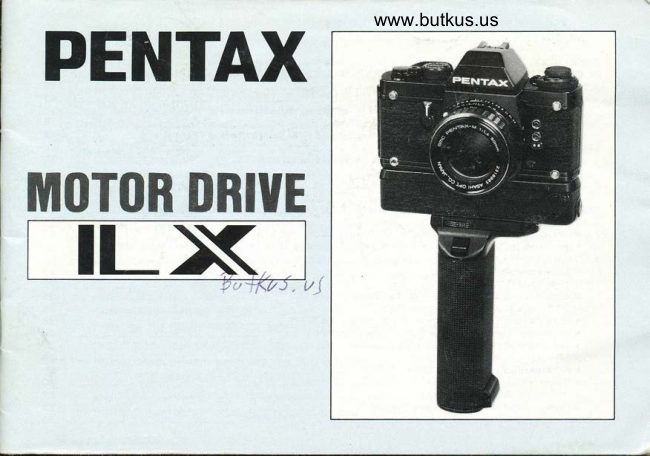
Pentax Motor Drive LX User manual
User manual for Pentax Motor Drive LX. 40 pages in English. Read the original PDF, download or print a copy without registration.
40 pagesEnglish3.3 MB PDF
Loading your manual…Open PDF directly
Document details
- Brand
- Pentax
- Model / document
- Pentax Motor Drive LX
- Document type
- User manual
- Language
- English
- Pages
- 40
- File size
- 3.3 MB
- Category
- Camera accessories
- Document date
- Not specified in catalog
Search available document text
Find a term, then jump to its page in the original PDF. Image-only pages may not be searchable; check the PDF for exact wording and diagrams.
Page 4 · Read text
www.butkus.us

   Motor Drive LX is an extremely versatile motor drive unit which operates
 in conjunction with a wide range of LX system accessories, enabling  it to
handle the toughest professional assignments. Relatively compact and
lightweight,itattaches quickly to the bottom of the camera and is designed
to handle well in both horizontal and vertical shooting formats.  lt features
both single-frame and consecutive operation with a variable film advance
rate in the consecutive mode all the way from 5 frames-per-second down to
0.5 frames per second, synchronizing with all shutter speeds except "B".
In addition, a choice of three power sou?ce units is available, each offering
specific advantages for different types of photography. For handy shooting
in the field, there's a choice of two battery-powered units (one utilizes
penlight batteries, the other is a rechargeable nickel-cadmium battery pack)
which attach directly to the motor drive. For long hours of continuous
operation oi extended applications in remote control and time-lapse
photography, there's Power Pack M, a portable AC/DC power unit which
features a built-in timer system and operates wherever there's a household
outlet and from portable DC power sources such as a car or boat battery. All
three power source units feature built-in shutter releases which not only
permit remote control release via remote control cord, but may be set
differently from the camera release button, enabling simultaneous single-
frame or consecutive shutter release capability.
View original page 4
Page 5 · Read text
Other convenient features of Motor Drive LX include an automatic" film
              rewind system, which lets you rewind a full 36-exposure film cartridge in
                  just seconds, plus a built-in LED function indicator that also lets you know
            when you've reached the end of the film. In addition, the motor drive
             works in conjunction with a full range up of LX system accessories to extend
                applications even further. For heavy-duty professional shooting, it operates
               with the Bulk Film Magazine LX which holds up to 250-exposures at one
                       tir.ne for consecutive shooting. For scientific, industrial and time-lapse
              photography,  it may be used in conjunction with data recording equipment
              such as Dial Data LX and Watch Data LX to record avariety of information
                 directly onto your negatives.
                  This manual provides instructions for the Motor Drive unit itself, as well
                as the optional accessories directly related to motor drive operation (the
             power sources, remote control equipment, etc.). Be sure to read the sections
               of the manual that apply to operation with the particular accessories used
                  in your system. Moreover, since separate instructions are not provided for
               the motor drive accessories explained in this manual, keep it on hand for
               future reference when you add to your motor drive system. As new
                accessories are constantly being added to the LX camera system, also be sure
                to consult your Pentax dealer from time to time so as to keep abreast of
               the latest equipment available.
l"
View original page 5Page 8 · Read text
www.butkus.us

BATTERY GRIP M                NOTE: All three power source units are optional accessories.


                         Power plug
                          Attachment screw
                               Trigger release button
                         C/S dial
                        Remote control terminal
                             Battery cartri
                             Battery cartridge
                               lock release
View original page 8Page 11 · Read text
POWER SOURCE OPTIONS

The Motor Drive LX may be used in conjunction      BATTERY GRIP M A
with any of three power source units, thus permit-     A highly reliable power source unit that operates via
ting you to tailor your motor drive system to meet       disposable alkaline or manganese penlight batteries.
individual shooting requirements. Each power source     Battery Grip M attaches directly to the base of the
is available as a separate purchase and offers the         motor drive, and is convenient for hand-held
f ollowing features.                                    shooting in the field. The disposable batteries used
                                                           as a power source are easily obtained and may be
                                                        replaced with new batteries in a few moments time
                                                        (whereas the Ni-Cd Battery Pack requires 6 hours
                                                                 for a complete recharge). ln addition, the penlight
                                                               batteries allow you to shoot 2.5X longer than with
                                                        a single charge of the Ni-Cd Battery Pack. Battery
                                                     Grip M also operates via remote control cord, and
                                                            features a convenient trigger release button on the
                                                   neck of the unit. Transports and rewinds a minimum
                                                         of thirty 36-exposure  f ilm cartridges with alkaline
                                                                 batte ries.
View original page 11Page 12 · Read text
www.butkus.us

 Ni-cd BATTERY PACK M @                 POWER PACK M G)
This unit also attaches quickly to the bottom of the    The AC/DC Power Pack M unit is the most
camera. As the smallest battery-powered power         economical choice for the photographer doing a lot.
source unit it offers maximum maneuverability and      of studio or set work, stadium coverage of sporting
handles well when shooti ng in the vertical format. lt     and news events, work with the Bulk Film Magazine,
also fits easily into gadget bags and its lightness         and other types of shooting requiring prolonged
makes it convenient for situations reguiring pro-         operation.
longed use. The pack can be recharged up to 300        As an AC power unit, it operates wherever a house-
times and has the capacity to transport 1000's of        hold electrical outlet is available, assuring stable
 f ilm rolls. The cost of the pack itself represents           voltage output and eliminating interruptions due to
only a fraction of the cost of the batteries  it              battery failure.  lt is also capable of prolonged
replaces. Photographers who used the Ni-Cd Battery     operation as a DC power source when operated on
Pack a lot, even find it economical to work with two     current supplied from a car or boat battery.
packs, (one to continue shooting while the other is       Additional features of the Power Pack include
being recharged).                                     a built-in timer for unmanned remote control
Like Battery Grip M, the Ni-Cd Battery Pack may        operation, and remote control terminals for remote
be hooked up for remote control operation via           operation at extended distances. lt also serves as
a choice of optional remote control cords and           a recharger unit for the Ni-Cd Battery Pack M (thus
features a built-in shutter release button. The pack       eliminating the need to purchase Charge Pack M for
transports and rewinds a minimum of 20 rolls of         photographers who also work with the Ni-Cd
36-exposure film per full charge. (The special             Battery Pack M).
Charge Pack M or Power Pack M unit is required for
rechargi ng.)
View original page 12
Page 13 · Read text
CAUTION: lf you attach the motor drive
                                                       with the film in mid-roll, always hold the
                                                         base of the camera away from sunlight or
                                                                other bright lighting sources. Until the wind-
                                                              er is fully coupled with the camera, there is
                                                              possibility that bright lighting seeping
                                                      through the auto rewind coupling could
                                                                 adversely affect exposures. Likewise, when
                                                                 detaching the motor drive in mid-roll, avoid
                                                                direct light and replace the auto rewind
                                                               coupling cap on the camera immediately.

      Attaching the Motor Drive
     The Motor Drive attaches directly to the base of the
      camera via the camera tripod socket.
      r Hold the base of the camera away from the light
      and remove the caps covering the camera  f ilm
       transport and auto rewind couplings. Screw both
      caps into the cap holders on top of the motor drive
       to prevent loosening them.


      10L
View original page 13Page 14 · Read text
www.butkus.us

r Set the motor drive C/S dial to OFF by aligning
the index mark with the green button (see page 19).
Attach the motor drive to the camera by lining up
the attachment screw with the tripod socket at the
base of the camera. Making sure that all contact
points line up properly, secure the motor drive
to the camera by turning the thumbscrew
clockwise. Tighten the screw firmly to ensure
proper electrical contact.

To Remove the Motor Drive
I Loosen the screw and separate the motor drive
unit  f rom the camera. Replace the coupling caps
over the couplings at the base of the camera
immediately. lf you do not replace the auto rewind
cap there is danger of ruining future exposures when
using the camera without the motor drive.


                                                                                                                          11
View original page 14Page 15 · Read text
EATTERY GRIP M


 Inserting the Batteries                                   Battery Care
When using Battery Grip M as the power source,          Battery performance tends to vary in accordance
 insert the batteries as follows before attaching the       with the brand and type of batteries used. When
grip to the motor drive.                                 doing a lot of shooting with the motor drive high
r Set the Battery Grip C/S dial to the OFF position     performance  al kaline batteries are recommended.
by aligning the green dot with the white dot.           Motor drive operation will become sluggish when
r Slide the battery cartridge release at the base of        replacement  is required. Replace all twelve
the grip in the direction of the arrow and remove          batteries with equivalent 1 .S-volt AA-size batteries.
the cartridge.                                              Protect the grip housing from battery leakage by
r Insert twelve 1.5V alkaline or manganese AA-size      removing the batteries whenever thq motor drive
batteries in the battery cartridge, making sure to           will not be used for long periods of time.
match up the contacts with the (+) (-) markings on
the clips of the battery cartridge.

12
View original page 15
Page 16 · Read text
www.butkus.us


                                         NOTE: The Battery Grip may be attached
                                             and removed from the Motor Drive before
                                                         or after the motor drive is attached or re-
                                            moved from the camera. However, always
                                                        set the battery grip C/S dial to the OFF
                                                          position on removal. When the grip is not
                                                    used for long periods of time, remove bat-
                                                                    teries. Remote control hook up is possible
                                                     via a choice of optional remote control
                                                          cords (See page 26).

Attaching the Battery Grip                     IMPORTANT! NEVER THROW USED BATTERI ES
r Keep the battery grip C/S dial set at the OFF        INTO FIRE OR EXCESSIVE HEAT AS
position and hold the battery grip with the C/S dial     PR ECAUTION AGAI NST EXPLOSION. ALWAYS
facing you. Line up the power plug of the battery      KEEP BATTERIES OUT OF THE REACH OF
grip with the power socket of the motor drive and       CHI LDREN.
insert the attachment screw into the motor drive
tripod socket. Secure the grip to the motor drive
by turning the thumbscrew clockwise until firmly
attached.


                                                                                                       13
View original page 16Page 17 · Read text
:::                                                                                                                                                                                                                                                              :!r ri::r  !!lr!:r 1u  i:litr  irli:: iia                             t:tr:                                                                                                           l:r  lll  !                                                                                                             ' ,.,            rlt ry,CdnRIf URV'PACK. M.,

The Ni-Cd Battery Pack is charged before leaving
 the factory and should perform suff iciently for the
 first rolls of film. However,  it should be given a full
charge at the earliest opportunity to ensure
maximum performance and avoid inconvenience.
Moreover, some packs may require charging before
 initial use. The standard means of charging the
Ni-Cd Pack is with the Charge Pack M as described
on page 15 (ln addition,  it can also be charged with
Power Pack M, see page 33).

Attaching the Ni-Cd Battery Pack
r Set the battery pack C/S dial to the OFF position.      Recharging with Charge Pack M
With the C/S dial facing you, line the Battery Pack       r Set the Battery Pack C/S dial to either C or S.
up with the base of the motor drive.                      r Insert the small connector plug of the Charge
r Fit the power plug of the battery pack into the        Pack into the Batterv Pack's remote control socket
power socket of the motor drive and insert the          with the groove facing upward. Secure the plug in
attachment screw into the motor drive tripod            place by tightening the collar ring @.
socket. Secure the Battery Pack to the motor drive       r Insert the A/C plug of the Charge Pack into
by inserting a coin into the head of the screw.           a household outlet. The red charge lamp @ on the
Tighten firmly by turning clockwise.                   back of the charger unit will illuminate to indicate
* The Ni-Cd Battery Pack may be attached and           that the Battery Pack is being charged. A minimum
removed  f rom the motor drive before or after the         of 6 hours is required to recharge a fully discharged
motor drive is attached or removed from the camera.     Ni-Cd Battery Pack. Do not recharge the pack for
Always set the battery pack C/S dial to OFF on        more than eight hours (overcharging shortens
removal.                                                  battery life).

14
View original page 17
Page 18 · Read text
www.butkus.us

                                                       * Only,use Charge Pack M or Power Pack M for
                                                         recharging the Ni-Cd Battery Pack. Best results are
                                                        obtained when recharging at temperatures between
                                              o"-40"C (32" -1o4" F ), with room temperatures
                                                       being the ideal. Performance will falter  if charged at
                                                          excessively high temperatures; charging at
                                                       temperatures below or above those specif ied above
                                                                    will also shorten battery life.
                                                          * Avoid high temperatures and humidity when
                                                           storing the Battery Pack. Best results are obtained
                                             when stored at temperatures between 10"-25"C
                                                                (50" -77" F).
Ni-Cd Battery Pack M Precautions                         * When the pack no longer recharges adequately,  it
* Whether used or not, the life of the Ni-Cd Battery         is exhausted. In certain countries, however, environ-
Pack is three years, or approximately 300 charges        mental protection laws place restrictions on the
within this period. When not used for long periods       disposal of cadmium containing products. Check
of time, even a fully charged pack will discharge of      with the proper procedure for disposal in your
its own accord; consequently,  test the pack after        country or bring to an authorized Pentax Service
prolonged periods of non-use. Make it a point to         Center or dealer for disposal.
charge and discharge the pack at least once every
other month and always use the pack as soon as
possible after recharging to ensure maximum battery       Never disassemble the Ni-Cd Battery Packlife and performance (battery life tends to shorten                                             and never throw a used pack into fire orif the pack is not used regularly).                                                          excessive heat, keep out of the reach of
                                                              ch ildren.

                                                                                                       15     I
View original page 18Page 19 · Read text
I

Film Loading/Blank Exposures (with unloaded          your exposures, follow the instructions given in
cameras) : Load the  f ilm in the normal manner by       "Motor Drive Operation" on the next page.
setting the camera shutter dial to a manual shutter
speed. Extending the  f ilm leader and insert  it             Preparation with Loaded Cameras: lf the shutter is
between the needles of the take-up spool. At this        uncocked when you attach the motor drive with
point, you may continue to make blank exposures        the  f ilm in mid-roll, temporarily set both the motor
with the rapid wind lever, which is probably the          drive and powe!r source C/S dials to S and press the
most convenient way the first time you use the           shutter button once to cock the shutter (the shutter
motor drive. To release the shutter in this instance,      cocked indicator will turn red). Proceed as described
however, set the motor drive C/S dial to OFF. (see        in "Basic Shooting" on Page 18.
page 1 9)

Blank exposuies with the motor drive: You can also
make the blank exposures using the motor drive.
The procedure  is basically the same as for single-
frame film advance (see page 18). After inserting
the  f ilm leader into the needles of the take-up spool,
set both the motor drive and the power source C/S
dial to S, then, press the shutter button once so that
the  f ilm wraps around the take-up spool. Press the
shutter button again if necessary until the film
perforations engage both sides of the sprocket.
Close the back cover and take up  f ilm slack with
the  f ilm rewind crank. Continue pressing the shutter
button successively until the dot representing "1"
registers in the exposure counter window. To make

16
View original page 19
Page 20 · Read text
www.butkus.us
 MOTOR DRIVE OPERATION

Motor Drive LX offers both single-f rame  f ilm          The film advance rate may be varied  f rom 5 frames-
advance and consecutive or sequential  f ilm-advance       per-second down to 0.5  f rames-per-second  via the
featuring a variable film advance rate for the utmost      special "fps dial" on the back of the motor drive.
versatility in  f ilm speed control. In the single-f rame        In addition to shooting with the camera shutter
(S) mode, the motor drive advances the  f ilm               release button, auxiliary shutter release buttons
immediately  after the exposure and cocks the shutter     built into the respective power source units facilitate
for the next exposure. In the consecutive (C) mode,     remote control operation and give added convenience
the  f ilm advances continuously until you let go of        for a wide variety of shooting situations.
the shutter release button or it reaches the end of
the roll.
View original page 20
Page 21 · Read text
depending upon the mode of film advance
                                                          desired for the camera shutter release button.
                                                             r Set the C/S dial of the power source @to either C
                                                         or S, depending upon how you wish the auxiliary
                                                          shutter release built into the power source to operate.
                                                     Note: Although both the motor drive and power
                                                      source C/S dial may be used at either C or S in any
                                                     combination, both dials must be set to either C or S
                                                             for the motor drive to operate.
                                                          r  lf you set one of the dials to operate in the C
                                                 mode, also set the fps dial @ at the hub of the
                                                    C/S dial for the desired  f ilm advance rate.
Basic Shooting                                              r Compose the picture, focus and check the exposure
The  f ilm advance mode for Motor Drive LX is                   if required. Take the photo with the shutter release
controlled by the respective settings of the motor         that proves most convenient for the situation.
drive and power sourcsC/S  dials. The motor drive      IMPORTANT: When the shutter isn't cocked
C/S dial controls the  f ilm advance mode with the        beforehand (sgch as when attaching the motor drive
camera shutter release button, the C/S dial of the         in mid-roll),  it will be necessary to press the shutter
power source controls the mode for the power source    button twice to take the picture; once to cock the
shutter release button. By setting the dials differently    shutter and again to release it. lf the dial is set to "C"
                                                                                                  a ilelay-one to C and the other to S - the film advance         while the shutter is uncocked, there will bemode for shooting with the motor drive may be        when you press the shutter release button for
varied merely by switching shutter release buttons,       the film to advance and the shutter to cock. To
instead of resetting the controls each time.              avoid this delay, press the shutter button once
r Press the green button of the motor drive C/S          quickly and let go (the shutter cocked indicator
dial @ and rotate the dial to either C or S,               turns red when the shutter cocks).

1B
View original page 21Page 22 · Read text
www.butkus.us


       Motor Drive C/S Dial
        This is the outer dial of the cluster on the back of
 I      the motor drive and features four lockable click-
        stop settings (only the lockable settings may be used).
 I    GREEN BUTTON: This button serves as a dial lock
         release and also indices the OFF position. When the
       white index line is aligned with the green dot, the
       automatic   f ilm advance system disengages from
        the camera. To set the dial, press the button and
        rotate the dial until the white index mark aligns with
       the desired setting.
       R: This setting gears the camera for film rewind
      and engages the motor driveis automatic film rewinC     a maximum operating speed of 5 fps is possible at
       system. Only set the dial to R for film rewind.       H (High) setting and 0.5 fps at L (Low). Intermittent
       S: Sets the camera shutter release for single-              speeds are obtained at the in-between settings.
       frame operation                                 H-L
       C: Sets the camera shutter release for consecutive             5 fps     3 fps     1 fps       0.5 fps
                                                    To set the dial: Place your thumb or f inger on theI      film advance at the rate indexed with the fps dial.
                                                      hub and rotate the dial until the desired settino        fps Dial
                                                                          aligns with the white index mark.I      This is the inner dial of the cluster on the back of
       the motor drive, it controls the film advance rate.
      The  f ilm advance speeds outlined below are possible
        at the respective dial settings, depending upon the
        shutter speed used and battery condition. provided
       shutter speeds in excess of 1/60 second are used,

                                                                                                             19
View original page 22Page 23 · Read text
The Power Source C/S Dials                             S: Sets the power source release button for single-
Except for the method of designating the OFF          frame operation.
oosition (a GREEN DOT for the Battery Grip M,        C: Sets the power source release button for
"OFF" for the Ni-Cd Battery Pack M), the C/S dials      consecutive  f ilm advance in accordance with the rate
for the direct-mount type power sources are             indexed at C with the motor drive's fps dial.
identical and function in the exact same manner.
The OFF Position: When the Battery Grip M C/S
dial is set to the GREEN DOT (in the case of the
Ni-Cd Battery Grip, to either of the OFF settings),
power to the motor drive is cut off and the auto-
matic film advance system does not function. In this
instance, the camera does not operate manually
either, unless the motor drive C/S dial is also set
to OF F.
20
View original page 23
Page 24 · Read text
www.butkus.us
     SHOOTING PRECAUTIONS

      The C/S Dials                                           Using the Self-Timer
,f     Both the power source and motor drive C/S dials       The self-timer will not function whjle the automatic
       should be set at either C or S while shooting with                    f ilm advance system is engaged. To use the self-timer
       the motor drive so as not to miss the opportunity        with the motor drive attached, set the motor drive
  I        for a good shot. Be sure to set the dials to OFF,         C/S dial to the OFF position and use it in the
      however, in the following situations.                    normal manner.
       Set the porver source C/S dial to OFF:
         l]J When not using the motor drive for long periods      Multiple Exposures
       of time (in the case of Battery Grip M, also remove     To make a multiple exposure on the frame in use:
       the battery cartridge to guard against leakage).           Set the motor drive C/S dial to OFF and make the
         llJ When not rewinding the  f ilm immediately at the        first exposure. Then, set the dial temporarily to R
      end of the  f ilm, promptly set the dial to OFF.             (to disengage the film advance system) and cock the
        (batteries will deplete with the power source C/S         shutter with the rapid wind lever. Set the dial back
        dial set at C or S while the LED indicator  is               to OFF to release the shutter (if no additional
      continuously  lit at the end of the film)                   exposures are desired on the same frame, it may also
       Set the motor drive C/S dial to OFF:                   be set to S or C).
     When it becomes necessary to operate the camera
      manually with the motor drive attached, such as
       using the self-timer to release the shutter during
       multiple exposures, etc. (the shutter does not release
      manually unless the motor drive C/S dial is at OFF).


                                                                                                                      21l--
View original page 24Page 25 · Read text
For a multiple exposure on a previous frame: Do not
use the automatic  f ilm rewind system.  lf you are on      NOTE: You may find  it easier to remove
frame 15 and wish to make a multiple exposure on         the motor drive for  multiple exposures,
Itu-" 10, for example:                                    especially random access multiple expo-                                                                                        f ilm back to          sures.  lf so, be sure to hold the base of[_l Set the C/S dial to R and wind the                                                                                                                                                                                                              f rom bright light andframe 9 with the  f ilm rewind crank.                     the camera away
p  Cover the lens with the lens cap, set the C/S dial          replace the  f ilm rewind coupling cap.
to OFF, and trip the shutter. Keeping the lens cap
on, wind the film on to frame 10 with the rapid
wind lever and trip the shutter again.
@ Remove the lens cap, set the C/S dial to R, and
cock the shutter with the rapid wind lever. When
ready to release the shutter, set the C/S dial back to
OFF. Repeat this step for all additional exposures
on the same  f rame.
                 the original  f rame without exposingE fo return to
the images already on the film, cover the lens with
the lens cap, set the C/S dials to S or C, and advance
the  f ilm with the shutter release until the 15 index
appears in the exposure counter window.
@ tt you wish to make double exposures on any of
the remaining  f rames, replace the lens cap and
advance the  f ilm with the rapid wind lever to the
frame desired; repeat steP 3 above.


22
View original page 25Page 26 · Read text
www.butkus.us

Shooting in Cold Climates                       Low Batteries
 Battery performance tends to deteriorate when           Batteries are low when the film advance rate
temperatures drop to near or below freezing.           becomes sluggish. When battery voltage drops while
Although performance returns to normal when         working with the Battery Grip M, promptly replace
 batteries are subjected to warm temperatures again         all twelve batteries. (Do not mix old and new
for some time, the following will help you avoid          batteries as this may result in leakage and is more
inconvenience when shooting in cold climates.            costly in the long run). When voltage drops while
* When using the Battery Grip M or Ni-Cd Battery       working with the Ni-Cd Battery Pack M, its time for
Pack M, connect the power source via Remote           a full recharge. Follow the instructions on page 14
Control Cord (see page 26). Keep it in your coat             (if recharging with the Charge Pack M Unit, on
pocket or wrapped warmly to protect the batteries      page 33 if recharging with Power Pack M). Because
from the cold.  lf using the Battery Grip unit, best        several hours are required to recharge the Ni-Cd
result are obtained when new batteries are used.          Battery Pack, it is helpful to have a spare  f ully
Likewise,  if using the Ni-Cd Battery Pack, the pack      charged Ni-Cd Battery Pack or other power source
should be fully charged.                           on hand if you wish to continue shooting without
*  lf you do not have a remote control cord, you           interru ption.
can minimize inconvenience by carrying a spare set
of batteries (kept warm) if working with the
Battery Grip, or a back-up battery pack if working
with the Ni-cd Battery pack.
  CAUTION: When batteries become too weak to     pack). lf film advance should cease and you are
   advance the film, the motor drive will stop in-       caught without spares, set the motor drive and
   between  f rames and the LED indicator will glow    power source C/S dials to OFF and wind the film
   continuously. Normal operation will resume when   with the camera's rapid wind lever for the rest of
   you change the batteries, (or recharge the battery   the  f rames.
View original page 26
Page 27 · Read text
AUTOMATIC FILM REWIND

The convenient automatic film rewind feature of
Motor Drive LX allows you to rewind a complete
36-exposure  f ilm roll in just seconds. When you
reach the end of the film, the motor drive will cease
to operate and the LED indicator on the back of
the unit will glow continuously. (NOTE: The
indicator also glows continuously when batteries
are exhausted, so before attempting to rewind the
film, also glance at the exposure counter to make
sure you are on the last  f rame).
r Press the motor drive C/S dial lock button and
set the dial to the R setting.
I  Slide the  f ilm rewind lever clockwise. The LED       system for random access multiple exposures  as
indicator will go out and the  f ilm will begin to           described in the LX instruction manual, as the
rewind. When the  f ilm is fully rewound, the motor       exposure counter doesn't synchronize precisely
will stop and the  f ilm rewind lever will disengage of      during automatic  f ilm rewind. (Use the procedure
its own accord.                                         described on page 22.1
r  Glance at the exposure counter once again to         * The film may be rewound manually during
make sure the film is rewound  all the way; then open     emergencies such as battery failure and you are
the camera back and remove the cartridge. Set the       caught without spares. After completing the
motor drive and power source CiS dials back to OFF.    remaining exposures manually with the C/S dial set
Film Rewind Precautions                                to OFF, if necessary, set the dial to R and rewind
* The automatic  f ilm rewind system can be stopped      the  f ilm with the film rewind crank. Set both the
before the  f ilm is completely rewound by sliding        motor drive C/S and Power Source dials back to
the  f ilm rewind lever back to its original position.     OFF and replace or recharge batteries (whichever
However, avoid using the automatic  f ilm rewind           applies) as soon as possible.

24
View original page 27
From the M. Butkus archive. Original publisher and archive notices are retained.
Check the model and edition against your equipment.
PDF verified 2026-10-10.