Camera accessories
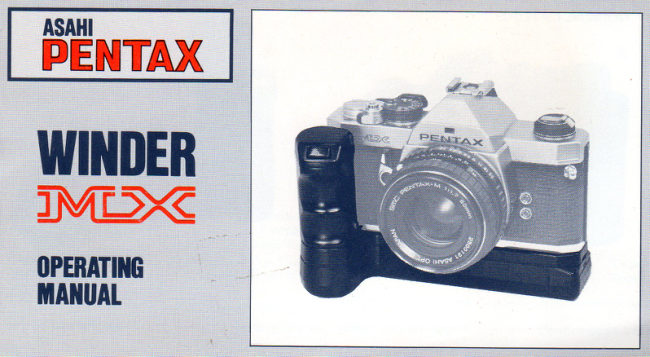
Pentax Motor Drive MX User manual
User manual for Pentax Motor Drive MX. 32 pages in English. Read the original PDF, download or print a copy without registration.
32 pagesEnglish2.4 MB PDF

Loading your manual…Open PDF directly
Document details
- Brand
- Pentax
- Model / document
- Pentax Motor Drive MX
- Document type
- User manual
- Language
- English
- Pages
- 32
- File size
- 2.4 MB
- Category
- Camera accessories
- Document date
- Not specified in catalog
Search available document text
Find a term, then jump to its page in the original PDF. Image-only pages may not be searchable; check the PDF for exact wording and diagrams.
Page 3 · Read text
ASAHI PENTAXMOTORDRIVE MX

Motor Drive MX is designedexclusivelyfor use with the Asahi
Pentax MX camera. The unit can be used witlt all shutter speeds,
other than Bulb (1 11000- 1 sec.),and the motorization rate has
a steplesslyvariable range of 0.5 - 5 fps with all shutter speeds
shorter than 1/3O second (1 /1000 - 1/60 sec.). Moreover,three
power sourcesare available:penlight batteriesvia Battery Grip M,
rechargeablenickel cadmium batteriesvia Ni-Cd Battery Pack M,
the normal AC household power supply via Power Pack M.
Motorization up to 5 fps is still possiblewith the Pentax MX when
using Dial Data MX or the Bulk Film MagazineBack.
Battery Grip M, Ni-Cd Battery Pack M, and Power Pack M can
also be used with the Pentax K2 DMD Motor Drive MD unit.
For detailed instructions on the Pentax MX, refer to the instruction
manual suppliedwith the camera.Since this manual coversnot only
Motor Drive M X, but its related accessories,no additional instructions
are supplied with optional accessories.Care should therefore be
taken not to lose this manual.


                  www.butkus.us
View original page 3Page 5 · Read text
SPECIFICATIONS


             Power Source:   Battery Grip M
                            12 alkalineor manganesepenlight batteries(18 V)
                              supply suff icient power to transport 100 or more rolls of
                             36-exposurefilm.
                              Ni-Cd Battery Pack M
                         One charge of 14.4 V battery pack sufficient for 40 or more
                               36-exi:osurerolls.
                            Power Pack M
                               o AC household power supply
                                                              . 1 2 - 1 5 V D C
           Motorization Rate:   o Single-FrameExposure
                               o ConsecutiveExposuresin a steplesslyvariable range of 0.5 - 5 fps.
          Exposure Counter:    Subtractive type with automatic stop at zero.
             ReleaseButton:   Found on Motor Drive MX Grip, Battery Grip M, Ni-Cd Battery
                           Pack M, and Power Pack M.
      Usable Shutter Speeds:    All shutter speeds,but Bulb (1/1000 - 1 sec.)during Single-Frame
                                   or ConsecutiveExposure Operation.
         Confirmation LED:   Red LED illuminates to conf irm releaseof shutter and transport
                               o f  f i l m .
              Tripod Socket:   Found on base plate of Motor Drive MX a n d       Battery
                          Pack M.


                         www.butkus.us
View original page 5Page 6 · Read text
Dimensions & Weight:  MX body + Motor Drive MX
                                 1 4 1 . 5 m m L x 9 5 . 5 m m H x 7 0 m m D , 7 2 7 g
                       MX body + Motor Drive MX + Battery Grip M
                          141.5mm L x 239mm H x 78mm D,'l,15Bg (w/batteriesl
                       MX Body + Motor Drive MX + Ni-Cd Battery pack M
                          141.5mm L x 1 18.6mm H x 77mm D,9275 (w/battery)
                    Accessory:  3m power Cable M
          Optional Accessories:     . Battery Grip M
                                 o Ni-Cd Battery Pack M
                                 o ChargePack M (should be purchasedtogether with Ni-Cd
                                     Battery Pack M)
                                 o Power Pack M (w/AC cord)
                                 o Remote Trigger Connector M (3m)
                                 o 1Om Power Cable M
      ChargePackM&Power
             Pack M Voltage:   10OV (t 10%)
    MX Optional Accessories:  o Bulk Film MagazineBack (250 ex.)
                                 o Dial Data MX


o5
View original page 6Page 9 · Read text
7. MX + Motor Drive MX + NiCd Battery Pack M                    8.  (Rear view of Figure 7.1


9. NiCd Battery Pack M (optional accessory)
                             PLUG of power source
                                     Ni-Cd Battery Pack M Attachment Screw
                                     Ni-Cd Battery Pack M Remote Control Socket
                                     Ni-Cd Battery Pack M C/S Dial
                                     Ni-Cd Battery Pack M ReleaseButton
                                                                    10. (Underside of Figure 9.1


                     Ni-Cd Battery Pack M Attachment Screw
                         (w/built-in Tripod Socket)
                         www.butkus.us                                   8o
View original page 9Page 10 · Read text
11. Power Pack M (optionat accessory)                            12. (Rearview of Figure 11.1

                               Main Power Pilot kmp
                              Power Pack M Trigger Button    DC Terminals
                                Timer Pilot l-amp

                            Remote C.ontrolTerminals
                              Power Pack M Remote
                                   Control Socket
                                Timer Start Switch
                              Timer-On Switch
                                Timer Knob
                                    Battery ChargeSwitch
                              C/S Switch
                              Main PowerSwitch
13. ChargePack M                          15. lom Power Cable M  16. Renrote Trd;ger Gonnctor M
(optional accessoryl                             (optional accessory)              (optional accessoryl
    OQ
                                 14. AC Cord

09
View original page 10Page 11 · Read text
ConsecutiveExposures(4.5fpeI taken with Motor Drive MX: SMC Pentax 300mmf 14,1|1OOOsec.at f/l 1, Tri-X.
                         www.butkus.us                                     1 0 o
View original page 11Page 12 · Read text
cHooslNc THE POWERSOURCE                                                                   ,,
                                                                                                                                                                                                       '   "   "   '";li:i:i

 To assistyou in choosing from the availablepower   o An economical solution for those doing a great
 sources,the advantagesof each are indicated below.  deal of motorized shooting. Since Ni-Cd Battery
 Battery Grip M                               Pack M can be rechargedapproximately 300
 o Even if batteriesare depleted during a             times it wi ll furnish sufficient energy to transport
 shooting session,they can be replacedwith fresh    about 12,OOOrolls of film (300 x 40). The coStof
 ones in a few moments time. Thus, no valuable      Ni-Cd Battery Pack M, then, representsonly a
 time is lost. In contrast to the above, it takes         fraction of the cost of batteries necessaryto
 approximately 6 hours to fully rechargeNi-Cd        transport the same amount of film.
 Battery Pack M.                                Power Pack M
 o Since penlight batteriesare easy to obtain and      o Becauseit operates on the ordinary AC power
 quite portable, one is always assuredof a reliable     supply, up to 250 exposures(when using the
source of power.                                 Bulk Film Magazine Back) can consecutivelybe
 o Battery Grip M provides sufficient energy to       taken without fear of power failure or
transport 2.5 X more film than Ni-Cd Battery        interruption.
Pack M (approximately100 rolls versus40 rolls          r By utilizing the built-in Timer of Power pack M,
of 36-exposurefilm).                        unmannedoperation is possible.
Ni-Cd Battery Pack M                              o As the most economical power source, it is ideal
o lts compact size and light weight offermaximum     for the laboratory.
handlingeaseand mobility, making it ideal for               .   lt assuresstable voltage characteristics.
action. Furthermore, using the vertical format of           .   f t also has provision to operate on 1 2 - 15 V DC
the picture area is just as easy as using the             (2 A or more), although a cord for such operation
horizontal format.                             must be provided by the user.
o Weighing20% lessthan Batterv Grip M, there
is lesslikelihood of growing tired with
prolonged use.
o Easily fits into a camerabag.

. 1 1
View original page 12Page 13 · Read text
A55EMt'LY


Fig.17 Remove the Camera Body Film Transport     Fig. 19 Attach Motor Drive MX securely to the
Coupler Cap O by rotating it counterclockwise     camera by screwing the Motor Drive MX
with a coin.                                     Attachment Screw O  into the Tripod Socket of
Fig. 18 To prevent losing it, place the cap O into     the camera.
the receptor Q  of Motor Drive MX, locking it
into placewith a coin.


                                                                                    12o
                         www.butkus.us
View original page 13Page 14 · Read text
Attaching Battery Grip M                           Attaching Ni-Cd Battery Pack M
 Fig.2O  Be sure to set the C/S Dial to OFF            F'A. 22-23 Insert a coin into the grooves of the
(align both green dots).                          head of the Ni-Cd Battery Pack M Attachment
Fb.2l  lnsert the Battery Grip M Attachment       Screw O , aligning the tip of the screw @ with
Screw O  into the Tripod Socket @ of Motor        the Tripod Socket O of Motor Drive MX, and
Drive MX, and securelyattach the grip by            securely attach Ni-Cd Battery pack M by rotating
rotating the Attachment Screw clockwise.            the Attachment Screw clockwise.


0 1 3
View original page 14
Page 15 · Read text
OPERATING METHOD


Fig.24 Load the MX with film and shoot two                 .  Note:  lt is desirableto shoot the initial blank
blanks as you normally would when working        exposuresmanually in order to verify that the
without Motor Drive MX.                                film is traveling through the camera properly by
Fig.25 Rotate the Exposure Counter Dial @        observingthe counterclockwiserotation of the
of Motor Drive MX clockwise aligning the figure      Film Rewind Knob.
which indicatesthe maximum number of           However,when desiringto shoot the blanks with
exposurespossible (e.9.36 or 2Ol with the           the motor drive unit, set the Exposure Counter
Alignment Dot O   .                                 Diaf to 2, and squeezethe Trigger Release
                                                 Button of Motor Drive MX until the Exposure
                                              Counter Dial indicates0 (zero), at which point
                                               Motor Drive MX will automatically stop. Next,
                                              proceed as explained in the text for FiS.25.

                          www.butkus.us                                 14o
View original page 15Page 16 · Read text
Using Battery Grip M                                   tion LED lfig.23,  (D ) will flash, in
Fig.26 Set the C/S Dial  (D of Battery Grip M @    conf irmation, as the shutter is tripped and the
to either C (ConsecutiveExposures)or S (Single-     film transported.
Frame Exposure).The C/S Dial also servesas the      Fig.28  - 31 When using the Trigger Release
power switch, setting the dial to the central          Button of the Motor Drive MX Qrip  (D  , set the
greendot (OFF) will turn off the power and         Motor Drive MX C/S Dial @  to S (Single-Frame
prevent accidentaloperation of the motor           Exposure) (Fig.28) H (High rate of Consecutive
drive unit.                                     Exposures)(Fig. 29), L (Low rate of Consecutive
Fig.27 Motor Drive MX O may be operated by      Exposures)(Fig. 31), or to any position between
either of the two Trigger ReleaseButtons. The      H and L (Fig. 30). When using shutter speedsof
f irst Trigger ReleaseButton is found at the top  (D   1/60 sec. or shorter (1/1000 - 1 /60 sec.), Motor
of the Motor Drive MX Grip  (E  , and the second    Drive MX will operate at 5 fps if the Motor Drive
at the neck @ of Battery Grip M @          MX C/S Dial is set to H, (high), and at 0.5 fps
When operating Motor Drive MX, the Confirma-     when the C/S Dial is set to L (low). Additionalty,
o 1 5
View original page 16
Page 17 · Read text
i
                                                                                                                                            \


the rate can be steplessly varld  by setting the        setting of the C/S Dial belonging to the same
dial to any intermediate position. When using         unit as the Trigger ReleaseButton in use.
shutter speedsof 1 /30 sec. or longer (1 /30  :        B (Bulb) can not be used. lf Motor Drive MX is
1 sec.),irrespectiveof the setting of the C/S Dial     operated with the Shutter Speed Dial set to B, a T
(H - L), the consecutiveexposure rate (fps) will      (Time) exposure will result. To close the shutter
fall in accordancewith the shutter speed being        at such a time, set the Shutter Speed Dial to
used. (lt is obvious, for example, that one can not    1 /1 5 sec. or above ("faster").
shoot at 5 fps when the Shutter Speed Dial is set    When this is done, the shutter will close, the film
to 1 /2 sec.).                                                 will be transported, and the motor drive unit
When using the Trigger ReleaseButton of the          will stop.
Motor Drive MX Grip, it makes no difference        Fry.32. When using the Trigger ReleaseButton of
whether the Battery Grip M C/S Dial (D (Fig.32)    Battery Grip M @   lFig.27l  with the Battery
is set to S or C, for Single-Frame or Consecutive     Grip M C/S Dial @ set to S, Single-Frame
Exposureoperation is always determined by the     Exposurewill result, regardlessof the setting of

                                                                                            1 6 o
                          www.butkus.us
View original page 17Page 18 · Read text
In the center of the Ni-Cd Battery Pack M C/S
                                                             Dial is the Ni-Cd Battery Pack M ReleaseButton
                                                       (D  which corresponds to the Battery Grip M
                                                         Trigger ReleaseButton  (D  . During Single-Frame
                                                  Exposure operation, the shutter is tripped as I                                                 soon as the Ni-Cd Battery Pack M Release
                                                       Button @  is depressed,and immediately upon ll'
                                                         releasingpressurefrom the button @   , the film
                                                                           is transported. (lt is perfectly acceptableto
                                                remove your finger from the ReleaseButton (D
                                                  even during operation of the shutter).

       the Motor Drive MX C/S Dial @  (Fig. 28 - 31).     o Note: Bear in mind that when desiring to shoot
     When the Battery Grip M C/S Dial  (D is set to       Consecutive Exposures at a high rate (e.9.
     C and the Battery Grip M Trigger Release Button     3 - 5 fps), a shutter speed of 1 /60 sec. or
         is squeezed,Consecutive Exposures will result,       shorter (1/1000 - 1 /60 sec.) must be used.
       the rate of which will be determined by the          For even if the Motor Drive MX C/S Dial is set
       setting (H - L) of the Motor Drive MX C/S             to H (5 fps), when using a long speed such as
       Dial O   (if the dial @  is set to S, a consecutive    112 sec., the f ilm will be transported at less
      exposure rate of HIGH will result).                 than 2 fps 1112sec. exposure + time toI                                                        transport film + 112 sec.= more than 1 sec.).
      Using Ni-Cd Battery Pack M
\|/    Fig.33 The Ni-Cd Battery Pack M  (D  f unctions
        in the same manner as Battery Grip M. The
      Ni-Cd Battery Pack M C/S Dial @  is operated
       exactly as the Battery Grip M C/S Dial (D

      c17
View original page 18Page 19 · Read text
36

                                            $.
                    N


Rewindingthe Film                                   Fig. 36 Rewind the film in the same manner as
Fig. 34 After exposing the roll of film, the          you would when not using Motor Drive MX.
Exposure Counter {E  will indicate 0 (zero), at      (There is no need to maintain pressureon the
which point Motor Drive MX will automatically      Film Rewind Lever @ when rewinding.l
stop.
Fig. 35 At that time, slide the Film Rewind
Lever @  of Motor Drive MX O slightly to the
left and then push it upward. Doing so will push
up the Film Rewind Button of the camera
body, allowing you to rewind the f ilm.


                                                                                            1 8 o
                         www.butkus.us
View original page 19Page 20 · Read text
USINGA TRIPODOR COPYSTAND


With Battery Grip M                            However, Motor Drive MX can not be directly
 Fig.37 Insert one of the plugs of 3m power         attached to a copy stand. The shutter may be
Cable M,or 10m Power Cable M (optional          releasedwith either the Trigger ReleaseButton
accessory),into the Motor Drive MX Remote         of Motor Drive MX or Battery Grip M. Operation
Control Socket @ and the other plug into the       of the respectiveC/S Dials is as explained in the
Battery Grip M Remote Control Socket @           text for Figs.28 - 31.
The two plugs of Power Cable M are of different     With Ni-Cd Battery Pack M
design (ConvertionalPlug & Right-Angle plug),       Fig. 38 Ni-Cd Battery Pack M is extremely
either of which can be inserted into Motor           convenient to use as it can be directly attached to
Drive MX or Battery Grip M; insert the more        a tripod or copy stand via its Tripod Socket
convenient of the two into the camera.            (shown in Fig. 10) without the need for utilizing
Attach Motor Drive MX to a tripod via its          Power Cable M.
Tripod Socket (visiblein Fig.4).

o 1 9
View original page 20
Page 21 · Read text
BATTERIES

                                 40               41


Loading Battery Grip M                          RechargingNi-Cd Battery Pack M
Battery Grip M is not equipped with provision for    With the Ni-Cd Battery Pack M also, the film
Battery Check, but as the end of battery  life          transport will grow progressivelysluggish as the
nears,the transport of the film will grow             voltage drops. At this time, recharge the Battery
progressivelysluggish. When this occurs, change     Pack at the earliestopportunity.  lt can be
batteries at the earliest possible moment.            recharged with the accessoryCharge Pack M or
Fig.39 Pressthe Battery Loader Release Lever @    Power Pack M (which is discussedlater).
in the direction of the arrow to remove the           Fig.41 The battery of Ni-Cd Battery Pack M can
Battery Loader (Fig. 40). Insert 12 1.5 V           be recharged approximately 300 times.
manganeseor alkaline penlight batteries into the     To recharge, insert the plug  8t  oI Charge Pack M
Loader, taking care that the plus and minus poles   @  into the Remote Control Socket of Ni-Cd
match those of the diagram provided in the           Battery Pack M @ (groove of plug facing up).
Battery Loader.                               Securethe plug in position with the Lock Ring @.
                                                  Next, insert the wall plug @ of Charge Pack M
                          www.butkus.us                                    20.
View original page 21Page 22 · Read text
into an outlet, set the C/S Dial to either C or S        6. When storing the Battery Pack avoid high
and the red Charge Lamp O  will illuminate,       temperaturesand high humidity. The 10 - 25"C
 indicating that the Battery Pack is being charged.    range is ideal for storang.
 It takes 6 hours to recharge a completely               7.  Discharging the battery after an extended
discharged Battery Pack. Avoid overcharging the      period of non-use will shorten battery life. Be sure
 Battery Pack (8 hours or longer).                       to regularly charge and discharge the battery (at
                                                         least once every other monthl  to maintain
Ni€d Battery Pack M Precautions                   battery life and performance.
 1. Maximum battery life is approximately 3           8. Do not attempt to replace the battery of
years (regardlessof whether it is used or not).       NiCd  Battery Pack M yourself . After discharging
 2.   lt can be recharged approximately 300 times.     the Battery Pack approximating 300 times,
 3. Even a fully charged battery will slowly           consult with an authorized Asahi Pentax
dischargeof  its own accord when not being used      representati\re.
for a long period of time. Consequently, test
before uslng, and always try to use Ni-Cd Battery    Precautionswhen Working in Low Temperatures
Pack M as soon as possible after recharging.       When subjected to low temperatures, batteries
4. Use only Charge Pack M or Power Pack M for     lose some of their voltage which may lead to
recharging. lf overcharged (8 hours or longer),       improper f unctioning of Motor Drive MX. When
battery performance and life will diminish.          using penlight batteries, use fresh ones, and when
5. Recharging should take place in a temperature    using Ni-Cd Battery Pack M, use it soon after  it
range of O - 4O"C, with room temperature being     has been sufficiently recharged. Malfunctioning
the ideal. lf recharging is attempted at excessively   due to battery use at low temperatures will correct
high temperatures, the battery will not be               itself when the batteries return to normal temper-
sufficiently charged and its performance will          ature. When working at extremely low temper-
falter. Moreover, attempting to recharge the          atures, keep the batteries as urarm as possible.
battery in temperatures either exceeding or falling
below the 0 - 40"C range will shorten battery life.
o21
View original page 22Page 23 · Read text
REMOTECONTROL

42   Within 10m                                        tr3


With Battery Grip M                              With Ni-Cd Battery Pack M
Fig.42 For remote control operation, attach the      Fig. 43 Attach the plugs of 3m Power Cable M,
plugs of the 3m Power Cable M, or 1Om Power       or 10m Power Cable M (optional accessory),into
Cable M (optional accessory),into the Motor         the Motor Drive MX Remote Control Socket @
Drive MX Remote Control Socket @ and the      and the Ni-Cd Battery Pack M Remote Control
Battery Grip M Remote Control Socket @.         Socket @ and remote control operation will
At this time, the shutter can be tripped with the     be possible.
Trigger ReleaseButton of either Motor Drive MX     At this time, the shutter can be tripped with the
or Battery Grip M.                                 Trigger ReleaseButton of either Motor Drive MX
                                                       or Ni€d  Battery Pack M.


                                                                                     22.
                          www.butkus.us
View original page 23Page 24 · Read text
4


Fig.44 For remote control operation with Ni-Cd    An ordinary household electricalcable (double
Battery Pack M @ attached directly to Motor        cord) can be connected to the contacts @  of
Drive MX O   , attach the plug of the Remote       Remote Trigger Connector M @ and Motor
Trigger Connector @ (3m optional accessory)      Drive MX can then be operated remotely by
into the Motor Drive MX Remote Control Socket    shorting the two cords at the opposite end of the
 @ or the Ni-Cd Battery Pack M Remote Control    double cord extension. In this manner, it is
Socket @ (Fig. 43). When this is done, Motor        possible to operate the camera remotely by
Drive MX can be operated remotely by bringing      distancesof up to severalhundred meters,
the two contacts @ of the Remote Trigger         opening up exciting possibilitiesin the world of
Connector together (electricallyshorting the        remote control photography.
Remote Trigger Connector cable). The Remote
Trigger Connector M can also be used in
conjunction with Battery Grip M.

o23
View original page 24
Page 25 · Read text
FOWER PACK TI APPLICATIO]S;

Power Pack M. Applications                                   tls
1. As an AC power source.
2. As a timer with 5 - 120 sec. time delay possible,
as well as consecutive exposures at fixed intervals
possible.
3. As a 12 - 15 V (2 A or more) DC power source.
4. As a remote control power source.
5. As a means of recharging Ni-Cd Battery Pack M.
As seen from the previous pages dealing with
remote control photography, Power Pack M is
not necessarytor remote control operation;
however, when the remote control power source
is AC, Por,verPack M is required. Thus, it
simultaneously servesfor applications No. 1 & 4      o As an AC Power Source
above. Concerningapplication No.5, Ni-Cd         Fig.45 Insert the plugs of 3m (or 1Oml Power
Battery Pack M can also be recharged by its         Cable M into the Motor Drive MX Remote
accessoryCharge Pack M.                           Control Socket @ and the Remote Control
                                                 Socket @  of Power Pack M @  .
                                           The use of the Remote Terminals (D  is
                                                  explained later.


                          www.butkus.us                                    24o
View original page 25Related documents and language editions
From the M. Butkus archive. Original publisher and archive notices are retained.
Check the model and edition against your equipment.
PDF verified 2026-10-10.