Film cameras
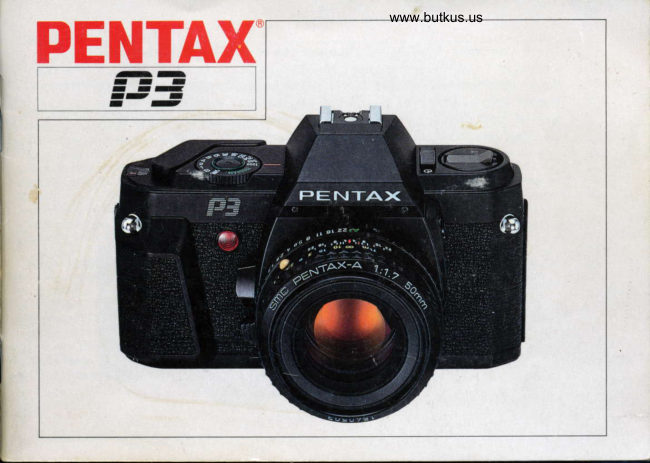
Pentax P3 User manual
User manual for Pentax P3. 50 pages in English. Read the original PDF, download or print a copy without registration.
50 pagesEnglish12.3 MB PDF
Loading your manual…Open PDF directly
Document details
- Brand
- Pentax
- Model / document
- Pentax P3
- Document type
- User manual
- Language
- English
- Pages
- 50
- File size
- 12.3 MB
- Category
- Film cameras
- Document date
- Not specified in catalog
Search available document text
Find a term, then jump to its page in the original PDF. Image-only pages may not be searchable; check the PDF for exact wording and diagrams.
Page 2 · Read text
Thank you most sincerely for choosing one of our Pentax 35mm SLR
cameras.
Before starting to operate this camera, please be sure to read this operating
manual very carefully to familiarize yourself with every detail of the
features and functions it has to offer. We hope you will enjoy fine pho-
tography with this camera for many years to come.
View original page 2
Page 4 · Read text
FEATURES


When this camera is useci with any SMC Pentax-A    Programmed AE Mode
 lens, it offers three exposure modes: Prograrnmed    The camera automatically selects the most suitable
AE, Metered Manual and Programmed Auto Flash.    combination of shutter speed and aperture to obtain
When the lens aperture is set to "A" position, the     correct exposure, simultaneously changing the
Programmed AE mode can be used. When the lens    combination according to the brightness of the
aperture is set to any f-stop other than the "A"        subject. This mode is suitable for those who do not
setting, the Metered Manual mode can be used.      want to be bothered by setting exposure controls or
o When the conventional K- or Kf-mount lens is     those wishing to take "action" photos.
used, the camera operates in the Metered Manual
mode.                                         Metered Manual Mode                                           *                                            The combination of shutter speed and aperture  is
                                                  completely up to you. Guided by the meter
                                                        indication in the viewfinder, you can adjust both
                                                      controls to obtain proper exposure.  lf necessary,
                                                          deliberate over- or underexposure can be obtained.

                                            Programmed Auto Flash Mode
                                       When you use a Pentax dedicated auto  f lash on this
                                              camera in its Programmed AE mode, the camera
                                                     automatically selects the proper aperture and shutter
                                                  speed to control  f lash output for proper flash
                                                            pictu res.


o2
View original page 4Page 5 · Read text
"  rn        www.butkus.us                                                                                                                                                                  .l **f                                                                                                                      :,*                                                                                      d

   What you should know  f irst about this camera                                                                  !:y  .  The camera does not operate unless the batteries
     are properly inserted. Be sure to check how they are
     inserted before operating  it. Also check  if the main
    meter switch is set to ON or OFF.
   o Most flashes made by others can be used on this
    camera, but Pentax dedicated  f lashes will offer more
    convenient.functions. Even if you use a f lash with
   TTL auto  f lash provision, this camera does not
    provide TTL auto f lash operation.
   o When you use the accessories such as Extension
    Tubes, Auto Bellows, etc. that are mounted
    between the camera body and lens, this camera
    operates in the Metered Manual mode. The
    Programmed AE mode cannot be used.
View original page 5Page 8 · Read text
Venmo @mike-butkus-camera  Ph. 2083
PayPal Name  Lynn@butkus.org      www.PayPal.me/lynnbutkus
View original page 8
Page 10 · Read text
www.butkus.us   INSERTING BATTERIES                                               *


   This camera  is powered by two alkaline or silver-oxide (AA-size,
   1.5-V) batteries.
  o Open the battery chamber cover by turning  it counter-clockwise
a    With a coin.


  r   lnsert the two batteries into the chamber with their (+) sides
      facing downward, and replace the cover.
a                                               w#n?#v


   .  As illustrated, turn the meter on by sliding the main switch in
      the direction of the arrow.I
                Zr-=         ZI= =                              -                                                                              7o              =tE
View original page 10Page 11 · Read text
.xr


                                                     .   Press the shutter release button half-way and make sure that
                                           a shutter speed appears on the left side of the viewfinder.

                                      Timer switch
                                    The built-in timer switch automatically turns the meter off in about
                                          ten seconds after you release your finger off the shutter button.

                                      ;f'Batterv check                                                   .'-  lf no shutter speed is displayed in the viewfinder even with a slight
                                                                        '  pressure on the shutter button, the batteries have no power or may
                                     be improperly inserted.
                                                 f  Wtren batteries weaken                                      "  When the batteries are becoming weak, the shutter speed displayed
                                                     in the viewfinder starts to blink slowly at the speed of once per
                                         second. lf so, replace the batteries immediately. lf the batteries are
                                        completely exhausted, the shutter button does not release the
                                                 shutter.


     o8
View original page 11Page 12 · Read text
ATTACHING AND DETACHING LENS                 www.butkus.us

To mount or interchange Pentax K, Ka and Kf mount lenses,
follow the steps below.
.  Remove the body mount cap and the rear lens cap. lf the finder
cap is still on the eyepiece, remove it.
o  Align the red dot on the camera body with the red dot on the
lens (See 6, 13). Seat the lens in the body mount and turn lt
clockwise until the lens locks with a click. When mounting the
lens in dim light, method (O) is recommended. This method
allows lens mounting by touch.
Align the raised node on lens barrel with the lens release by
touch. Then turn and lock as above.
.  To remove the lens cap, press in on the notches at both sides.
.  To remove the lens, press the lens release lever toward the
camera body while turning the lens counter-clockwise.
.  After removing a lens  f rom the camera body, replace the  f ront
and rear lens caps to protect the lens from dust and stains.


Note: Don't damage or stain the electrical contact points on the
mount face. When they become stained, wipe them with a clean,
dry cloth
View original page 12
Page 13 · Read text
FILM WIND LEVER


                                                            Exposure countar
                                                       The scale is indexed as follows:
                                                       S..0.2.4.       ....   . o 20 o....
                                                          24.....36.
                                                                   Interlocked with the  f ilm wind
                                                           mechanism, this counter indicates the
                                                        number of exposed frames.

S€tting the wind lever for rapid shooting                Film advance stroke
The film wind lever can be set at the stand-off         The film wind lever should be thrown as far as it
position for faster film advance, Even if you              goes,
rsmove your thumb from the lever, it remains at        Note: The wind lever may stop in the middle of
the stand-off angle, ready for the next quick shot.       a stroke when the  f ilm comes to its end, Do not
After completing a series of pictures, the lever            force the lever and rewind the film. leaving the
should be pushed in to the original position.               lever as it is.
o10
View original page 13Page 14 · Read text
MAIN SWITCH, SHUTTER RELEASE BUTTON, SHUTTER DIAtwww.butkus.us


   Main switch
  To release the shutter, be sure to turn the main switch to ON.
  When the main switch is off, the shutter cannot be released and
   the meter remains off  .                       dt


   Shutter release button
   As you turn the main switch on and press the shutter release
   button half-way. the meter will turn on, and a further pressure on
   the shutter button will release the shutter.
                                                       *


.   Shutter speed dial
   When shooting in the Metered Manual mode, turn the shutter
    dial until the desired shutter speed aligns with the index (red line).
  1000-1=1/100O-lsec.
  B = Bulb (long-time exposure)
  100 t = 1/100 sec. (flash-sync speed)


                                                                                      11.
View original page 14Page 15 · Read text
FILM


DX FILM

             Color Fi l,n  @wry              ooooooooooJTo]
      lCO
           36.,o
                                                                                information panel

This camera automatically sets the ISO film speed    The film speeds which can be automatically set by
of DXcoded  f ilm when it is loaded into the  f ilm        this camera range from ISO 25 to 1600, so be sure
chamber. Therefore, you are recommended to use     to use the Dx€oded film having a film speed within
only DXcoded film in this camera. (lf non-DX  f ilm    this range.
is loaded the camera will automatically set the  f ilm
speed to 100, whatever  f ilm speed it may have; in
other words, the only non-DX film usable for this
camera  is one with ISO 100.)


o12
View original page 15Page 16 · Read text
LOADING FILM                                 www.butkus.us


Always load or unload  f ilm in the camera in
a shady spot, or shield  it from direct sunlight
with your body.

   As illustrated, unfold the rewind crank by
   pushing it with your  f inger-nail.
    Pull the rewind knob upwards until the back
   cover snaps open.
   Slide the film cartridge into the  f ilm chamber          lD Film chamber       O Spool teeth
   with the  f lat side up. Lock the cartridge in place    O Guide rails         O Film leader end mark
   by pushing the rewind knob down, rotating  it     O Sprocket teeth       O DX-information  pins
    slightly making sure that it grips the spool.
                                                  Keep the DX-information pins free from
                                                               scratches, dirt, dust, etc.
                                                                             13.
View original page 16Page 18 · Read text
www.butkus.us


Close the back cover, making sure that it has snapped firmly in
Dtace.


Cock the film wind lever while checking to see if the film rewind
knob turns in the direction of the arrow.


Repeat making blank exposures until "0" appears in the exposure
counter, The next frame is ready for the first shot.

The film-loaded indicator on the back cover will tell you if the
film is loaded or not.
View original page 18
Page 19 · Read text
UNLOADING FILM


                             When you reach the end of the roll, the  f ilm wind lever wiil stop
                                                                                            a stroke.                                 moving abruptly - maybe at some point in the middle of                           Do not force the lever beyond the number of exposures shown on
                                   the cartridge.
                      o  Press the film rewind button recessed in the base of the camera.

                                             .  Unfold the crank and turn  it clockwise all the way until you feel
                                                                it loosen when the film leader releases from the take-up spool,


                                             .  When the rewinding is over, lift the rewind knob sharply to open
                                      the back cover, and take the cartridge out.


                                                             lf you accidentally opened the back cover without rewinding
                                     the film, close it immediately, since the film except the tast
                                        several  f rames might be saved.
o16
View original page 19Page 20 · Read text
STRAP AND SOFT CASE                           www.butkus.us

o To attach the strap to the camera, first pass the
end of the strap through the strap lug on the
camera, fold it back, then pass it through the strap
ring, and through the strap clasp and the last ring.
The strap end may be passed through the inside or
outside of the clasp.
o Remove the front cover from the back cover.
Put the camera in the back cover and put both
case hooks around the camera's strap eyelets.
The camera  is now held securely in place.


o The soft case for this camera is available in two
sizes: P3-S for the camera with a standard 50mm
lens, and P3-L for the camera with a zoom lens
such as 35 - 70mm.


                                                                             17.
View original page 20Page 23 · Read text
FOCUSING


 You can focus in three ways, with the split-
 image, microprism, and/or matte field. To focus
 using the split-image, turn the focusing ring
 until the two images in the split-image circle at
 the center of the focusing screen are perfectly
 aligned. When using the microprism collar,
 focus until the glitter disappears from inside the
 collar. With the matte field, focus until the
 image on the matte field appears sharp and
crisp.
 iv..'r*. lf the maximum aperture of the attached
 lens is smaller than f/5.6 (for example, f/8 as in
the case of a long telephoto),  it is easier to focus
on the matte field since the split-image and
microprism collar areas become much too dark
for satisfactory   f ocusing.

Diopter adjustment for viewfinder eyepiece
People who wear eyeglasses due to myopia,
hypermetropia  or presbyopia, sometimes  f ind it
diff icult to focus while wearing their glasses. ln
this case, use the accessory diopter correction
lenses M (See page 42l,.
View original page 23
Page 24 · Read text
www.butkus.us HOLDING CAMERA


Proper holding of the camera is essential to             release button may cause blurred photographs.
minimize camera shake which causes blurred         Take a secure, well-balanced posture without
pictures. Practice holding and operating your           straining yourself. The portion marked O in the
camera before inserting your  f irst  f ilm cartridge,        illustration should be drawn to your body.  lt is
Generally there are three basic ways to hold the       a good idea to stabilize your body and the camera
camera. In any case, hold the camera tightly to         using a tree, building wall, table, etc. For long
your face with your hands. The grips on this           exposures or while using telephoto lenses, it is
camera will help you keep a steady hold on your     recommended to use a tripod in order to reduce
camera. Release the shutter gently while slowly       camera shake to a minimum.
breathing out. Strong pressure on the shutter


                                                                                21o
View original page 24Page 25 · Read text
SHOOTING IN PROGRAMMED AE MODE

                                             .  The camera is switched to the Programmed AE mode by just
                                             setting the lens aperture to the "A" position while keeping the
                                       Auto-lock Release Button on the SMC Pentax-A lens.


                                     r  You can leave the shutter dial set at any position.


                                             .  Turn the main switch on, then press the shutter release button
                                           half-way, and you will see "P" and a shutter speed are displqyed
                                                 in the viewfinder. As you further press the shutter button,
                                         the shutter will be released.


c22@t
View original page 25Page 26 · Read text
www.butkus.us

o When the subject is too bright or dark, "1000" or "1" blinks as
a warning. When the subject  is too dark and "30" or smaller figures
appear in the viewf inder, it warns that there is a danger of camera
shake. ln such a case, use a tripod or a flash. (For details, refer to
page 27.1
View original page 26
Page 27 · Read text
SHOOTING IN METERED MANUAL MODE

                                           .  When the lens aperture  is off the "A" setting and set to any f-stop,
                                     the camera operates in the Metered Manual mode. lf the aperture
                                                          is set at the "A" position, release it from the position by turning
                                     the aperture ring while depressing the auto-lock-release button,                I
                                                                                                                                                                                                                                         I


                                           .   Slightly press the shutter release button with the main switch on,
                                 and you will see "M" and a shutter speed are displayed in the
                                       viewfinder. When a shutter speed and another blinking shutter
                                    speed appear simultaneously as shown at left, it indicates
                                           incorrect exposure. Change the shutter speed or the aperture
                                            until the blinking shutter speed disappears, so that correct
                                   exposure can be obtained.
View original page 27Page 28 · Read text
It                                                      www.butkus.us                                        ':t


    When setting shutter speed first
      Set the shutter dial to the desired shutter speed. Rotate the aperture
       ring until the shutter-speed display changes from a blinking speed to
      a just glowing speed, namely, only one shutter speed is seen, so that
t     correct exposure can be obtained'  lf the display does not switch
     from a blinking speed to a glowing speed even by turning the
,     aperture ring, reset the shutter speed by turning the shutter dial'
View original page 28From the M. Butkus archive. Original publisher and archive notices are retained.
Check the model and edition against your equipment.
PDF verified 2026-10-10.