Film cameras
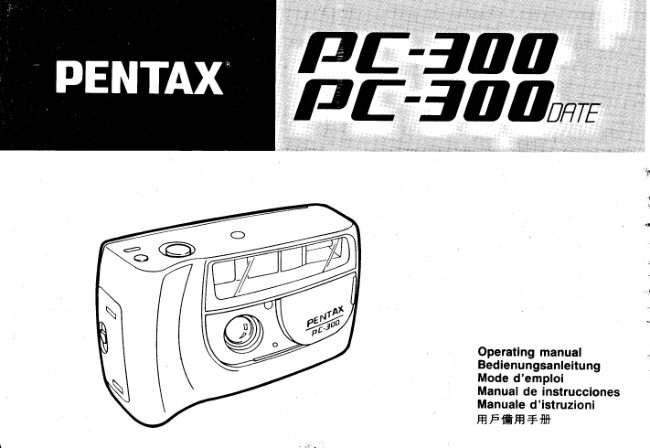
Pentax PC-300 / PC-300 date User manual
User manual for Pentax PC-300 / PC-300 date. 12 pages in German, French, Spanish, Italian. Read the original PDF, download or print a copy without registration.
12 pagesGerman, French, Spanish, Italian1.1 MB PDF
Loading your manual…Open PDF directly
Document details
- Brand
- Pentax
- Model / document
- Pentax PC-300 / PC-300 date
- Document type
- User manual
- Language
- German, French, Spanish, Italian
- Pages
- 12
- File size
- 1.1 MB
- Category
- Film cameras
- Document date
- Not specified in catalog
Search available document text
Find a term, then jump to its page in the original PDF. Image-only pages may not be searchable; check the PDF for exact wording and diagrams.
Page 3 · Read text
NAMES OF PARTS         BEZEICHNUNGEhIDERTEILE  DESCRIPTIFTECHNIOUE

           O Self-timer Button                     O Selbsta uslcisertaste                    O Bouton du retardateur
           O Auxiliary Rewind Button                O Filmriickspulknopf                    O Bouton de rebobinage auxiliaire
               0  Shutter Release Button             @ Auslijser                                      0  D6clencheur
es      @ fitm Counter                   @ Bildz2ihlwerk                  @ Compteur de vue
        @ Built-in Flash                                  6  Eingebauter Blitz                @ Flash incorpor6
        @ Viewfinder Window                          (D Sucherfenster                  @ Fendtre du viseur
        @ Lens Protector                       O Objektivschutz                 @ Volet protecteur d'objectif
        @ Self-timer,/Red-eye Reduction Lamp          E Selbstausldser/Vorblitz-Lampe         @ Retardateur/6clair de r6duction                                                                                           '-@
           Q Light Sensor Window                             €) MeBzelle-                                       Celluli
        @ Lens                                         {D Objektiv                  @ Objectif
        @ Back Cover Release Lever                    (D Ri.ickwandentriegelung             @ Levier d'ouverture du dos
        @ Viewfinder Eyepiece                         (D Sucherokular                  @ Oculaire de vis6e
        @ Film Information Window                      (E Filminformationsfenster             @ Fen6tre d'information sur la pellicule
        @ Tripod Socket                                    (9 Stativgewinde                  @ Ecrou de pied
        @ Red-eye Reduction Flash Switch                 (b Vorblitzschalter                 @ Touche flash r6duction des yeux rouges
        @ Battery Chamder Cover                      (D Batteriefachdeckel               @ Couvercle du longement de pile
               g Back Cover                                 (D Ruckwand                    @ Dos
        @ Adjuster                  www.orphancameras.com(D Einstellstift                   @ Ajusteur
View original page 3Page 6 · Read text
Photography
Keep a distance of at least 1.5 m between the subject and the camera. When taking pictures
outdoors, keep the sun behind you to take good pictures.

Gaution : Make sure not to put your fingers or hair in  f ront of the lens, light sensor window
and built-in flash.

1. Open the.lens protector. Look through the viewfinder and compose your image. (See
      f ig u re Z    . )   'The         lens cannot be focused at distances less than 1.5 m
2. Depress the shutter release button halfway and the green lamp in the finder lights up. The picture
   can now be taken. lf the green lamp blinks, this indicates that the built-inflash is being charged
   or that battery power is too low. In this case, release the button and wait a few seconds before
   pressing it agbih. The picture can be taken if the green lamp in the finder lights up. (See figure B.)         '    When the green lamp is blinking, the flash is not charged. Release the shutter release button
     and wait a few seconds for the flash to be charged.         '         lf the green lamp is still blinking after waiting'l 0 seconds or more, the batteries should be
     replaced.


Flash Photography
1. The built-in flash in this camera is automatically activated when available light is nol sufficient
   for properexposure
                            the distanceranges                   righrshows           on'theZ. fnitiOre                                                                                        Flash-eltecttve                                                                                             ranqes                                                     rso               good                        pictures.   that will produce                                                                1                                                                 0 0  1                                                                                .5- 3. 1m ( 4.9- 1                                                                                               0.2ft.)
                                                          200      | .5-4.4m  (4.9 -14.41t.)
                                                          400  1 .6-6.3m ( 5.2-2O.71t.)

 Red-Eye Reduction Flash Function
To reduce the red-eye phenomenon in the picture, s6t the red-eye reduction flash switch ON.
 With this mode, the red-eye reduction lamp illuminates the subject just before the shutter is
 released. (See figure [9  . )

Red-eye phenomenon in flash photography
When a picture is taken using a flash. a subject' s eyes may appear red in the print. This
phenomenon  is caused by the  reflection of  the electronic flash  in the  retina.  lt can be
 reduced when  the surroundings of  the  subject are brightened, or shooting distance  is
shortened with the lens set at the wide-angle position or by employing the red-eye reduction
 f las h f eat ure .
Self-Timer Photography
This lunctionallowsthe photographerto includehimselfin the picture.

As illustrated,when the self-timerbutton is pressed,the self-timerlamp lights up and the timer starls as soon
as the buttonis pressed.The pictureis taken 10 secondsafter the buttonis pressed.(The lamp startsblinking
                         (See      the            final              three                  seconds.)during                                    figure                     @  .)
                                   pressing .  lf you       want              to             cancel                    the self-timer                                    after                                             the button,pressthe buttononce againor turn off the power.
  ' The self-timerdoes not operatein dark placeswhen the flash is not charged.Checkthat the green lamp lights
  up beforeusing the self-timer.
 ' Use of a tripod is recommendedfor self-timerphotography.
Film Rewinding
The film is automaticallyrewoundwhen the last pictureis taken.
The f ilm counterreversesand the molor stops automaticallywhen the film is completelyrewound.Make sure that
the film counterindicales"S" beforeopeningthe back cover and removingthe film. (See figure m-m     .)

Rewinding  Film in Mid-roll
Open the lens protector and press the auxiliary rewind button with the adjuster pin on the
strap  to  rewind  the  film  in  mid-roll. The  motor  stops  automatically when  the  film  is
completely rewound.
Make sure that the film counter indicates "S" before opening the back cover and removing
the film. (See figure E   .)
View original page 6Page 8 · Read text
tNSTALLTNG/REPLACINGBATTERTES

You need two "AA" batteries to operate this camera. Although both manganese and alkaline
 batteries are suitable for this camera, the latter is recommended for longer battery life. Ni-Cd
 batteries are not suitable.
 1. Open the battery chamber cover. (See f igure E   .)
2. Insert two  batteries by aligninS (  f  ) and  (-)  marks of the batteries with marks on the
cover, then close the cover. (See figure E   .)
'  Up  to  10 rolls of 24 -exposure film can be taken with new  alkaline (LR 6)  batteries
  assuming that all of pictures are taken with flash. (According to Pentax testing conditions)

Battery Check
When  the batteries are properly inserted and the shutter button  is pressed halfway, the
gr ee n lamp a t  t h e c e n t e r b o t t o m o f th e fin d e r lig h t u p o r b lin ks. (Se e figur e E.)
 . The camera does not oDerate when  the  batteries have been used up  or have oeen
  improperly inserted. '  As the  batteries deplete, flash recharging and film winding/rewinding  will take longer.
  Replace the batteries as soon as you notice this.
 '  Batteries must be handled with care. Incorrecf use of batteries can cause overheating or even
  explosions.
 " Battery performance is poor at low temperatures but returns to normal at ordinary temperatures. .  Do not short-circuit, disassemble, recharge or throw used batteries into fire as they may explode.
 Handling Precautions
 1.  This is not an underwater camera and  it may not be possible to repair it  if  it is immersed in
    water. Contact authorized service facility.
2  Sand or mud entering the camera may damage the camera. Do not place it directly on a sandy
    beach.  lt is not designed for professional or other taxing .uses.
3  Do not use paint thinner, benzene or other solvents for cleaning the camera.
4  Do not store or leave the camera for a long time in places where the temperature is high.
5  Moisture condensation will form in the camera when it is brought into a warm room after shoot-
    ing in cold weather. Put the camera in the camera bag or a vinyl bag be{ore bringing it in to
    lower the lemperature change. Take out the camera when the temperature change is less drastic.
6 . A camera is a precision instrument. Do not drop  it or bang  it against objects. Have it inspected
   when  it is exposed to strono shock or oressure.
7 . The camera operates normaily within a temperature range of 40"C(104"F)  to-5"C(23"f).
8. The camera contains high voltage circuits. To prevent electric shock and other hazards, do not
    disassemble the camera.
 9. The camera should be relurned in for service every year or every other year to keep it in proper
    working order. lt is also a good idea to have it inspected when  it has not been used for a long
    time or before taking important photographs.
View original page 8Page 9 · Read text
witF
     m                  E                   E
'ILAS                       tNSTALLAZTONE/SOSTTTUZTONEDELLEBATTERIE    [F]EW/ E+*€itU"n                               www.orphancameras.com
View original page 9Page 10 · Read text
DATABACKOPERATION                        BEDIENUNGDERDATENRUCK
NOTE:THISlS APPLICABLETO THE PC 300 DATEMODELONLY.                        H I N W E I S : D I E S ED A T E N R U C K W A N D P A S S T N U I
@ Mode button @ Selectbutton O Adjust button @ Batterycover fixing screw            @ Mode-Taste @ Select-Taste @ Adjust-Taste @
                                                                                                      Einstellen der Daten
Changingthe Mode                                                                                    Mit jedem Druck auf die Mode-TasteQ erscheint auf
                                                                                                 von                                                                                                                                                   (B, Tag-Stunde-Minu                                                                                                     ?9 Jahr-Monat-Tag,                Mode                                                       in                                                                                  inEach     lime you pressthe                                               the LCD panelchangp.c                                                                successionfrom        folge                          buttonO  , tne mode                                                                                                                                                                          "---                                                                                         und  rS)                                                                                                        Tag-Monat-Jahr.                                                                                                                                               bedeutet,                                                              "Month-Day-Year"                       to                                                to                                                                                         " to iD,r                  E "Day-Hour-Minute" A _"Year-Month-Day"                                 C
to Er "Day-Month-Year".Stop pressingthe buttonwhen the desiredmode appear                ACHTUNG  : "M" auf dem LCD-Feld bedeutet "M<
indicatesthat no data will be imprintedon the picture.                                     Riem en, um die T asten zu dr Ucken.
NOTE: "M" in the LCD panel indicates"Month". Use the adjusterpin on the strap to press       Korrektur  der Daten
the buttons.                                                                                                     1. Drucken Sie die Select-Taste@ bis die Stelle, d
Correcting the Data                                                                                               2. Dann drucken Sie die Adjust-Taste @ und iinde
1. Pressthe "Select" buttonO untilyou reachthe flickeringdigit whichyou wish to change.          gewdhlten Stelle. Mit jedem Druck auf die Adjust-T
2. Pressth_e"Adjust" button@ to changethe digitof specifiedcategoryyou chosewiththe "Select"        Wenn Sie die Taste gedruckt halten, laufen die Ziffer
   button@  . Digitsincreaseby one each time you pressthe "Adjust" buttonO  . lf you keep it          werter.
  depressed,the digit will advancecontinuouslyafter two or three seconds.                            3. Einstellen der Sekunde: Drucken Sie die Select-T
3. Adjustingthe seco-nd:Pressthe "Select" butt6nO until ":" willflicker.And pressthe "Adjust"         drucken Sie in Ubereinstimmung mit den Zeitsign
   button@ in sync with a time signal to set the secondto zero.                                      zeige auf Null zu stellen.
4. Afterthe correction,pressthe "Select" button@ to makethe data imprintingpossible(the bar        4. Nach der Korrektur drucken Sie wieder auf  dir
  mark (-) appearson the LCD panel).                                                         abzuschlieBen.Auf dem LCD-Feld erscheint nun
Battery                                                                                                    Batterie
The databackis poweredby one CR20253V Lithiumbattery.When the displaysin the LCD cannot      Die Energieversorgung frlr die Datenrrlckwand erfolg
be seenclearlyor when the watchlunctionbecomesunstable,replacethe Batterywith a new one     Wenn die LCD-Anzeige nicht mehr klar zu erkennen isf
by looseningBatterycoverfixingscrew@ . Whenthe batteryis set correctly,Datawill be displayed.      ausgelauscht werden. Losen Sie die Befestigungsscf
Resetthe data accordingto "Correctingthe Data".                                                    die neue Batterie richtig ein. Dann erscheinen willkr.
                                                                                                      korrigieren konnen.


                                                                                                         **      qi-f;k-                            "-fir,*E!r!4FF+*.!t?"            -il4n;|Ftf                      .ee.!!''K.i
View original page 10Page 12 · Read text
SPECIFICATIONS
Type:                   35mm lens-shutter camera
Film:                          35 mm DX-coded film with ISO rating from 100 to 400; J135
                                     cartridge. The camera film speed is automatically set to ISO 100
                            when non-DX film is used.
Picture format:                  2 4 m m x 3 6 m m
Film loading:                   Auto film loading. Closing the back cover and pressing the
                                    shutter release button  will automatically wind  film  to  first
                                 exposure.
Film movement:                Auto winding: auto rewinding starts at end of roll. (Rewind speed:
                                 approximately 22 sec for 24-exposure film.) Film can also be
                              rewound in mid roll.
Frame number:                 Automatic readout of successive frame numbers in ascending
                                   order when shooting and descending order when rewinding.
Lens:                         Pentax 35 mm, t|4.5, 3 elements in 3 groups
Focusing system:               Free focus. Focusing range: 1.5m (4.9ft.) to infinity.
Shutter:                     Programmed AE electronic shutter.
Self-timer:                       Electronic  lamp   indication.  Approx.   1O-sec  delay.
                                 Cancellation after activation is possible.
Viewfinder:                    Albada type bright frame finder
Exposure:                   Programmed auto-exposure Range: EV 10 - 15 (lSO 100)
Flash:                              Built-in flash with automatic low-luminance firing.
Charging time:                  Approx. 6 sec according to Pentax testing conditions.
Power source:               Two  1.5V "AA"  alkaline or manganese batteries. (Ni-Cd
                                   batteries not usable.)
Size and weight:                 1 2 0  ( W )  x  7 0  ( H ) x 5 0   ( D ) m m ; a p p r o x . 1 8 5 g

Date recording system:          Informalion is recorded on the reverse side of the film.
Date imprinting modes:        Push button to set unit to any of five modes; "Year/Mon/Day",
                                  "Day/Hour/Min/",               (Blank),  "Mon/Day/Year"   or
                               "Day/Mon/Year".
Date imprinting power source:   3 V lithium battery (one CR2025 battery)
Size and weight:                 1 2 0  ( W )  x  7 0 ( H )  x 5 3   ( D ) m m ; a p p r o x . 2 0 0 s

Reversal film (slide film) may not be properly exposed. Use of negative color film (print film) is
recommended.
View original page 12From the M. Butkus archive. Original publisher and archive notices are retained.
Check the model and edition against your equipment.
PDF verified 2026-10-10.