Film cameras
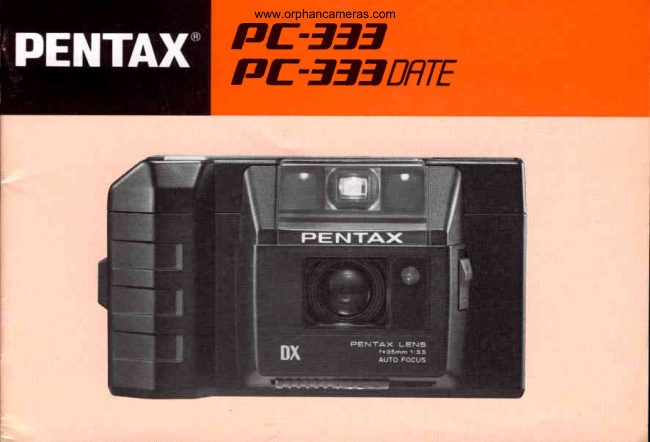
Pentax PC-333 / PC-333 Date User manual
User manual for Pentax PC-333 / PC-333 Date. 32 pages in English. Read the original PDF, download or print a copy without registration.
32 pagesEnglish2.8 MB PDF
Loading your manual…Open PDF directly
Document details
- Brand
- Pentax
- Model / document
- Pentax PC-333 / PC-333 Date
- Document type
- User manual
- Language
- English
- Pages
- 32
- File size
- 2.8 MB
- Category
- Film cameras
- Document date
- Not specified in catalog
Search available document text
Find a term, then jump to its page in the original PDF. Image-only pages may not be searchable; check the PDF for exact wording and diagrams.
Page 6 · Read text
www.orphancameras.com


O Film-transport indicator
@ Flash-readyindicator
(D Viewf inder eyepiece
(E Film-loaded indicator
(D Back-cover-releaselever
@ Tripod socket
(D Lens-coverlever
(D Midroll rewind button
@ Back cover
@ Battery-chamber cover


                                                                           3 J l
View original page 6Page 10 · Read text
BATTERYCHECK               www.orphancameras.com

                                             2
              ffi         t f  ffi


1. Open the lens cover and depressthe shutter          Battery Power Check
   button halfway.                           When the batteries get weak, the flash recycle
2. A green lamp will light up or flicker when           time and auto winding/rewinding time will become
   the batteriesare properly loaded.                   longer. Replacethem with fresh ones.

o    lf the batteriesare not properly loaded, or
exhausted,the shutter cannot be released,nor
can the film be advanced.
View original page 10Page 11 · Read text
] F I L M                           www.orphancameras.com


D X F I L M


                                                   0 o o o o o 0 o o o o o o          ColorFil,n  (;dil(!-


          36.,0
                                                                      DX-information

This camera is designedto use DX-coded film only,     o    lf non-DX f ilm with any f ilm speedis loadeo
and when the DX-codedf ilm with an ISO number       into this camera, the f ilm speed is automatically
within the range f rom 50 to 1600 is loaded, the         set to ISO 100.
camera automatically setsthe f ilm speed with the       o  When buying DX f ilm, make sure the package
film in use.                                       bearsthe "DX"  mark or that the cartridge has
                                                    a DX-information panel.
                                                    o  Specialf ilms like 35mm Instant Reversal
                                                     Film cannot be used.


                                                                                                                                                       .*l1
View original page 11Page 12 · Read text
L O A D I N G F I L M                  www.orphancameras.com


Always load or unload f ilm in a shady spot, or            2. As illustrated,place the f ilm cartridgein the
shieldthe cameraand f ilm f rom direct sunlight              film chamberby f irst f itting its flat side on the
with your body.                                          top of the rewind shaft.

                                           X Always keep the DX-lnformation pins free1. Open the back cover by sliding the back cover                                                      from scratches,dirt or dust.   releaselever in the direction of the arrow.
View original page 12Page 13 · Read text
www.orphancameras.com


                                                                             Slack


                        f i o o o o o !

                               +     , : ,                     :   t a aa a a a
                                                                  t   '
                                                   aa a' : :aat. .aa, :a: a: t1. .a :


3.  Pull the f ilm leaderout far enough to be                         .  Take up any slack left in the film so that it is
   placed on the O   f itm roller/take up spool, as          flat, as illustratedabove.
   shown above.

o  Make sure the film is properly placed
between the O guide rails.
View original page 13Page 14 · Read text
www.orphancameras.com

                              4
    @J         ru

4. Close the back cover, and the film will be             5. When the f rame counter is set to "1 ," the
   automatically wound on to the first frame.            auto film winding stopsautomatically.
                                          Now you are ready to start shooting.
o When the film is being wound on, the red
stripes in the f ilm transport indicator f licker,           o  The film-loaded indicator on the back cover
indicating that the f ilm is advancingproperly.             tells you whether or not f ilm is in the camera.
 lf not, open the back cover and reload the film.


Caution: Should you wish to remove the film loaded from the camera, never force it, but unload
the film in the normal way describedon page 16, to avoid any damage to the take-up spool.

                                                                                                1 1
View original page 14Page 15 · Read text
CAMERA HOLDING              www.orphancameras.com


It is important to hold the camera properly in             in a f ixed position, and relax the rest of your
order to take blur-free photos. Practiceholding        body in a secureposture. Brace the elbow of
and operating the camera before insertingyour          the arm supporting the camera againstyour
f irst roll of f ilm.                                    body. Always pressthe shutter button gently.
The illustrationsshow the basic holding            When taking f lash pictures with the camera
positions. No matter which position you use,           held vertically, be sure to keep the f lash head
be sure to grip the camera steadily with both           on the upper side.
hands, hold the camera gently againstthe face

1 2                                                                                                   4
View original page 15
Page 16 · Read text
RECOMMENDED CAMERA.TO-SUBJECTwww.orphancameras.comDISTANCE


o  For the best possibleresults,take your
pictures within the camera-to-subjectdistance
from one meter 1s oo (inf inity). This camera
does not focus on the subject lessthan one
meter (3.3 ft.) away.
View original page 16
Page 17 · Read text
T A K I N G P I C T U R E S             www.orphancameras.com


                  fjo

             o
                                                            1.  After composingyour picture, bring the O
                                                    Autofocus Spot on the main subject you want      ffi
                                                                to focus on.
O Autofocus Spot (Bring this on the main part of
  your subjectyou want to focus on.)                 o   ln this instance,be sure to keep your hand,
O Picture-AreaFrame (General-photography                                                             hair, etc. away from the Autofocus Windows,
  range)                                        Taking Lens, Light SensorWindow and Flash.
@ Parallax-CorrectionFrame (Short-distance
  photography range)
O Green Lamp (When it lights up, you are ready
   to shoot; when it f lickers, it's a warning
  againstunderexposure.)


1 4
View original page 17Page 18 · Read text
www.orphancameras.com

         o


2. Depressthe shutter button halfway. When the        3. Depressthe shutter button completely to
  O  Green Lamp lights up, you are ready to take        releasethe shutter. As you releaseyour  f inger
   a picture.                                         from the shutter button, the f ilm will be wound
                                                 on to the next f rame.
o    lf the Green Lamp f lickers, the subject is not
bright enough; you have to use f lash.                  o    lf you want to change the subject, releaseyour
o  When the camera-to-subjectdistance is about         finger from the shutter button and then depress
one meter (3.3 ft.), composeyour picture within        the shutter button once again.
the O  Parallax-CorrectionF.rame.


                                                                                    1 5
View original page 18Page 19 · Read text
R E W I N D I N GF I L M                www.orphancameras.com

I
         -l-J_                                 1
                                                                     i @


  s:=S=:€::=\!


1. Severalsecondsafter the last frame of the             2. Open the camera back and remove the f ilm
    roll is exposed,the motor automatically starts          cartridge by f irst pulling the top of the cartridge
   rewindingthe f ilm. While the rewind operation        toward you with your  f inger, as shown above.
    is taking place,the Film Transport Indicator's
   red stripes keep f lickering.

o    lt usuallytakes about 30 secondsto rewind a
roll of 24cxposure f ilm.
o  Never open the camera back until the motor                                                  1Jstops.


1 6
                                                                                                                                                                                                                                                                                                                                                                                                                  . a
View original page 19Page 22 · Read text
www.orphancameras.com


                                                               Difficu lt Autofocus Subjects
                                             The autofocus system of this camera may not
                                                       function properly in the situations described
                                                   below. In such cases,focus on a subject near
                                                     the actual subjectyou are shooting,and lock
                                                     the focus by using the focus-locktechnique,
                                                   then frame the subject and shoot.
                                                              1. Black objects which are hard to reflect
                                                                 light (infrared).
                                                              2. Wire netting, latticework, iron exercise-bar,
                                                                etc. with lesslight ref lection.
                                                              3. When neon signs,fluorescent lamp,
                                                           television,sunlightcoming through
3. While keeping the shutter button depressed            the trees, etc. are in or around the Auto-
   halfway, move the camera to recomposeyour           focus Spot.
   picture with the subject in the desiredposition,       4. Glasspanelling,mirrors, car bodies, etc.
   then depressthe shutter button all the way to          which are glossyand reflective.
   take the picture.                                        5. Fast-movingobjects such as trains and
                                                           cars,
                                                              6. Water jets, water surfaces,smoke, f lame
                                                                                                              f ireworks and other transparentor
                                                         translucent objects.


                                                                                    1 9
View original page 22Page 23 · Read text
iiir;F"i,i LASH PHOTOG RAPHY            www.orphancameras.com


 lf the Green Lamp flickers in the
viewfinder as you depressthe
shutter button halfway, it indicates
                                                                                                                                                                                               [lthat you should use f lash. lf you                                                                         r*nlttrrPush  dowtrr ^ V
don't use f lash in such a case,you                                                               when  not  in use
will get a blurred or underexposed
picture. Also, if you are shooting                                                                    -i
people in the shade of trees or in a
dimly-lit place,you can also use
flash to prevent their facesfrom                                          Ibeing undercxposed.

Number of Flashes                             1 . As shown above, push up the Flash Pop-up
Approx. eight rolls ol 24-exposurefilm or five             Lever, and the f lash head will pop up and
rolls of 36-exposuref ilm can be shot with this            begin to charge automaticallY.
f lash with  f resh alkaline batteriesat normal             2. Severalsecondslater, the Flash-ReadyIndicator
temperatures.                                       by the Viewf inder Eyepiecewill light up,
Flash Control Range                                      indicating that the f lash is ready to  f ire. Pushing1 -  3.5 m (3.3 -  11.5 ft.) with ISO 100 film              the f lashhead back into place will return the  ?i.
1 -  5 m (3.3 -  16.4 ft.) with ISO 200 - 1600           camera to normal picture-taking mode.                   1ij,
f i l m
1 -  2.5 m (3.3 -  8.2 ft.l with ISO 50 f ilm                                                                                     I
                                                                                                                                                                                                                                                                                                   I


20
View original page 23Page 24 · Read text
www.orphancameras.comI
    CAUTIONS
     o  The recycle time of this f lash is about six
     secondswith  f resh batteries. lf  it takes more than
     1 5 seconds,the batteriesare most probably
     exhausted.
     o    lf you releasethe shutter before the f lash-
     ready lamp lights, you may get a dark
      (u nderexposed) pictu re.
     o  Do not depressthe shutter button while the
          f lash is being charged;otherwise the charging
      will be interrupted.
     o  When the f lash is not in use, keep the f lash
    head in its originalposition to prevent power
     consumption.                                                  Flash not used 1                                 Flash used J
     o When using the f lashas a supplemantarylight
     source in daylight, the f lash effect slightly differs,
    dependingon the brightnessaround the subject
      or the camera-to-subjectdistance.
View original page 24Page 28 · Read text
www.orphancameras.comi$
       Setting "Hour-Minute" Mode                            Setting "Year-Month-Day" Mode
rr*   f-i3-: rEl  (: 3:30p.m.)                          [g-6--T---,.]il   (: May1, 1e86)
        1. Pressthe Mode Selector Button until the              1. Pressthe Mode Selector Button until the
         "Hour-Minute" mode is set in the                    "Year-Month-Day" mode is set in the Display
         DisplayWindow.                               Window.
       2. Pressthe O Setting Button and set the                2. Pressthe @ Setting Button and set the year to
        second according to the announcement of              "86"  in the DisplayWindow.!*      time or your watch. The secon        will be         3. Pressthe O  Setting Button and set the
          set to zero, although it will just keep f lickering       month to "5"  in the DisplayWindow.
            in the DisplayWindow.                                4. Pressthe O  Setting Button and set the day
       3. Pressthe O  Setting Button and set the                 to "1"  in the DisplayWindow.
         minute to "30"  in the DisplayWindow. #       4. Pressthe G) Setting Button and qet the hour to
         "15"  in the DisplayWindow. The 24-hour
          clock designation is used for the time
i *        indication.
      o  Note that since the sign "-"  between "Hour"
     and "Minute" flickers every second, it may not be
      imprinted on the f ilm  if the shutter is released
      while it is invisible.


                                                                                  25
View original page 28Page 29 · Read text
ATTACHING STRAP; SOFT CASE   www.orphancameras.com

   Wq     "*Tr#'S


                                                                 l l l l l l ' ] l t


                                                              1. Passthe string of the strap through the Strap
You can use this strap as a neck strap or a wrist            Hanger.
strap.                                                       2. Passthe other end of the strap through the
                                                              ring of the string. You have now a wrist strap.
View original page 29Page 30 · Read text
www.orphancameras.com


3. To make it a neck strap, move the belt ring to
   the other end of the strap, and then, as
    illustrated,pull the strap out from the small
     r i n g .
4 . To return it to a wrist strap,pullthe belt ring
   out from the small ring, and move the belt ring
    to the other end of the strap.
                                                      This soft case is optional. Passthe strap attached
                                                              to the camera,through the hole on the top of the
                                                     case.


                                                                              27
View original page 30Page 31 · Read text
www.orphancameras.com S P E C I F I C A T I O N S                                                                                                                      . .                                                               iI

Type: Fully-automatic, leaf-shutter35mm camera.Film : 35mm DX f ilm with ISO ratingsf rom 50 -  1600; non-DX f ilm with ISO 100.                            *t                                                                                                                                                                                                              I
Film loading:Automatic film loading.
Film winding/rewinding: Automatic winding system with  f ilm transport indicator; automatic rewinding at
   the end of roll of film; rewind operationautomaticallystopsas rewind is completed;possibleto rewind
    in mid-roll with film rewind button; rewind speed:approx.30 sec,for 24-exposurefilm.
Frame counter: Automatic reset.
Lens: Pentax3Smm f 13.5,3elementsin 3 groups,63oangleof view.
Focusing: lnfrared-activeauto focusing system, autofocus range from one meter (3.3 ft.) to infinity,
   bu ilt-i n focus-lock device.
Shutter: Programmed-AE-typeelectronic shutter with speedsfrom approx. 1/500 to 1/30 sec.
Viewfinder: Albada bright f rame viewf inder, 85% picture area, 0.45 magnification, -1 diopter.                                                                                                                                                                               {IIJtfViewfinder display: Picture-areaframe, autofocus spot, parallax-correctionframe, green lamp lights up to                                                                                                                                                                                                                                                                                                                                                                        {'t
    indicate correct exposure, green lamp f lickers to indicate underexposure.
Exposurecontrol: Programmed-AEcontrol from EV 8.6 (approx. 1/30sec.,f/3.5) to EV 17 (approx'                      tIIi
   1/500 sec.,f/16) at ISO 100 with SPD cell metering.Meter switch: Shutter button (locked when lens cover is closed).                                                                                                                                                            Ii
Flash: Built-in pop-up type with flash-readyindicator,guide number of 10 (lSO 100 in meter).
Flashcontrol range: 1 -  3.5 m (3.3 -  11.5 ft.)with ISO 100 film.
Flash recycletime: Approx. 6 sec. (with fresh alkaline batteries).
N u m b e r o f f l a s h e s : A p p r o x l. 2 r o l l s o f 2 4 - e x p o s u r e f i l m ; a p p r o x . S r o l l s o3f 6 - e x p o s u r e f i l m( a t 3 0 s e c .
    intervalsand normal temperatures).
Power source: Two AA-size alkaline batteries.
Dimensions:119.5(W) x 68.5(H) x 49.5(D)mm 14.7" x 2'7" x 1.9").
Weight: 260 g 19.2 oz.l
Accessory: Strap

30
View original page 31Page 32 · Read text
aa
                                 www.orphancameras.com


PC-333 DATE
Film: DX film with ISO 50 - 1600 (automatic fitm-speedswitching).
Data recording rystem: An internal recording lamp records information onto reverseside of film.
Data imprinting mode: Push buttons to set unit to any of three modes; "year/MonlDay,"  ,,Hour/Min,,,
   or "-  ' - - -" (blank). Year/Mon/Dav modet ("80" to "19"  -  lggoto  2oi9): Month ("1" to ',12,'l;
   Day ("t " to "31"). Hour/Min mode: Hour ("0" to "23"1; Minute (,,00,,to ,,59,,).
   Blank mode'r  - - - -" (no data imprinted).
Power sources: One lithium battery for clock and data display; camera's batteries also serve for data
   imprinting.
D i m e n s i o n s1: 1 9 . 5 ( W )x 6 8 . 5 ( H ) x 5 2 . 5 ( D l m m  . 4 . 7 " x 2 . 7 " x 2 . i , ' l
Weight: 27O g @.5 oz.)


                                                                           31
View original page 32From the M. Butkus archive. Original publisher and archive notices are retained.
Check the model and edition against your equipment.
PDF verified 2026-10-10.