Film cameras
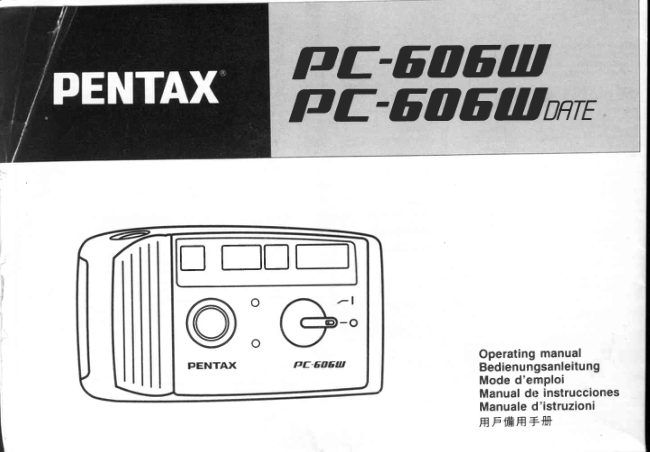
Pentax PC-606W / 606W Date User manual
User manual for Pentax PC-606W / 606W Date. 15 pages in German, French, Spanish, Italian. Read the original PDF, download or print a copy without registration.
15 pagesGerman, French, Spanish, Italian1.5 MB PDF
Loading your manual…Open PDF directly
Document details
- Brand
- Pentax
- Model / document
- Pentax PC-606W / 606W Date
- Document type
- User manual
- Language
- German, French, Spanish, Italian
- Pages
- 15
- File size
- 1.5 MB
- Category
- Film cameras
- Document date
- Not specified in catalog
Search available document text
Find a term, then jump to its page in the original PDF. Image-only pages may not be searchable; check the PDF for exact wording and diagrams.
Page 3 · Read text
BEZEICHNUNGENDER TEILE
O Shutter ReleaseButton           @ Ausloser                 @ D6clencheur
g  AuxiliaryRewind Button              O Filmnickspulknopf            @ Bouton de rebobinageauxiliaire
lO Sell-timer Button                           (E Selbstauslosertaste                Q Bouton du retardateur
@ Film Counter                            tO Bildzahlwerk                @ Compteurde vue
O Built-inFlash                           G) EingebauterBlitz              @ Flash incorpord
@ nutotogue-rifi6l-                 Q Autofokusfenster              @ Viseur de mise au point automatique
g vi#tinderwindow            @ Sucherfenster                    O FenCtredu viseur/O
   Self-timerLamp               @ Selbstausloserlampchen          @ T6moin du retardateur
O Light SensorWindow            @ Me8zelle                       O Cellule
   Power Switch                    O Ein/Aus-Schalter                  O Interrupteurd'alimentation           -r*
                              O objektiv                       O Obiectif
                              O Filminformationsfenster             O FenCtred'informationsur la pellicule
O ViewfinderEyepiece                                             I  Sucherokular                    Q Oculairede vis6e
l$ Back Cover Belease Lever             Q Rtickwandentrieg€lung                       lP Levier d'ouverturedu dos
lD pack Cover                     Q Rtickwand                                                              tf Dos
O Battery Chamber Cover                                 (t Batteriefachdeckel                                       (| Couvercledu logementde pile
It  Tripod Socket                                  (a Stativgewinde                                                         I  Ecrou de trepied
(D Adjuster                       O Einstellerwww.orphancameras.com    Q Ajusteur
View original page 3Page 6 · Read text
3. Align        the             film               leader                      with                          the                                  film load                                   mark.                                      (See figure                                                                               ![].)     -                           guide     Insert          the                film                                          rails               between                          the                                 and remove                                            any                                                         slack.
4. Make sure that there is no dirt on the seal beforeclosingthe back cover. Make sure that the
   two tabs in the back cover firmly lock in place when the cover is closed.The camera will not
   be weather resistantif the cover is imperfectlyclosed and it may also let in light. lSee figure E.)
5. Turn on the power and press the shutter button once to automaticallyload the film and " 1" is
   displayedin the film counter.lf " 1" is not displayed,the film has not been loadedproperly.Load
     it again. (See figure 6.)
Photography
Keep a distanceof at least one meter between the subject and the camera. When taking pictures
outdoors,keep the sun behind you to take good pictures.
Caution: Make sure not to put your fingersor hair in front of the autofocusfinder,lens,light sensor
window and built-inflash.
Waterdropsor dirt on the lens protectiveglass,autofocuswindowand lightsensorwindowwill make
it impossibleto take good pictures.Clean them before picturetaking.
1. Turn on the power,placethe subjectin the autofocusframe [ =   ] and composethe picture.(See
   figurelll.)      .    The lens cannot be focusedat distancesless than one meter.
2. Depressthe shutterreleasebuttonhalfwayand the greenlamp in the finderlightsup. The picture
  can now be taken. lf the green lamp blirlks,this indicatesthat the built-inflash is being charged
   or that battery power is too low. In this case, releasethe button and wait a few seconds befbre
   pressingit again.The picturecan be takenif the greenlamp in the finderlightsup. lSee figureB.)
    " When the green lamp is blinking,the flash is not charged.Releasethe shutterreleas-ebutton
    and wait a few secondsfor the flash to be charged.     -         lf the green lamp is still blinkingafter waiting 10 secondsor more, the batteriesshould be
     replaced.


Flash Photography
1. The built-inflash in this camera is automaticallyactivatedwhen availablelight is not sufficient
   for proper exposure.
2. Fhe       table          on the                     right shows                             the distanceranges                                           t e n      Ftash-effectiveranoes         produce               good                         pictures.   that will                                                                  1 0 0        1 . 1 - 3 1 m
                                                                  200        1 . 2 - 4 . 4m
FocusLock Photography                                       400        1 . 6 - 6 . 3m
Focusingis performedin the autofocusframe [:     l. When the subject is not in the autofocusframe, use the focus
lock to take the oicture.
Focus Lock Operation
Place the subject in the autofocusframe II     I and press the shutter releasebutton halfwayto focus. The subject
will stay in focus as long as the shutter release button is kept at the halfway position and the green lamp is lit.
                            pressNow    recompose                                                                                        picture.               the                    picture and                                    the shutter                                             release                                                                           fully                                                     button                                                  down to                                                                      take the                                                                             (See figure 9l .) ' The      focus lock                     is released                       and                               the green                                   lamp                                        goes off                                           when                                                            the shutter                                                                     release                                                                                                              is released.                                                                             button
 -  lf you change the distance between lhe camera and the subject, release the focus lock and refocus.
 . The focus lock cannot be used if the green lamp blinks when the shutter releasebutton is pressed halfway(see
  Flash PhotographySection 2 for details).

This function allows the photographerto include himself in the picture.

As illustrated,when the self-timerbutton is pressed, the self-timerlamp lights up and the timer starts as soon
as the button is pressed.The picture is taken 10 seconds after the button is pressed. (The lamp starts blinking
during the final three seconds.)(See tigure [!!l  .)
 '   lf you want to cancel the self-timerafter pressingthe button, press the button once again or turn off the power.
. The self-timerdoes not operate in dark places when the flash is not charged. Check that the green lamp lights
  up before using the self-timer.
 ' The focus locks when the self-timerbutton is pressed. First place the subject in the autofocusframe I I     I and
  press the button halfway down to lock focus. Now recompose the picture and release the button.
 ' Use of a tripod is recommendedfor self-timerphotography.
Film Rewinding
The film is automaticallyrewound when the last picture is taken.
The iilm counter reversesand the motor stops automaticallywhen the film is completelyrewound.Make sure that
the film counterindicates"S" before openingthe back cover and removingthe film. (See figure 1111.)
Caution: Do not open the back cover when there is water or sand on the camera or your hands. The camera
will be damqgqd if water or sand enters it. Clean the camera before opening the back cover to remove the film.
(See figurel12l .)
Rewinding Film in Midroll
Turn on the power and press the Auxiliary Rewind Bufton with the adjuster pin on the strap to rewind the film
in mid roll. The motor stopsautomaticallywhen the film is completelyrewound.Make sure that the film counter
indicates "S" before opening the back cover and removing the film. (See figure ll5| .)
View original page 6Page 9 · Read text
Batte Re        nt
lf there is sand or water on the camera or your hands, clean belore replacingthe batteries.
1.  Placea coin or the like in the grooveof the batterychambercover at the base of the camera.
   Turn the coin in the directionoi the arrowto the I G  ] mark to open the cover.(Seefigure[{].)
2.  Placea lithium battery(CR123A)with the minus(-)  pole in first. Align the batterychennber
    cover with the IG  ] niaik and piess it in while tuinihg counterclockwiise.(See figure @  .)
Caution:When the electrodeand ring insidethe coverare wet or dirty,wipe them clean with a soft
and dry cloth.*  Up to 30 rollsof 24-exposurefilm can be taken with a new lithiumbatteryassumingthat the llash
   is used lor about 500/oof the pictures.(Accordingto Pentaxtesting conditions)
Battery Check
When the battery is properly inserted and the shutter button is pregqed halfway, the green lamp
at the centerbottomof the finderlightsup or blinks.(Seefigure1161.)*  The cameradoes not operatewhen the batteryhas been usedup or has been improperlyinserted.*  As the batterydepletes,flash rechargingand film windinglrewindingwill take longer. Replace
  the batteryas soon as you notice this.
Handling Precautions
1.  Thiiis not an undenvatercamera and it may not be possibleto repair it if it is immersedin
   water. Contactauthorizedservicefacility.
2. Sand or mud enteringthe cameramay damagethe camera.Do not place it directlyon a sandy
   beach. lt is not designedfor professionalor other taxing uses.
3. The camera is damagedif dirt, mud, sand, dust or water entersthe camera when the film or
    batteryis replaced.Note that repairsof such damagesare chargeableeven during the war-
    ranty period.
   Removeany dirt or sand from the weather-resistantseals.A damagedpackingwill not keep
   the camera weather-resistant.Have your agent replacesuch a seal as soon as possible.
    After use wipe off any dirt or wateron the camerawith a soft, dry cloth. lf dirt is persistent,use
   a moistenedcloth to wipe it off and then swab the water with a dry cloth.
   Do not use paint thinner, benzeneor other solventsfor cleaningthe camera.
   Do not store or leave the camera for a long time in placeswhere the temperatureis high.
   Moisturecondensationwill form in the camerawhen it is broughtinto a warm room after shoot-
    ing in cold weather.Put the camera in the camera bag or a vinyl bag before bringingit in to
    lowerthe temperaturechange.Take out the camerawhen the temperaturechange is lessdrastic.
9. A camerais a precisioninstrument.Do not drop it or bang it againstobjects.Have it inspected
   when it is exposed to strong shock or pressure.
10.The camera operatesnormallywithin a temperaturerange of 50oC to -5"C.
1 1 . The cameracontainshigh voltagecircuits.To preventelectricshock and other hazards,do not
   disassemblethe camera.
12.The camerashouldbe returnedin for serviceeveryyear or everyotheryear to keep it in proper
   workingorder.lt is also a good idea to have it inspectedwhen it has not been used for a long
   time or beforetaking importantphotographs.
                           www.orphancameras.com
View original page 9Page 10 · Read text
zu lassen,wenn sie ldngereZeit nicht benutzt         oder bevor wich
gemachtwerden sollen.
View original page 10
Page 11 · Read text
Qt oder bevor wichtigeAufnahmen


I                       www.orphancameras.com                          EIFEEiU
View original page 11
Page 12 · Read text
DATABACKOPERATION
NOTE: THIS lS APPLICABLETO THE PC-606WDATE MODEL ONLY.
@ Mode button @ Select button |@ Adjust button @ Batterycover fixing screw
Changing the Mode
                Mode                                                       in                                                the                                     LCD panelchanges                                                                                    in                                                                 successionfromEprch     time you pressthe                           buttonQ  , tfre mode    '.'Year-Month-Day"                                                                   "------"                                                                 "Month-Day-Year"                        to                                                   to            @ "Day-Hour-Minute"                                 C                                                                          to @)@
to C) "Day-Month-Year".Stop pressingthe buttonwhen the desiredmode appears."------"
indicatesthat no data will be imprintedon the picture.
NOTE: "M"  in the LCD panel indicates"Month". Use a fine pointeddeviceto pressthe buttons,
and press them gently.
Correcting the Data
1. Press the "Select" button @ until you reach the flickeringdigit which you wish to change.
2. Presstfur "Adjust" button@ to changethe digit of specifiedcategoryyou chosevith the "Select"
   button@  . Digits increaseby one each time you press the "Adjust" button@  . lf you keep it
   depressed,the digit will advancecontinuouslyafter two or three seconds.
3. Adlustingthe secoJrd:Pressthe "Select" buttrinO until ":" will flicker.And pressthe "Adjust"
   button@ in sync with a time signal to set the second to zero.
4. After the correction,pressthe "Select" button@ to make the data imprintingpossible(the bar
  mark (-) appearson the LCD panel).
Battery
The databackis poweredby one CR2O253V Lithiumbattery.When the displaysin the LCD cannot
be seen clearlyor when the watch functionbecomesunstable,replacethe Batterywith a new one
by looseningBatterycoverfixingscrew@ . When the batteryis set correctly,Datawill be displayed.
Resetthe data accordingto "Correctingthe Data".

 .  Batteriesmust be handled with care. Incorrect use of batteriescan cause overheatingor even
  explosions. -  Batteryperformanceis poor at low temperaturesbut returnsto normalat ordinarytemperatures. .  Do not short-circuit,disassemble,rechargeor throw used batteriesinto fire as they may explode.
View original page 12Page 14 · Read text
mgehen.FafscheVSpv{nOungvon Batterien kann Uberhit-
;achen.          -.'
igen TemperaturTJb, f"nrt O"i narrt"rp"
bffn"en,{|rafiladen-gder-\_  alte Batterienins Feuerwerfen;dabei


SUL RETRO
View original page 14Page 15 · Read text
SPECIFICATIONS
                            35 mm fully automaticlens-shuttercamera
Weather-resistant Construction:  Weather-resistantwith JIS protection Class 4 splashproof
                                 construction(not adverselyaffectedby water splashesfrorirany
                                   direction).
Film:                       35 mm DX-codedfilm with ISO rating from 100 to 400; J135
                                   cartridge.The camera film speed is automaticallyset to ISO 100
                         when non-DXfilm is used.
Picture format:                2 4 m m x 3 6 m m
Film loading:                  Auto.film loading. Closing the back cover and pressingthe
                                shutter release button will automaticallywind'film tdfirst
                             exposure.
Film movement:               Auto winding:auto rewindingstartsat end of roll.(Rewindspeed:
                              approximately22 sec for 24-exposurefilm.) Film can al6o be
                           rewoundin mid roll.
Frame number:               Automaticreadoutof successiveframe numbersin ascendino
                               order when shootingand descendingorder when rewindingl
Lens:                       Pentax35 mm, t14.5,3 elementsin 3 groups
Focusing system:                Infrared active autofocusingwith focus-lock.
                           Range: approx. 1.0 m (3.3 feet) to infinity
Shutter:                   ProgrammedAE electronicshutter.
Self-timer:                     Electronicred lamp indication.Approx. 10-secdelay. Cancel-
                                   lation after activationis possible.
Viewfinder:                  Albada type bright frame finder
Exposure:                 Programmedauto-exposure Range: EV 10 - 15 (lSO 1OO)
Flash:                             Built-inflash with automaticlow-luminancefiring.
Chalging time:                Approx. 6 sec accordingto Pentaxtesting conditions.
Power source:                3 V lithium battery(CR123Aor the equivatent)
Size and weight:              124.5 (W) x 72 (H) x 53 (D); approx.2}4 g
Accessories:               Cameracase
Date recording system:         Informationis recordedon the reverseside of the film.
Date imprinting modes:        Push buttonto set unit to any of ftve modes;"year/Mon/Day",
                              "Day/Hour/Min/",           (Btank), "Mon/Day/year,' or
                             "Day/Mon/Year".
Date imprinting power source:  3 V lithium battery(one CR2025battery)
Size and weight:              124.5 (W) x 72 (H) x 55 (D); aplox.217 g
Reversalfilm (slide film) may not be properlyexposed. Use of negativecolor film (print film) is
recommended.
                           www.orphancameras.com
View original page 15From the M. Butkus archive. Original publisher and archive notices are retained.
Check the model and edition against your equipment.
PDF verified 2026-10-10.