Film cameras
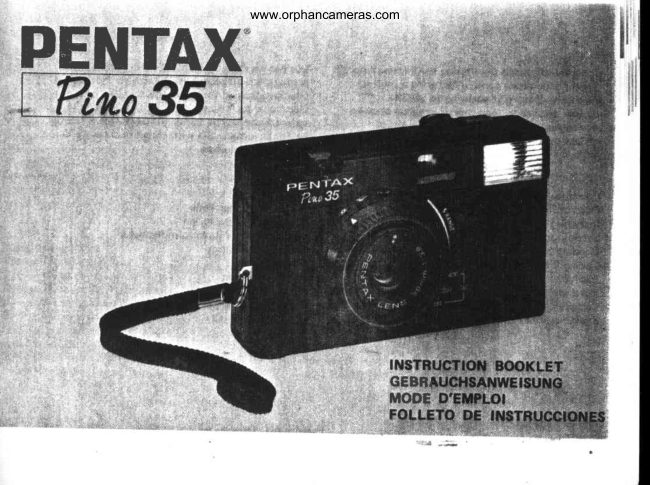
Pentax Pino 35 User manual
User manual for Pentax Pino 35. 39 pages in German. Read the original PDF, download or print a copy without registration.
39 pagesGerman1.6 MB PDF
Loading your manual…Open PDF directly
Document details
- Brand
- Pentax
- Model / document
- Pentax Pino 35
- Document type
- User manual
- Language
- German
- Pages
- 39
- File size
- 1.6 MB
- Category
- Film cameras
- Document date
- Not specified in catalog
Search available document text
Find a term, then jump to its page in the original PDF. Image-only pages may not be searchable; check the PDF for exact wording and diagrams.
Page 2 · Read text
www.orphancameras.com


Congratulationton purchasingthe Pentax Pino 35     Die Pentax Pino 35 Kamera ist eine kompakte
clnrera, I oompact carpra featuring a built-in       Kamera mit eingebautem Blitzgerdt. Horzlichen
flash unit. Bgfore attempting to usa the              Gliickwunsc*rzu lhrer Wahl. Lesen Sie bitte vor
calrlera,be sure to read this instruction booklet      Gebrauch der Kamera diese Bedienungsanleitung
thoroughly to familiarizeyourralf with its          aufmerksamdurch, damit Sie die Kamerarichtig
@rrect oporation and to ensure full and lasting      bedienenlernen. Sie wird lhnen dann langeZeit
pcrforrnance.                                     beste Dienste leisten.

Contcntr                                                 lnhaft
Dercriptior  of Partr                        4     Bezeichnungder Teila                      5
l r t r t a l l i n g B a t t e r i e s                     . . . . . . 8         Einsetzender Batterien     .  .                                 I
Sctting the Film Speed                                .  .  . 12     Einstellender Filmempfindlichkeit   .  .  .  .  .  . 13
L o a d i n g t h e F i l m                         . . .    . . .    . 1 4    E i n l e g e n d e s F i l m s                       . . . . . . 1 5
T a k i n g P i c t u r e s                                        . . . 2 O     F o t o g r a f i e r e n.                               . . . . . . 2 1
F f a s h P h o t o g r a p h y .                       . . . . . 2 4      B l i t z a u f n a h m e n . . .                         . . . . . 2 5
RcwindingtheFilm                              .  .  .  . .30    R i i c k s p u l e n d e s F i l m s                        . . . . 3 1
C a r n e r a C a r e                                         . . . . 3 2     P f l e g o d e r K a m e r a                        . . . . . . 3 i 1
S p e c i f i c a t i o n 3. .                             . . . . . . 3 6       T e c h n i s c h s D a t o n .                      . . . . . . 3 7


     I
View original page 2Page 6 · Read text
www.orphancameras.com

                     o  Back Cover ReleaseKnob
                     o  FlashOn/Off Switch
                            c) Viewfinder Eyepiece
                     o  Film Advanceknob
                     o  Take-upSpool
                     G  Battery Compartment
                                Cover
                     o  Film Chamber
                     o  Tripod Socket
                   @  Sprocket
                   @  Film Rewind ReleaseButton
                           (D Back Cover
View original page 6Page 8 · Read text
www.orphancameras.com


This comera ls powered by two l,5V AA penlight
botteries. Be sure to use two fresh botteries of the
some type.

n   o*n   the bsttcrY oompartnEnt ciov€r by
sliding it in the direction marked "OPEN".


A    Correctly insert the batteries, as shown by the
(E and O  polarity marks labeted inside the battery
compartment.

  Do not uce Ni{d  or othcr
   rechargeable battorigs.
View original page 8Page 10 · Read text
www.orphancameras.com

IBattery Checkl
Slide the flash on/off  switch upward  to "ON".
lf the flash-ready lamp comes on within  a few
seconds, it means the batteries are good.    lf  it
takes more than 3O seconds to come on, replace
the batteries with new ones.
lBattery LifeJWitha setof freshmenganesealkalinebatteries                       I
you shouldbe ableto takemorethan360 flash
shots in successive sequence.  (ln ambient
temperatures  of 20 degrees centigrade")


    I
View original page 10Page 12 · Read text
www.orphancameras.com

                   %W'ffiI'ry


lsetting the Film Speedl
Set the film speed by aligning the mark "A"  with
the ISO setting corresponding  to the speed of the
intended film.  The film speed is marked on the
film's external Packing box.
 Usefilms with spcsdr   . rrdn{{slil&$cqFltfol ISO 100,200
  or 400.
View original page 12Page 16 · Read text
www.orphancameras.com
                                            ff


!|   Turn the film advanceknob in the direction
of arrow, transportingthe film while smoothly
meshingthe perforationr of the film with the                                o o o o o o o o o o q -
Sprockst.


6   Closethe back cover while pressingthe film
c8rlotto up againstthe top of the f ilm chamber.
View original page 16Page 17 · Read text
www.orphancameras.com

g   Den Filmtransportknopfzum   g    Tourner  le bouton  d'avance     g    Gire el mando de avance de
Transport des Films in              du film dans le sens de sa fldche        la pel rcula en la direcci6n de la
Pfeilrichtungdrehen und dabei      en veillant d ce que les                flecha y transporte  la pel fcula
die Filmperforationeinwandfrei     perf orations s'engrdnent              mientras sus perf oraciones
mit der Transportrollein Eingriff    convenablement  sur la roue          engranan suavemente con la
bringen.                           dentde.                            rueda dentada.
E   Die Riickwand schtieBen,     E    Refermer  le dos de           E    Clerre la tapa posterior
uaobeidie Filmcassettenach           l'appareil en poussant la cassette     mientras presiona la cajita de la
oben gegendie Filmkamrner        du film contre le haut du              pel fcula hacia arriba contra  la
gedraicktwird.                     compartiment du film.                parte superior de la c6mara de
                                                                                               la pel rcula.


                                                                                            1 7


                                                                                                                                                                                    .'?r*     ,.=.
View original page 17Page 19 · Read text
www.orphancameras.com


                                                                    "a$i&a,
E   Den Film straffen, indem            f,l   Rattraper  le mou du film en    E    Elimine cualquier flojedad
man die Filmriickspulkurbel         d6pliant  la manivelle de rebobi-      de la pel fcula desptegando la
hochklappt und sie vorsichtig in     nage et en la tournant  lentement      manivela de rebobinado de la
Pfeilrichtungdreht, bis jeglicher    dans le sens de sa fldche.               pel fcula y giriindola suavemente
Durchhang beseitigt ist.                                               en la direcci6n de la ftecha hasta
                               A   On peut aussi bobiner  le        que la flojedad quede eliminada.
 ll   Abwechmlnd den Fitm                   f ilm et prendre quelques vues i
transportierenund                   blanc jusqu'd ce que le compteur     A    Bobine  la petf cula y dispara
Leeraufnahmenmachen,bis das     de vues indique  "1 ".                en blanco hasta que el ndmero
Bildzdhlwerk"l  " anzeigt.          Pendant le bobinage du film,            "1"  aparezca en el contador  de
Der richtige Weitertransport des      s'assurer de son avance en            exposiciones.
Films kann iiberpriift werden,        observant  si le bouton  de             Mientras bobina  la pel fcula,
indem man darauf achtet, ob        rebobinage tourne.                 compruebe  que dsta avance
sich der Filmriickspulknopfdreht                                        apropiadamente  observando
oder nicht.                                                              para ello si gira o no gira el
                                                            mando de rebobinado de la
                                                                                  pel rcula.
View original page 19Page 20 · Read text
www.orphancameras.com

                                                  .               : . r -

                                                                                                                                 e      :s|;a!6Ifa&!@*4'rt{lF6ssi?eTls!i6s.Fsnl4i(.                                                                  i-  rqxcf',:.          . #.     -:-M$'r,.             ,    '
: Taking Pictures
               ..                  ,*ffi|,

 E   Align the "Y" mark with the desiredweather
 symbol.
  1b:       c!$   G Claarsun      Cloudy sun    ,Cloudy

 Use exposure settings within range indicated by
 the foflowing weather symbols.
 rso loo -:1.  cg  G
 rso 2oo -:ii   cg  G
  lso 4oo -p.-            cE  G

 A  When sighting with the camera, oompose
 your subject by framing it within the viewfinder.
View original page 20Page 22 · Read text
www.orphancameras.com


ts    Gently  press the shutter  release button  half-
way.   lf the LED signal lamp does not come on.
press the button   all the way  to effect exposure.
IFocusirrgRangel
You can easily take snap shots with  this camera
because everything from about 1.5 meters and
beyond will be in sharp focus.
                     lEtvTAx


                                l 5 m                  6    .ff
  x N:#,ilt o 5fiigi
View original page 22Page 23 · Read text
www.orphancameras.com


f|   Den Auslciservorsichtig halb   E   Appuyer doucementsur le      g    Presione suavemente  el
durchdri.icken.Wenn die LED-      d6clencheurd mi-course. Si le       bot6n  disparador  del obturador
Signallampenicht aufleuchtet,      timoin  ri diode LED ne s'allume     hasta la mitad.   Si la liimpara de
kann die Aufnahme durch          pas,appuyer sur le d6clencheur     indicaci6n del LED no se
vol lst6ndigesDurchdriicken des             i fond pour r6aliserl'exposition.    enciende, presione
Auslcisersgemacht werden.                                             completamente   el bot6n  para
                                 [Plage de mise au pointl            efectuar la exposici6n,
IAufnahmebereich]              Cet appareil permet une prise de
Schnappschiissesind bei dieser     vuesfacile car tout ce qui se      IGama de enfoquel
Kamerakein Problem,weil alles     trouve au-deldd'l,5 mdtre sera      Usted podrii tomar  ficilmente
in einer Entfernung zwischen1,5    parfaitementau point.                instantdneas con esta cdmara ya
Meter von der Kamera und                                             que todo, desde
unendlichscharf abgebildet                                          aproximadamente  1,5 metros al
wird.                                                                                              inf inito, queda n ftidamente
                                                                            enfocado.


                                                                                                                                                              !r.*     ;:
View original page 23Page 24 · Read text
www.orphancameras.com                           ",.$1t..W&;ffidlYryr*,    Photosraphyffi-l
 When ottempting shots indoors or in cloudy
 weother,lightly press the shutter releosebutton
 holf-woy,   lf the LED signol lomp in the upper
 right corner of the viewfinder comes
 on, then switch to flosh.

 n    $ide the flash on/off switch
 upwardto "ON".


 A    For bust-size portraits, use the flash guide
 symbol  " 2   " by setting  it opposite the mark
  "    |   ": for half-length portraits, use the  ,,  ii   ,,
 symbol setting; for full-length  portraits, use the
  "   iti   " symbol setting.


24


    J
View original page 24Page 25 · Read text
''                www.orphancameras.com
Hlitzaurnahiffif        Photographieau flash     Foiognafiacon flash

Eevor Aufnohmen   in Riiumen        Lors d'une prise du vuesd           Cuondo  trote de tomor  fotogrofios
oder bei Bewdlkung  gemocht           l'intdrieur ou por temps couvert,     en interiores  o con tiempo
werden, den Auslijser zuerst        oppuyer lig|rement sur le            nuboso,  presione  ligeramente   el
vors ich tig hal b d u rc h d ritc ke n.       diclencheur d mi-course. Si le        bot6n  disporodor  del obturodor
llenn  die LED-Signallompe    in       t€moin d diode LED s'ollume         hosto  lo mitod.   Si se enciende  lo
der oberen rechten Ecke des        dons le coin supirieur  droit du       ldmporo  de indicocion   del LED
Suchers oufleuchtet,  ouf  Blitz         viseur, foire oppel ou flash.            situodo  en lo esquino  superior
schalten.                                                                                      izquierdo  del  visor, combie a
                                n   Releverl'interrudteurde         fotogrofio  con  flosh.
n   Den Btitz-Ein/Aus-Schalter     miseenlhors servicedu f lash
nach oben auf "ON"  schieben.      vers"ON".                          n    Destice el interruptor  de
                                                                    encendido/apagado del  f lash
A    Fiir Portrdtaufnahmen  im     A   Pour prendredes portraits,     hacia arriba. hacia la posici6n
PaBbildformat das B I itzleitsymbol     utiliserle symbolede guidede      "oN".
 "  2 " d e r M a r k e "         I                         f l a s h"    I    " e n  l ' a m e n a n t e n
gegeniiberstellen.                 regarddu repdre"     |   "; pour     A   Pararetratosen los que se
Fiir halbformatige                desportraitsd mi-corps.utiliser     incluyael busto, utilice el sfmbolo
Portrdtaufnahmen die                 le symbole"   ii   ": pour des por-   de gufa del f lash "  9,  " y p6ngalo
Symboleinstellung  "    ii    ".  ttit        traitsen pied. utiliserle symbole   en la posici6nopuestaa la marca
Vol lf ormat-Portriitauf nah men           "   iti   ".                                        "     ,   ". Pararetratosde medio
"   iri   " wdhlen.                                                    cuerpo, utilice el sfmbolo "   ii    ,, V
                                                             para retratosde cuerpo entero,
                                                                             utilice el sfmbolo "   iti   ".

                                                                                            xt
View original page 25Page 27 · Read text
www.orphancameras.com


 r  For full-length  shott:  align the  "    |   " mark
with the flash guide symbol  "  ffi  ".
 I   Fiir Vollformataufnahmen:    Das  '-   |   "-
Symbol dem Blitzleitsymbol   " W  " gegeniiberstellen.
r  Pour des portraits  en pled:  faire correspondre  le
repire  "    f   " et le symbole de guide de flash  "  lt   ".
r  Para tomas do cuerpo  entero:  Haga
corresponder la marca  "    |   " con  el simbolo  de guia del
flash "  iii   ".
View original page 27
Page 28 · Read text
www.orphancameras.com

                                                                                                                                                                                                                    l "


 f,l  Before shooting flash, check to see that the
 flash-ready lamp  is on.

 IFla s h Ra n g e l    ( U s i n g P r i n t F i l m)
 rso 100 g          ,llr                    fit
 rso 200 g         It                     fi,t
 rso 400             tl                     fit

a     lf the shutter release button  is pressed before
the flash-ready lamp comes on,  it may result in
no flash or in dark, underexposed flash shots.
o  When not shooting with  flash, be sure to reset
the  f lash onlolt  switch to the "OFF"   position.
o  When taking pictures in the vertical format,
hold the camera with  the  f lash unit  positioned  on
rop.


2A
View original page 28Page 31 · Read text
Rfickspullhdgr Filmt    Rebobinagewww.orphancameras.comdu filn       Rebobinadodo le pslfcuh

                                                                          'Cuando
It/ennolle Aufnohmen des Films      Lorsque  le film  est entiCrement                hoyo expuesto  todo  el
qenochtsind, lii&t sich der Film       exposi,  son bobinoge devient             rollo,  no serd posible  seguir  bobi-
ilcht m ehr wei tertra nsPo rt ieren.      impossible.   Dans ce cos, ne pes      nondo  Io peliculo,  Cuando  ocurro
ln diesemFall nicht versuchen,        forcer,  mois rebobiner   lo pellicule       esto, no bobine  lo peliculo  o la
CenFilm mit Gewalt                 d l'intirieur   de lo cossette.              fuerzo; rebobine  lo peliculo  ex-
weiterzuspulen,sondern ihn in                                             puesto en el interior  de su cojito.
dieCossettez u ril c kspuI en,         E  Appuyer  sur le bouton de
                                  d6blocage pour rebobinage.                      ll  Presione el bot6n de
ll Die Rtictspu lentriegclung                                                  liberaci6n del rebobinado de la
hineindri.icken.                                  f,l  O6ptoyer la manivelle de           pel fcula.
                                   rebobinage et la tourner dans le
f,l Die f ilmriickspulkurbel         sens de la fldche. Continuer d         El  Despliegue la manivela de
aufklappenund in Pfeilrichtung     tourner la manivelle jusqu'd ce       bobinado de la pel (cula en la
drehen.Die Kurbel solange         qu'elle tourne librement sans         direcci6n de la flecha.  Continrie
drehen.bis kein Widerstand         rencontrer de rdsistance. Ouvrir      girando la manivela de rebobinado
mehrzu spiirenist, und sich die      ensuite le couvercle du dos et         hasta que no sienta mds resisten-
Kurbelfrei dreht. Dann die           retirer le f ilm.                          cia y la palanca gire libremente.
Kamerariickwandof fnen und         Faire d6velopper le film  le plus       Luego, abra la tapa posterior de la
denFilm herausnehmen.               t6t possible aprds qu'il a itd         cdmara y saque la pel fcula.
DenFilm dann so schnellwie       compldtement  exposd.             Despuds de sacar la pel rcula
moglichentwickeln lassen.                                            expuesta de la cdmara, ll6vela a
                                                                                revelar tan pronto como sea
                                                                                posible.


                                                                         31
View original page 31Page 32 · Read text
Gamera Gare                                www.orphancameras.com
,k4,.         ,&

  o  When not using the flash unit  for an extended      a  The camera houses a high voltage circuit
  period. test flash  it occasionally to help maintain      which can be a shock hazard.  Thus, when the
  capacitor performance.                            camera malfunctions,  never attempt  to dismantle
   .  When the glass surfaces of the viewfinder  or         the camera on your own.
  the lens are smudged with   f ingerprint stains or
  other marks, promptly  clean them by lightly            Battery Precautions
  wiping them with some lens-cleaningtissue,           o  When not using the camera for an extended
  moistened with lens-cleaningsolution. Remove        period, be sure to remove the batteries.  This will
  dirt and dust from these surfaces with a blower        avoid damage from  battery leakage.
  brush.                                                o   Generally, batteries will perform less
  a   In hot summer months, do not leave the             satisfactorily in cold temperatures. Thus, when
 camera where  it will get too hot  - such as the         shooting in extreme cold, take such measures that
 beach, in the trunk and interior compartments  of        wilf help keep your batteries warm  or carry a
 a car  -  as it can adversely affect film and battery      spare set of batteries with you. One advisable
 performance, and evey possibly damage the          method would be to keep the batteries warm
 camera mechanism  itself .                               inside your pocket.
   .   Give your camera a good cleining  after using             .   Staining of battery terminals with sweat or
   it in the mountains or the seaside. lf neglected,       grease can result in poor electrical contact.  Wipe
  salt air can corrode camera parts; while sand, dirt       the terminals with a dry cloth before putting the
 and other foreign matter can damage the                batteries into service.
 camera's internal mechanism.


 32


                                                                    L
View original page 32Page 33 · Read text
www.orphancameras.com
 I
il

                                                                                            _,rq_:
   fflego der Kamora

        .  Wenn der Blitz ldngereZeit nicht b€nutzt             .-  Die Kameraist mit einer
     wird, gelegentlichTestbtitzedurchfiihren,damit     Hochspannungsschaltungausgestattot,die eine
     die Kondensatorlei3tungerhaltenbleibt.            Stromschlaggefahrdarstellt. Deshalbdie Kamera
        .  Wenn die GlasflSchendes Sucherrund der        im Stcirungsfatlniemalsselbstauseinanderbauen
    Objektivs mit Fingerabdi.ickenoder anderen        und E igenreparaturversucheunterlassen.
    Fleckenverschmiertsind, sie unverzUglichdurch
     leichtesAbwischen mit einem mit Objektiv.          Wichtige Hinweise fiir Batterien
    reinigungskisung angefeuchteten                                   .  Wird die Kamera ltngere Zeit nicht b€nutzt,i$ObjektivreinigungstuchsSubern.Staub und loren    unbedingt die Batterien herausnehmen.Dadurch
   Schmutzmit einer Blasebtirstevon diesenFldchen    wird einer eventuellenBeschddigungdurch    beseitigsn.                                                 Auslaufender Batterienvorgebeugt.
    o  lm Sommer bzw. bei hohen Temperaturendie         .   Bei niedrigenTemperaturennimmt die
   Kameranicht an Stellen liegenlasrn,wo sie zu        Batterieleistungin der Regelab. Beim
   warm werden kann, wie etwa am Strand, im          Fotografierenin extremer K6lte daher die
    Kofferraumodei im HandschuhfacheinesAutos      Batterienwarmhalten oder einen Satz
    usw.,da dadurch Filnn,Batterieund die Kamera     Reservebatterienmitf0hren. Die Batterien kcinnen
    selbstSchadenleiden k<innen.                zum Beispielin einer Manteltaschevor Kiilte
    o  Die Kamera nach Gebrauchin den Bergen         geschiitzt werden.
   oder am Meer gut reinigen. Anderenfallskann       o  GelangtSchweiBoder Fett auf die
    talzhaltigsLuft Korrosion von Kamerateilen        Batterieklemmen,kann dies einen schlechten
   verursachen,wiihrend Sand,Schmutz und andere     elektrischenKontakt zur Folge haben. Die
   Framdkcirperfiir den Innenmechanismusder       Klemmen mit einem trockenen Tuch abwischen,
   Kameraschddlichsein kcinnen.                   bevor die Batterieneingelegtwerden.
View original page 33Page 34 · Read text
www.orphancameras.com

 $oinr t apporar-d l'apnareil

  .   Lorsgue  le flash n'est pas utilisd pendant une              .   L'appareil comporte  un circuit d haute tension
 pdriode prolongde, procdder de temps d autre d       qua peut provoquer une ddcharge 6lectrique; par
 un essai de fonctionnement  pour maintenir  la         consdquent, en cas de dd,faillance, ne pas essayer
 capacitd de son condensateur.                       de d6monter soi-mdme l'appareil.
 o   Si la surface du viseur ou de l,objectif  est
 souil6e par des traces de doigt ou autres taches,        Prtlcautions relatives aux piles
 la nettoyer sans trainer en la frottant  d6licatement     o  Lorsque l'appareil n'est pas utilis6 pendant
 ii l'aide d'un tissu de nettoyage d'objectif  , imbib6     une pdriode prolongde, veiller d en retirer les piles
de liquide de nettoyage adhoc.  Enlever les pous-      pour iviter qu'elles ne suintent.
 sidres        et         saletds               de ces surfaces d l'aide d'un                    r                                                                gdndral,                                                 En                                                                                les performances                                                                                 des piles                                                                                                  baissent         -soufpinceau                          f let.                                                        par                                                      basse                                                                tempdrature;                                                                               par consdquent,                                                                                                               lors                                                                                               d,une
 .   Par temps chaud, ne pas laisser l,apjxreil dans      prise de vues par temps froid, tenir l,appareil et
un endroit trds chaud, comme sur une plage,           les piles au chaud ou prdvoir un jeu de piles de
dans le coffre ou dans une boite d gants d.une         rechange.  ll est conseilld de maintenir les piles au
voiture, etc., car la chaleur pourrait  6tre ndfaste       chaud dans une poche, par exemple.
pour  la pellicule, la batterie ou les performances       o  Des taches de transpiration ou de graisse sur
des m6canismes de l'appareil lui-m€me.                 les bornes des piles provoquent un mauvaiso   Aprds            l'avoir                     utitisd en montagne                                  ou sur                                       une                                                      contact                                                                  dlectrigue;                                                                      avant                                                                        de les                                                                                                        utiliser, f rotter lesptage,       nettoyer              convenablement                                      l.appareil,                                             car                                                     les                                                    bornes des                                                                           piles avec                                                                      un linge                                                                                        sec.
embruns risquent de rouiller certaines pidces et le
sable, la poussidre et autres corps dtrangers
pouvent endommager les m6canismes internes.


34
View original page 34
Page 35 · Read text
www.orphancameras.com
Cuidadosde la cdmara

a  Cuando no vaya a utilizar el flash durante un       o   La cdmara dispone de un circuito de alta
largo perfodo de tiempo, efect0e pruebas con dl       tensi6n que podrfa ser causa de una descarga
de vez en cuando para ayudar a mantener  el              elictrica.  Por lo tanto, no trate nunca de
buen rendimiento  del capacitor.                     desmontar usted mismo  la cdmara cuando ista no
o  Cuando las superf icies de vidrio del visor o del       fu ncione apropiadamente.
obletivo est6n sucias, con manchas de huellas
dactilares u otras marcas, lfmpie estas superf icies      Precauciones con las pilas
rdpidamente pasando de forma delicada un papel            .   Cercifese de quitar  las pilas cuando no vaya
para limpiar obletivos que esti humedecido en         a utilizar la cdmara durante un largo perfodo de
una soluci6n de limpieza apropiada. Elimine el        tiempo.  Esto evitard los daflos que podrfan causar
polvo y la suciedad de estas superf icies con un         sus fugas.
pera sopladora.                                        a  Generalmente, las pilas rendirdn menos
.  Durante los meses calientes del verano, no deje    cuando  las temperaturas sean bajas. Por lo tanto,
la cdmara en lugares donde pueda calentarse          cuando tome fotograf fas bajo un frfo  intenso,
excesivamente como por ejemplo, en la playa o       tome  las medidas necesarias para mantener
en el portaequipajes y compartimientos interiores     calientes las pilas, o lieve consigo un juego de
de un vehfculo.  Esto podrfa afectar negativa-           pilas de repuesto. Un mdtodo recomendable para
mente el rendimiento  de las pilas y de la pel fcula,     mantener calientes las pilas consiste en guardarlas
e incluso podrfa dafiar el propio mecanismo de       en el interior de sus bolsillos.
la cdmara.                                            a   Si se manchan los terminales de las pilas con
r  Limpie bien su cdmara antes de utilizarla en        sudor o grasa, los contactos elictricos de dstas no
las montaflas o en la costa. De no seguirse este        serian apropiados.  En este caso, limpie los
consejo, el aire salobre podrfa corroer partes de        terminales con un pafio seco antes de poner en
la cdmara y la suciedad y otras materias extrafias       servicio las pilas.
podrfan dafiar el mecanismo  interior.
                                                                            35
View original page 35From the M. Butkus archive. Original publisher and archive notices are retained.
Check the model and edition against your equipment.
PDF verified 2026-10-10.