Film cameras
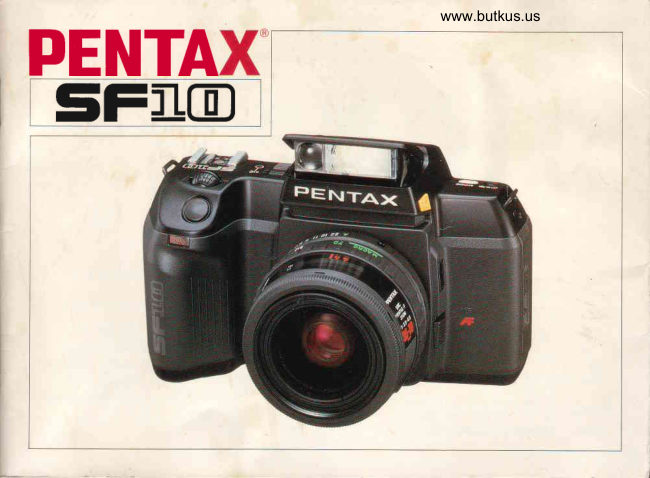
Pentax SF-10 User manual
User manual for Pentax SF-10. 68 pages in English. Read the original PDF, download or print a copy without registration.
68 pagesEnglish6.9 MB PDF
Loading your manual…Open PDF directly
Document details
- Brand
- Pentax
- Model / document
- Pentax SF-10
- Document type
- User manual
- Language
- English
- Pages
- 68
- File size
- 6.9 MB
- Category
- Film cameras
- Document date
- Not specified in catalog
Search available document text
Find a term, then jump to its page in the original PDF. Image-only pages may not be searchable; check the PDF for exact wording and diagrams.
Page 3 · Read text
Welcometo the fantastic world of Pentaxautofocus                                         CommerciaI ly available lensesand accessories
SLR photograPhY!                                              produced by other manufacturersare not
This camerais a high-precision35mm SLR camera                                       made to our precisespecificationsand there-incorporatingsuch advancedtechnologicalfeatures                                                        fore, may causediff icultieswith  -  or actualas auto focusing,auto exposure,auto film windingi
rewindingand a built-in RetractableTTL-Auto      damageto - your Pentax camera.We do not
Flash(RTF). Pleaseread this operatingmanual      assumeany responsibilityor liabilityfor
carefully for a full explanationof the camera's         diff icultiesresultingfrom the use of lenses
functions and operationsbefore you start           and accessoriesmade by other manufacturers.
usingit.


The namesof the camera'sworkingpartsare listed
in the nomenclaturesectionson the front and back
flapsof this manual,so pleasekeepthe flaps
unfoldedfor quick referencewhileyou read
this manual.
We sincerelyhopeyou will enjoytakingmemorable,
high-qualitypictureswith this remarkablecamera
for manyyearsto come.
View original page 3
Page 8 · Read text
1. FASTENINGCAMERASTRAP                           www.butkus.us


Fasten the camera strap as illustrated.  lt is recommended
to adjust the length of the strap so that the camera is
positioned above your waist to prevent the camera from
swingingwhile you walk.
View original page 8
Page 9 · Read text
1. Pull the batt. cover releaselever in the direction                2.' Position the battery with its metal contact facing
   indicated by  [ > J to open the battery-chamber cover.        down, then close the back cover by reversingstep 1.


Note: This camera operates on a battery, so be sure to
        "2CR5"                    or the sametype lithium battery asinsert one
designatedbefore you start operating it.

o 4
View original page 9Page 10 · Read text
www.butkus.us


                    I


3. Set the main switch to  [.rt)] and conf irm that the           Note: Warning for low battery level
   auto-exposuremark IAUTO] appearsin the LCD        When the battery level becomes low, the low battery
   panel.                                                warning  t .a     I comes on, and the battery should be
                                                   changedas soon as possible.The shutter will lock up
                                                               shortly after the  t s       I starts blinking.


Note: Even if the battery is insertedupside-down,
the indicationsappear in the LCD panel, but the
shutter cannot be released.

                                                                                                            5 o
View original page 10Page 11 · Read text
3. MOUNTTNGLENS


1. Remove the body-mount cap Q and the rear lens              2.  Align the red mount  indexes of the camera and the
   cap  o.                                                                  lens, place the lens onto the camera's lens mount,
                                                                   then tur n the lens clockwise until  it locks with a click.


  The body-mount cap is designedto protect the camera
   from scratchesand dust when it is shipped from the
   factory. For storing purposes,use the optional Body
   Mount Cap K.

o 6
View original page 11Page 12 · Read text
www.butkus.us


3. Remove the front lens cap by pressing in the tabs on       X  To disengagethe lens,turn the lens counterclockwise
   both sides.                                                  while depressingthe lens-lockreleaselever.


                                                          Note:
                                                Do not damage or stain the lens information contacts
                                                                   or the AF coupler on the mount surfacesof the camera
                                                     and the lens. lf this occurs, wipe them gently with a clean
                                                             dry cloth.

                                                                                                            7 o
View original page 12Page 13 · Read text
4. LOADING FILM


                              Film cartridge                              =---


                                0 o o 0 o o o O o r  l o  i                             I


                                      0 0 0 0      Film speed                  _l
      (lSO rating)                DX-information panel

1. Use DX-coded film with an ISO speed between 25           2. Push down the back-cover releaselever to operi
   and 5OOO.                                                    the back cover.
                                                             3. Hold the film cartridge with its protruding side down
                                                       and slide the upper end in first.


o The camera automatically setsthe ISO film speedfor
DX-coded film,
o Non-DX-codedf ilm is automatically set at ISO 100.

o 8
View original page 13Page 14 · Read text
www.butkus.us


                                                                              0 0 0 0 0    0 0 n 0 0
                                    =
                                          J
                                                    ar o o D o q                                                                                                   IIIIT      o 0 0 0 0     o o o o o o o r
                                                                               o o o o o o o


4. While holding the cartridge with your left hand, pull         5. Position the film leaderend at the film loading mark
   the film leaderout.                             O  , as illustrated.
                                                  Make sure the film perforations engagethe sprocket
                                                                 teeth O  properly. Also make sure the film is placed
                                                               properly between the film guide rails O  .


Note:
o The shutter curtainsare made of a thin, delicatematerial
to maintain extreme precision.Be careful not to touch
them with your hand or the film end during film loading.
o The DX-information pins are contacts to read the film's
ISO speed, so keep them free of dirt, dust and scratches.

                                                                                                            $ o
View original page 14Page 16 · Read text
5i                                                  www.butkus.us

1


                   1;"gp1axil\:=r='--


The ssft case is available as an option, and consists of         The front cover is availablein three sizes:S (Standard),
a front cover and a back cover.                    M (Medium) and L (Large). For the lensesthat can be
1. Open up the front cover, and place the camera in           contained in each front cover, reter to the table.
   the back cover.
2. Securethe camera in the back cover by tightening             Front cover                 Lenses
   the f itting screw at the bottom with a coin.                   S     50mm f 11.4,Zoom 35-70mm  or any
                                                                           other similar-sizedlens
                                            M     Zoom 28-B0mm, Zoom 35-105mm
                                                                                  or any other similar-sizedlens
                                                                 L      Macro 1Oomm, Zoom 70-210mm  or
                                                                   any other similar-sizedlens


                                             Now you have completed preshooting preparations.

                                                                                                           1 1 ' .
View original page 16Page 18 · Read text
2. OPERATINGwww.butkus.usSHUTTER-RELEASEBUTTON


toNl          [.tll] : Signalscorrect focusing and self-timer      1 . Set the main switch at  [.tl)] . While the shutter release
                 operation with PCV tone.                       button is presseddown lightly, information such as
                      I  I I : CancelsPCVsignals.                        exposure settings is displayed in the viewfinder. Then,
                                                    when the shutter releasebdtton  is pressedall the way
[ O F F ]          I O ] : Be sure to set the main switch at this           down, the shutter is released.
                  position when the camera is not in use.                 lf you remove your finger, the viewfinder display will
                                                         go off after approximately 5 seconds.


                                                                                                           1 3 0
View original page 18Page 21 · Read text
4. SELECTINGSINGLE FILM ADVANCE MODE        5. SELECTINGFOCUSMODE


Turn the select dial O while pressingdown the drive           Set the focus-mode switch to the auto-focus position
button O until the mark Ir    ] appearsin the LCD             indicated by a red I lF]  mark.
panel.
                                                                         lapl   :  The camera automatically sets the correct focus
I  r    ] SinSle film-advance mode:                                   by adjusting the lens.
     You can take a single picture every time the            [MF) :  Focusing is manually adjusted by turning the
       shutter releasebutton  is pressed.                              focusing ring (seepage 4O).
I r:r  ] Consecutive film-advance mode:
     You can keep taking pictures consecutively as long
      as the shutter releasebutton  is held down.
t O l   s e t t - t i m e r m o d e :
     A self-timer is activated when the shutter release
      button is pressedand a picture is taken automati-
       cally after approximately 12 seconds.            r3     @'c3

o 1 6
View original page 21Page 22 · Read text
www.butkus.us  l''':


It is important to hold the camerafirmly and properly.
o When taking a picture, hold your breath and pressdown
the shutter releasebutton gently with your fingertip.
(Pressingdown the shutter releasebutton forcefully can
causecamera shake.)
o Stabilize your body and camera by using some object,            rusuch as a tree, building or table.
o When photographingwith a slow shutter speed or
a super telephoto lens, it is recommended to use a tripod
and an optional Cable Switch F.
o Especiallywhen using a super telephoto lens with
a tripod, use of a tripod heavier than the total weight of
camera and lens is an effective meansto minimize camera
shake.


                                                                                                           1 7 .
View original page 22Page 24 · Read text
www.butkus.us


3. The shutter is releasedby pressingthe shutter release     X The figure indicated in  I EX,]  is the exposure number.
   button all the way down.                                                              It increasesby one each time the shutter is released.
View original page 24
Page 25 · Read text
When you wish to position the subject away f rom the            1.   lf you take a picture with the auto-focusframe
auto-focusframe [c l]  for your image composition, use           positioned away from the subject,the focus is
the following proceduresto lock the focus.                       automatically set on the background (seephotograph).
                                                                     2. Aim the auto-focusframe at the subiect, pressthe
                                                                 shutter releasebutton lightfy and keep the green
                                                               in-focussignalon by holding it at that position.
                                                                            (Tfris makes the camera mem orize the correct focus.)
                                                                     3. Move the camera back to the original composition
                                                               while holding the shutter releasebutton at the same
                                                                    position, then pressit all the way down to take
                                                             a picture.
o As long as you hold the shutter releasebutton half-
way down and the green in-focus signal is on, the focus
remains locked. When you remove your f inger, it is
unlocked. This procedure can be repeatedany number
of times.

o20
View original page 25Page 26 · Read text
www.butkus.us


When the zoom ring is rotated, an image becomes larger
or smaller,so you can find the image size you like best.
*  Smaller figures on the zoom ring indicate wide-angle
   settings to cover more image area while larger f igures
   are telephoto settings to take larger imagesof distant
   subiects.
View original page 26
Page 27 · Read text
1O; if  l(l,NG,A.FICT,URE


                                                          tr:Tl               Fr--Tl

        Pressthe shutter-releasebutton gently to releasethe
         shutter. The film is automatically transported to the next
                 f rame.


        o 2 2
L
View original page 27Page 29 · Read text
$N


2. Remove your finger from the shutter releasebutton.          3.  Pressthe shutter releasebutton  all the way down to
   Push the yellow flash pop-up switch  [f  J to expose           take a picture.
   the RTF above the pentaprism.
   The RTF starts chargingautomatically. When charging
    is completed, the flash mark  t g       I comes on in the
  LCD panel and also the flash mark in the viewf inder
       I  I  ]  ligl"ltsup when the shutter releasebutton  is
   pressedlightly. (The flash recycle time is approxi-
   mately 4 seconds.)
                                                          Note:
                                                           o When shooting is finished, be sure to put the RTF back
                                                                    into the original storageposition.
                                                          o While the RTF is in the pop-up position, a small amount
                                                                       of electric current is constantly supplied to recharge it. So,
                                                 when not in use, be sure to keep it in the storage position
                                                                         to save the battery.

                                                                                             25o
View original page 29Page 30 · Read text
www.butkus.us


o Effective  flash range in Programmed  Auto  Flash mode         Operatio nal precautions
                                                                    1. While the RTF is being charged,keep your f inger off
                                             ','Eff'bdive                                             ,range           the shutter releasebutton.
                                    f |"t.4 -  2.8       0.9m - 4.3mm          2. RTF flash warning
                       tl4              0.7m - 3m           When using the lenseslisted below, the camera'ssafety
                                f 15.6             0 . 7 m -  2 . 1 m           mechanismwarns againstuse of the RTF; f lash marks
                                                                              in the LCD panel t A    J and viewf inder [   ,  J begin to
                                                                     blink when the shutter releasebutton is lightly pressedNote: The effective flash range (from the f ilm plane to
                                                                         at the completion of ff ash charge. In this case,even ifthe subject) differs dependingon the maximum aperture                                                                the shutter releasebutton is pressed,the RTF will not(tne smallestf-number) of the lens in use.
                                                            dischargeand the camera is automatically switched to
                                                                the normal shooting mode.
[Technical Tip] How to determine the maximum aperture
                       "SMClf the marking on your lens reads    PENTAX-F              o Lenseswith a focal length of lessthan 35mm.
ZOOM 1:4-5.6  35-105,"  for example, it has                   o Lenseswith a focal length of over 21Omm.
a maximum aperture of  f 14 at the focal length of 35mm           o Macro lenses.
and f/5.6 at 105mm.
                                                     The purpose of this warning is to prevent vignetting
                                                                        at four cornersof a picture due to lack of illumination
                                                                     or semicircularvignetting at the bottom of a picture
                                                      due to the lens blocking the illumination path of
                                                                the RTF. Since this mechanism is activated only in
                                                          combination with F-serieslenses(lenseswith the
                                                        marking of SMC PENTAX-F), no warning appearsin
                                                            combination with other lenses,so care is advised
                                                   when using lensesother than F-serieslenses.


o26
View original page 30Page 31 · Read text
3. When taking a photograph with both close and
    distant subiects in the same frame, selecting
   an aperture for the distant subject may cause
   overexposureof the closer subject (washed-out
   appearance)due to excessiveillumination.
4. Do not use a lens hood. The RTF's dischargemay be
   cut off . This may also happen in the photography
   within the distanceof 1 m when a 35mm wide-angle
   lens is mounted.
5. To prevent "red-eye ettect";
               "red-eye                           effect" is a phenomenon in   The so-called
   which the flash illumination reflectsoff the retina
   becausethe pupil opens up in darkness.lt is
   impossibleto prevent it but it can be minimized by
    lighting up the location (to closedown the subject's
   pupils) or, in caseof a zoom lens,by moving
   closer to the subject using a wide-anglesetting.
6 .  In the daylight f lash-syncphotography,over
   exposuremay occur when a subject'senvironment
    is too bright.


                                                                                                           2 7 o
View original page 31Page 32 · Read text
www.butkus.us


l2l  Using a manual aporturo setting:
    (Pleaseread this section after you finish reading                      lf the subject distance is known beforehand, calculate
      "OPERATION OF MAJOR FUNCTIONS"              the aperture based on that distance.    the
    section.)                                                      o (G.N.)  +  (distance)  -- (aperture)
   When you wish to increasethe depth of  f ield, you can        *     lf the aperture calculated by this formula does not
    manually select a desired aperture. In order to select          correspond to any f-number found on the aperture
    an aperture manually, the camera must be set in                ring (for example, the aperture "3," which is between
    the Aperture-Priority.AE mode (seepage 38) or                  "4" and "2.8" ), set the aperture to the smaller
    the Metered Manual mode (seepage 40).                   f-num ber ( "2.8"1 .
                                                  The RTF's guide number (G.N.) variesaccordingto
Flash recommendation signals                                the ISO speedof the f ilm in use, as indicated in
                                                             the chart below.  '..i..i'.i'..l...,.i..'....,.'.i.'i...i..i...'.'....'i.'.i.ii'...'.'.li'.'i'i'.'..ii.'i.'i.iii'i..i..'i.'i.u.iii'i..'i.i..i
  Apertu re-Priority A E       o          o
                                                      SO 25          G . N . 6  Metered Manual          X          o
                                                           so 50         G . N . 8 . 5
                                                         so 100        G . N . 1 2
To calculate the effective RTF range with the selected                     so 200        G . N. 1 7
aperture,the following formula can be used:
                                                           so 400           G.N. 24 o Maximum distance:   (G.N. ) + (aperture)
 o Minimum distance:   (Maximum distance) + 5
    (This formula cannot be used for a subiect closer than                                                  To use the RTF at aperturef 14 with ISO 100 f ilm:
    0.7 meters.)                                                              1 . Set t-hef ens apertu re ring to  f 14.
                                                                          2.  Calculate an effective flash range.
                                                            12 (G.N,) + 4 (aperture) = 3m (maximum
                                                                     distance)
                                                                   3 m ( d i s t a n c e ) + 5 = 0 . 6 m ( m i n i m u m
                                                                   distance +  0.7 (actual minimum distance)
 . 2 8
View original page 32From the M. Butkus archive. Original publisher and archive notices are retained.
Check the model and edition against your equipment.
PDF verified 2026-10-10.