Film cameras
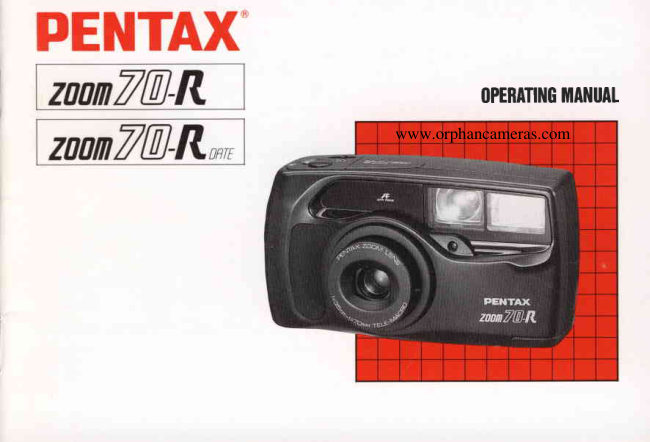
Pentax Zoom 70-R / Zoom 70-R date User manual
User manual for Pentax Zoom 70-R / Zoom 70-R date. 44 pages in English. Read the original PDF, download or print a copy without registration.
44 pagesEnglish5.4 MB PDF
Loading your manual…Open PDF directly
Document details
- Brand
- Pentax
- Model / document
- Pentax Zoom 70-R / Zoom 70-R date
- Document type
- User manual
- Language
- English
- Pages
- 44
- File size
- 5.4 MB
- Category
- Film cameras
- Document date
- Not specified in catalog
Search available document text
Find a term, then jump to its page in the original PDF. Image-only pages may not be searchable; check the PDF for exact wording and diagrams.
Page 3 · Read text
Welcome to the world of Pentax zoom compact        lcon indicatorsused in this manual:
photography!Your compact, lightweight camera is a
great companionto preserveyour favorite memories.    Operation direction                <-
Its built-in35 - 70 mm zoom lens gives you the
freedom to frame everythingfrom breathtaking                                              Lamp glowing                             -,-,1.7
landscapesto family portraits,even detailed close-
ups. Built-inauto flash helps you capture a subject
in a dimly-litnight or an indoorscene with clarity,     Lamp flickering                             .':'.
and functionsas a fill-in flash for daylightflash-sync                                                                                                     t o (  I  )
photography.Since most of the operations -  in-          Correct
culdingfilm speed setting,winding/rewinding,                   ofocus and exposure control -  are automatic, you
can take great pictures with little effort. The DATE       lncorrect                           X
model makes it easy to rememberwhen you take
pictures.
Please read this manual carefully before operating
the camera to learn how to take consistentlv
flawless oictures.

Names of the camera's working parts are listed on
the front and back flaos of this manual.Keeo the
flaps unfoldedfor quick referencewhile you read.                                                       |eS its
                                                                                                               lomati-
                                                               m
View original page 3Page 4 · Read text
] SUTLINE OF #ASIC                     e,ffiffi#,ffiBEs
tr                zl              EI


                                                                                          ,
                                                                                          I r x


Open the back cover        Load the film and close the  The film automatically       Set the main switch to (  l )
(see page 8).                back cover.                 advances  to the  first frame.   (see page 4).
                                  B


Frame your subject and     Focus your subject         Press the shutter release   When the film reaches  its
operate the zooming  lever    (see page 12).              button.!n dark conditions.   end. the camera automati-
to determine the composi-                                the flash fires automaticallv. cally rewinds the film
tion (see page 6).                                                                       (see page 16).
View original page 4Page 6 · Read text
oShield the camera from salty air and.water at the beach, splashing liquid of any kind,
  and rain. lf immersed in water, the camera will be rendered inoperable.
o lf the camera  is exposed to dlrt, mud, sand, dust, moisture, toxic gas or salt water, the
  camera may be damaged or rendered inoperable.
o Avoid leaving the camera for extended periods where temperature and humidity are
  high, such as in a car.
o Never use solvents such as paint thinner, alcohol or benzine to clean the camera.
o Be careful not to drop or otherwise subject the camera to strong vibrations, shock or
  pressure.
o Do not appty force to the zoom lens; do not place the camera with the lens facing down.
o The electric circuitry inside the camera contains high voltage working parts. Never
  attempt to disassemble the camera.
o Keep the batteries out of the reach of chitdren
o Do not mix battery brands, types or old battery with new one. Otherwise overheating or
  fire might result.
o The misuse of batteries causes hazards such as leakage, heating, explosions, etc.
  Batteries should be inserted with the "*"  or ..-,, sides facing correcfly.
o To prevent explosion, never try to break up or rechage the batteries, or throw exhausted
 ones into fire.
                                            e
View original page 6Page 8 · Read text
PREPARATIONS


Strap
Fit the strap on the camera as illustrated.
On the DATE model, use the clamp's protrusionto press
the SELECTand ADJUST buttons.
Note:
oAdjust the strap so that the camera is positioned
  above your waist to minimize camera sway when
  you walk.

Soft case (optional)
When putting the camera into the soft case, be sure to
turn the main switch off (O).
                                          @
View original page 8Page 9 · Read text
Main switch                                                   Baftery check
  On ( I ): The power is on, and the camera is ready for       After you turn the main switch on ( I ), the lens slightly
            setting and shooting.                           extends and the lens protector opens. Then you can
   Off (O): The power is off, and the camera is not in use.     shoot.
  When the camera is left unused for more than 3 minutes
   with the main switch on ( I ), the lens automatically        Notes:
   returnsto the 35 mm (wide-angle)position.               a lf you have a DATE model, do not remove the
   Caution:                                                      batteries until they are exhausted,since they are
   The lens protector automaticallyopens when the main       used to keep constant track of time for the date
   switch is on ( | ), and closes when the main switch is         function.
    off (O). Never attempt to open the lens protector by                 . Refer to page 33 for directions on battery insertion.
   hand.
@
View original page 9Page 10 · Read text
&i1
  HOW TO


When shooting, hold the camera securely with both        Caution:
hands. Keep the camera as still as possible, and gently    Do not holdthe zoomlens becauseit movesback and
press the shutter release button. (lf pressed forcefully,       forthwhenzooming.
the camera is likely to shake, and the picture will be
bluned.)Try to brace your elbows against your body, or     Note:
support yourself and the camera against a stable,         o Do not placeyourfingersor hairon the lens,
stationary object, such as a wall.                        autofocuswindow,sensorwindow,flash,etc.

When using flash with the camera vertically positioned,
hold the camera so that the flash is above the lens.


                                          @
View original page 10Page 11 · Read text
Step Zoom and Continuous Zoom
When you press the zooming lever lightly,the lens zooms to and
stops at an adjacent step among 5 successive zoom settings: 35,
42, 50,60 and 70mm. This is the Step Zoom function. When you
press the lever further,the. lens zooms quickly and continuouslyto
any desired zoom setting from 35mm - 70mm, until you release
the lever. This is the ContinuousZoom function.

Note:
aTo stop at a next step using Step Zoom, return the zooming
  lever to the center position, then press it lightly again.
View original page 11
Page 12 · Read text
1 1 .

  BAS'G                           DX FILM
                                       fr


                                                         Film speed (lSO rating)

After reading this instruction manual to familiarizeyoursdf   Automatic  film speed setting
with operations,you're ready to insert the film.              This camera is designed to use DX-coded films with
                                               ISO ratings from 50 to 1600. When such film is loaded,
Notes:                                                                     its film speed is automatically set in the camera.
o When buying DX film, make sure the package bears the
  "DX" mark.                                     aThe shutter may continue to release for a frame or
a Non-DX film cannot be used.                           two after the number of exposures indicated on the
 . Use high-speedfilm with an ISO rating of 1000 or 't60O      film canister has been shot, but the last frame may
  mainly for shooting indoors or in dimly-lit conditions.        not be developed.


                                          @
View original page 12Page 13 · Read text
Fi.
                 +i!.     ila,&.ilrni;:i,:2. FILM;,,.. LOADING                  ;il;iill'*


      Il  SliOethe back cover release lever in the direction of    B  putt the film leader out far enough from the carlridge
      the arrow as illustratedto open the back cover.              to reach the take-up spool (D. Aligh the tip with the
                                                                       film leaderend mark O.
   El ptace the film cartridge in the film chamber, fitting its
        flat side on the top of the rewind shaft.                 Notes:
                                                       a Make sure the film perforationsproperly engage the
                                                            sprocket teeth G).
                                                       a Make sure the film is properly placed between the
                                                         guide rails @.


@
View original page 13Page 14 · Read text
Slack
      X
    o
rMake  sure the film is taut as illustrated.Take up any     4  Ctose the back cover. The film automatically
  slack in the film by pusing it back into the cartridge.       advances to the first frame.
.lf  the end of the film leader is extremely bent,           When "f " appears in the exposure conter on the LCD
  straighten it or cut off the bent portion.                    panel,the film automaticallystops winding.The
                                                                indication as shown above appears.

                                                      Notes:
                                                                       olf "i" does not appearon the LCD panel,the film is not
                                                           properly loaded. Reload the film.
                                                   o After the shutter is releasedfor each exposure,the film
                                                           automaticallyadvances to the next frame.
                                              o
View original page 14Page 16 · Read text
When you press the shutter release button half-way, the    When the LCD panel is as shown above, the camera is
lamps O and/or €) as shown above glow or flicker.           in the Auto and Single-FlameShooting modes. These
                                             modes are used for ordinary picture-takingsituations.
(D Green lamp: When it glows, you can take a picture.    The flash fires automaticallyin dimly lit places.
  When it flickers,you cannot.
O Red lamp:When  it glows, flash is ready to fire.         Note:
  When it flickers, flash is being charged.             aWhen the power is switched on, the Auto and Single-
                                                Frame modes are automaticallyengaged.
Nete:
 alf the green lamp flickers, the subject is too close.
  Adjust the camera-to-subiectdistance so that the
  green lamp glows, then release the shutter.
                                          @
View original page 16Page 17 · Read text
pl Press the shutter release button half-way with your
                                                             subject in focus, and the green lamp glows.
                                                                                                                  lf the'subject is closer than one meter (3.3 ft), the
  E  After zooming and composing your shot, position the       green lamp flickers and the shutter cannot be
      autofocus frame (C)  on the subject.                      released. In this case, lengthen the camera-to-subject
                                                                distance.

                                                          Note:
                                                                                                       .lf  you wish to shift subject focus, release your finger
                                                          from the shutter release button and press the shutter
                                                             release button half-way again.

@
View original page 17Page 20 · Read text
Ha rd-to-autofocus  subjects
                                                           Like many other autofocus cameras, this camera's
                                                        autofocus system is highly precise,but is not almighty,
                                                     so it may not focus as you wish on certain subjects.
                                                                  In such cases, use the focus-lock technique on a
                                                           subject which is both near the actual one and
                                                            equidistantfrom the lens.
                                                        Subjects which are hard to autofocus include:
                                                                1. Black objects like hair, which don't reflect much
                                                                           light (and therefore don't reflect infrared autofocus
                                                      beams).
E Wnite pressing the shutter release button half-way,          2. Wire netting, latticework, iron exercise-bars,etc.
                                                                3. Flickeringlight sourcessuch as neon signs,   re-aim the camera or recomposethe picture, then
                                                              fluorescent lamps, TV images, sunlight coming   release the shutter.
                                                         through trees, etc., and subjects illuminated by
Notes:                                                    these light sources.
o You can cancel focus lock simply by taking your            4. Glossy and reflective surfaces like glass, mirrors,
                                                             car bodies, etc.  finger off the shutter release button.
oWhen in the Consecutive Shooting mode (EJJ),focus        5. Fast-movingobjects, like trains in motion.                                                                    6. Water jets, water surface, smoke, frame, fireworks,  lock cannot be used.
                                                                        etc., which are formless.


                                          @
View original page 20Page 22 · Read text
Rewinding the film in midroll
lf you wish to unload the film before exposing all the
frames, push the auxiliary rewind button with the
protrusion of the strap's clamp; film rewinding starts.
When rewinding is completed,the motor stops, and
1${}; flict<ers.

Caution:
Never open the back cover until rewinding is completed.
View original page 22Page 23 · Read text
OPERATIONT..OF
  wAJOn


           orro,                            Notes:                                  i 0
                     v                .Whenpicturetheareaautofocusin macroframeor close-range(3)   is off-centerphotography,of the
                                                       use the techniques described in "Focus-lock shooting"
   This shooting mode is used to take close-up pictures.       on p. 14.
  When the macro symbol (O) appearson the LCD panel,    o When the subject is closer than 60 cm, the green
   you can take macro pictures. When shooting a subject       lamp flickers. When the subject is even closer, at less
   about 0.6 meters (2 ft) away, compose the shot within        than 30 cm (1 ft), the green lamp lights up.
   the oarallax-correctionframe.

@
View original page 23Page 25 · Read text
To select various exposure modes, press the MODE button 0
                                   Slow-Shutter speed     Backlight
        Auto       Daylight-Synchro    (Flash OFF)     Compensation


                                   Daylight-Synchro
                                 (Red-eye reduction
                                        flash mode)

  oPressing the red-eye reductionflash button(+lO    in the Auto or Daylight-Syncmode alternatesthe normalmode
    (indicated by black line) with the red-eye reduction flash mode (indicated by red line).
                            oFor normal use, setthe Auto and Single-Framemodes as shown at left.
  vtoDE(-)                aWhen the main switch is turned on, the Auto and Single-Framemodes are auto-
                                  matically engaged. @o1l        ""r  ,;
    C)          w                                                     Consecutive
Single-Frame Shooting  Self-Timer                        Shooting       Multi- Exposure   To select the desired shooting
                                                                    mode, press the drive mode
                                                                                    button O.
View original page 25Page 26 · Read text
l:ilillti#i+*$$.+,-ffitr#ffi*iftlixt*1il:illililliliil
                                  iilii#iiitfiffifiiiililt+ifiitx#ifiiitEiti$iil:i1;il*;;ffil$Eilfiiilii,iiliiii                                         ffiffi"Hii#,$H#"i.$#ffii#i#,i"fd$+;#i#ilFjf$g#gilffiH#if

 o In the Slow Shutter speed                               o In the Bulb mode,  if the
  mode. if the red-eye reduc-                                red-eye  reduction  flash
   tion flash button t f 1 O  is               Slow-Shutter     button  | +lO     is pressed,              Bulb
  pressed,the desired mode              sPeed             the desired flash mode  is
   is set as shown on the                                         set as shown on the  right.
   right.

                                         Slow-Speed                                                                                                     Bulb-Synchro                                          Synchro


                                         Slow-Speed                                            Bulb-Synchro
                                        Sync                                                    (Red-eye
                                           (Red-eye                                                      reduction flash
                                                reduction flash                                        mode)
                                        mode)
 oln the Slow Shutter speed, Slow speed sync, Bulb or Bulb-synchro mode, if the mode button (D is pressed, the
  mode changes as in the normal mode.
 aln the Slow Speed Sync and red-eye reduction flash modes or Bulb-synchro and red-eye reduction flash modes,
    if the mode button 0  is pressed,the mode changes as in the red-eye reduction flash mode.
Red-eye Reduction Flash Mode
With the Red-eye reduction flash mode, the flash fires two consecutive times. The first flash fires iust before the
shutter is released (low-power output) which causes the irises of the eye to close down (contract).Then the second
flash fires (normalflash output),which reduces the possibilities of the red-eye effect significantly.

                                          @
View original page 26Page 27 · Read text
With Daylight-Sync


                                                                 In portrait photography,the subject is often darkened in
                                                        the picture because the exposureis automaticallyset
                                                                  for a bright background.This happenswhen the subject
                                                                        is backlit, when there is a window behind the subjectl
                                                            or when the subject is shadowed by trees, etc. In
                                                 such cases, use the Daylight-SynchroShootingmode
Without Daylight-Sync                                     within the appropriateflash-effective range so that the
                                                        subject and backgroundare shot in beautifullybalanced
                                                            lighting.


                                                                 Note:
                                                            o Make sure you're within the flash-effective distance
                                                             range and that the flash (red) lamp glows before
                                                                  shooting.
View original page 27Page 28 · Read text
Slow Shutter Speed                            Slow-SpeedSynchro
  @                  (FlashOFD                                      Shooting


 In this mode, the flash does not fire, and a picture is
taken at a slower shutter speed. Use this in situations
when flash photographyis prohibited,such as in
theaters,museums,etc. Furthermore,this mode is also
useful when you wish to take a soft-lighted picture with
natural atmosphere.


Notes:
owhen shooting in darkness,another indicatorhelps
  avoid underexposure.press the shutter release button         lf the red-eye reduction flash button ( t  ) is pressed in
  half-way;the Flash-Onmode mark ( t  ) on the LCD      the Slow Shutter Speed mode, the Slow-Speed Sync
  panel flickers to recommenduse of the flash.             flash mode is set. lt's possible to expose both subject
oWhen shooting in darkness,the shutter speed gets      and background in a balanced way as shown in the
  slower,and camera shake is more likely to blur your      photo.
  shot, so use a tripod.
                                          @
View original page 28Page 32 · Read text
a1


Notes on Self-Timer and Dual-Frame Self-Timer:                                           In this mode, keep
oTo cancel the self-timer after it has been started.      O                    pressing the shutter  press the drive button.                                                             release button foroWhen used in combinationwith the Bulb ( B ), Bulb-   O+                   consecutive shooting.
  Sync (  I B  ) or Bulb-Sync with Red-eye reduction      VE@                  Moving subjects such
  flash mode ( t B O   ), the shutter stays open for                                   as a running person,etc.,
  about 1/2 seconds.                                                          can be shot.
.When using flash with the Self-Timer or Dual-Frame
  Self-Timer mode, make sure the flash is charged (the     aThe camera frcuses on the subject frame by frame in
  red lamp glows) before operating either timer feature.         this mode, so make sure to keep the autofocus frame
 When the battery mark ( [-J  )appears on the LCD        (C)  on the subject.
  panel, the camera may not operate. Replace the        oWhen using the flash in this mode, consecutive
  batteries (see page 33).                                  shooting is possible only after the flash is charged
                                                               (the red lamp glows) following each exposure.


                                          @
View original page 32From the M. Butkus archive. Original publisher and archive notices are retained.
Check the model and edition against your equipment.
PDF verified 2026-10-10.