Film cameras
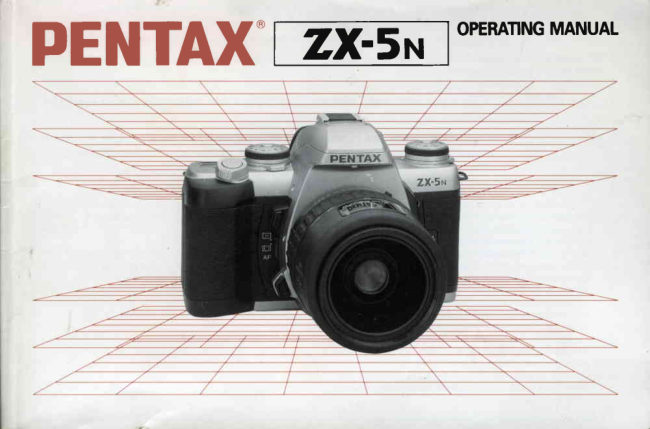
Pentax ZX-5n User manual
User manual for Pentax ZX-5n. 96 pages in English. Read the original PDF, download or print a copy without registration.
96 pagesEnglish6.7 MB PDF
Loading your manual…Open PDF directly
Document details
- Brand
- Pentax
- Model / document
- Pentax ZX-5n
- Document type
- User manual
- Language
- English
- Pages
- 96
- File size
- 6.7 MB
- Category
- Film cameras
- Document date
- Not specified in catalog
Search available document text
Find a term, then jump to its page in the original PDF. Image-only pages may not be searchable; check the PDF for exact wording and diagrams.
Page 3 · Read text
FOR SAFE USE OF YOURCAMERA

Although we have carefully designed this camera for safe operation, please be sure to follow  precautions
given on this page.

 A  WARNING This mark indicates precautions that, if not followed, could result in
                serious injury to the operator.
 A  CAUTION This mark indicates precautionsthat, if not followed, could result in
             minoror mediuminjuryto the operatoror damageto the equipment.

 A wARNTNG                   A  cnuroru
. The electronic circuits inside the camera contain     o Do not use the flash near anyone's eyes, as  it may
  high voltage working parts. Never attempt to disas-       hurt them. Be particularly careful with  the  flash
  semble the camera yourself.                          around infants.
.  Never touch internal parts of the camera if they be-     o Never try to disassemble, short or recharge the bat-
  come exposed from dropping the camera or  for        tery. Also, do not dispose of the battery in fire, as it
  some other reason, as there is danger of an electric      may explode.
   shock.                                               o Remove the batteries from the camera immediately
o Wrapping the strap around your neck is danger-             if they become hot or begin to smoke. Be careful
   ous. Make sure that small children do not get the       not to burn yourself during removal.
   strap caught around their neck.
o Do not look directly at the sun through the camera,
   as viewing the sun for an extended period may
  damage your eyes.
o Be sure to store batteries out of the reach of  chil-
   dren. Seek medical assistance immediately if acci-
   dentally swallowed
View original page 3Page 4 · Read text
PRECAUTIONSFOR YOURCAMERA C

         Your Pentax camera is a high-precision mechanism.     o Regular size color prints may cut off what appears
        Handle  it with great care.                             on the extreme edges of the film frame. Compose
                                                                  your picture with a margin of safety at the edges.
         Precautions when  taking  pictures
         o Do not use the camera where  it may come  in con-     Precautions  for storage
             tact with rain. water, or any other liquid, because     o Avoid leaving the camera for extended periods in
            the camera  is not weather, water, or liquid resis-      places where the humidity and temperature are
             tant. Should the camera get wet from rain, splash-      very high, such as in a car.
            ing  water,  or  any  other   liquid  wipe    it   off     o Do not store the camera in a closet with moth balls
           immediately with a dry soft cloth.                         or in an area where chemicals are handled. Store it
         o Do not drop the camera or allow  it to  hit solid ob-         in a place with good dry air circulation to prevent
             jects.  lf the camera suffers a shock or impact, take       the growth of fungus.
                     it to a Pentax service center for inspection.
                  . Be careful not to subject the camera to strong  vi-     Precautions  for proper care
            brations, shock or pressure. Use a cushion to pro-     o Never touch the shutter curtain or mirror with your
             tect the camera when carrying  it in a motorcycle,        finger or any other object.
            car, boat, etc.                                        e Use a blower and lens brush to remove dust accu-
                  . Condensation on the interior or exterior of the cam-      mulated on the lens or viewfinder.
           era may  be extremely  harmful  to  the  camera     o Never use solvents such as paint thinner, alcohol or
         mechanism as  it may cause rust. Furthermore,  if      benzene to clean the camera.
            the camera is taken from warm temperature to a     o Electrical problems may often be caused by water,
           subfreezing one  or vice versa, the formation  of         dirt or dust  at points  of  electrical contact. Also
             icelets may cause damage. In such a case, put the       check for battery leakage, traces of dirt or grease,
          camera  into a case or  plastic bag so  that  any        or corrosion due to salinity or gas.  lf you cannot
          changes in temperature difference is minimized. Do       correct the problems, have your camera inspected
            not remove  it from the bag until temperature has        at a Pentax service center. Repairs of this natureF     stabilized.                                              are not covered under the terms of the warranty
                                                           and charges may be assessed.F                              www.butkus.us
View original page 4Page 5 · Read text
lpD                PRECAUTIONSFORBATTERYIJSAGEi

  Other precautions                                    Use two 3V lithium batteries (CR2 type).
  o The temperature range at which  this camera          Misuse of the battery can cause hazards such as
    functions properly is 50'C to -10'C (122'F  to 1           leakage, overheating, explosion, etc. The battery
    4'F).                                                   should be inserted with the " 1" and "-" sides fac-
  o A camera which has been submerged in water            ing correctly.
    usually cannot be repaired. lf such an accident           Battery performance may  be  temporarily  hin-
   should occur, it is advisable to contact a Pentax          dered in low temperatures, but  will recover  in
    Service Center immediately.                             normal temperatures.
  o To maintain optimum performance,  it  is recom-         Keep a spare battery on hand for replacement
   mended that the camera be inspected every one          convenience when shooting outdoors  or while
    or two years. lf the camera has not been used for            traveling.
   an extended period, or  is being prepared for an                    lf the built-in flash is used continuously, the bat-
    important  photographic  session,  it  is  recom-            tery may become warm, but  it does not mean
   mended that you have the camera inspected or            that the battery is faulty; it is one of the battery's
    test shoot with  it.                                            characteristics.
   r Repairs deemed necessary due to usage of this          Replace the batteries at the same time. Do not
   product in an industrialor commercial application          mix battery brands. type or an old battery with a
   may  not be covered under the  terms  of  the         new one. lt may cause explosion or overheating.
   Pentax warranty.
   . The PENTAX warranty provides only for the re-
    pair of defects  in  materials  or workmanship.
   Damage of any kind cannot be repaired at no
   charge under the terms of the warranty.  lf the dif-
    ficulty is caused as a direct result of the product
    being used  in  conditions  as  outlined  in  the
    "Precautions for Your Camera" section or any
    other operation contrary to the instructions out-
    lined in this manual, charges will be assessedand    a repair quotation will be provided.                  4
                             d
View original page 5Page 6 · Read text
PRACTICALSHOOTINGGUIDE


                                                     Zooming the lens

  Taking         a picture                when the main subject  is not                                                              in               Making a subject larger or smaller.                                                  ..p.65,66  the Autofocus                frame.
  C h a n g i n g i n - f o c u s r a n g e .                ...................p .5 6
  Focusing on a particular spot......               ........p.65


                                                                      Putting yourself into a picture.                 .........'p.44
           Flash photography                                                                   Taking a picture  in strong  backlit situations with the
                                              m ain subject in the shade.                '........'......p.81
  Takinga picturein low light situations. .....'........'p.37          Taking a picture of people with  night scenery in
  Minimizingthe red-eyeeffect.             .............p.40          the backgr ound. ..........
  Taking a portrait when the subject is in the shade. p.81
  Taking a picture of people with night sceneryIn
  the background.......,...                      ....p.82               Landscapephotography
  Takinga picturein a roomy placesuch as a church
  or receptionha||............                    ---p.77


        Exposuremodesilt€ilrll-l
I
I Taking a picture with the desiredexposuresetting.     . . . . . . . . . . . . .                                                          . . p . 6 0 , 6 4I                                                          Taking a picture of a fast moving subject.  ......p.36,58  Taking        a picture                     in strong                            backlit situations                                           with the             Takinga horizontallydynamicpanoramicpicture....p.53                                              .............p.81  mainsubject                in the                shadow.
I                         www.butkus.usTaking consecutivepictures of a moving subject. p.44

                                                                .,,'-.;. ..^-..,:.-.,.:                      .*iasd;u*@!--!*..-.                  -dr
View original page 6Page 11 · Read text
EASYTO USE (For beginners)
1. Loadingthe batteries                                   2. Attaching the lens


Open the battery chamber cover by using a coin.           Align the red indexes on the lens and camera. Turn the
Load two batteries (GR2 type) according to the mark-     lens to the right until  it seats with a click. (See page
ings (*,      ) in the battery chamber. (See page 13.)        1 6 . )
                           ring              the shutter  dial          5. Turning on the power


While holding down the aperture-     While holding down the  shutter      Set the main switch to  I ON l. See
A lock button, turn the lens aper-       dial lock button. turn the shutter     page 1 9.
ture ring to the   t A   I  position.       dial to  t A  I  . (See pase 26.). The
(See page 26.)                      exposure mode will be set in the
                                Programmed AE Mode.
View original page 11Page 12 · Read text
6. Loadingfilm                                                    7. Selecting the Autofocus  Mode
                                   :,K: W


Open the back cover, insert a roll of film, align the end    Set the focus mode switch to  I AF  ]. (See page 34.)
of the film leader with the red mark. and close the back
cover. The film should advance to the first frame auto-
matically. (See page 22.)

8. Composing the scene with the zoom ring                9. Focus on the subject and shoot


                                        turn                       the                           viewfinder,While      looking             through
                       you                                       desired                                            thewww.butkus.uszoomcom-    leaseF o c ubuttons L t   l lhalfwayo n t h e tosubject.lock focus,Depressand thethenshutterdepressre-it                              obtain thering     to       the right                 or left until
position. (See page 30.)                                      fully to take a photo.(See page 35.)
View original page 12Page 14 · Read text
HOW TO USETHISOPERATINGMANUALEI
This manual is organized into the following sections. allowing you to optimize the use of the camera:


            I  . BASIC OPERATION                                               III. ADVANCED OPERATIONS
       (PREPARATION)Page 12 - 25                   Page 43 - 89


                                tr. BASIC OPERATION                            IV. OTHERINFORMATION
                    (SHOOTING) Page 26 - 42                   Page 90 - 95


o  f f you want to begin taking pictures with this new camera as soon as possible, read section  I and  ll, "BASIC
  O P E R A T I O N ( P R E P A R A T I O N ) "a n d " B A S I C O P E R A T I O N ( S H O O T I N G ) . "
  These sections introduce only the basic functions of this camera. More detailed information can be found in sec-
  tion  lll and section lV.
                           www.butkus.us
View original page 14Page 15 · Read text
(1)ATTAC}|I}IGTHECAIIERASTRAP

-

  @
  .2
 o
 o
  !m u
    Joz
     !
     I
  m
     !
 u       BASICOPERATION
  {
   oz              ( PREPARATION)                   Fit the strap on the cameraas illustrated.
                                                                                                                 . There is a pocket on the strap so you can store the
                                                                     finder cap, release socket cover, hot shoe cover or
                                                      any other small accessoryas illustrated.
View original page 15Page 17 · Read text
-
   E
   t2
  o
  o
   !m  u
   =o
   2
     !vm
       !
  u
  _{
   o3     3. tionTurn ofthethebatteryarrow chamberto lock  itcoyersecurely.screw  in the direc-     4. SetLGDthepanelshowsmain switchthetoinformationI ON ] andascheckshownthatabove.the
                . When the battery is replaced, all camera settings re-    o The LCD displayas shown aboveis givenas an exam-
         main unchanged except  the  audible PCV  signal      ple and may be different if a lens is attached.
          switching, red-eye reduction flash function and auto-
          matic flash function of the built-in flash.
        o The optional " AA-Battery Pack Fo" is also available
            for this camera instead of using the lithium batteries.
View original page 17Page 20 · Read text
(4) USINGTHESHUTTERRELEASEBUTTON
      The  shutter  release button  has  two   positions.-      Depressingit down halfway (first position) turns on the                 ni
  E    exposure meter and autofocus system. Depressing it             vv
  v,    fully (second position) releasesthe shutter. When tak-
  o    ing a picture, depressthe shutter releasebutton gently
  o     to prevent camera shake.            MM    !nu                                                                  Not pressed    Pressed halfway    Pressedfully
           r To prevent camera shake,depressthe shutter release                        down          down
         button gently.                                                                        (firstposition)   (secondposition)    Ioz    o Before loading a roll of film, slowly depressthe shut-
     !        ter releasebutton to learn where the first position is.
  tm      o The LCD indicationstays on for about 10 seconds     !
          after the button is releasedfrom the halfway position.  u        Depressingthe shutter releasebutton down halfway
  _{    keepsthe LCD indicatoron.   oz


                                www.butkus.us
View original page 20Page 22 · Read text
(6) FILM LOADING

     We suggest that you first operate the camera with no
-       film loaded to become familiar with  its operations.
 @
 t2   A u t o m a t i c f i l m s p e e d s e t t i n g
 o    This camera is designed to use DX-coded films with ISO
       ratings from 25 to 5000.   o!m
 T
 _-{     . When DX-coded film is used, the correct film speed is
  oz      automaticallycoded film, yousetcanfor setthethecamera.film speedlf you manually.use a non-DXSee
 G   I      page 76.
 m             .  Before loading film for the first time after purchase,   !
 u      open the back cover and remove the protective card.
      DO NOT TOUCH THE SHUTTER CURTAINS.
                                                                               1. To open the back cover,  slide the back cover  re-  =oz                                                                     lease lever in the direction  of the arrow.
                                                                            2. Place the  film  cartridge  in the  film chamber  as
                                                        shown  in the illustration.
              )
                                                                                                                                 . Always load and unload film in the shade or by using
                                                                 your body to shade the camera.


                                www.butkus.us
View original page 22Page 26 · Read text
3-
 E
 32
 o
  o!m
 T
 6z
 Gum T
 v
                                                                                                                                                                                            ' R e w i n d i n g a R o l l o f F i l m  i n M i d - R o l ,       3. Open the back cover and remove the film.  Jo=                                                                                                             lf you wish to unload the film before exposing all the
      o A rolf of 24-exposure film takes about 13 seconds to     frames, use this function.
        rewind.
             .  Before opening the back cover, check that   I Q   ]  is    Set the main switch to the  t ON I position, and then de-
                                                              press the mid-roll rewind button by using the protruding        b l i n k i n g .
      o When the camera is not in use, set the main switch to     part of the strap clamp.
                 t h e  I O F F ]  p o s i t i o n .
             . The shutter may be released a frame or more after          . Do not depress the button with an object having a
         the specified number of frames have been used as in-      sharp tip.
                                                                                                                                .  Before opening the back cover, check that   I O   ]  is        dicated by the number of frames on the film cartridge.
        However, those extra frames may be lost in process-       b l i n k i n g .
         ing. When you take important pictures, rewind the
          film          when                  the                            filrn                       reaches the number of frameswww.butkus.usindi-        cated             on the                        film                          cartridge.
View original page 26Page 28 · Read text
(1)USI]IGTHEPROGRATITEDAEI'ODE           il,BASTCoPERATtoil(SHo0T[{G)


--
 E
                                                 OFF 32                        AL221611 8 s.64
  c'
 o
  !m T
  =oz
     Purpose                                                    2. Turn the shutter dialto   I A  ] while holding down
      For easy picture taking, use  this mode. In  the       the shutter dial lock button. The shutter dial can be   o-oo_{  ProgrammedAE mode, the camera automaticallyse-      released from  I A ] in the same manner.
       lects the best combination of aperture and shutter ze     speedsetting allowing you to take pictures by simply       .   I P ] appearson the LCD panel to indicatethat the
      depressingthe shutter releasebutton.                 ProgrammedAE Mode is set.
                                                                                              r See page 56, 58 and 6O for other availableexposure
    How to set                                       modes.
       1. Turn the lens apertu?e ring to the  I A ] position as
       shown in the illustration.
           . To move the lens aperture ring to the  I A  ] position,
        turn the aperture ring while holding down the
        aperture-A                   lock                      button                         on the                                      lens.                                 The                                             lens www.butkus.usaperture         ring can be                  released                         from                                the                                                            in the                                                                    I A                                                                           ] position
      same manner.
View original page 28Page 29 · Read text
(2)USINGTHEMULTI(6)'SEGMENTMETERINGMODE
                                      M U L T I ( 6 ) - S E G M E N T M E T E R I N G
                                                          This camera incorporates a high-precision six-segment
                                                TTL metering system. Light values are measured in six
                                                   segments within the image field, enabling an optimal ex-
                                                      posure to be made under a variety of  lighting condi-
                                                                  tions. With conventional averaged metering systems,    -
                                                     underexposure of the subject results from the bright-    @
                                                     ness of the background affecting the overall metering.    o
                                                       With multi(6)-segment  metering, the camera records   Y S
                                                            the brightness in six zones within the image field and              \r,    T
                                                     uses these measurements to choose an exposure that     !mv
                                                                           will  not  underexposed  the  subject. The  multi(6)-
                                                  segment metering system also calculates exposure val-   o ;
ln the multi(6)-segment  metering mode, the metering    ues for a scene to automatically compensate for high-        z  l
system automatically measures light  in six different     contrast and other difficult lighting conditions. Even a    @
zones, enabling proper exposure value in a wide variety     beginner can achieve excellent results with ease.
of normal and adverse lighting conditions, such as a
backlit condition.                                                                                                                                                                                                                                                                                                                                                       IooIze
1. Set the metering mode switch  to   [ *   ].

r When a lens other than an A, F or FA lens is attached,
  use either center-weighted metering or spot meter-
  ing. The multi-segment metering mode cannot be set.
  See page 68 for selecting the metering mode.
View original page 29Page 30 · Read text
(3) USINGTHE 3.POINTAF MODE


--
  E
  Io
 o
  !m v
    Jo2
       This camera incorporates 3-point autofocus system.  o      The subject will be focused properly even  if the main
       subject is slightly off the center of the AF frame.
       IooJzo    Set the AF mode switch  to   I C    f j.
              . The Spot AF Mode  is also available in this camera.
        See page 65 for details.


                                www.butkus.us
View original page 30Page 34 · Read text
o  lf a power zoom lens  is attached, three zooming
                                                           speeds are available. Turning the power zoom  ring
                                                                                    fully  to  the  right or  left, zooms the  lens  quickly.
                                                                 Turning  it slightly gives you slow operation. At an in-
                                                                                                         speed.--                                                                o termediateZooming theposition,lens withthethelenspowerzoomszoomat mediumfunction                                                                                                                    auto-
 @                                                                    matically focuses the lens on the subject. However,
  2o                                                                              forhalfwayfinal focusing,down to focusdepressthe thesubject.shutter release button o    !                                                               o When the main switch  is set  to    I OFF   ]  while a m    I                                                          Pentax-FA zoom lens is in use. the lens automatically
   Ioz                                                                      retracts to its shortest physical length.
     Usingthe PowerZoom Function
        1. Push the power zoom ring forward until the words   G-oo-'l      IPOWERZOOM] appear beneath the power zoom
                                                                            An FA zoom  lens without  zo       ring.
       2. Turning the power zoom ring to the right brings the                                the power supply contacts
         subject closer (telephoto) and turning it to the left                              are shown in the illustration
       makes the subject smaller (wide angle). To stop                            does not  have the  power
        zooming, release the power zoom ring.                                 zoom function  (ie: FA28  -
                                                               70mm  f ,/4 AL lens).


                                                               Power zoom
                                www.butkus.uscontacts
View original page 34Page 36 · Read text
Q) SELECTINGTHE AUTOFOCUSMODE


--
  E
   Io
 o
  !m
    !
  _-{
  oz
  o       For autofocus operation, set the focus mode switch  to
          t AF].
     When you depress the shutter release button halfway
      down, the lens automatically focuses.    IooJze
       o See page 48 for manual focusing.


                                www.butkus.us
View original page 36Page 38 · Read text
3. To release the shutter, gently depress the shutter  re-     Predictive Autofocus  Mode
         lease button fully.                             When the camera senses subject movement during the
                                                            autofocus operation, the camera  will  automatically
           r The shutter cannot be released if the subject is out of     switch  the focus mode  to  the  predictive autofocus
         focus.                                       mode to measure the speed of a moving subject, and
I-      o Depress the shutter release button  halfway down.     predict where  it will be at the moment of shutter release
 E      While IO]   is on, the camera-to-subject distance is     to maintain sharp focus on the subject.
 c2      fixed (focus lock). To refocus on another subject, lift
 o      your finger off the shutter release button.                o  lf the subject is moving too fast, the shutter may not
             .                      mode                                                          is      When  the  drive                                   switch                                                   set                                                             to   the       be released.  oTm        Consecutive-Frame                      Mode                                                lens                                                 focuses                                                                     I                                EJ  ], the T
        each time you release the shutter.
             . When using the SMC Pentax-F Soft 85mm  t,/2.8  Ioz         lens, set the aperture between t,/2.8  and f ,/4.5. See
  (t      page 52 for details.
   Ioo-{
 ze


                                www.butkus.us


                     **   ..'.;*-*&"**r&";q,#ig*d'i                  "    *'+r                                                           LF.-       -,,.n
View original page 38Page 44 · Read text
1


-

 @
  Io
  o1t
 m
 7
  =oz
G   A I - J T O M A TI C F L A S H F U N C T I O N ( S M A RFTL A S FHU N C T I O N ) rlow  tO ::et
      This is a convenient flash mode that the flash dis-      1. Push the flash pop-up button to activate the flash.
      charges only when  it is necessary even if the flash is in      2. Depress the  multi-function   button  until    I n  ]  ap-
       the popped-up position.                                    pears on the LCD panel.    Ioo=zo      The Automatic  Flash Function varies depending on
       the selection of the camera's metering mode and the     o Depress the multi-function button  with  the  built-in
      exposure mode as follows:                                      flash popped-up position. lf the button  is depressed
                                                                      with  the  built-in flash retracted position, the PCV
        Exposure                        Meterrng Mode                  mode will be switched.
       Mode          Multi-segment     Center-weighted       Spot

                       Automatic    dis-   Automatrc       dis-   Automatic                                     i . . 1 f i       ! ( )    ! a t i i c e i
         Programed     charge   in   low   charge in low  light   discharge  in     With the built-inflash poppedup, depressthe multi-
        A E               light and  backlit   srtuatron             low       light      function button until I E J disappearsfrom the LCD
                          srtuatrons                                    s rt uattonwww.butkus.uspanel.        Other
        Exposure     Forced emrssion   Forced emission      Forced emis-
       Modes                                                   ston
View original page 44Page 46 · Read text
---

  E,
   zom o
       Consecutive pictures can be taken by holding down the    The self-timer mode delays the shutter release, and  is    o!m    1 . C o n s e c u t i v e - F r a m eM o d e                                  2. Self-Timer Mode
  7     shutter release button.                                      useful for taking group shots that include the photogra-
                                                                   pher. The shutter will be released about 12 seconds
     How to set                                                      after the shutter release is depressed.       Io2ct    Set the drive mode dial to  ttrl   ].
                                                How to set
              . The camera focuses on the subject frame by frame in      1. Set the drive mode dial to  I e)J.
          this mode.
       o The shutter cannot be released while the built-in flash
            is being charged.

                                www.butkus.us
View original page 46Related documents and language editions
From the M. Butkus archive. Original publisher and archive notices are retained.
Check the model and edition against your equipment.
PDF verified 2026-10-10.