Flashes & lighting
Permacad Electronic flash User manual
User manual for Permacad Electronic flash. 13 pages in English. Read the original PDF, download or print a copy without registration.
13 pagesEnglish4.9 MB PDF
Loading your manual…Open PDF directly
Document details
- Brand
- Permacad
- Model / document
- Permacad Electronic flash
- Document type
- User manual
- Language
- English
- Pages
- 13
- File size
- 4.9 MB
- Category
- Flashes & lighting
- Document date
- Not specified in catalog
Search available document text
Find a term, then jump to its page in the original PDF. Image-only pages may not be searchable; check the PDF for exact wording and diagrams.
Page 2 · Read text
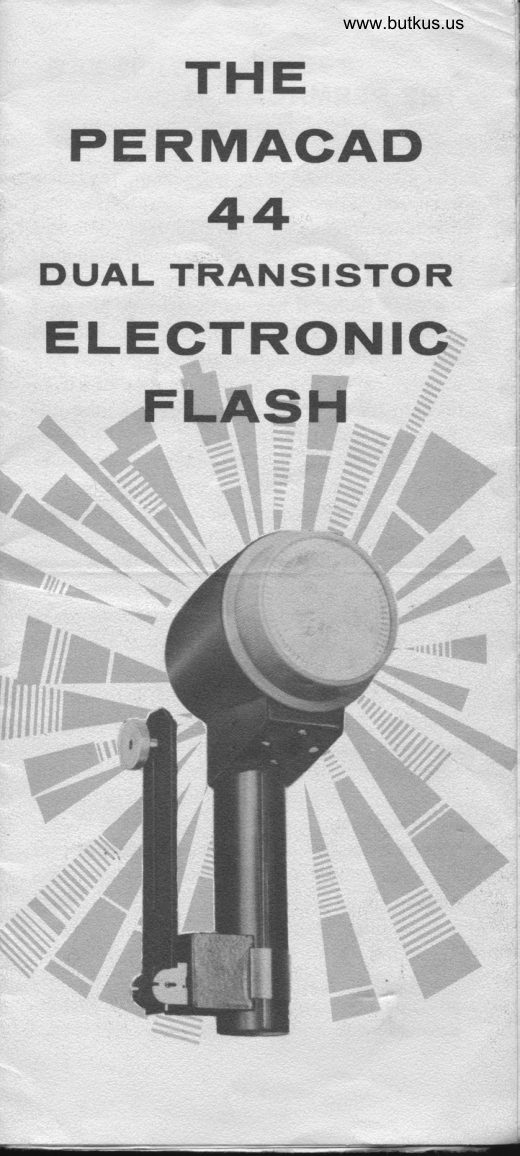
THE PERMACAD 44
   Dual Transistor Electronic Flash
The Permacad 44 is a permanent, repeating
flash unit, a new kind of photographic product
that is completely self-powered.  lt is contained
in one case the size of a conventional flash gun,
yet it eliminates the need for carrying and chang-
ing flash bulbs. lt has its own easily attached
camera mounting bracket which folds out of the
way when not in use. Because  it is so easy and
economical to use, you will want to use it as
fill light for outdoor shots as well as your pri-
mary light source for indoor pictures. The Perm-
acad 44 is ideal for color pictures. lts circular
flashtube and reflector provide daylight type
light, matching daylight color films. Caref ul de-
sign gives even light distribution over the full
picture area with all but extreme wide angle
lenses.
    It freezes action at 1 11300 second, regardless
of shutter speed used, giving you sharp, clear
pictures every time and eliminating the effects
of camera and subject movement. Permacad 44
operation is economical. The unit may be pow-
ered with the built-in, rechargeable nickel-cad-
mium battery, or with household alternating
current.  lt is as simple as a flashlight to operate
-just turn on the switch or plug into a house-
hold outlet. The easy-to-use exposure dial
shows you the settings you need, reducing the
guesswork and calculations usually necessary
in flash photography.
  The Permacad 44's components are the fin-
est made. lt is precision engineered, and, like
all good photographic equipment, will last in-
definitely with normal care.
View original page 2Page 3 · Read text
www.butkus.us
HOW TO PUT YOUR
PERMACAD 44
INTO OPERATION
The Permacad 44 may now be mounted on the camera. The
knurled knob on the folding arm screws into the base of
the camera to secure  it to the bracket.
  An electronic flash depends on energy stored in a
capacitor, which will operate far more efficiently after
"forming," or cycling the flash several times over a period
of five minutes or more. For this reason' when you are
going to use the Permacad 44 after an inactive period of
more than a few days, set it for AC operation and flash
it nine or ten times. This may be done through the normal
shutter cord with the camera contacts, or by substituting
the shutter cord with a manual tripping cord, such as the
fl53-1 made by Heiland.
  Use of this flash is simple and easy when you follow
the convenient check lists below but read this folder
thoroughly first to obtain the best results.

ON BATTERY:
      1. Mount flash bracket on camera.
      2. Attach shutter cord.
      3. Set Guide Number on exposure dial (see chart, page 6).
      4. Determine exposure and set lens-aperture.
      5. Push switch to ON/BATT (red dot visible).
      6. Wait for Ready-Light to glow.
      7. Shoot picture.
      8. Turn switch to OFF/AC-CHG when through shooting.
ON AC CURRENT:
      1. Mount flash bracket on camera'
      2. Attach shutter cord'
      3. Attach AC cord to Permacad 44.
      4. Plug AC cord into wall outlet'
      5. Push switch to OFF/AC-CHG posiiion'
      6. Set Guide Number on exposure dial (see chart, page 6).
      7. Determine exposure and set lens aperture.
      8. Wait for ReadY-Light to glow.
      9. Shoot picture.
         %                   "


              PIRMACAD 44
                                   www.butkus.us
              RTADY T()R
             A( POWER
                   ()PTRATI()N
View original page 3Page 5 · Read text
READY-LIGHT
The Ready-Light (see illustration) indicates that the unit
is ready for operation. Turn the unit on and wait for this
light to appear. The flash may be operated now, but for
a maximum, consistent amount of light wait as many extra
seconds as were needed for the Ready-Light to come on
before shooting. The Permacad 44 is fast in any case. On
either AC or battery operation you can shoot a short se-
quence of pictures at about eight second intervals.


                                         RTAI)Y-LIGHT


                                                                                                                    Digitally signed by Mike Butkus
                                                                                       DN: cn=Mike Butkus, o=Butkus camera manuals, ou=butkus.org,
                                                                                              email=mike@butkus.org, c=US      Mike Butkus                   Date: 2023.09.20 20:46:11 -04'00'

HOW TO USE EXPOSURE DIAL
Another feature for your convenience is the Permacad 44
exposure dial. This easy-to-use calculator gives you the
f/stop settings for lamp-to-subject distances when the
Permacad 44 is used as the main source of light. Simply
find your film guide number in the table on page 6. Set
the exposure dial so that the guide number for your film
aligns with the point of the Ready-Light opening. Read the
proper lens opening opposite the lamp-to-subject  distance
on the dia[.
  The calculation normally made to determine the proper
exposure in flash photography is: Guide number +- dis-
tance in feet :  lens opening. With the Permacad 44's
handy exposure dial this calculation is done for you.
   Example; Suppose the film you are using has a guide
number of 80, as listed in the table of guide numbers else-
where in this folder. Set 80 on the dial at the pointer. The
lamp-to-subject distance is 10 feet. Opposite 10 feet on
the dial you find the proper lens opening is f78.
View original page 5Page 6 · Read text
www.butkus.us
BATTERY FEATURES
Battery operation is ideal for free movement and for out-
door shots. This unit uses sealed, built-in nickel-cadmium
cells. They will give a long life of convenient and econom-
ical service.
  As many as 50 flashes can be obtained from each full
charge. The cells may be recharged as often as necessary.
Make it a standard practice to charge them before storing.
Recharge them before using after long storage.
     ff the Permacad 44 has not been used for a period of a
month or longer, or in any case before operating on
BATTERY, plug the unit into the wall outlet for about five
minutes and flash it 9 or 10 times. Flashing on AC will
bring the Permacad 44 up to peak efficiency and conserve
the battery charge. The Permacad thrives on frequent use
-use  it often!

CHARGING THE PERMACAD
CELLS
The cells in this unit are recharged very simply by setting
the switch on the OFF/AC-CHG position and leaving the
Permacad plugged in overnight to a wall outlet. lt will take
a maximum charge in 12 to 24 hours, but will not be harmed
by being left charging for a few days.

OPERATING ON AC POWER
AC power operation, ideally suited for indoor photography,
will conserve the charge in the battery for times when free-
dom of movement is of primary importance. The Permacad
44 operates from a 105-130 volt source of alternating cur-
rent (nominally 117 volts), standard in most U.S. localities.
An additional advantage of this type of operation is that
you are; constantly charging the cells when the unit is
plugged in and set for AC operation.
   Simply connect the line cord to the Permacad unit and
plug the other end into a wall outlet. For AC operation the
switch must be in the OFF/AC-CHG position, where the
red dot is nol visible. The unit will not be damaged  if the
AC cord is connected while the switch is in the ON-BATT
position-you would simply be operating on battery power
instead of AC. To turn the unit off, disconnect the cord
either from the wall outlet or from the Permacad 44.
View original page 6Page 7 · Read text
CAMERA.FLASH
   SYNCHRONIZATION
      The Permacad 44 is designed to take pictures with cameras
       having built-in flash contacts.  lf your camera has a between-
       the-lens shutter with X-contact (zero delay), the Permacad
         will synchronize with  it at all shutter speeds. lf ybur camera
      has a focal plane shutter,  it will synchronize only at slower
      speeds, up to 1125 or 1/50 second. (See your camera in-
       struction manual). Most cameras without built-in X (zero
       delay) synchronization can be easily adapted or contacts
        built in by a competent camera repairman.
      To check synchronization yourself, see picture and
       instruction below. You can make this test to find the
       shutter speeds at which your camera is synchronized for
       flash. Connect your camera to the Permacad 44 with the
       shutter cord. Set the camera at its widest lens opening and
       point it at a light colored wall so the reflected flash will be
        visible through the lens. Open the camera back and watch
       for the light coming through the lens when you trip the
       shutter at various speeds. When you can see a full circle
      of light, synchronization is good and you are getting the
       benefit of all the light from the Permacad 44. You may use
      any of the shutter speeds that give you a full circle of light.
      Note that cameras with focal plane shutters may show a
      "square" of light instead of a circle.


               www.butkus.us

  UNMOUNTED USE
      For general use mount the Permacad 44 on your camera.
     The even distribution of light, called "flat lighting," is de-
       sirable for group pictures and for color. Where you want
      modeling or a new effect, use the flash off the camera.

L-
View original page 7Page 9 · Read text
HOW TO USE THE GUIDE
NUMBERS

lndoors
When the Permacad 44 is used indoors, simply set the
 guide number for your film on the exposure dial and read
the f/stop for the proper flash-to-subject distance. Guide
numbers generally are intended to give the proper exposure
 in a medium sized room with light colored walls and ceil-
 ing. When shooting pictures in a very large room or hall,
the camera lens should be opened up one f/stop more
than is indicated by the guide number.

Outdoors
For shooting outdoors at night, open up your camera lens
two full f/stops more than the guide number indicates to
compensate for lack of reflecting surroundings. For day-
light outdoors the Permacad may be used as a fill light to
open the shadows in the eyes and underthe chin. For best
results let the sun do most of the lighting, and add only
the right amount of light to fill in the sun's shadows. First
set the guide number on the exposure dial and read the
 f /stop for your flash-to-subject distance. Then stop down
one  f /stop for color film, or two  f /stops for black and white.
This keeps the flash-fill light secondary to the sunlight.
Since the flash duration is far too short to be affected by
shutter speeds*, you should now adjust the shutter speed
for outside light conditions. Use an exposure meter on
the sunlit, or highlight side, to determine the proper shutter
speed for the f/stop already selected.

Example l: Using Ektachrome (Exposure lndex 32), subject
eight feet away. The Euide number  f rom the table on page 6
is 45. Set this guide number on the exposure dial and read
f /stop opposite eight feet on the distance scale. Note that
the indicated  f /stop is shown as  f /5,6. Stop down one  f /stop
for color, setting the camera atf 18. Now, with an exposure
meter or guide, determine the shutter speed for f/8 from
the brightest area of the subject

  *fhis does not apply to focal plane shutters. See camera-flash
   synchronization,  p. 5.
View original page 9
Page 10 · Read text
www.butkus.us
 Example ll: Using Ansco All Weather Pan film (Exposure
 lndex 125), subject 11 feet away. The guide number from
 the table is 90. Set guide number 90 on the exposure dial
 and read the f/stop opposite 11 feet. NOte that the recom-
 mended aperture is  f /8. Stop down 2  f /stops for black and
 white, setting the camera at f 116. Now, with a meter or
 exposure guide, determine the shutter speed for  f /16 with
 the brightest area of the daylight lighting conditions.

COLOR CORRECTING LENS
An' electronic flashtube produces light of approximately
 daylight quality but slightly on the blue or "cold" side of the
color spectrum, giving you "cold" color pictures in some
conditions. The Permacad 44's special color-correcting
lens gives the light proper balance for true-color pictures.
 It will not add color but will help you to get true, clear
colors, as daylight alone does.

EXPOSURE
Proper exposure requires that the important shadow areas
of the subject be exposed enough to show detail in the
final print.  lt also requires that the important highlight areas
not be blocked up by too much exposure. The Permacad
44 helps to obtain proper exposure because the extremely
short duration of light prevents the highlights from block-
ing, even when the shadows are fully exposed. To achieve
proper r .poSUr9, make your first test exposures using the
guide numbers suggested on page 6. The results should
be satisfactory, but for the very best results make some
exposures at a smaller lens aperture and some at a larger
aperture. Then determine the guide number which will give
the best exposure with your own equipment and processing
combination. Multiplying the  f /stop used for the best ex-
posure by the distance from flash to subject will give you
your own personal guide number.
   Photogrbilhy at its very best requires careful control of
all the variables that enter into equipment, supplies and
techniques.  lf you do your own processing,  it is suggested
that your techniques be standardized and you become
entirely familiar with your supplies and equipment. Only
in this way will you be able to consistently produce pictures
of the highest technical quality. However, even as a casual
hobby, you will be able to produce excellent pictures by
closely following the manufacturers' instructions.
View original page 10
Page 11 · Read text
OUTDOORS FILL.IN LIGHT
ABOVE-Natural shadows hide detail in a daylight shot,
BELOW-Same subject with Permacad 44 used as fill-in light.
View original page 11
Page 12 · Read text
www.butkus.us
PERMACAD 44
CHARACTERISTICS
Light Output.            Kodachrome ASA 10, guide
                      number 25. 30 watt-seconds
                         stored energy.
Reflector Coverage   .        70"; ample for most wide angle
                             lenses.
Effective Exposu re T ime      1 /1300 second.
Color Temperature  of Light Approximately noon daylight,
                              ideal for daylight color films.
Portable Power Source       Built-in, sealed, nickel-cadmiu m
                          rechargeable battery.
A.C. Power Source   .       105-130 volts, 60 cycles per
                         second.
Height                    10 inches.
Head Diameter         3% inches.
Handle Diameter   .          1/, inches.
Flash Gun Weight.         31 oz.
Bracket Weight .    .         7 oz.


                                              RITTECT()R
                                               INSIDE
                                        oPTtcAL  ttl{s


                                           TTASH
                                           TUBE


                                            EATTTRY-A(
                                       swtTcH

                                      SHUTTTR (()RD OUILTI


                                              HANI)LT


                       10
View original page 12Page 13 · Read text
"lt{
                                                                                                                                                                     I*
                                                                                                             t


WARRANTY POLICY
This equipment when sold in the United States and
its possessions is unconditionally guaranteed against
defects of material or workmanship for a period of
90 days. Service will be rendered and defective parts
will be replaced without cost to the purchaser within
that period, provided that the equipment has not been
abused, altered or operated contrary to instructions.
The manufacturer  of the Permacad 44 electronic flash                                                                                                                                                                                   1I.fshall not be liable for any repairs or alterations except
those made with its written consent and shall not be
liable for damages from delay or loss of use or from     &
other indirect or consequential damages of any kind,     1n
whether caused by defective material or workmanship             c
or otherwise. lt is expressly agreed that the manu{ac-                                             dturer's liability, under all applicable guarantees and                 ;
warranties expressed or implied, shall be strictly              I
limited to the replacement of parts as hereinbefore        :{
provided. In order to validate the warranty, the pur-                                                                                       Ichaser must fill in the warranty card lN FULL and
mail it to the manufacturer within five days after
purchase.

P roced u re Du ri ng 90-Day
Warranty Period
                                                                                                                                                                                                                                                                                                                                                                                                                                                             IlilAny Permacad 44 which proves defective during the
90 day wairanty period should be returned to the
dealer from whom it was purchased. The dealer willconvey  it to the appropriate Permacad 44 authorized                                      ;l.'tIttr*
repair station. YOU MUST FURNISH YOUR VALI-            t
DATED WARRANTY CARD. NO WARRANTY RE-             .i*PAIR WILL BE MADE WITHOUT IT.                                                                                                                                 i
For validation, mail your warranty card within 5 days
after purchase to P. O. Box 8776, Denver 10, Colorado
150416
                               f
                                                                                                                                                   --1Lt
View original page 13From the M. Butkus archive. Original publisher and archive notices are retained.
Check the model and edition against your equipment.
PDF verified 2026-10-10.