Film cameras
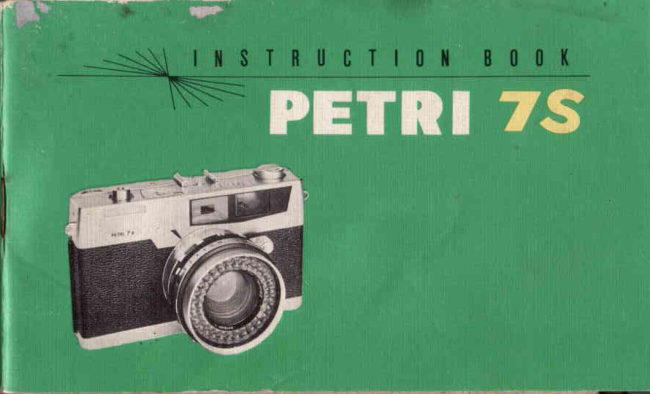
PETRI 7S User manual
User manual for PETRI 7S. 20 pages in English. Read the original PDF, download or print a copy without registration.
20 pagesEnglish2.5 MB PDF
Loading your manual…Open PDF directly
Document details
- Brand
- Petri
- Model / document
- PETRI 7S
- Document type
- User manual
- Language
- English
- Pages
- 20
- File size
- 2.5 MB
- Category
- Film cameras
- Document date
- Not specified in catalog
Search available document text
Find a term, then jump to its page in the original PDF. Image-only pages may not be searchable; check the PDF for exact wording and diagrams.
Page 3 · Read text
a

SUPERTATIVE FEATURES (lF PETR] 75 I.8 & 2.8

Type  :            35 mm camera with coupled built-in exposure meter.
Film Size :        35 mm film (2O or 36 exposures).
Lens :              Petri 45mm f I.8 (or I2.gl amber-coated lens.
Shutter            Petri MVE shutter with speeds: B, L, Il2,  Il4,  ll8,
                   .1/rS, 1/3O, Ll6o-, IlI25,  Il25O, 115OO second.
                  SeIf cocking, MX synchronization, built-in selftimer,
t                  release pressure 2OOg.
irposure System:    Zero method reflection type; fully coupled 'Circle-Eye'
                exposure meter. Needle visible on the top of the

                                                                                                                                                                                                                                                                                                                                                                                                                                                                                                                                                                                    )               camera body and in the view finder.
Rangefinder :        Helicoid-type Coupled Rangefinder. Focusing from
                  2.65 {t to infinity.
Yisrfinder:           Bright-line type, Parallax Correction mark.
Film Transport:      Single-stroke (t8O') rapid transport lever which auto'
                   matically transports film and cocks the shutter.
             www.butkus.usCrank rewinding system.
                Automatic resetting film-counter, hinged camera back.
View original page 3Page 6 · Read text
1.  FiIm Counter
  2.  Shutter Release Bqtton
  3.  Exposure Meter Needle
  4-  Accessory Shoe
  5.  GREEN-O-MATIC Viewfinder
  6.  Film Rewind Crank
  7.  Neck Strap
  8.  Circle-Eye Photocell
  9.  Focusing Lever
10.  Film Speed Indicator
1r.  Shutter Speed Dial
r2.  Shutter Speed & Diaphragm
      Setting
13.  Diaphragm Ring
L4. MX Switch
15.  Distance Scale
16.  Selftimer
17.  Film Speed Setting Lever
18.  Flash Socket
19.  Eye Piece
20.  Sprocket
2L.  Film Advance Lever
22.  Take-up Spool
23.  Film Cassette Chamber
24.  Tripod Bush
25.  Film Rewind Button
View original page 6Page 7 · Read text
tltil tomil0        Opening the camera back.   The rewind crank.
                          PuIl out the lever at the side        Pull out the rewind crank as
                         of the camera with  your        far as it will go.
                            thumb-nail, and the cover wiII
                           automatically be released.


                         www.butkus.us
View original page 7Page 8 · Read text
Film Loadinq             Advance the film.           Closing the camera back
Slip the film end into any slit    Place the cassette into the     Return the rewind crank too_n _ the Take-up Spool and     film compartment. Advance       its original position. Checkslide it dowa toward the bot-     the film until the perforations       that the film is in the correct
tom of the camera body.       on both edges are angaged       position and close the camera                                with the camera sprockets.        back.
View original page 8
Page 11 · Read text
50025012b 6030 i5 8 421.


     Adjust the film speed                       Select the  shutter                                         2.l.   indicator according to                            speedthatyou require.
      the ASA (DIN) of film                            Ifse fast speeds for       in use. This operation                                                    bright subjects and      should be carried out                                                  slow speeds for dark      before or alter loading
      the film.          www.butkus.us             subjects.
View original page 11Page 12 · Read text
The needle visible in the viewfinder


    Under Exposure  Pr6ps1 flposgrg   Over fypqsg;gE[EM
WWWThe needle visible on top-{over


                7S                                   the                       toward3.  subjectPoint theandPetriadjust                              aperture                      the
       ring' until the exposure needle
     meets the indicator mark in the
      viewfinder. You can also use the
     exposure indicator located on
     the top of the camera body.
View original page 12Page 13 · Read text
POINTS ON USINO T]|E T)(POSI|RE lllETTR

Sometimes, when you are    [andscape photography
photographing dark subjects,
you may not be able to adjust    When taking landscapes with large                             expanses of sky, point the camerathe exposure needle to the                                     slightly downwards.before you take
indicator mark. On this oc-    a reading. This avoids inflation of
casion use a slower shutter     the meter, which would cause under
speed.                            exposure.
Filters for the Petri 7S fit                                 Portrait photographyover both the lens and the
Circle-Eye exposure'meter,    Take a close-up reading of thesubject
thus eleminating  filter factor     taking care not to measure the bright-
alterations.                       ness of the sky and other background
When the subject is too dark      objects.
and the camera does not give      II the light is strongly contrasting
a reading, set the aperture    between light and dark areas, read.r                                ings should be taken of both por-and shutter speed manually.                                   tions and the average figure used.If the' subject is too bright                                be found                                             It may                                              convenient                                                         to useuse a NDX4 filter (see article    the                                 needle                                  on top                                                       of the camera                                                                       foron filters).                         this typewww.butkus.usof photography.
View original page 13
Page 14 · Read text
I                     _l
                      OUT OF FOCUS          The viewfinder
                                           As you look through the view finder you
       After setting the correct exposure,                 wiil notice a bright line frame. The subject                                                   within this frame can be photographed.            it is necessary to adjust the focusing.                                                However, when taking portraits or close'up      As you look through ihe viewfinder,                                                            shots, use the three dots in the lrame as      a yellow rectangle will be seen in            the picture border. (Parallax correction       the center.' In this rectangle out-of-               marks.)
      focus pictures will appear as two
       images. - Adjust the focusing lever
       until'one clear image is shown.         Sequence of photography.
      Note that the bright line finder in-                                             1.  Select the shutter speed and set the aperture       dicates the exact picture area to
     be photographed, and the picture       c   Adjustaccordingly.the focusing.      composition should be  selected        3.  Select the picture-composition  withrn the       accordingly.                                   bright line finder.
                                                           4.  Release the shutter button.
                                                                                                              13
IL
View original page 14Page 15 · Read text
}|'.0I{ TO HOIB T]|E PETRI 75


The slightest shake of
your camera greatly
affects the sharpness
of the picture. Cradle
the camera in  both
hands and piuce the
back of it against your
cheek or nose. To give
extra stability, draw
your elbows into your
side. Hold your breath
and release the shutter
in a smooth action.             www.butkus.us
View original page 15Page 16 · Read text
TTAS1|  P}|OTOGRAP}|Y

The Petri 7S has a MX shutter suitable for use with
either electronic or bulb flash units.  Set the flash
synchronizing lever according to the unit used  - X for
electronic, M for flash bulbs. Connect the flash lead to
the synchro flash terminal, and check that either the
electronic flash is''fu_lly charged, or that the flash bulb
is correctly in position.  Set the shutter according to
the synchronization chart opposite, and the aperture
according' to the bulbs or unit used  -  see their  re-
spective instruction for use. Focus in the normal wdy,
and release the shutter. The Petri 7S has a universal
eccessory shoe, which enables you to  attach your
flashgun if required.
When not  taking flash pictures the shutter may be
set in either the M or X position.
Synchronization chart.
  Flash bulb     M Synchronization   X Synchronization
 M Class             AII shutter speeds    1/3O sec. or slower
 F CIasS                             /        U6O  tt     tt         tl
  Electronic Flash                               All shutter speeds
View original page 16
Page 17 · Read text
}|Olry TO USE                                   NEPTi| OF TIEI.D
Tl|E SETFTI]I|ER                     When you take a picture, you will notice that
                                               the finished result shows an area both in front
 Pull down the selftimer lever as far           of and behind the subject which is sharp. This                                           'Depth of field'  varies according to the size of as it goes and release the shutter button. The film will be exposed          aperture used and the focal length of the lens.                               A small aperture and a short focal length lens about B seconds later.                                            give a large 'Depth of field'. The selftimer can be set either before
 or  af ter the advancing the  film.       O To photograph subjects with lots of important
You can use self-timer with various              details, as in architechture, use a small aper-
 speeds, but not with B.                           ture.  To blurr out unsightly backgrounds                                          use a wide aperture.
                                C To get sharp pictures, refer to the 'Depth
                                                   of field'-chart  opposite, which indicates the
                                          zone of sharpness of each aperture at a set
                                                      distance.
                                C Set the aperture first.  Select the shutter speed
                                        by turning the shutter speed dial  until  the
                                            exposure needle meets the indicator mark.
                                           Should you not be able to make the exposure
                                                needle and the indicator mark line up exactly,
                                                 select the nearest shutter speed and make
                            www.butkus.usphragmthe final ring.alteration by adjusting the iris dia-
View original page 17Page 19 · Read text
UNLOADINO T1|T TII.M
Rewind Button.            Rewind crank.            Removing the film.
When you have finished the      While pressing the rewind     Select a place in the shade
IiIm, you must rewind  it into       button, pull out the rewind    and avoid the direct sun-Iight.
the cassette. First press the      crank. Turn it in the direc-    To check that the film is fully
rewind button located at the        tion indicated by the marking,    rewound, advance the  film
bottom of the camera body.        until you feel no resistance.     and see if the rewind crank                                                         moves.  If not, the film is in
                                                                                            its cassette.


                              www.butkus.us
View original page 19Page 20 · Read text
Petri Filters
                                            For Black & White Photography
                           UV    Colourless. Absorb excessive
                                                               ultra violet rays.
                                           Yl      Light yellow. Landscapes, snow,
                                                            clouds.
                              YZ    Yellow. Same as YI, but strongermW@ffi                        effect.
                              YA3   Orange. For photographing dis- Petri Lens Hood                                                          tant views.
The Petri lens hood has been carefully       Rl    Red. For dramatic cloud and
designed to prevent extraneous light from                landscape effects.
entering the lens of your camera. It  is      POI   Green. Landscapes. Snow, clouds.
constructed of light  alloy metal and     NDX4 Neutral density. For  brilliant
s_mafly styled to enhance the beauty of                 sunshine (colour or black & white
the Petri 7S camera.                                      photography).
 Petri Auxiliary lens Set                      For Colour Photography                         W4   Reduces excess blue.
Adds extra coverage to your photography.      C4    Reduces red in early morning orHard coated colour corrected lenses. No               evening shots.
adapters needed. Each set complete with     CB    For flash photography.
auxiliary telephoto and wide angle lenses,      CJ2   Daylight to artificlal conversionmatching viewfinder and zippered case.                        filter.
View original page 20Related documents and language editions
From the M. Butkus archive. Original publisher and archive notices are retained.
Check the model and edition against your equipment.
PDF verified 2026-10-10.