Film cameras
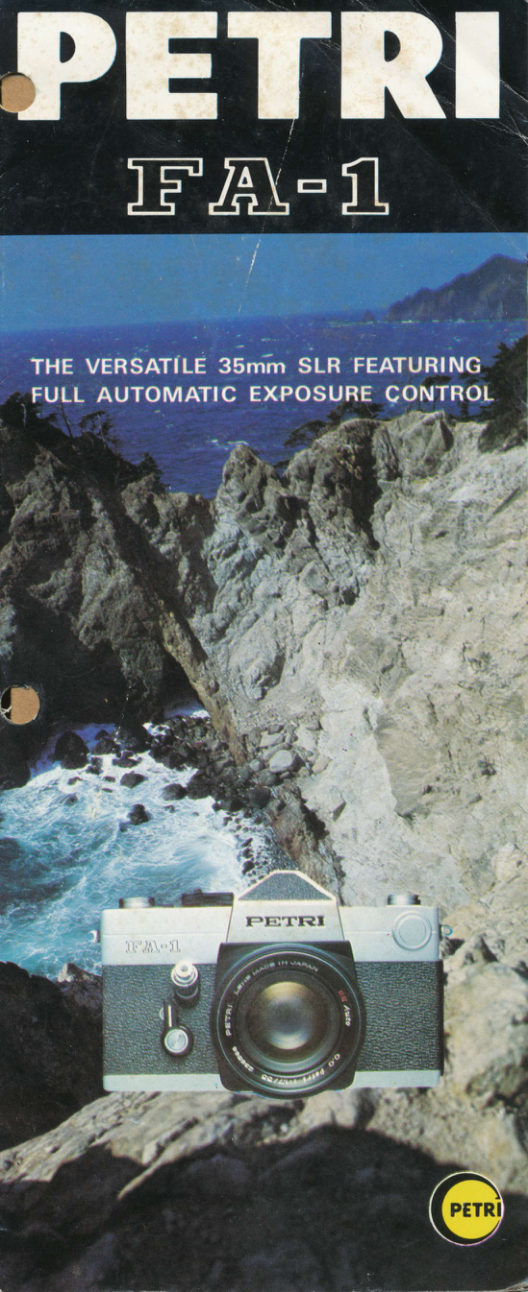
PETRI FA-1 User manual
User manual for PETRI FA-1. 37 pages in English. Read the original PDF, download or print a copy without registration.
37 pagesEnglish3.5 MB PDF

Loading your manual…Open PDF directly
Document details
- Brand
- Petri
- Model / document
- PETRI FA-1
- Document type
- User manual
- Language
- English
- Pages
- 37
- File size
- 3.5 MB
- Category
- Film cameras
- Document date
- Not specified in catalog
Search available document text
Find a term, then jump to its page in the original PDF. Image-only pages may not be searchable; check the PDF for exact wording and diagrams.
Page 4 · Read text
www.butkus.us


TYPE:                 Automatic EE camera with Pentaprism viewfinder and built-in cross coupled CdS
                            exposure meter in open aperture Through-The-Lens  metering system.
FILM:              35mm film (20, 36 or 12 exposures)
PICTU R E:            24mm x 36mm
                                                                                                                                                                                 fLENS:                PETRI 55mm.f /1.4,7 elements in 5 groups (or                                                                /1.7,6 elements in 4
                         groups) with fully automatic diaphragm.
SHUTTER:            Focal plane .type with speeds, 1 second to 1/1OOO second and B. Built-in
                                  self-timer.
EXPOSURE SYSTEM:  Shutter speed pre-selected system. CdS exposure meter automatically measures
                       optimum exposure conditions ranging  f rom EV 2 to EV 1 8 with ASA 100 (D lN 21 )
                                 film. Geared to the use of the normal lenses. Manual operation possible.
                     ASA:25 to1600 DIN: 15 to 33
VIEWFINDER:       Pentaprism viewfinder with Micromatic prism focusing device. The exposure meter
                         needle and diaphragm number visible in the viewfinder. Under/Over exposure
                           warning marks also visible
FILM TRANSPORT:  Single stroke rapid filrn winding and shutter cocking
LENS MOUNT:           Petri bayonet lens mount
SYNCHRONIZATION: FP and X automatic setting
FILTER SIZE:        55mm screw-in type (52mm. for  f /1 .7 lens)
LENS HOOD SIZE :         5 7mm slip-on type (54mm.  f o r  t /1 .7 lens)
DIMENSIONS:       5.9 x 3.7 x 4.1 inches (149 x 94 x 1O4mm)
WEIGHT:            36 oz. (1O3Og.)
NOTE:            28mm EE,35mm EE, 135mm EE,200mm EE and 85-210mm EE Zoom lenses,
                                exclusively designed for the EE system, available.                  _ ? _
View original page 4Page 6 · Read text
www.butkus.us


DESCRIPTION OF PARTS


                 Film Advance Lever             Accessory Shoe                  Shutter Release grtton    c            @            @
     @   Film Counter                    Cordless Flash Contact  @    Self-timer Lever
                                                Film Rewind Crank   @   self-timer release Button     @   Shutter Speed Dial      @o
     @   Film Speed Indicator  @   Cable Release Socket   @   Battery Compartment
                                                                        -4-
View original page 6Page 7 · Read text
@  Distance Scale
           @  Neck Strap Loop             @  Depth of Field lndlcator
           @   Flash Socket               @  Diaphragm Scale
           @  Back Cover [-ock             @  Diaphragm Pin
                                @  Aperture Control Pin
-5-
View original page 7Page 8 · Read text
www.butkus.us


@   Film Cassette Chamber           @   Auto and Manual Diaph_ragm Lever
@   Viewfinder                      @   Tripod Bush
@   Viewfinder Frame              @   Film Rewind Button
@   Sprocket
@   Take-up Spool
                                                              -6-
View original page 8Page 9 · Read text
BATTERY FOR THE CdS EXPOSURE METER
 The built-in CdS'exposure meter is powered with a 1.3 volt mercury
  battery (Mallory RM 675R, National M'1C, Toshiba TH-KC or
  equivalent). The battery compartment is located on the left-hand
  front side of the top cover. The exposure meter isswitched on bya
  stroke of the,film advance lever. When the exposure meter needle
  does not respond to a change of light conditions, the battery has
 become exhausted and must be replaced.
  Unscrew the battery compartment cover with your finger tips .ld
  insert a new battery with the plus (+) upward, facing the battery
  compartment cover, into the battery compartment.


-7 -
View original page 9
Page 10 · Read text
www.butkus.us


mike                      DigitallyDN: cn=mikesignedbutkus,by mike butkus
                             o=orphancameras,                                              ou=29,
                              email=mike@butkus.org,                                              c=US     FILM WIND LEVERbutkus              Date: 2019.08.10 19:36:35 -04'00'                         When the film wind lever is advanced, the following
                                       things happen simu ltaneouslY:
                                           1. The battery switch is turned on and the exposure
                                       meter is activated.
                                        2. The film frame is transported to the next unex-
                                          posed frame.
                                         3. The film counter is advanced.
                                       4. The shutter is cocked.
                                   After the shutter is released, the battery circuit is shut
                                          off and unnecessary battery drain is avoided:
                       EXPOSURE COUNTER
                             The counter is located on top of the camera body. lt
                               shows the number of film frames exposed, and auto-
                                      matically resets to "S" (for "Start") position when the
                                   back cover is opened. Frames of the 12th, 20th and
                                36th ar.e marked in red to signal end of the roll, depen-
                                   ding on the length of the film used.
                                                   B_
View original page 10Page 11 · Read text
FILM SPEED (ASA OR DIN} SETTING
    After the film has been loaded, be sure to set the ASA or DIN film
   speed index specified for the film in use on the film speed scale. This
    adjusts the exposure meter for the film being used and an essential
    step in getting properly exposed pictures.
   To set the film speed, raise the external ring of shutter speed dial and
   turn to align the reading equivalent to speed of the film in use with
   the index mark. Do not set in between click-stops.  lf the reading
   does not align correctlrT, the ring will never drop down. The black
   numbers represent ASA values and range from ASA 25 to 800, and
   the red numbers represent DIN values ranging from DIN 15 to 30.
   Read the instructions supplied with the film and set the correct film
   speed index number. lf the number of the film speed corresponding
   to that of your film is not available on the film speed scale, use the
    closest number and never set betweerl two settings. For convenience,
   the positions for intermediate film speeds are shown only by dots.
   See the illustration.
                                                200       o 4 800a o      | 600  ASA 25 ?   50?     100 ??                       ?                   ??        ?    *r"r.*3rtt%YU,                                          80      125 160     250                       s;  40                        64                                                                         520     500 640   1000 t250

              15                                             2l   DIN                                      30?                                                         ?                            ?                              ?               ??        ?18??                    ??    NUMBERS                                              28                                                 29                                                                                                                  92                                      25  26                                                                              3l                                  iz  is              nio        BYSHOWNDOTS
-9-
View original page 11Page 12 · Read text
www.butkus.us


     SHUTTER SPEED DIAL
       Your camera shutter has a range of speeds covering sufficiently all the ordinary
         picture situations. lt has the settings of : 1/1OOO,1/500, 11250,11125,1160,1130,
         1115, 1/8,114,112 and 1 second and Bulb. When the Bulb setting is used, the
        shutter stays open as long as the shutter button is being depressed (for time
         exposure). The settings are represented onthe shutter speed dial located right-hand
       on top of the camera body. For convenience, only the lower half of the numbers(250
       for  1 /250, etc.l and B (for Bulb) are etched on the black wheel. The shutter
       speed is set by lining up the appropr'iate number or B with the black line on
                                                     'between       the top cover. Do not set the shutter speed        two click-stops.
      The shutter speed can be selected either before or after the shutter has been
        cocked.
       For indoor photography, it is recommended to set the shutter at 1/30 or 116O;
        for outdoor photography, at 11125 or 1125O; and for action photography such as
        in sports or snap shots it is important to use faster speeds of 1125O,11500 or
          " 1/1OOO to avoid blurring.
      The number "15" for 1/15 second is larger than others and painted in fluores-
        cent. When using the shutter speeds slow.er than.1/15 second, it is recommend-
      ed to use a tripod and a cable release equipment so as to avoid camera shake,
                                                                               -t0-iii
View original page 12Page 14 · Read text
www.butkus.us


    FULLY AUTOMATIC EXPOSURE CONTROL IN THROUGH-THE.LENS SYSTEM
                                          Set the aperture at "EE" mark in red letter on the                                                                li]I:ii  $\1tr:OPEN APERTURE SYST'EM                                          diaphragm scale. This is all you have to do forThe diaphragm in the EE photography operates as
                                                                                                           theshown in the diagram,  i' ,;"    ,p'   ":'t l"              exposure control. By setting the aperture at
                                   "EE" mark, the auto and manual diaphragm lever is
                                                                                                                                                                                                                                                         't                                                   A" position (fully                                              automatically switched to the
                                             automatic operation) even in case it is being set at
                                           the "M" position in green (manual operation). Thus,
 (1)  The exposure control is done with full aperture        the exposure control is done with the full aperture       opening.  o                                           opening and the viewfinder is always seen bright for
                                         easy and accurate focusing. (This is called "Open
                                              Aperture System.)
                                        The light entering Through-The-Lens  strikes the two CdS
  l2l  Just before the shutter operates, the diaphragm                                                          cells located on each side at the base of the Pentaprism       automatically stops down to theosize the
       exposure meter has selected.                         (see the diagram) and the CdS cells measure the average
                                                     brightness of subjects you frame in-the viewfinder. (This
                                                                        is what is called "Through-The-Lens metering system".)

  (3)  After exposure, it opens again and the battery   o          circuit  is shut off.
                                                                      -12-
View original page 14Page 15 · Read text
NOTE
1 The B (bulb) setting is not usable in the Electric Eye photo-
   graphy. Switch the diaphragm to the manual operation and
    set the diaphragm by turning the diaphragm scale.
2 The stopped-down  light measuring is applicable to the 55mm
   standard Electric Eye lens, but not to other interchangeable
    Electric Eye lenses.
EXPOSURE WARNING MARKS
 In the viewfinder there is a diaphragm scale and
 on each end of the scale you will notice the red zone.
The red mark below the f/16 is an over-exposure
 warning mark, and the one above the tl 1.4 (or
                                                  an                                                                          f                           /1.7 lens) is the one above the  f /2 for
 under-exposure warning mark.

                      R E {1) OVER-EXPOSU
 When the exposure meter needle swings down to the
 over-exposure warning mark, it  shows "over-
 exposure". Set the shutter at a faster speed or use an
 appropriate filter to absorb the amount of light. (For
 the proper filter, see Page 34.)
View original page 15Page 17 · Read text
MANUAL EXPOSURE CONTROL IN THROUGH.
 THE.LENS SYSTEM
  There is a "M" (short for Manual) mark in green letter
  around the upper side of the lens barrel, and the auto
                                                                         dia-  and manual diaphragm lever @ which switches the
  phragm to "M" position from "A" (short for Automatic)
   position is located on the oppqsite side of the "M" and "A"
  marks. Move the auto and manual diaphragm lever to the
    left, and you willsee the diaphragm is set at the"M"position.
  The manual operation is used in the following photographic    Move the lwer and switch to the "M" position.
   situations:
  TO ADJUST THE EXPOSURE CONDITION                 one stop wider to the full aperture tllan the f/number
  When the main subject of the whole picture area you frame        indicated in the viewfinder when you have set the exposure
   in the viewfinder is extremely dark or bright, it is recom-      at the "EE" control. lf the subject is brighter, set the
  mended to adjust the exposure condition so that the      f/number at a half or one stop closer to the minimum
   important subject is correctly exposed. Set the exposure at        aperture than the f/number the "EE" control let you know.
  the "EE" control and read the f/number in the viewfinder.        For example, when you take a portrait with a pack-ground of
  Then, swing the auto and manual diaphragm lever.to the left      snow scene or on the beach, you can get aproperly exposed
  and set the diaphragm on the "M" position.  lf the important        picture by using a half or one stop wider aperture opening
   subject is comparatively dark, set the f/number at a half or       than normal.
-t5-
View original page 17Page 18 · Read text
www.butkus.us


TO CHECK THE DEPTH OF FIELD                           meter needle stays above the mark, use a slower shutter
Setting the auto and manual diaphragm lever on the "M"        speed, and if it stays under the mark, use a faster speed.
position you can pre-view the depth of field and see in the    NOTE: ln manual exposure control, the diaphragm ring
viewfinder the lens zone of sharpness with any aperture.                                                                                                                                                                                                                                                                                 f /1.7)  the                                                                   should be swung between  f /1.4(or
TO TAKE CLOSE-UPS                                                              largest aperture, and f 116, the smallest aperture.
                                                                                                           lf you have inadvertently swung it to the "EE"  f       When you use a close-up unit such as the extension
                                                                                                                                                                                                                  is   1'4                                                      mark on the diaphragm scale, the diaphragm           tubes or the extension bellows, the automatic ex-
\2>&-                                                                    consequently switched to the position in the auto-    .\    posure control does not work.  PETRI FA-l             matlc exposure control. so, switch the diap          however, has a means of obtaining a proper ex-            hragm to the "M" position again.
    4
           posure setting.                           TO USE NORMAL LENSES
   5'6   Look through the viewfinder, and you will see a    When you use,the normal lenses that are not designed for the
  g      small blue dot very close to the t12.8 in the dia-     "EE" photography, the automatic exposure control does not
                                                     work. However, you can obtain the proper exposure reading          phragm scale.This  is the exposure indication mark.
     11                                                       through the procedures stated in TO TAKE CLOSE-UPS             First, set the diaphragm on the "M" position and                                                                    (page 16 ). As to the Petri interchangeable lenses designed for
                                                          the "EE" photography, see PETRI INTERCHANGEABLE 16I                                                 LENSES at page 31.
Then, looking through the viewfinder swing the diaphragm    IMPORTANT Make sure that the film speed is set at the
ring as far as the meter needle comes on to the expozure                         correct reading specified for the film in use.
indication mark in the diaphragm scale. Through these                        (For further information, see FILM SPEED
procedures you can get the optimum exposure setting.  lf the                 SETTTNG at page 9.1
                                                                       -r6-
View original page 18Page 20 · Read text
www.butkus.us

I
                                SHOOTING AGAINST THE LIGHTI                                    When the light is available from the back of the subject and your
                                           main subject is comparatively darker than the back-ground, it  is
                                             recommended to adjust the exposure condition. The procedure  is
                                             same as required when the important subject is dark. (Refer to TO
                                      ADJUST THE EXPOSURE CONDITION at page 15.)
                                                         First, set the exposure in the EE photography and read the
                                               f/number in the viewfinder. Then, rotate the diaphragm ring to the
           Normal lighting          Back lighting         right and set the f/number at a half or one stop closer to the full
                                                     aperture than the f/number indicated in the viewfinder when you
                                                   have set the exposure for the EE photography.    ,
l
.T


                                                                                     -t8-
View original page 20Page 21 · Read text
VIEWFINDER AND FOCUSING
  PETRI FA-1has the original PETRI Micromatic Focusing system
   for fast and accurate focusing. The precision focusing elements in
   the viewfinder consist of a group of more than 800 micro-prisms as
  shown in the center of the picture.
  As you look through the micro-prism area @ in the viewfinder,
  vou can see the subject clearly, ONLY when it is correctly
   focused. Rotating the focusing ring you will notice the appearance
   of something like a mesh of a net in the center of the viewfinder.
  This reticulation is caused by the flickering of reflected light        @  @  c
   entering the camera lens. When the subject is correctly focused the
   flickering grid fades away from the micro-prism area. In the
                                                                                                             is  second inner circle @ is the plain glass area where the subject
   always seen sharp and clear, even when the lens is out of focus.
  When the lens is correctly focused the image in the micro-prism
   area will be as sharp and clear: as that seen in the surrounding circle
  @.

                                                           FOCUS      OUT OF FOCUS-t9-                                                          IN
View original page 21Page 22 · Read text
www.butkus.us


                           DEPTH OF FIELD
                         A lens that can be focused lets you accentuate the important image in a
                                                   picture, while  it can de-emphasize irrelevant objects in front of and behind
                                         the main subject by throwing them out of focus. This involves what is
                                 known as "Depth of Field". The smaller the aperture is the more the
                                                    depth-of-f ield   i ncreases.
                             HOW TO READ THE. DEPTH OF FIELD
                                       The scale is engraved on the lens barrel of your camera and indicated in
                                                black lines spreading out both sides of the index marker at the center.
                                          Simply focus the lens in the normal way, and each pair of black lines
                                       which points to the diaphragm scale indicates the depth-of-field zone
                                                corresponding to the diaphragm you set.
                                      For example, the depth-of-field zone for the standard 55mm lens is
                                                  indicated as follows: When the focusing distance is 8 feet and the f/l1
                                                                 is selected, one of black lines at f/11 points to 6 feet, the nearest point
                                                               still in focus, and the other points to approximately 12 feet on the
+                                              other side, being the furthest distance in focus.


                                                                                  -20-
View original page 22Page 25 · Read text
HOW TO HOLD YOUR PETRI FA-1 CAMERA
The format of your picture is determined by the position in which you
hold the camera. Holding the widest part in a horizontal position will
result in a horizontal format. Holding the widest part in a vertical
position will result in a verticat format. Blurring in a picture often is
caused by camera shake at the moment of exposure. Practice holding
the camera and releasing the shutter so you can take pictures without
jarring or shaking  it.
Use the following three simple.rules for taking a pictune to aroid
camera movement:
     1. Before releasing the shutter, take a deep breath and hold it until
        after the picture has been taken.
    2. While taking the picture, hold the camera firmly with both
      hands and press the back against your face and forehead as
        firmly as possible
    3. Squeeze the shutter release button, do not prod or tap  it.
        Practice squeezing until you can release the shutter without the
         slightest quiver.
View original page 25Page 26 · Read text
www.butkus.us

 FILM LOADING
 PETRI FA-1 accepts the standard 35mm cartridges     Load the film in a shade, using your body with your
 conftining 12, 20 or 36-exposure lengths of film.      back to the sun as protection if you have no other
 Avoid direct sunlight falling on the film cartridge.      method.


1. TO OPEN TH E CAME RA    2. TO PULL OUT THE KNOB        3. FILM LOAD,ING
  BACK                              Pull out the film rewind knob on    Slip the film end into any slit on
Pull down the lever with your    top of the camera. This is to allow    the take-up spool and slide it down
thumbnail and open the camera    the film cassette to be put into the   toward the bottom of the camera
back. At the same time, the ex-     cassette chamber.                 body, and check that the film
posure counter automatically re-                                       perforation is properly engaged
turns to "S" (which means "Start")                                        with the tooth of camera sprocket.
position.
                                                                                 -24-
View original page 26Page 27 · Read text
4. TO ADVANCE THE FI LM         5. TO CLOSE THE CAMERA    6. TO RELEASE T,HE SHUTTER
 Advance the film advance lever a     BACK                    AND ADVANCE THE FILM
 little and see that the film  is  The camera back will be locked    Repeat this action twice, and You
 fastened round the take-up spool,   with a snap by a slight pressure.    are ready to take your first picture.
 before closing the camera back.
  NOTE: In case the film rewind knob does not turn coonterclockwise by advancing the film advance lever, it
           shows that the film is not properly transported. Open the camera back and check the take-up spool.
-25-
View original page 27Page 28 · Read text
www.butkus.us

FILM UNLOADING
After the entire length of film in the      removed into the film cartridge so it can
cartridge has been exposed,  it must be      be removed from the camera.
                                ",


1.  TO REWIND THE FILM                                        2.  TO REMOVE THE CAR-
                                                                                                                                                                                                                                          I DGEDepress the   f ilm rewind button     little tension on the crank while the        TR
located on bottom of the camera    film is being rewound. When the    Pull out the film,'rewind knob and
body. Raise the film rewind crank    tension stops, you know that the    remove the film cartridge.
and turn it in the direction indicat-    rewinding is complete.               Avoid direct sunlight when remov-
ed by the arrow. Yciu will feel a                                   ing the film cartridge from the
                                                           camera. Also, the camera lens
                                                                 should face downward while the
                                                                              cartridge is being removed so as to
                                                                               prevent  it from dropping out.
                                                                         _26_
View original page 28Page 29 · Read text
HOW TO CHANGE YOUR LENS
(1}  REMOVING THE LENS
Turn the Lens Mount Ring in a counterclock-
wise direction until the red mark appears on
top of the lens barrel. The lens can then be
removed from the camera.
I2I  INSERTING THE LENS
Line up the red dot on the camera body with
that on the lens mount ring. Then insert the
lens making sure that the protruding lock on
the bayonet mount of the lens is on the top.
When the lens is in position, turn the lens
mount ring tightly in a clockwise direction.
View original page 29
Related documents and language editions
From the M. Butkus archive. Original publisher and archive notices are retained.
Check the model and edition against your equipment.
PDF verified 2026-10-10.