Film cameras
Plaubel ROLL-OP II User manual
User manual for Plaubel ROLL-OP II. 13 pages in English. Read the original PDF, download or print a copy without registration.
13 pagesEnglish2.5 MB PDF
Loading your manual…Open PDF directly
Document details
- Brand
- Plaubel
- Model / document
- Plaubel ROLL-OP II
- Document type
- User manual
- Language
- English
- Pages
- 13
- File size
- 2.5 MB
- Category
- Film cameras
- Document date
- Not specified in catalog
Search available document text
Find a term, then jump to its page in the original PDF. Image-only pages may not be searchable; check the PDF for exact wording and diagrams.
Page 1 · Read text
www.butkus.ust.:
I n strucli ons Oror rhe                           !rse,
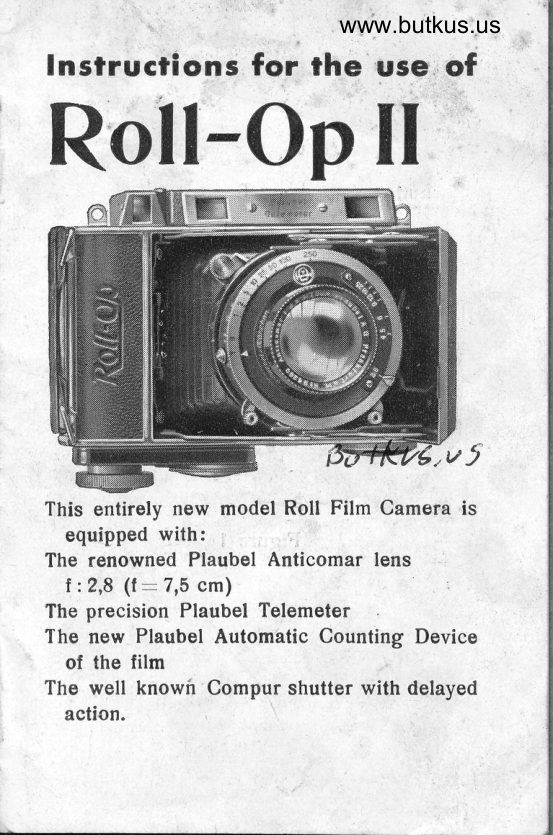
Roll-Op Il


This entirely new model Roll Film Camera is
  equipped with:
The renowned Plaubel Anticomar lens

                                                                                                                                                                                                                                                 .    f :2,8 (t-7,5cm)
The precision Plaubel Telemeter
The new Plaubel Automatic Counting Device
  of the film
The well knowfi Compur shutter with delayed
  action.
View original page 1Page 4 · Read text
www.butkus.us

                                                                                                                iTo open Gclmero 3
Hold the cemera by the left hand a.nd press
upon button A. Then the camera front with
lens & Compur shutter will spring open and
clip into position.
Focussing;
Alter the camera struts have clidred in and are
fixed in their respective spring recesses, the
Roll-Op II is in Focusfordistant obiects (marked
on the focussing scale by *). For focussing
near objects please uso the
Goupled ronge finder:
This instrument is fixed to the right hand side
of the camera-body, together with the Newton
finder.
By looking through the eye piece C ol the
range finder (see fig. 2) you will soe two
halves of the picture; they will not coincide
for near.objects, it the camera is set for
                                           then,,infinity". For instance a cross X will
appear as shown in fig. o here below.
By turning the levor B (figure 1) of the worm
screw (moving the Compur shutter with the
Plaubel Anticomar lens, and simultaneously
View original page 4Page 7 · Read text
The shutter
     is the world renowned ,,Compur.. (Latest
     model ,,Rapid..). The shutter speeds are con_
      trolled by revolving the nickeled ring around
     the shutter until the desired speed is opposite
     the white triangular mark. For all speeds of
      I second to rlno the shutter must first be set
    by moving the lever opoosite lever B to the
            until you hear a slight clicking.     light
                                                        tof    For ,rl" time snd ,rB" bulb nevLr try      set the shutter, as for these positions it is always
     ready for use. You would damage the ffi€-
    , dt"lism by trying to set the Compur for ,,T..
    and ,rBtt,
    For releasing the shutter pull the lever near
    the diaphragm scale downwards genfly or
     press upon the wire release.
    The Delayed-Action can be used for all speeds
    from I second to rlrco Normal Compur, or
    speeds I Scd. to rlzuo Rapid Compur. It cannot
   be used for ,rTu and ,r8,, or speeds of
      rlzso Normal or                           r/aee Scd. Rapid. To use the
     Delayed - Action, pull back the milled knob
    over the speed scale, then set the shutter;
    when the release lever is dopressed, the self
    timer will operate the shutter after an inter-
    val of about 12 seconds.
View original page 7Page 9 · Read text
Diophrogm scole
is fitted under the Anticomar lens, glnd serves
to adjust the lens aperture according to ihten-
sity of light and depth ol focus required. We
advise you to use a reliable exposure meter.
Landscapes, genre scenes, and all other pic-
tures in open air require no larger apertures
than say f:9 or  f :12 with shutter speeds of
rlzs, rlrw. Sporting pictures however, requiring
speeds of rlzoo to l/ass should be made with
apertures of  f :4,5 to  f :2,8, according to the
intensity of light.
The aperture of t.22,8 should be reserved
primarily for indoor snaPshots or photos with
artificial light.


                                      3To close ccrmero
First of all attention must be paid that the
                                      havelens is to be set badt to o' should it
been used for near obiects. Then hold the
Roll-Op II in both hands, and press with both
thumbs upon the struts until the lens board
folds up into the camera.
To lood rhe comerq:
Release the spring catdr under the leather
View original page 9Page 10 · Read text
www.butkus.us
       handle R I (fig. 2) and open the leather covered
       badr, which is hinged on its under side. Insert
     an empty take up spool in the upper com-
      partment, as follows:
       Pull out the film key, turn up the spool holder,
         fit the empty spool on the round pin and re-
       place the spool holder into the spool dtamber.
     Then replace the film key R2; press lever N
      of the counting device (fig. 3) in the direction
      indicated by the arrow and turn RZ until it
       enters into the slotted part of the empty spool.
    Film number indicolor:
      In order to turn the indicator plate, it must be
        lifted up and then it may be rotated by means
      of the milled edge. Take out the spool holder
     from the lower spool dramber, insert a full
                                                                   left                                          the     unexposed                          on to                         (putting                   filmroll                                             it
                                                  the                                           into                                 holder                          spoolI     pin)        and replace                      the
      dramber. Pull out the cover paper about 4in,
       insert the cover paper point into the long slot
      ol the empty spool, taking care that the paper
      runs parallel, not oblique. Close the badr of the
      camera, release again the lever N by pressing
        it in the direction of the arrow (fig. 3) and
      turn the lilm key R2 until the hand, printed on
      the film cover paper iust passes the under
View original page 10Page 11 · Read text
red window. Do not wait for the No I  to
appear. Never forget during this manipulation,
to release the lever N as indicated above.
Close the film window by sliding over the
nid<eled cover on the camera badr and leave
it closed until all exposures are rnade. Now
the first picture is ready for exposure, but
still the counting device has to be set, This
is done by lifting the counting wheel and
turning it until figure I, engraved on the
wheel, is opposite the red dot of the lever
N; in this position the counting wheel is
allowed to spring in again. Then all is ready
for taking the first photo.
To turn the film for the further pictures, release
lever N for a moment, and turn lilm key R2
until stopped automatically. You will now see
figure 2 of the counting wheel opposite the
red dot (indicator) whidt means that the film
for picture 2 is in position. This is repeated
for all 16 pictures.
After all the 16 photos are exposed, release
again lever N as indicated above, turn the
film key until the whole of the protecting
paper is wound up, open the back of the camera,
and remove the exposed film roll in the usual
way.

                     t0
View original page 11Page 12 · Read text
www.butkus.us
Filrer3:
For obtaining best results wo recommend the
use of our special filters, made ol first class
Jena glass and potished absolutely planparallel;
the filters aro provided with screw cells,
allowing them to screw into the front lens ol
the Anticomar the most reliable way. For
orthodtromatic film the tilters (whidt we make
in 3 densities) have the following factors:
,rlight" -  2x, ,,medium" -  4x, ,,dark" -  8x.For pandrro films the respective factors are:
1,5x, 2x & 3x. These factors are approximate;
they may vary a little according to the spe-
cilic emulsion ol the film.    q

Supplementory lens:
We supply suth a lens for pictures in about
a distance of say 22 indres (large portraits'
llowers etc.).

leother cose
of a special design, allowing to photograph
without taking the Roll-Opll out of the case
(de luxe, brown).
View original page 12
Page 13 · Read text
Further occessories:
Pod<et tripod in leather case.    r
Leather case for lilters or supplementary lens.
Soft leather case for the Roll-Opll.


Ploubel Verkoufs - Gesellschqfi
Brounschweig
View original page 13
Related documents and language editions
From the M. Butkus archive. Original publisher and archive notices are retained.
Check the model and edition against your equipment.
PDF verified 2026-10-10.