Film cameras
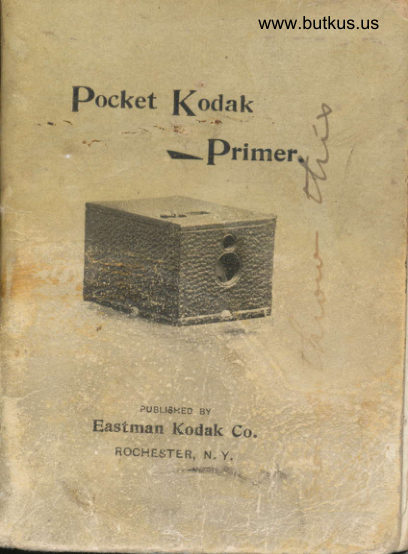
Pocket Kodak Primer User manual
User manual for Pocket Kodak Primer. 74 pages in English. Read the original PDF, download or print a copy without registration.
74 pagesEnglish4.8 MB PDF
Loading your manual…Open PDF directly
Document details
- Brand
- Kodak
- Model / document
- Pocket Kodak Primer
- Document type
- User manual
- Language
- English
- Pages
- 74
- File size
- 4.8 MB
- Category
- Film cameras
- Document date
- Not specified in catalog
Search available document text
Find a term, then jump to its page in the original PDF. Image-only pages may not be searchable; check the PDF for exact wording and diagrams.
Page 1 · Read text
www.butkus.us


       IUALBHEO BY
Eastman Kodak Co.
   ROCHS$TER, N, Y.
                     ,-.@FA!-,-
View original page 1Page 2 · Read text
IiODAIi
            Trade Mark, 18ti8.
    EASTMAN KODAK CO.
           ROCHESTER, N. Y.

MaNuF^crurrFs  oF
   Kodaks.
   Kodets,
    Ilullet Cameras.
    Bulls-E5'e Cameras'
   Easttuattts Solio PaPert
   Western Collodion PaPer,
   Eastern Collodiott Paper.
   Eastmants DrY PlateS,
   Eastman's Permanent Bromide Papert
   Eureka Bromide Paper,
   Eastman's Platino-Btomide Paper,
   Eastmants Etrumeled Bromide Papert   Eastmants Transpareltt I'ilms'
   Eastman's Trausbrtrency  Plates,
   Eastman-Walker RolI llolders.
    Tripods.
   View Cameras and
   Other Specialties.

Nov.  1896.
View original page 2Page 3 · Read text
www.butkus.us

       REI.OR'D LOADTNG,
  Before-- taking any pictures with thePocket I{odak r-ead the-following instruc-
 ti o  r r s- carefu  I  r y, and make yoursell= perfecil y
familiar with the instrument takiirg espec-ial care to learn the constructiod of-theshutter. Work it for both tirne and in-
stantaneous exposures several times before
threading up the fllm.
 As sent from the factory, each Pocket
Kodak is loadcd with a spool of fllm for tZ
exposures 7L4xZ inches, but the fllrn is notthreaded up for use. In preparing to usethe camera, therefore, remove the spoolfrom [he yoke, and.proceed as directe-d inParb I.!
  The first thinE for the amateur to bear in
rhind is that the lisht which serves to im-press the photographic image upon thesensitive fllm in a fraction of a secondwhen itcomes through the Iens can destroy
the film as quickl.y as itmakes the picCure.
Until it hasbeen ileveloped and fiied, thefllm must never be exposed to white hght
lthis includes gas light, lamp light, etc.l, orit will be rui netl. . l'h roirehotrt a-it ttie opera-
tions of loading and un-loading, thele^tbre,
be extremely careful to keep'the blacXpaper wound tightly around- the fllm toprevent the admission of light.
View original page 3Page 4 · Read text
Venmo @mike-butkus-camera  Ph. 2083
PayPal Name  Lynn@butkus.org      www.PayPal.me/lynnbutkus
View original page 4
Page 5 · Read text
CONTENTS.


  Plnr    I.-Loading.
  Plnr   II.-MakingtheExposrlres.
 Panr Ill.-B,emoving the Film.
'  Pltrt  IV.-Using Glass Plates.
  Pln'r   V.-" \Ye Do the liest.tt
  Pe'nr Vl.-Developing and Printing.
  Plnr  VII.-IIints.
View original page 5
Page 6 · Read text
www.butkus.us

           PART  r,
    I,oading the Pocket Kodak.
  'Ihe fllm for the Pocket I{odak is put up
in light tight rolls, and the
camera cant therefore, be
loaded in daylight. This
operation should, however,
be performed in a subdued
light, not in the glare of
bright sunlight,
 To load:
l. Take a position at a table
  as far as possible from any
 window. place the pocket
  I(pdak on the table before
 you and pull out the catch.  TITE FTI,M.
View original page 6Page 7 · Read text
2. Lift the camera body from the box. It
  wili come out easily and without forcing,
   if you start it evenly.


          -;-a@-'      www.butkus.us


3. Take the fresh spool of fllm and break
  the gummed slip that holds down the end.
  of the black paper, and pull the paper ofi
  about three inches.
View original page 7Page 8 · Read text
www.butkus.us


 4. Lift up the spool yoke and ilrread. ilre
  paper und.erneath, holding the spool l'ith
  the ratchet end toward the bottorn of ilre
   roll holder.


     Mike Butkus                                 Digitally                                                                                              DN:email=mike@butkus.org,Date:cn=Mike2023.10.15signedButkus,by20:38:36Mikeo=ButkusButkusc=US-04'00'camera manuals, ou=butkus.org,


Norn.-The ratchet serves no useful purpose urrtil
   the spool is used as a reel.
View original page 8Page 9 · Read text
Slip tbe spool into place in the yoke.


       6. Draw out the black paper six inches
         beyond the end of the camera body, thus:


                    www.butkus.us


\-
View original page 9Page 10 · Read text
www.butkus.us


7. 'Iurn the key several times to the right
  and pull it out of the reel.

NorE.-A stop prevents l,he key from coming loose
   from the camera.
8. Pull up the reel yoke, thread the paper
 under the yoke and into the slot in the
  reelt crimping the end as shown in cutr
 and being careful to see that it draws
  evenly.

                  ii'. n&**


                                                            a,
View original page 10Page 11 · Read text
9. Push the reel yoke back into place  :
  inserb the key and turn to the left until
    it, is seated in the reel. Then give one or
 two more turns until the black paper
  binds itself onto the reel.


10. See that the paper draws true and
  straight. If one edge runs against the
  end of the spool more than the other,
  loosen the paper and slide it, sidewise
  until it runs perfectly true on the reel.
View original page 11Page 12 · Read text
www.butkus.us

11. Re-insert the holder in the case, being
  careful not to let the black paper catch
 and tear in so doing.


                    The paper should
                   be in this position.

                 12. Push in  the
                         catch.
View original page 12Page 13 · Read text
13. Turn the key to the Ieft about l8 times,
  when the figure l will appear before the
  red celluloid window in the back of the
  camera. thus:


  The fiIm is mow in  position for
'taking the  first  plctute.


                         10
View original page 13Page 14 · Read text
www.butkus.us


               PART II.
          Makingthe Exposflres.
     SncrroN I.-INSTANTANEoUS Exposunns.

                    (,,sNAP SHOTS.")
      The Pocket l{odak shutter is always set,
     and is operated by pushing.the spring al-
      ternately to right or left.)'          If the spring stands at the right hand
      side of slot simply push it to the left, and
       uice-aersa.
        Tf the spring should be pushed the wrong
     way, the shutter would simply remain
     unmoved, and no t'clicktt wouldbe heard,
      thus ind.icating that it should be pushed in
      the opposite direction.
      To take instantaneous pictures the obJect
     should be in the broad. open sunlight, but
      the camera should not. The sun should be
     behind the backorover the shoulderof the
      operator.

                                11
View original page 14Page 15 · Read text
Ase the Lat9est Stop.
  Snap Shots can only be made when the
largest stop is in the lens. If a smaller stop
be used the light will be so much reduced
that it wiII not sufficiently impress the


                    Ftc. 1.
image on the flIm and failure will result.
In making snap shots the slides A and B
shown in Fig. l should be pushed down to

                         L2
View original page 15Page 16 · Read text
www.butkus.us

 the limit of motion. Slide A eontrols time
and instantaneous exposures. Ertr snap
 slrots this slide musLbe d,own.

  Slide B controls the stops, of which there
are thre.e. When it is clear d.own the larg-
est stop is in place. This is ilre one to use
for all snap shots. except where the sunlight
is utt"usuallltr strong and. there are no heavy
shadows, such as views on the water or in
tropical or semi-tropical climates, when the
rniddle stop may be used.

  The smallest stop must never be used for
sna,p shots or absolute failute  will re-
sult.
  The principal, things to learn in using the
Pocket I{odak are to

          EoId it gteady
         and
            Ifold it Level.
                         13
View original page 16Page 17 · Read text
I f the operator attempts to photograph a
tall building, while standing near it, by
pointing the camera upward (thitrking
thereby to centre it) the result will be
similar to the picture below.


                    FtG. 2.
ET']'ECT PRODIICED BY TILTING THE KODAK,
                       14
View original page 17Page 18 · Read text
www.butkus.us

  The I{odak rvas pointed too high. This
building should have been taken from
the middle story window of the building
opposite.
 The operator should hold the I{odak
leuel, after withdrawing to a proper dis-
tange, as indicated by the image shown in
the f,nder on the top of the camera
  If the object is low down on the ground,
like a small child, or dog, the I{odak
should be held down level with the center
of the object.
                                                                           :.-aI
                                  .ifJffi
View original page 18Page 19 · Read text
Remembet

  lst. That only the sunny side of an object
should be'photographed    .
  2d. Thatthe sun should be back of you
or over your shoulder.
  3d. That t'he s',rn must never shine in ilre
lens when an exposure is being mad.e.
  4th. That the object must not be in ilre
shade, but in the broad., open sunlight.
  5th. That if the atmosphere is dull and
smoky the picture will be dull and  .. flat."
View original page 19
Page 20 · Read text
L['                            www.butkus.us


                          FtG. 4.
            - $'he.n making a horizontal exposure,         hold the camera with the flneers^of thd           right han9                    -underneath  it and' steady it         with the left hand, as shown in Fif.  4.          Press the shutter spring to one side frith           tbe thumb of the right, hand.
             This Makes the Jg*posure,
                                     17
View original page 20From the M. Butkus archive. Original publisher and archive notices are retained.
Check the model and edition against your equipment.
PDF verified 2026-10-10.