Flashes & lighting
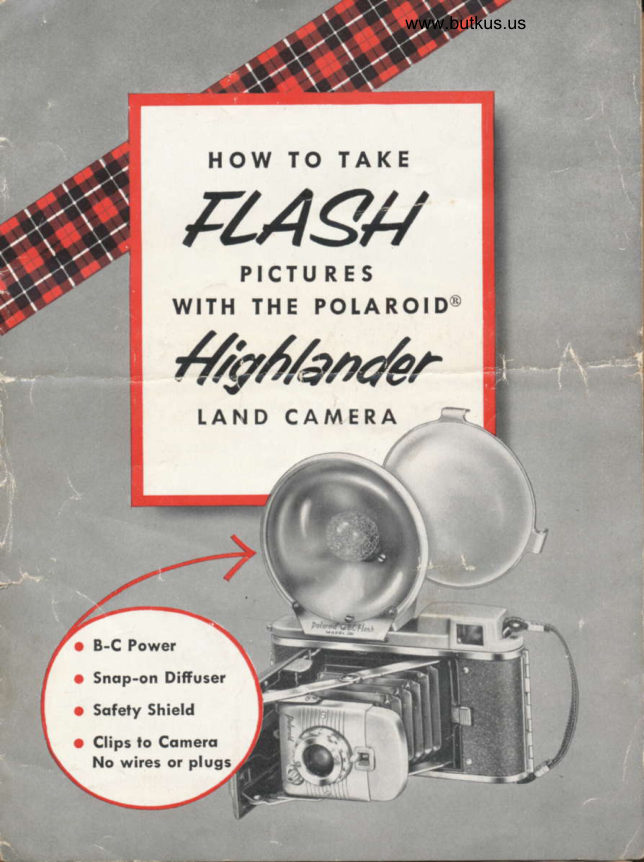
Polaroid flash for Highlander camera User manual
User manual for Polaroid flash for Highlander camera. 7 pages in English. Read the original PDF, download or print a copy without registration.
7 pagesEnglish2.6 MB PDF
Loading your manual…Open PDF directly
Document details
- Brand
- Polaroid
- Model / document
- Polaroid flash for Highlander camera
- Document type
- User manual
- Language
- English
- Pages
- 7
- File size
- 2.6 MB
- Category
- Flashes & lighting
- Document date
- Not specified in catalog
Search available document text
Find a term, then jump to its page in the original PDF. Image-only pages may not be searchable; check the PDF for exact wording and diagrams.
Page 2 · Read text
Flash is ideal for informal indoor shots where
                      light is rarely bright enough for snapshots. The
                      light from the flash buib is fast enough to stop
normal activity, so strong tlrat ordinary room illumination need not
be taken into account when taking flash pictures. The built-in flash
guide gives shutter settings for all distances indoors. You need only
estimate distance accurately to get perfect pictures.


                Your flash gun can add an important touch to
                  pictures made outdoors in daylight. On bright
                   days, flash fills in shadows where needed, soft'
ening the picture and bringing out detail that otherwise is lost. On
gray days flash can provide highlight interest. Your Diffusing Filter
will help you control the amount of "fill" light you get from your
flash.
View original page 2Page 3 · Read text
www.butkus.us


     ATTACH THE GUN
    TO YOUR CAMERA
With hand on base of reflector,
simply slide gun on your camera. The
shoe on the base of the gun fits into
the accessory slide of the camera and
the electrical connection is made
automatically when you clip the gun
to the camera.
It is important to push it all the way
in so that it snaps firmly in place.                                                               Digitally signed by Mike Butkus
                            Mike Butkus DN:org, cn=Mikeemail=mike@butkus.org,Butkus, o, ou=Butkus.c=US
     rNsERr rHE BuLB                                                            Date: 2025.01.06 15:11:06 -05'00'O
Tip the safety shield forward and
press the bulb into the socket. The
bulb fits at a slight angle to make most
efficient use of the reflector.  lt will lock
into place automatically. Do not try to
twist the bulb to lock it-there's no
need to.
Place the safety shield back into position. In case the bulb should
shatter, the shield is designed to absorb the impact and deflect
the glass away from the subject and the photographer.
To eject used bulbs push in on the ejector lever on the rear of the
gun. The bulb will pop out automatically. Never try to pull the bulb
out of socket without using ejector lever.
           WHAT BUTBS TO USE
Press 25, No. 5 and PF{ bulbs are generally recommended for use at
all distances because they give the most light.
Bantam 8 and PF3 types have a srnaller light output than Press 25
No. 5 and PF4 but are quite practical for most pictures. Use shut.
ter settings given on the flash guide for these bulbs.  llo not usr thc
clrar, grr-flllcd Dulls or thr snall ll-2 !ul[s.
CAUTION: Do not leave bulb in flash gun for long periods when
your camera is not in use. lt may shorten the life of the battery.
View original page 3Page 5 · Read text
www.butkus.us

    srr rHE sHUTTER@
The DISTANCE BETWEEN FLASH AND SUBJECT lS MOST lM'
PORTANT. Measure or estimate it carefully since the amount of
light that falls on the subject varies tremendously as the flash gun
is moved closer or farther away.
Tfrentain your-  lookshutterat thesetting.flash guideThe guideon theis basedback ofontheaverageflash indoorgun to pic-ob'
tures in rooms with light walls and ceilings. The knob iust below
the lens should be set on "1" for flash pictures.
Color of the subject, the lightness or darkness of the surroundings,
errors in distance, can all affect your pictures. But you can always
get the picture you want with this simple rule: lf your picture is too
dark, set the shutter to a lower number; if too light, set it to a
higher number.
           REMovE FtAsH GUNA  How ro

               To remove, press
                 forward on the
                    base                             of                            the                            gun -                                            reflector.                      not                       on                            lhe
                      Pressure on the re-
                          flector might cause
                  serious damage                      both to the camera                                    \,\
                  and the flash gun.

   WRONG                            RIGHT
View original page 5Page 6 · Read text
www.butkus.us


/i)surtr-rN FrAsH GUrDE        ( 3 )NO WTRES OR PrUGs
   You can tell at a glance just         Just slide the flash sun into   what setting to us-e for e-ach         the accessory slidei That's    distance. Guides can  be              all there is to it. The electric:l
   changed as new film tyoes ap.          connection  is in the clip.    pear.
                          (l)orFFUsrNG FrtrER
@ror.rc BATTERv uFE               Clips onto the safety shield of   This is a powerful B-C Gun          your flash gun to cut down the   which will fire thousands of           intensitv of flash. Softens  in-    bulbs. Battery should last         door shbts and provides bal-   from I to 3 years without re.       anced lighting in  outdoor    placement.                              flash shots.

Each Polaroid Flash Gun is carefully tested befcre  it leaves the fac'
tory. Each is guaranteed for a full yea!' from date of purchase
against defects in material or workmanship (battery excepted).
Any such defects will be remedied without charge (except trans-
portation). Units damaged in use or worn through normal service
will be repaired under an appropriate system of charges for labor
and parts.
For service or repair, return gun to your photographic dealer, or
mail prepaid to Polaroid Corporation, Cambridge 39, Mass. Pack
well in stiff box and attach separately-stamped envelope giving
your name, address and nature of difficulty.
View original page 6Page 7 · Read text
SOTNE TIPS FOR GOOD fUgSHOTS


Your Diffusing Filter will give a gentle soften.
ing effect to your flash pictures by cutting
down the intensity of the light and scattering  it more widely. The effect
 is particularly good in extreme close-up shots (3Yz teetand with close-
up lenses) where portrait quality is desired. In outdoor flash shots,
where sunlight provides the principal illumination, use the filter to re-
duce flash intensity and "balance" the lighting.
The filter clips onto the outside of the safety shield of your flash gun.
When using the filter, set shutter 2 numbers lower than shown in the
flash guide.             V
In general, your flash pictures will be more
pleasing if you place the subject near an
angled background or sidewall which reflects some of the light from
the bulb back onto the subject. This gives some fill.in lighting which
helps to avoid a flat picture.  lf you can't get near a corner, try to place
your subjects no further than 6 feet from a light-colored wall.

BATTERY CARE
The batterv   f ur-nished wit6 yourflash gun sh-ouldlast one to threeyears, depending
on how frequently
you use your gun.
 1l exposures oe-come erratic  orbulbs fail to flash,     Remove the  three     The battery will popchances are you       screws on the inside        out when you pull theneed a new bat-       of  th e  refl ecto r       loose end of the bat-terv. Your sun has     around  the  bulb         tery. pull tab (blacka        Elereadv       socket, and  lift  off        tape).Minimax'ISOS 22Vz volt      the reflector.
battery. Replace  itwith one of  the      Replace the battery with another of the same sizesame size and volt-      and voltage. Be sure to place it on top of the bat-age. Here's how.to       tery pulltab with the plus (*) end to the right.
put a new one ]n:       Replace the shield and tighten screws.
View original page 7
From the M. Butkus archive. Original publisher and archive notices are retained.
Check the model and edition against your equipment.
PDF verified 2026-10-10.