Film cameras
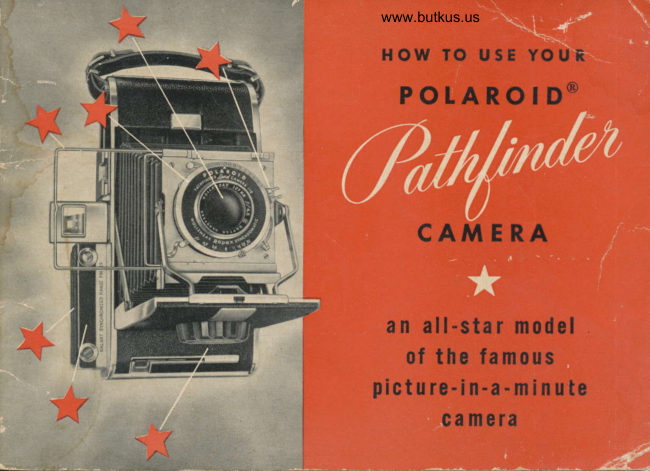
Polaroid Pathfinder User manual
User manual for Polaroid Pathfinder. 35 pages in English. Read the original PDF, download or print a copy without registration.
35 pagesEnglish12.4 MB PDF
Loading your manual…Open PDF directly
Document details
- Brand
- Polaroid
- Model / document
- Polaroid Pathfinder
- Document type
- User manual
- Language
- English
- Pages
- 35
- File size
- 12.4 MB
- Category
- Film cameras
- Document date
- Not specified in catalog
Search available document text
Find a term, then jump to its page in the original PDF. Image-only pages may not be searchable; check the PDF for exact wording and diagrams.
Page 5 · Read text
How to L(lAD THE CAMERA
      You can load the camera in as little as ten seconds-far less time than  it takes you to read
      these instructions. The picture roll actually drops i4 place. Do not load in direct sunlight.

     FIR5T, OPEN UP THE BACK


                                                                    www.butkus.us


                              Lift cutter bar as shown.                        Swing latch-lever down. Back will open.


            2
\Paee
View original page 5Page 6 · Read text
www.butkus.us
         OPEN ALL THE WAY AND LAY FLAT


                                                          THIS IS THE
                                                           INSIDE COVER
                                                       LIFT IT AND LAY IT FLAT

                                                            N EGATIVE (SPOOLED) ROLL NOW IT'S READY     POSITIVE (WH ITE) ROLL                       WILL DROP IN HERE              CLIPS IN HERE  FOR TOADING


                   RO LLER    STOP PI NS              ROLLER

                        AT THE orHER PARTstTnD A MoMENT AND tooK  t'   l       The two rollers are the heart ol the camera. The picture papers will pass between these rolters,
which control the picture-making by squeezing the developer reagent evenly between the positive and negative
sheets. Keep these rollers clean -  spin them quickly before each roll is loaded, and remove with a damp clothany particles of dirt. The stop pins shown above drop into holes punched in the paper and stop  it automatically
in the correct place each time you advance the paper to develop a picture.
                                                                                                Page 3
View original page 6Page 7 · Read text
How tO TAKE A PICTURE
  The purpose of this brief section is to show you how to take one kind of picture
       simple but common kind. lt is a picture of a person, taken out.of-doors and  -a   close enough to be a good, informal portrait.

           TO OPEN THE CAMERA
                                                               PUlt SHUTTER SIIDE all the way
                                                               out until it clicks and locks
                JUST PNESS TI{E COVEN CATCH                          firmly. PICTURES WILL BE
                   and the cover will pop up,                  BLURRED IF SLIDE IS NOT
             Open fully until cover                FULLY EXTENDED AND
                      braces click and lock cover                     LOCKED.
                             rigidly.


                  THtS lS THE F0CUS|ltG t(lt0B.
                   Do not turn  it until camera
                              is fully opened.

                         Mike Butkus             Digitally                                                                                                                                                                       DN:email=mike@butkus.org,Date:cn=Mike2024.04.17signedButkus,by12:29:45Mikeo=ButkusButkusc=US-04'00'camera manuals, ou=butkus.org,

                                                                                                  STIDE RELEASE
                                                                                   Push in on
                                                                                                    black center
                                                                    Shutter slide and release.   piece.


Page 6
View original page 7Page 8 · Read text
www.butkus.us
TO CTOSE THE CAMERA     HOW TO
PUSH l1{ 0l{ StIDE REIEASE and      HOID TH E CAM E RApush all the way back. Then pick
up camera in both hands, lens fac-         FOR A HORIZOl{TAt PICTURE,                                       hold the camera this way,ing you. Press down with thumbs                                            with your left hand throughon both cover braces, squeeze cam.                                      the strap as shown. Holdera cover shut.                                   camera firmly against face
                               and shoulder to prevent
                                             motion.

CAUTl0l{: Be sure the
wire-frame view-
finder and focusing
track are pushed
back into place be-
fore closing camera,


                               F0R VERTICAI PICTURES, there         . . . but you may find you can hold
                                         are two convenient ways to hold    the camera even steadier if you
                                        the camera. The position shown    cradle it upside down on your
                                      above is the conventional way-     shoulder, as shown here.

                                                                                           Page 7
View original page 8Page 9 · Read text
sET THE SHUTTER

Your Pathfinder Camera has the finest press-
type shutter made, one which is used by pro-
fessionals the world over. The shutter has
many speeds and many features which are
described in more detail on Page 20, but for
this picture you need do only this:

Turn the outermost ring on the shutter until
the indicator points to the 50 mark. (This
means that your camera will be shooting at
1/50th second.) Make sure the shutter
speed marking is set exactly over the indica-
tor. Settings to either side are apt to result in
erratic exposure.

Then, move the cocking lever to the right
as far as it will go. lf you move it only part
way, the shutter may jam when released.                       www.butkus.us


 Page 8
View original page 9
Page 10 · Read text
www.butkus.us


    SET THE tENS

       Like the shutter, the lens in your Pathfinder
     Camera  is a favorite choice of press photog-i       raphers.  lt is famous for its sharpness and
       high quality.  lt is a big lens, and thus it has
      great light-gathering power. lt will take pic-
      tures when the light is quite dim. For this
        picture, however, you are in bright daylight,
      and the lens opening must be closed down
       to exclude a great portion of the light. Set
      the indicator lever to the f/l6 mark.  lf the
     day is cloudy, a larger opening is needed
      and you should set the lever to the f/l1 or
                f /8 mark.


                                                                                                Page 9
View original page 10Page 11 · Read text
BACK VIEW SHOWING RANGEFINDER
IOOK TH ROUGH TH E RANGEFINDER
Stand about 5 feet from your subject and look         'thethrough     rangefinder: You will see two
images. Now turn the focusing knob slowly until
the two images of the eyes come together to
make one sharp image. Your camera is in                                                            -lproper focus when you see only one image of
the most important part of the subject-in this                                                                                                                                                                         Icase the eyes.
                                                                                    \
                                                                                    \\

                                                                     Tilt camera slightly when using rangefinder, to
                                           make  it easier to find sharp lines to range on.
This is whatyou see when     This is what you see
 subject is not in focus.   when subiect is in focus.
YOUR CAMERA lS ll0W FOCUSED. Donotchangedistance between subjectand your camera lens.

Page lO
View original page 11Page 12 · Read text
www.butkus.us
AIM THROUGH THE VIEWFINDER
The optical viewfinder snaps open easily with a flick of
the finger. Now pull out the wire frame (mounted on the
 shutter housing) as far as it will go. Pull by the outer
frame which willautomatically  pick up and move the inner
frame into position. Your viewfinder is now ready for
 sighting subjects 10 feet or more away.


      FRONT
        LENS
                                                The camera will actually record slightly
                                              more of the scene than you will see
                                                      through the viewfinder. This helps to   WIRE FRAME              PARALLAX CORRECTION                                                            correct for small errors in centering
                                                  and framing.For subjects closer than 10 feet, you must correct for
parallax to aim your €mera accurately. This is done with
the wire frame. Just above the shutter cocking lever,
you will find a series of numbers. Opposite the infinity
(o) mark, you will see the end of the wire frame    the                                                 -indicator for parallax correction. Puih in on the inside
wire of the frame until the indicator is at the desired
distance. For this S-foot picture, set the indicator between
the 4 foot and 8 foot marks.
                                                                                        Page 11
View original page 12Page 13 · Read text
How to DEVEL0P
A PICTURI

HOLD THE CAMERA THIS WAY

                                          PUSH THIS BUTT0ll all the way          LIFT CUTTER BAR and take
                                                                       in, then release. D0 1l0I H0tD           a  f irm hold on the paper tab,
                                                            lT D0fUl{! Paper will not stop           putting your thumb length-
                                                                                       if you do.                           wise along the top.

                         wAlr 6*q, sEcoNDs!    lmportant. When you pulled the    THIS WAY                                                            tab, you started the processing of                                                                                       in-   your first picture-and also ad-                                  The'pictH),..I1:       ,f,eveloping
                            side the                          lnt   vanced the paper for the next.
                                                    the in-   (You can check this by lifting the
                                                                the    cutter bar and looking at the print.
                                     picture                         addi-    ing on the tab.) The "negative" of
                                       tional                     ls re-   the first picture remains in the
                                    quired.               sed to   camera untilyou pullthe tab again.
                                   estimating              k your-   At that time it is torn off and dis.
                                      self with a wa                      carded.
 WHICHEVER FEELS MORE
 SECURE AND COMFORTABLE
 Shield the camera from direct
 sunlight during this operation.

 Page L2
View original page 13Page 14 · Read text
www.butkus.us


PUtt IHE TAB out of the slot with a slngle fairly-rapid motion.                 Ct0SE CUTTER BAR and hold
Do not hesitate midway. Pull all the way out until you hear a click            down firmly with thumb.
and the tab stops automatically. Pull straight out, not downward.               Then tear off excess paper.
Paper is now advanced and ready for second picture.


     STIDE IATCH BACK on the         tIFT PICTURE D00R and          tlFT PICTURE CAREFUIIY along perfora-
      pictu re door.               remove the  finished           tion to avoid tearing. Then close and
                                           print, starting with oval          relatch picture door by sliding latch
                                          cutout.                         back to original position. Your camera
                                                                                              is now ready for the next picture.


                                                                                        Page 13
View original page 14Page 15 · Read text
N(lW  !
-  apply the permanent finish provided by the PolaroidPrint Coater packed with each picture roll. lmportant:
Get the habit of coating your pictures right away,
before you forget. You'll find that Polaroid pictures lead
a hard life. Everyone wants to see them as they come
from the camera - and that's the very moment whenthey are, most likely to be damaged by handling. The
Coater covers your prints with a tough, plastic finish,
giving them a handsome lustre and lasting protection
against print hazards in storing and handling.  lf for any
reason you cannot coat your pictures immediately, be
sure to coat them before storing.


Page 14
View original page 15
Page 16 · Read text
www.butkus.us

      IT'S EASY TO USE
    THE PRINT COATER
It takes just a few seconds, and the                         t'U                                                      ,'*'n*;results are perfect  if you are careful to
follow the directions accompanying the
print coater.                                                        (


                                      \

FIRST, take the curl out of the print      f HElf, apply print coater according   Att0W PRll{T T0 DRY. Be careful
by drawing  it over any handy edge,    to instructions, being careful not to    notto stack pictures or handlethem
such as a table edge.                miss any corners or edges.             until the coating is completely dry.


                                                                                        Page l5
View original page 16Page 17 · Read text
How to C0RRECT Y0UR PICTURE 0N THE SP0T
Now- let's look at the picture you just made. lt may not be exactly what you want because the lens
setting was only approximate. This pagg shows how to make corrections to improve exposure. The
next covers other common errors, all of which you can correct on the spot.


INCORRECT EXPOSURE


The easiest way to make
changes is to move the
lens opening lever to a
largerorsmaller  nu m ber.
The smaller the f/num-
ber, the larger the open-
ing in the lens witl be,
and the more light will
come in   making your          -picture lighter.            To make
your picture darker, use
a  larger        f/number.                             DAnf                   (See    T00
Page     18          for more infor-                               smaller                                  flnumber.-  set to a     ,USTin lensRlGllT-noopening required.change      T00a higherLlGllTf/number.-  set to
mation on lens setting.)


Page 16
View original page 17
Page 18 · Read text
www.butkus.us
BTURRED OR
FUZZY IMAGE
The three common
causes of tuzzy pictures
are shown at  right.
Check focus again. Be
sure to hold the camera
securely-and hold your
breath when you press
the shutter release.     t0cusHG lltAccuRATE        CATERA IIOVED          SUB'ECT TOVED
 Don't punch the release;    Note subiect is blurred.        All objects in picture      The face is blurred while
squeeze it slowly.            Background  is sharp.            are blurred.             rest of subject is sharP.
TOADING OR DEVELOPMENT ERRORS CAN CAUSE THESE:


                                                                                            UIIDERDEVEI0PEII]IEGATIVE         ROIL LIGHT.STRUGK                                    U]IEVEII                                                                      IIOT                                           PULII]IC                                                              SHIETDED                                                      StOT                                      OF TAB     TA8
                                                           KeeP           Note white                                                                               tab       full                                      with a single                                                                                minute after- pullingAllow                                  Pull tab                                             FR0tlll LOADlllG                                                        SUll-streaks across-      picture.      quick motion to avoid          slot in shadow when          tab, longer in cold
Do not break scotch-tape       streaks. Don't stop                 pulling tab.                   weather.
           seal  t                    midway.

                                                                                        Page 17
View original page 18Page 19 · Read text
How to choose BEST LENS and SHUTTER SETTINGS
You can change the exposure of your pictures     HERE'S HOW TO find the best combination for
       them lighter or darker-in either of     a given scene:-maketwo ways:
                                        FIRST... MEASURE OR ESTIMATEBy changing the shutter setting to make the                               THE IIGHT TEVEI OF THE SUBJECTshutter give a longer or shorter "wink," letting
more or less light through.                                   lf you have a Polaroid-G.E. exposure meter,
By changing the f/number of the lens to make      simply point the meter at the scene (or take a
the aperture larger or smaller. (When your      closeup reading for best accuracy) and note the
camera is not loaded, you can see how this is     number from 1 to 8 the meter reads. On top of
done: Set the shutter to "T" and press the      the rangefinderyou willsee this simple exposure
release lever to open the shutter. Then move       calculator.  lt converts the number into a choice
the f/number control to observe the action of       of shutter and lens opening combinations which
the iris diaphragm.)                                            will produce the correct exposure. For example,
                                                                              if you set the pointer to 6, you have several
                                                     choices: t/16 at 1/1OOth, t/22 at l/s0th, t/32
                                                    at 1/25th, etc.                            EXPOSURE
                          CALCULATOR               lf you own a conventional exposure meter, set
                                                 the film emulsion speed into the meter in ac.
                                               cordance with the speed instructions packed
                                                with each Polaroid picture roll, then read op-
                                                         tional settings directly from the meter.
                                                                                                lf you have no meter, check the exposure guide
View original page 19Page 20 · Read text
www.butkus.us
       packed with your Polaroid picture roll. From       use, and use the speed opposite that number.
       the chart, pick the number (from I to 8) that      This is what the f/number control does: Each
       applies best to the light conditions you are        division of the f/number scale cuts the exposure       working under. Then set the exposure calcula-                                                                   in half as you go from t/4.5 to t/32   the larger        tor on top of the rangefinder housing to that                                        -                                                        the number, the smaller the lens opening (and     number-and read off the optional settings,
     as suggested under instructions for the      the less the exposure).
        Polaroid-G.E. meter.                        The smaller numbers, although they p.rr'lt
                                           more light to pass through the lens, make
     NOW... MAKE YOUR CHOICE              focusing more critical. These pictures show how                                                            the sharp portion of the same picture increased    OF THE BEST COMBINATION                                                       as you use the larger f/numbers.
      One way is to select the f/number you want to


tfr
ia                            LENS SET Ar f/4.5           LENS SET AT f/32

      The portion of the prcture that is shdrp (called    THE GENERAL RUtE: Use the middle range
      "Depth of Field") increases greatly with the       settings      t 18,'t lLL, t lL6   whenever possible.                                                                  -                                                                                   -        larger f/numbers. Depth of field is also greater      Save the                                                              extremes for unusual                                                                                                            light conditions
        at longer distances.                            and sPecial effects'
                                                                                        Page 19
View original page 20Page 21 · Read text
How to choose BEST IENS ond                  THESE ARE THE SPEEDS
SHUTTER SETTINGS (Conr.)              WHICH YOUR SHUTTER OFFERS:
Some kinds of pictures can be made most          (Note that the exposure is cut approximately
successfully by deciding first on the shutter                   in half with each faster setting.)
speed ycu want and setting the f/number                                               T- "Time" expo-accordingly. Action pictures require faster                                                           sure: Shutter
shutter speeds; depth-of-field considerations                 opens with first
will sometimes suggest slower shutter speeds.                       click, closes on         "tow UGHT                                                             second click.                    LEVELS''
                                                B-"Bulb"  expo-           D0 1t0T                                                                  Shutter                                                                  -   sure:                                                                                as              HAI{D.HOtD                                                           stays open
                                                                 long as release     Camera must be                                                                                           is held in,                                                                                               steady to avoid blu r
                                                                                    1   one second         at these settings.                                                                      2 -  l/2 second                                                                            5 -  1/5 second                                                                                    l0 -  l/lO second                                                                    -
             www.butkus.us
l{0TE: To correct exposure if a picture turns out too               25   1/25 second    "ll0RtlAt" SETTIil0S willlight or too dark, adiust  f /number rather than shutter               50 -  l/5O second    stop motion in o[dinaryspeed. Lens can be set midway between fr'marks for               100 -  1/lOO second  posed pictures.                                                                    -precise adjustment, Shutter cannot. The only speeds
available are those shown on the indicator.
                                                                                       "fAsT ACTt0t{" sETilltGS
CAUTloll: Do not leave the shutter "cocked" when            200   1/20o second are needed for u n-camera is not in use. Do not leave  it on the 1 /400th            400 -  1/4O0 second  posed pictures where
setting, even when not cocked, Tirning will be dis-                  (This                                                                     -   setting.r-equires rapid movement is aptturbed if these precautions are not observed.                                  an extra Pusn) to take place.

Page 2O
View original page 21Page 22 · Read text
www.butkus.us
MORE ON DE PTH OF FIETD

For clear pictures, all of the important parts of       interiors, every possible bit of sharpness range
the scene must fall within the sharp depth-of-       is desirable. The table below gives depth of
field area. For some pictures, a depth of only a        field measurements for the three lens openings
few inches will suffice. For others, such as room       at all distances.

                       DEPTH OF FIETD TABTE
                     Figures show distances (from lens) within which picture details
                            will be sharp, with camera focused as indicated in left-hand column.
      Distance
    Focused on                 t/4.5                            t/5.6                            t/8
        3ft            2'lI)4'  to  3'r4n               2'Ll'  to 3'L"              2'LOY+il to  3'L-|/a,'
        3y2 ft        3'5"   to  3'7u           3'4u to 3'7"           3'314' to 3'8rAu
        4ft         3'11"  to  4'2u             3'10" to  4'2'          3'10u  4'4'
        5ft         4'LO'  to  5'2'              4'9'  to  5'4u          4'8u   to  5'6'
         6ft        5'1Ou to  6'4u           5'6u to  6'6u          5'6u   to  6'8'
        8ft           7'6'   to  8'7'              7'4'  to 8'11"            7'L'   to  9'4n        lo ft         g'Lu   to  1 1'               9'    to  ll'7"            8'7'   to  L2'4u
       15 ft          l3'2u  to  L7'LOn            l2'7u to  18'6"          12'    to  2l'
       25 ft         20'    to  34'             19'  to  37'            17'    to 47'
      50 ft         33'    to  lO5'            30'   to  1.60'           26'    to  Inf.
         IN F.          93'    to  Inf.             74'  to  lnf.            52'    to  lnf.
          For smaller openings, use the depth-of-field
            indicator next to the focusing scale of the
           camera. Indicator shows approximate depth for
                all distances at f/16 and  f 132.
                                                                                          Pagc 2l
View original page 22Page 23 · Read text
Special tips on the RANGEFINDER and VIEWFINDER

THE KAIART RANGEFINDER
All of the famous accuracy of this pioneer press-       Occasionally, a rough jar in handling may cause
type rangefinder is preserved in the special      a slight vertical displacement of the two images.
adaptation of it to your Pathfinder Camera.
Each rangefinder is carefully matched to the
camera lens it accompanies.
The rangefinder is of the "super-imposed
image" type. When the camera is not in focus,     To adjust this, simply remove the screw in the
you will see two distinct images through the       calculator slide nearest the viewer and pivot the
f inder window. As the camera nea rs focus, these       slide so that it exposes a screw beneath. View
two images move closer and closer together,      through the rangefinder with the camera in a
and when the camera is in sharp focus on the       horizontal position and turn this screw a few
object, the images should be exactly super-      degrees clockwise or counter-clockwise to bring
imposed so that only one is visible.                 the images into vertical alignment.
THE NEW OPTI-FRAME VIEWFINDER          easily, the viewfinder lets you correct for
                                                           parallax   the error which creeps into. theYour Pathfinder Camera has a new combination               -                                                framing because of the fact that the cameraviewfinder. With it, you are able to frame the                                             lens and the viewfinder lens have slightlyentire scene very accurately, without the                                                         different viewpoints. You correct for the errorcramped eye-space that most optical finders                                              by moving the entire wire frame in toward thesuffer from.                                            camera lens by a small amount, depending on
In addition to framing the scene accurately and     the distance from the object. The parallax

Page 22
View original page 23Page 24 · Read text
www.butkus.us

correction scale is engraved on top of the        W}IAT THE FINDER SETSframe which holds the shutter.  lt shows the                                            The finder sees less than the camera will
amount of correction for three distances -              record, varyingwith distance. The "field" of4 feet, 8 feet and infinity (*). As you push
frame in toward camera, indicator slides      ffi   thewhichcamerait takeslensin -  variesthe amountslightlyofdependingthe scenealong beside these numbers. The frame can                            -                                     on the distance at which the camera  isbe set midway between numbers for exact                                                focused. The finder cannot compensatecompensbtion at intermediate distances.                                                     completely for this variation, and accordingly
Note thatanother setof numbers is engraved             the finder will show you less of the scene for
beside this one. These are used for close-            distance shots than the camera will actually
up aiming with the Polaroid Close-up Lens             record. You will find that this is a valuable
Kit. See Page 30.                                        safety feature.


                                                                                       Page 23
View original page 24From the M. Butkus archive. Original publisher and archive notices are retained.
Check the model and edition against your equipment.
PDF verified 2026-10-10.