Film cameras
Polaroid Photoelectric shutter Model 440 User manual
User manual for Polaroid Photoelectric shutter Model 440. 13 pages in English. Read the original PDF, download or print a copy without registration.
13 pagesEnglish3.2 MB PDF
Loading your manual…Open PDF directly
Document details
- Brand
- Polaroid
- Model / document
- Polaroid Photoelectric shutter Model 440
- Document type
- User manual
- Language
- English
- Pages
- 13
- File size
- 3.2 MB
- Category
- Film cameras
- Document date
- Not specified in catalog
Search available document text
Find a term, then jump to its page in the original PDF. Image-only pages may not be searchable; check the PDF for exact wording and diagrams.
Page 2 · Read text
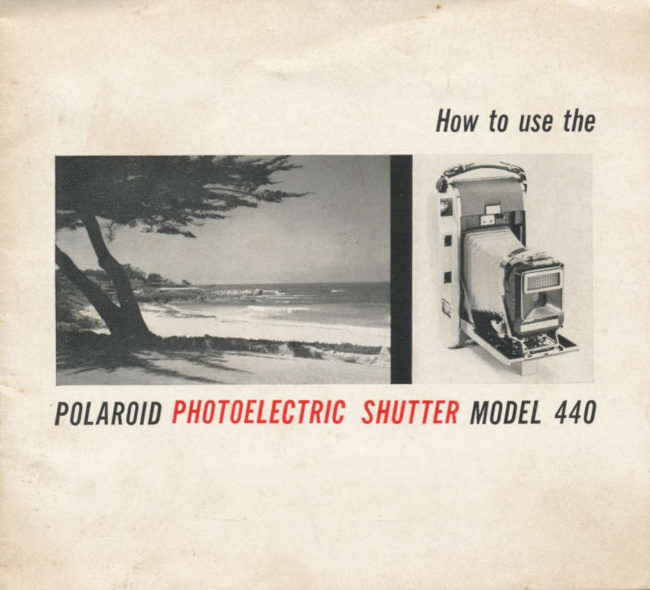
The Polaroid Photoelectric Shutter Model 440
       is a fully automatic shutter which is attached
      to the Polaroid Land Camera. It is designed to
     be used with Polaroid La,nd 3000 speed film.
    The light that falls on the photocell of the
     440 Shutter automatically sets the speed of
      the shutter blade at the exact instant the picture
       is snapped. The shutter speed will vary from
      L/l}th of a second to 1/1000th of a second, de-
     pending .on the amount of light needed for
       perfect exposure. In addition to selecting expo-
      sure automatically, the shutter also insures a
      picture of exceptional sharpness. Because it
      "stops down" the lens to a very small aperture,
      the depth-of-field of the picture is so great that
      for most pictures foeusing is unnecessary.
       Your success with the shutter will be greatly
     enhanced if you will spend a moment reading
       this brief booklet, and practicing with the shut-
      ter before mounting it to the camera.
     NOTE I Your camera must be light-tight for
       successful use of the 440 Shutter and 3000 speed
      film. If your eameta serial number is not pref-
      aced with ar7 "L", the light seals furnished with
     the shutter should be fitted on the camera,
      following the instructions enclosed with them.
    HOW TO ATTACH THE SHUTTER
        Set the shutter of your carlera to EV 14 (or
     No. 5 on cameras using the original numbering
      system), and set the I-B knob to "B". The

                               www.butkus.usl,-* 2 --^
View original page 2Page 3 · Read text
440 Shutter will actually swing the knob to "B"Mike Butkus          Digitally                                                       DN:org,Date:cn=Mikec=US2024.12.30signedButkus,by13:08:37Mikeo, ou=Butkus.org,Butkus-05'00'      email=mike@butkus.                                   automatically in most cameras, but it is wise
                                     to pre-set the knob to "8" in case the fit between
                               the shutter and camera is not perfect,
                                 Once the camera has been set at EV 1!+, it is
                                  most important not to change the setttng while the
                                      shutter is at.!,ached. If you move the setting
                                    wheel, the camera shutter may stay open when
                                the 440 Shutter is removed, fogging the next
                                        picture.  If thisshould happen, turn the dial back
                                to EV 10 (No. 1) to release the shutter blade.
                                 Thread the tripJever beneath the support arm
                                  of your camera shutter, hold the unit flat and
                                     firmly against the front of the camera and move
                              the latch lever over to the latch position.
                           As the latching lever is swung to the latch
                                      position, you will notice that the regular trip-
                                  lever for the camera shutter is depressed. Al
                                     the end o.f the latching motion, lhe catnera shutter
                                   shouid click, .iust as it toould if you h,ad taken a
                                                                                         place,                                    1licture. Be sure that this click takes
                                  because the camera shutter must be open behind
                                   the 440 Shutter. If you don't hear a click, just
                                   press the tripJever the rest of the way.
                                         Incidentally, if you should ever make a com-
                                      pletely black picture without even a faint sign
                                         of an image,  it will be because the camera shutter
                              did not click, or because the I-B knob didn't
                                swing over to "B". Double-check these points
                                each time you mount the 440 Shutter.
View original page 3Page 4 · Read text
tF
                                       :h,
 INSUFFICIENT.TIGHT INDICATOR
  You will note on the back of the shutter a                             sjffsmall window, through which a white flag can
be viewed when the light is dim. When this
warning indicator is centered in the windorv
 there is not sufficient light to make a picture auto-
matically with the shutter. Check this windorv
before clicking the shutter. In general, you will
find that the shutter will work automatically
almost anywhere outdoors, until about two hours
before sunset. In very deep shade, or on ex-
tremely dark days, it's wise to watch the insuffi-
cient-light indicator. Even though there may
not be enough light to operate the photoelectric
shutter, there will be plenty of light to continue
to take pictures with 3000 speed film in the
camera. If the indicator shows that the 440
Shutter will not operate, just remove the shutter
and take pictures manually.
HOW TO TAKE PICTURES OUTDOORS
  With the 440 Shutter attached, you are ready
to take outdoor pictures automatically, with
never a worry about setting the camera for
correct exposure. But first you should under-
stand what effect the 440 Shutter has on the
focus of your camera.
  The 440 Shutter reduces the lens aperture to
f./54, which enormously increases the depth-of-
field of the camera. This means that with the

4                        www.butkus.us
                                                                                                          *-:eila*t*;=            ..dr5;-,         ..
View original page 4Page 6 · Read text
camera focused at 6 feet everything will aetually
           be in sharp focus from \tl  f.eet to infinity. If
            your camera has a wire-frame viewfinder (Model
            95A, 95B, 100 or 700) focus the camera at 6 feet
           and leave it there, because you will never have
             to ehange even for pictures as close as 3rl f.eet.
                   If your eamera is a Model 150 or Model 800,
           with a coupled rangefinder, you will still want
            to use the focusing knob, not for focusing, but
            because the viewfinder adjusts for near and far
            viewing as you turn the knob. For greatest
            viewfinding accuracy, yotr will find it best to
           use the focusing knob. However, if you would
             rather sacrifiee some accuracy in the viewfinder
              in order not to have to focus, set the camera to
           the 6-foot distance and forget about focusing.

         EXTREME CLOSE.UPS
           The depth-of-field of the 440 Shutter will let
          you take pictures as close as 24 inehes if you
            focus the camera to the furthest forward posi-
              tion    3rl f.eet. At that setting everything will            be sharp-   between about 2 feet and about 10 feet.
             Portraits made at this distance are quite strik-
             ing, and you will find this feature of your 440
             Shutter particularly enjoyable. In makirrg such
              pictures, remember that the viewfinder is not
           intended for aiming as close as 2 feet. Allow
            plenty of room between your subject and the
            top and right-hand sides of the viewfinder frame.

www.butkus.us
View original page 6Page 7 · Read text
For all norrnal outdoor
 pictures, just aim the
 camera and take the pic-
 ture. The first few times
you use the shutter you
may not be completely
sure that the shutter has
 tripped, because it has a
 \-ery gentle action, and
makes scarcely any noise.
Here again, a little prac-
tice with the shutter be-
fore attaching it to the
camera will help you get
the feel of the shutter as
 it trips. Try to squeeze the
shutter-release slowly and
smoothly. Do not punch
it, or you may cause a
blur in your picture. Al-
though a great many of
your pictures outdoors
will be made at fast shut-
ter speeds, there will be
sc:ne that will be made at
rather slowshutter speeds,
and it is important not
to jar the camera at the
instant picture is snapped.

6
View original page 7
Page 9 · Read text
ADJUSTMENT KNOB
  On the top of the 440 Shutter there is an
 adjustment knob, pictured here. It should be
 used only when a situation calls for it   and then with sorle care.                    -
   This knob serves trvo purposes     it changesthe sensitivity of the photocell to -adjust it for
extremely bright scelles, and it changes the aver-
age lightness or darkness of pictures made in
your particular camera, to suit your preference.
  Note that at the extreme clockwise position
of the knob a red triangular pointer on the knob
 rvill match a mark rvhich says "Glare Scene".                  **ffiThis refers to scenes in rvhich the lighting is so
strong that it is actually uncornfortable to your
eyes   snow scenes, brilliant beach seenes orbright- sunlight on water, for instance. For such
pictures, set the knob to its extreme clockwise
position, matching the red triangle on the knob
to the mark on the instruction plate.               "Lighten"      "Darken"
  There is another indicator on the knob, a red
dot, the position of which can be varied over
the range of "Light    Darken" indicated on
the printed plate surrounding the knob. With
this adjustment you can make your pictures
come out slightly lighter or slightly darker in
order to suit your preferenee. It is suggested,
however, that you not vary this setting from
picture to picture, because you will have diffi-
culty getting uniform pictures. You will almost

8
View original page 9
Page 10 · Read text
always fincl that a mid-range setting of the knob
             will be right.  If you notice most of your pic-
            tures coming out a little lighter thau you lvish
           to have them, set the knob toward"Darkell";
             vice versa for lighter pictures. The approximate
          range of control obtained rvith this setting  is
          shown in the pictures at the left.
           CLOSE.UP READING TECHNIOUE
          The 4-10 Shutter has an additional feature
            which, with careful use, will Iet you take pictures
              in situations which rvould ordinarily confuse tlte
            photocell, such as a back-lighted picture, for
            instanee, or one with a predominant sky area
           in  it.  As noted earlier, if the photocell in
           the shutter "sees" direct sunlight or an undue
          amount of sky, it will "think" that the scene is
             lighter than it actually is, and the resulting
             picture will be too dark. In general, it is perhaps
            best to avoid this kind of picture-taking situa-
              tion, but if you wish to take the extra care to
           apply the following technique, you will be able
             to extend the usefulness of your shutter. There
             are three situations where this technique is useful:
                         l.  Pictures with backJighting (face in
                  shadow, sunlight behind the subject).
               2. Low angle pictures with the sky as the
                  predominant background.
               3. A brightly lighted subject against a very
                  dark background.

www.butkus.us
View original page 10Page 11 · Read text
To trandle these situations, your shutter has a
 "rneter-locking point", reached when the shutter
 tripJever is depressed about 4/lths of the way.
 With the shutter off the camera, practice moving 4
 the tripJever slowly until you feel it click. This
 will be at the point where the top edge of the
metal tripJever is opposite a small raised line
at the corner of the shutter housing. When the
shutter lever has reaehed this position, it will
not return until it is pressed the rest of the way
to take the picture. At this point the meter is
locked and the exposure which results will then
be determined by the amount of light that the
meter registered when it was locked.
 To utilize this feature. make an extreme
close-up reading on the side of your subject's
face closest to the camera. You must be as ciose
to the face as you can possibly get without casting
a shadow    rrot more than two or three inchesaway. No- portion of the cell opening must be
exposed to the background or to the sunlight
beyond the subject, otherwise you will obtain a
false reading. Hold the camera up to the sub-
ject, 2 to 3 inches away, and carefully depress
the tripJever to the locking point. Then step
back and take the picture by pressing the trip-
lever the rest of the way   about l/8th inch.  Before you attempt to- use this technique,
practice with the shutter to develop a "feel"
for the locking point. Otherwise you may inad-
vertently snap a picture while you are trying to
make a close-up reading.

10
View original page 11
Page 12 · Read text
SHUTTER SPEED RANGE
                      The maximum sPeed of
                                 the shutter is about 1/1000th
                              of a second, and this is the
                           speed at which the shutter
                                    will operate in brilliant sun-
                                shine in bright surroundings.
                         Under these conditions, You
                                   will find that you can stoP
                            motion very effectivelY, be-
                              cause at 1/1000th of a second
                             there is hardly- anY action
                                       of a human subject that can't
                            be frozen. With less brightlY
                               lighted scenes, the shutter
                                operates at a slower sPeed.

                       YELLOW FILTER FOR
                         CLOUD EFFECTS
                           There is a Yellow filter,
                                 available as an accessorY for
                          your shutter, which covers
                             both the lens and cell oPen-
                              ings. With this filter, You
                             can darken the skY in a Pic';
                          ture somewhat and thus
                                 heighten the beautYof clouds.
                         Complete instructions for
                                 use of the filter accomPanYit.

www.butkus.us                                                        11
View original page 12Page 13 · Read text
TAKE CARE OF YOUR SHUTTER
  Your shutter is as ruggedly built as any high-           730 Main Street
 quality photoelectric exposure meter and can be            Cambridge 39, Mass.
expected to last fully as well. Because the meter            Chicago844 West7,AdamslllinoisStreet
movement is of necessity rather delicate, avoid            3105 Commerce Street
                                                                                              Texasany severe shocks to the instrument. Do not              Dallas 26,
                                                                                                       Placelet sand or dirt get into the mechanism. Keep              Denver1637 Court2, Colorado
fingerprints away from the glass surfaces in front           826 Cole Avenue
                                                                              Holrywood                                                                                      38, Californiaand back
                                                                       West Walnut                                                                                                                 Streettion     coating,-  theyand areshouldcoveredbe cleanedwith a low-reflec-only with           431
                                                                                             Kentuckylens tissue or a soft handkerchief. It is also very               Louisville 2,
important to be sure the eamera leris is perfectly              Union,1025 CommerceNew JerseyAve,nue
clean. Keep the shutter in ,the pouch when           930 F Street N.W.
not in use.                                                           Washington 4, D. C.
                                                                    2257 Cascade S.W.
  The Polaroid Photoelectric Shutter Model 440               Atlanta, Georgia
                                                                    2319                                                                             Brentwood                                                                                                   Boulevardis guaranteed against defects in materials or                                                                                                     17                                                                       Brentwood
rvorkmanship for a full year following the date              St. Louis, Missouri
of original purchase. During this period, any           209 Loeb Arcade
such defects will be remedied without charge               Minneapolis, Minnesota
(except for transportation) when the shutter is          47GraflexSimcoeLimitedStreet
returned through your dealer, or shipped to any              Toronto, 0ntario, Canada                                              "t:fla
of these Polaroid Corporation Repair Stations.
                                                                                                   {
                                                                                                                                                                                            :

                                                   Polaroid@                                  Printed in U.S.A.
View original page 13From the M. Butkus archive. Original publisher and archive notices are retained.
Check the model and edition against your equipment.
PDF verified 2026-10-10.