Film cameras
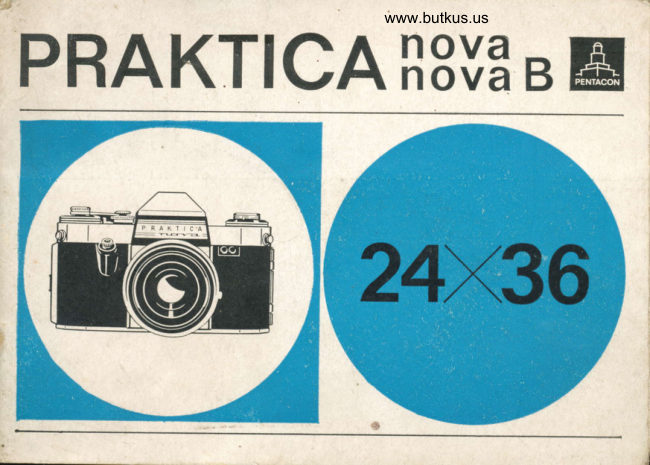
Praktica Nova / Nova B User manual
User manual for Praktica Nova / Nova B. 26 pages. Read the original PDF, download or print a copy without registration.
26 pagesOriginal document2.2 MB PDF
Loading your manual…Open PDF directly
Document details
- Brand
- Praktica
- Model / document
- Praktica Nova / Nova B
- Document type
- User manual
- Language
- Check the original document
- Pages
- 26
- File size
- 2.2 MB
- Category
- Film cameras
- Document date
- Not specified in catalog
Search available document text
Find a term, then jump to its page in the original PDF. Image-only pages may not be searchable; check the PDF for exact wording and diagrams.
Page 7 · Read text
www.butkus.us
         INSTRUCTIONS FOR USE
                  The PRAKTICA nova is a single-t"n, ,"r,"r camera for the 24x36mm picture
                     format. The fi.rmly built-in pentaprism reveals an upright, parallax-free finder
                    image with sides unreversed. The return mirror p"miit pricticalty continuous
                     viewing of the image which is blacked out only for the lhort ,orent  of the                     exPosu re.

 Special features    Return mirror
            of the   Two-way system of focusingPRAKTICA nova                    Convenient rapid lever wind
                   Smoothly working oblique shutter release with locking device,
                        in natural finger position
                    Coupling of shutter wind and film transport
View original page 7Page 8 · Read text
Lock against double exposures and blanks        I
                                                        graduated rromtr2sec. to 1/"66 sec. and B                                   j..,.j!;r".metricarv                        ffi,;;,j:T
                         Synchronization  for electronic flash and bulbs
                         Interchangeable lenses with focal lengths from 20 mm to 1000 mm
                       Automatic pressu re diaph ragm
                       Hinged camera back
                       Automatic exposu re counter
                   Wide range of accessories


                       Subsequent model developed from the PRAKTICA nova:
                   PRAKTICA nova B with built-in photoelectric exposure meter.
2l
View original page 8Page 9 · Read text
www.butkus.us
                 '        Abridged   1. Open the camera back.
       Instructions  2.  Pull up rewind knob (6). Place full cartridge into cartridge chamber. Push
             for Use       rewind knob in again. lnsert beginning of film into slit of iake-up spool (g),
                         bend it down and wind it up (coating outwards) until teeth of transport
                             sprocket (7) engage in upper and lower film perforations. Film must be
                               ,    drawn tightly across picture gate (For take-up spool with pilot pin note
                                section "lnserting the fi1m".)
                      3.  Close the camera back.
                      4.  Adjust film speed indicator (9) and film type setting disk (17).
          Only for     4.1. Set film speed by means of stop value dial (12) in window (11).
PRAKTICA nova B   5. Cock the shutrer (winding lever 16) and actuate shutter release (2).
                             Repeat this until exposure counter (18) stands on 1.
                      6.  Read exposure speed and aperture from exposure meter.
:         Only for    7.  Direct camera towards object. Turn setting ring (10) for follow pointer
PRAKTICA nova B         until follow pointer (14) coincides with meter needle ('13). Having found
View original page 9Page 10 · Read text
the required combination ofshutter speed and aperture, set speed setting
      ring and aperture ring on lens mount accordingly.
 8.  Lift speed setting ring (19) and rotate it until the marking point stands
      against the desired speed. Move setting knob (20) for speed groups as far
     as it will go in the direction of the color symbol for the speed adjusted.
 9.  Set finder image to maximum sharpness with the aid of the rangefinder
      lens or the focusing area by rotation of focusing ring (23).
10. Release the shutter.,
11. After the last exposure depress rewind release knob (15). Swing our rewind
     crank (25). Rewind film in direction of arrow.
12. Open camera and remove the film.

Beside these items it is, of course, necessary to study the following pages of the
lnstructions for Use carefully.
View original page 10Page 11 · Read text
www.butkus.us


   Cross section  A surface-silvered mirror diverts the lens rays so that the image aPPears on the
            of the    ground-glass screen. When the shutter release is depressed, the reflex mirror
PRAKTICA nova      i ou", oit of the path of rays and masks any stray light coming on to the ground-
                          glass screen, so that the rayi may fall on to the pictu re gate. As soon as the mirror
                         f,as reached its uppermoit poiition' the shutter is opened for the exPosure.
                 Upon completion of the exposure, the_mirror returns immediately to the 45
                   degree viewing position. This means that the subject is almost continuously
                          visTUle and can-be checked once more afterthe exPosure has been made.
View original page 11Page 12 · Read text
Taking lens and finder lens being one and the same, there is no danger of paral-
                               lax error. The finder image is somewhat smaller than the negaiive fo'rmat.
                                 Everything that you see in the viewfinder must necessarily appear on the film.
                                                   In. picture composition, therefore, the finder image can be utilized to its very
                                   edges. Thus it is possible to worl< with lenses of various focat lengths, and witlr
                                      accessor), equipment, without the need for any additional viewing attachments.
                           The upright, correct-sided finder image always gives a true reproduction of the
                                      subject.


1.6
View original page 12Page 14 · Read text
Exposure Setting of the exposure counter (19) is not necessary. lt becomes ready for   counter  operation automatically when the camera back is closed.

Setting the   Move the DIN or ASA value of film speed indicator (9), showing the speed of the
 film speed  film in.the camera, against one of the-numerals 12, 20 or 36lnuriber oie*poru.es  indicator   possible with the film.)

Setting the   only on PRAKTICA nova B
 film speed                Rotate stop value dial (12) until in window (11) the film speed stands against the
                  . marking point.

  Film type   Move the symbot (17) corresponding to the  fi lm in the camera against the markingsetting dial   point.
View original page 14Page 15 · Read text
www.butkus.us
                                         el"ct -"nd-white                    fJ
          @  n"""rtal,cofor film for daylight
          @  R"""ttal color film for artificial light
               S   Uegative color film for daylight
&          @  Negative color film for artificial light

          Preparing for   Swing winding lever (16) around as far as it willgo and let it glide back. Release
          the exposure the shutter and cock it once more: the automatic exposure counter (18) now
                             stands on number 1. The camera is ready for the exposure. The coupling of
                               shutter wind and film transport makes double and blank exposures impossible.
View original page 15Page 16 · Read text
Attention!  Be careful not to depress rewind release knob (15) when cocking the shutter.
                                  This would cause overlapping of pictures.
                                Swing cocking leveronly in winding-up direction as far as itwill go. Movement
tr                             by force in the opposite direction would cause damage.

                Finding the   Read exposure speed and aperture from a photoelectric light meter or a chart.
           exposure speed  Set speed by movement of ring (19) and aperture by movement of ring on lens
                                mount.

                Only for    Direct camera towards object. Turn setting ring (10) for follow pointer until
      PRAKTICA nova B    yellow follow pointer (14) coincides with meter needle (13)
                          The speed values on the setting ring stand opposite the apefture numerals on
                              stop value dial (12). The speed values are arranged in groups of different
                                  colors as follows:

        10
View original page 16Page 17 · Read text
www.butkus.us
                           Red numerals :  long exposure time
                          White numerals :  short exposure time
                                        coincide in color with the values next to speed setting ring (19)
                         Green numerals :  exposure speeds in seconds
                                   not marked next to speed setting ring (19)
                                   Control exposures at "B" setting by second-hand of a watch
                                        (use tripod and cable release)
                             Having found the combination of shutter speed and aperture required for the
                             exposure, adjust speed setting ring (19) and aperture ring on lens accordingly.I
I              Setting the    Lift speed setting ring (19) and rotate it until the red marking point stands against
            shutter speed  the desired speed. Ring snaps in when released.

                                                                                                                               11
View original page 17Page 18 · Read text
White numerals :  short speed,s
                          30:lho  sec.,60 :   rlso sec., 125 :  rlns sec.,250 :   Llzso sec.,500 :   l/onn sec.
                           Red numerals :  long speeds
                            2:   rlz sec., 4      i/2, S€c., g :  l/a sec.                                                   -ilr                                  Each stop indicates one half of the next longer speed or double the next shorter
                               speed in the scale.

           Setting knob (20)    Short exposure speeds (white numerals)
            for speed groups         Turn indicator of knob to white mark (21) as far as it willgo
                              Long exposure speeds (red numerals)
                                  Turn indicator of knob to red rnark (21) as far as it will go
iltt                       When using electronic flash (symbol l)
                                  Turn indicator of knob to white mark (21) as far as it will go
                               Exposure speeds in seconds ("B" setting)
                                  Turn indicator of knob to white mark (21) as far as it will goIl
View original page 18Page 19 · Read text
I                                             www.butkus.us
                      The exposure speeds may be set either before or after the shutter has been
                              cocked.

                 Setting   The modern lenses of the PRAKTICA nova/nova B, equipped with automatic
           the aperture    pressure.diaphragm, are set simple by clicking the aperture setting ring in at the
  t  I                             desired.diaphragm  numeral. on actuation of the shutter release, ihe diaphragm
                                 closes down automatically.
                           For chec-king depth of field, these lenses may be closed down to the pre-set
                              value before the exposure is made. This is performed on the Jena lenses by means
                          ofa hand lever (22) and on the Meyer lenses by a selector ring.
t            Attentionl  When using lenses with pre-set diaphragm please refer to section on "Auto-
                               matic diaphragm release".

                                                                                                          13
View original page 19Page 20 · Read text
Focusing The viewfinder of the PRAKTICA nova includes a Fresnel lens. In the center of
                               the lens is the split image rangefinder which is surrounded by a circular focusing
                                screen.

                 lst method   The split-image rangefinder  is used when the subject reveals conspicuous upright
                                  lines in the horizontal or conspicuous horizontal lines in the vertical image.
                   on rotation of distance setting ring (23) the two part images move towards
                            or away from each other. As soon as the vertical or horizontal lines. as the case
                        may be, of the two part images meet and form one complete picture, maximum
                             sharpness has been achieved.

           2nd method   The circular focusing screen is used for objects in motion or without distinct
                                    lines. Focusing here is performed in the same manner as on the usual ground-
                                     glass screen. The Frensel lens around the focusing area serves to brighten up the
                           image but is not to be used for focusing.
,14
    :-      .&-..
View original page 20Page 21 · Read text
I                                              www.butkus.us
                           Taking lens and viewfinder lens being one and the same, there is no danger of
                               parallax error. Persons with faulty eyesight may insert correcting lenies in
                              special mounts into the eyepiece of the viewfinder, which also accipts other
                                special  fi nder attachments.
                             Lenses with pre-set diaphragm are set to the desired stop by means of the ad-
                                 iustable aPerture setting ring. You may now focus with the lens at full aperture
                           and return tothe preselected diaphragm stop without removingthe camerafrom
                           your eye. The depth of field can be read from the depth-of-field scale on the lens
                          mount. To the left and right of the triangular mark are diaphragm numbers,
                          and the distance figures below these diaphragm numbers show thJlimits of the
                            range of sharpness.


                                                                                                  15
View original page 21Page 22 · Read text
Releasing Depress shutter release (2) steadily untilthe shutter has run down. Rotation of
               the shutter   milled ring on shutter release in anti-clocl<wise direction (red dots meet) locks
                                release mechanism against inadvertent triggering. Unlocking is performed
                                  accordingly. For exposures longer than l/"u sec. tripod and cable release should
                             be used.
                            Body shutter release accepts cable release.
          Warning signal  After the exposure a signal (24) appears in the upper left corner of the finder
         ;           j                              image, meaning that the shutter has to be cocked forthe next picture.
      I          Removing When the exposure counter indicates that the number of frames marked on the
      I                the film    film roll has been exposed, depress rewind release knob (15), swing out rewind      'lri                                 crank (25) and rewind the film in the direction of the arrow. Resistance becomes
                                   noticeable as winding is completed.
                    A new film may be inserted as described before.

        16
!1
View original page 22Page 24 · Read text
'    Flash  There are two possibilities of using flashlight sources with the PRAKTICA nova.
         synchronization The cable cor d of the flash unit is connected to the flash socket (3) corresponding
                              to the flash unit.

          synchronization The F contact releases the flash about 10 ms before the picture gate is completely
                             opened by the shutter. This socket is used for short-burning flash bulbs and is of
                               advantage since a shorter exposure speed may be selected than is possible in
                               connection with the synchronizing contact X. We would advise setting an ex-
                                posure speed of r/;o sec. with flash bulbs of the F class.

     X synchronization The X contact releases the flash when the picture gate is completely opened by
                                the shutter. The shortest exposu re speed for this flash socket is  r I rfisec. (f,).
                          The X contact is employed with electronic flash but can also be used with flash
                                    bulbs. Directions regarding exposure speeds are given by the bulb manufactures.
hL.     18.. -.. .-l-..
View original page 24Page 25 · Read text
www.butkus.us
  Maintenance   The PRAKTICA nova ar:.j PRAKTICA nova B, as high-class precision instruments,
      and care   must be protected against shock and dust. From time to time dust and film
                    deposits have to be removed from cartridge- and spool-chamber and from the
                     picture gate with a soft lens brush.
             Do not touch the optical parts (lens, viewfinder, mirror) with your fingers.
                   Should this, however, have happened, the finger marks must immediately be
                  removed with care. Clean the parts with a soft brush or a soft, smooth piece of
                       linen.

    Accessories    Everready Case
for PRAKTICA   Cable Release
   nova/nova B     Filte rs
                  Lens Hoods
                    Carrying Strap, ad justable
                    Intermediate Rings

                                                                                                19
View original page 25From the M. Butkus archive. Original publisher and archive notices are retained.
Check the model and edition against your equipment.
PDF verified 2026-10-10.