Film cameras
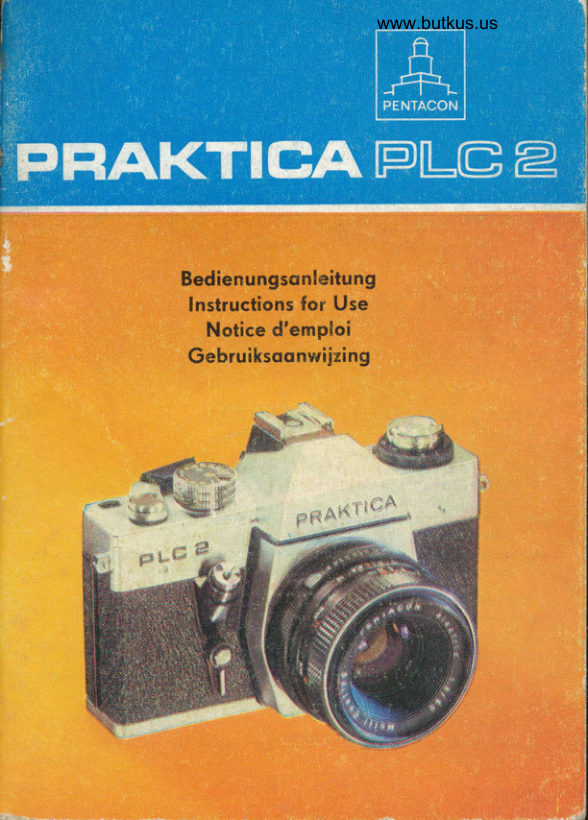
Praktica Plc 2 User manual
User manual for Praktica Plc 2. 57 pages in German, French, Dutch, English. Read the original PDF, download or print a copy without registration.
57 pagesGerman, French, Dutch, English10.6 MB PDF
Loading your manual…Open PDF directly
Document details
- Brand
- Praktica
- Model / document
- Praktica Plc 2
- Document type
- User manual
- Language
- German, French, Dutch, English
- Pages
- 57
- File size
- 10.6 MB
- Category
- Film cameras
- Document date
- Not specified in catalog
Search available document text
Find a term, then jump to its page in the original PDF. Image-only pages may not be searchable; check the PDF for exact wording and diagrams.
Page 1 · Read text
www.butkus.us


    Bedienungsonleitung
      lnstructions {or Use
       Notice d'emploi
     Gebruiksoonwiiring

      ,##
%
View original page 1Page 2 · Read text
Bedienteile der PRAKTICA PtC 2
 1 FilteronsdrluBgewinde
 2 Rtickspulknopf
 3 Steckschuh
4 Belichtungszeiten -Einstellknopf
5 Sponnhebel
6 Drohtousloser-AnschluBgewinde
7 Ausloser
8 Ausloser   f rir Selbstousloser
9 Selbstousloser-Spo nnhebel
control Elements of the PRAKTICA PtC 2
1 Filter threod
2 Rewind knob
3 Accessory shoe
4 Shutter-speed diol
5 Cocking lever
6 Coble releose threod
7 Shutter releose
8 Self-timer releose
9 Self-timer cocking lever
El6ments de commonde du PRAKTICA PLC2
1 Filetoge pour le roccordement des filtres
2 Bouton de rebobinoge
3 Sobot de fixotion
4 Bouton de 169loge des temps de pose
5 Levier d'ormement
6 Filetoge de roccordement du d6clencheur flexible
7 D6clencheur
8 D6clencheur pour le d6clencheur outomotique
9 Levier d'ormement du d6clencheur outomotique
Bedieningsdelen von de PRAKTICA PLC2
1 Filterschroefdrood
2 Terugspoelknop
3Insteekschoen
4 Belichtingstijden-instelknop
5 Tronsporthondel
6 Aonsluiting voor droodontsponner
7 Ontsponner
8 Ontsponner voor zelfontsponner
9 Zelfontsponner

2
View original page 2
Page 3 · Read text
www.butkus.us


lm Text der Bedienungsonleitung sind die Hinweiszohlen ouf die
Bedienteile in (  ) gesetzt.

In these instructions for use the reference numbers for the control
elements hove been put in porentheses.


Dons le texte-de lo pr6sente notice d'emploi, les chiffres indiquont
les 6l6ments de commonde dont il est question sont mis entre
po renthdses.

In de tekst zijn de verwijzingsgetollen von de bedieningsdelen
tussen (   ) gezet.
View original page 3
Page 4 · Read text
Bitte spenden Sie 2,50 Euro, um diese Website über E-Bay zu unterstützen ... www.PayPal.me/butkusView original page 4
Page 5 · Read text
10 Morke ftir Filmempfindlichkeitseinstellung
  11 Skole   f [ir Filmempfindlichkeit
  12 Hondobblendtoste  oder Umscholter
    1 3 Schcirfentiefenskole
    1 4 Entfernungseinstellring
    1 5 Blendeneinstellring
  16 Umscholter  frir Belichtungsoutomotik
  17 Rrickspulkurbel
  18 Symbole  frir Messen mit Offen- und Arbeitsblende
  19 Mittenkontokt
 20 Morke frjr Belichtungszeiteneinstellung
 21 Bildzcihler

 10 Film speed mork
 11 Film speed indicotor
 12 Monuol stop-down key or selection switch
 13 Depth-of-field scole
 14 Distonce setting ring
 15 Diophrogm setling Iing
 16 Selector for outomoticlxposure  control
 17 Rewind cronk
 18    !Vmbols for meosuring- ot full ond ot toking operture 19 Centre flosh contoct
 20 Shutter speed setting mork
 21 Exposure counter

 10 Repdre de r6gloge en fonction de lo  ropidit6 de lo pellicule     utilis6e
 11 Echelle des ropidit6s
12 Touche pour lo fermeture monuelle du diophrogme ou
   commutoteur
13 Echelle des profondeurs de chomp
14 Bogue de 169loge des distonces
15 Bogue des diophrogmes
16 Commutoteur pour le systdme de 169loge outomotique des   temps de pose
17 Monivelle de rebobinoge
18 Symboles pour lo mesire ovec un diophrogme pleinement
    ouvert ou en position de trovoil
19 Contoct centrol
20 Repdre pour le 169loge du temps de pose
21  Lompteur de prises de vue
View original page 5Page 7 · Read text
22 Okulorfossung mit Zubehorwechselstelle
23 Rrickspulmitnehmer
24 Potronenroum
25 Stohllo mellen-SchlitzverschluB
26 Filmtronsportrolle
27 Holtebockchen
28 Aufwickelspule
29 Morke zum Filmeinlegen
30 Fongbiigel


2-2 Oculor mount with occessories  fitting
23 Rewinding cotch
24 Cortridge chomber
25 Metol-blode focol-plone shutter
26 Film tronsport sProcket
27 Supporting element
28 Toke-up spool
29 Film looding mork
30 Wire cotch


 22 Monture de l'oculoire ovec odoptoteur d'occessoires
23 Entroineur pour le rebobinoge
 24 Polier d cortouches
 25 Obturoteur focol d lomelles d'ocier
 26 Bobine d'entroinement de lo pellicule
 27 Chevolet de retenue
 28 Bobine d'enroulement
 29 Repdre pour lo mise en ploce de lo pellicule
 30 Etrier de retenue

 6
View original page 7
Page 8 · Read text
www.butkus.us


                                                             Digitally signed by Mike Butkus
                                              DN: cn=Mike Butkus, o=Butkus camera manuals,
                                                   ou=butkus.org, email=mike@butkus.org, c=USMike Butkus     Date: 2024.02.20 14:32:06 -05'00'
                  26 27 2829 30


    22 Oculoirvotting
    23 Terugspoelmeenemer
    24 Potronenruimte
    25 Stolen lomellen-spleetsluiter
    26 Filmtronsportrol
    27 Filmgeleider
    28 Opwindspoel
    29 Merkje voor het inleggen von de film
    30 Vongbeugels
View original page 8Page 9 · Read text
s
                                              &r.  FEt*YAcOr,lMADrNdpi
                                                                                                                   : '.,:{ ;:{:r  ,        't,

                             www.butkus.us


31 Stotivgewinde
32 Rrickspulouslciser
33 Botterieroum mit Botterie
34 Umscholter frir Blendenfunktion

31 Tripod threod
32 Rewind releose knoo
33 Bottery comportment with bottery
34 Diophrogm operotion selection switch

31 Filetoge pour le roccordement du trepied
32 D6clencheur de rebobinoge
33 Polier d piles, ovec une pile
34 Levier de chongement de diophrogmotion

31 Stotiefschroefdrood
32 Terugspoelontsponner
33 Botterijruimte met botterij
34 Schokeloor voor de functie von het diofrogmo
I
View original page 9Page 10 · Read text
www.butkus.us


   Wir wiinschen lhnen mit dieser modernen Spiegelreflexkomero viel
    Erfolg. Neben einem neuortigen Stohllomellen-SchlitzverschluB,
   hoher Konstonz der Belichtungszeiten, kurzer Synchronzeit  fi.ir Elek-
   tronenblitzoufnohmen ist ihr besonderes Merkmol die Lichtinnen-
   messung bei Offenblende und domit ein stets strohlendhelles Sucher-
     bild. Ein Vorteil, den diese Spitzenkomero der elektrischen Blenden-
    wertiibertrogung verdonkt. Belichtungszeit, Blendenzohl und Film-
    empfindlichkeit sind gekuppelt. Die Messung erfolgt teilintegrol
   und objektgetreu. Bevor Sie jedoch mit proktischen Aufnohmen
   beginnen, bitte die Bedienungsonleitung genou lesen. Sie vermei-
   den dodurch MiBerfolge und Storungen on der Komero.


  We wish you much success with this modern single-lens mirror
    reflex comero. You will enjoy the odvontoges of the novel type of
   the metol-blode focol-plone shutter, its high shutter-speed  stobility,
   the fost shutter speed ot which the electronic flosh con be
    used, ond, whot is of speciol importonce the internol lightmetering
    ot full operture with the continuously bright viewfinder imoge. This
    is the odvontoge of the electric diophrogm volue tronsmissi-on. Ex-
   posure time, diophrogm number ond film speed ore coupled, ond
   metering is mode portiolly integrol ond true to the object. Before
   you.begin to toke your first pictures, we should like to osk you to
   reod these few instructions corefully. lt poys, becouse you will most
   probobly ovoid foilures ond trouble otherwise coused by improper
   hondling of the comero.


l
View original page 10Page 11 · Read text
Nous vous Souhoitons beoucoup de succds ovec cette moderne
chombre reflex dont les otouts moitres sont un obturoteur focol d
lomelles d'ocier d'un nouveou genre, une houte constonce du temps
de pose, lo ropidit6 de lo synchronisotion pour les prises de vue ovec
des  f loshes 6lectroniques  et notomment son systdme de photom6trie
int6rieure, le diophrogme pouvont 6tre pleinement ouvert -  un
ovontoge que ce produit de pointe doit d lo tronsmission 6lectrique
des ouvertures de diophrogme et qui se troduit por une imoge on
ne peut plus cloire dons le viseur' Le temps de pose, I'ouverture du
diophrogme et lo ropidit6 de lo pellicule sont occoupl6s. Lo mesure
s'efiectul por int6grotion portielle. Quont d I'odoptotion ou sujet d
photogrophier, elle s'ovdre porfoite' Nous vous recommondons
ioutef6is de lire ottentivement lo pr6sente notice d'emploi ovont de
posser ou trovoil protique ovec cet opporeil, ne seroit-ce que pour
6viter des insuccds - voire des ponnes,


wij wensen u met deze moderne spiegelreflexcomero veel succes.
Noost een nieuw stolen lomellen-spleetsluiter, grote tijdcon-
stontheid korte synchronisotietijd voor elektronenf litsopnomen is
de lichtmeting door het objectief en doormede een oltijd s.tro-
lend helder ioekerbeeld hoor bijzondere kenmerk. Een voordeel,
die deze comero oon de elektrische diofrogmowoorde-overbrenging
te donken heeft. Belichtingstijd, diof rogmogetol en fil rngevoelig heid
zijn oon elkoor gekoppeld. Het meten geschiedt gedeeltelijk inte-
giool en objectgetrouw. Voordot u echter met de opnomex begint,
moet u olstublieft de gebruiksoonwijzing precies lezen. Doordoor
vermijdt u mislukkingen en storingen oon de comero,

 10
View original page 11
Page 12 · Read text
www.butkus.us


Ri,ickwond iiffnen
Riickspulknopf (2) bis zum horten Anschlog noch oben ziehen' Do-
durch wird die Rtickwond entriegelt und konn oufgekloppt werden.
Bildzcihler (21) springt dobei outomotisch in die Ausgongsstellung
zu ri.ick.


Opening the comero bqck
Pull the rewind knob (2) out to its stop. This unlocks the bock which
con now be opened. The exposer counter (21) is outomoticolly reset
to its zero position.


Ouvrir le dos de l'opporeil
Tirer le bouton de rebobinoge (2) vers  le hout, jusqu'd lo but6e
d'orr6t. Le dos de I'opporeil est oinsi  d6verrouil16 et peut 6tre
robottu. Le compteur de prises de vue  (21) revient outomotique-
ment en position z6ro lorsque le dos de I'opporeil est d6verrouill6.


Achterwond openen
Terugspoelknop  (2) tot oonslog omhoog trekken. Doordoor wordt
de ochterwond ontgrendeld en kon worden geopend. De beeld-
teller (21) springt hierbij outomotisch in de 0-stond terug.

                                                                                  11
View original page 12Page 13 · Read text
www.butkus.us

 Film einlegen
Filmpotrone einlegen. Fongbiigel (30) drirfen nicht noch oben ste-
hen, ggf. om gercindelten Spulenteller verstellen. Filmzunge bis zur
gri.inen Morke (29) ziehen, unter dos Holtebockchen (27) schieben.
Zcihne der Filmtronsportrolle (26) mi.issen in die Filmperforotion ein-
greifen.
Bei storker Filmkri.immung einen Fongbiigel durch Drehen om Spu-
lenteller ouf den Film ouflegen. Rrickspulknopf (2) wieder eindri.ik-
ken, ggf. dobei drehen.


Inserting the film
Put the film cortridge into the cortridge chomber, ond observe thot
the wire cotches (30) do not point upwords, Adjust ot the knurled
spool disk, if required. Pull the film tongue out to the green mork
(29) ond poss it under the support element (27). Observe thot the
teeth of the film tronsport sprocket (26) engoge with the film per-
forotion.
Put one wire cotch (30) onto the film by turning the spool disk,  if
required, in cose of excessive bending of the film. Push the rewind
knob (2) in ogoin ond turn it o little, if necessory, to ensure engoge-
ment.

12
View original page 13
Page 14 · Read text
www.butkus.us


    Mettre lo pellicule en ploce
   D6poser lo cortouche dons le polier d cortouches. Les 6triers de
   retenue (30) ne doivent pos pointer vers le hout. Le cos 6ch6ont,
   d6plocer l'ossise molet6e de lo bobine. Tirer lo longuette de lo
    pellicule jusqu'ou repdre vert (29) et lo foire posser sous le chevolet
   de retenue (27). Les dents de lo bobine d'entroinement de lo pelli-
   cule (26) doivent s'engoger dons lo perforotion de cette dernidre.
   Lorsque lo pellicule est fortement recourb6e, il fout tourner l'ossise
   de lo bobine jusqu'd ce qu'un 6trier de retenue vienne se poser sur
    lo pellicule. Repousser le bouton de rebobinoge (2) et le soumettre,
     le cos 6ch6ont, d une rototion.


    Film inleggen
   Filmpoiroon inleggen. De vongbeugels (30) mogen niet omhoog
   stoon, event. op de getonde spoelschotel verstellen. Filmlip tot
   go! h,et groene merkje (29) trekken en onder het filmgeleider
   (27) schuiven. De tonden von de filmtronsportrol (26) moeten in de
       fil mperforotie g rijpen.
    Bij sterke filmkromming moet men een vongbeugel door het drooien
   oon de spoelschotel op de film leggen. De terugspoelknop (2) weer
   indrukken en event. doorbij drooien.
 t,                                                                    r3I&.
View original page 14Page 15 · Read text
Rlickwond sdrlieRen
Ruckwond on der Riegelseite gegen den Komerokorper drilcken.
Sie verriegelt sich selbsttcitig.


Closing the comero bqdt
The comero bock locks outomoticolly when being pressed to the
comero body on the lotch side.


Fermer le dos de l'opporeil
Pousser lo portie en question contre le corps de I'opporeil sur le
c6t6 oir se trouve le verrou. Le verrouilloge o lieu outomotiquement.


Aclrterwond sluiten
De ochterwond oon de vergrendelbore zijde tegen de comero
drukken. Zij vergrendelt zich outomotisch.

14
View original page 15
Page 16 · Read text
www.butkus.us


 Auf nohmebereitschoft  herstellen
Der Sponnhebel (5) besitzt einen Leerhub von etwo 15o und konn
so in die Bereitschoftsstellung  gebrocht werden (Griffsicherheit bei
serieno  uf no h men). spo nnhebLl-(5)  vollstci nd ig bis Ansch log schwen-
ken, zurr.ickfijhren und Komero mit Ausl6ser (7) ouslosen.-Vorgong
wiederholen und onschlieBend nochmols sponnen. Der outomotTsch6
 Bildzcihler (21) zeigt jetzt die Bildzohl 1 on.


Cocking the comero
The.cocking lever (5) hos on idle stroke of obout 15 deg. till  it
reoches. the reody position (trigger slog for series exposures)l Swivel
the cocking leve.r.(5) fully to the stop, let it go boci< ond press the
shutter releose (7). Repeot the process ond iock the shutier ogoin
subsequently. The outomotic exposure counter (21) does no* iho*
exposure  1.

                                                                          15
View original page 16Page 17 · Read text
Etoblir l'6tot de fonctionnement
C'est oprds une course d vide d'environ 15o que le levier d'orme-
ment (b) peut 6tre ploc6 en position de disponibilit6  (s6curit6
d'octionnement en cos de prises de vue en s6rie). Pivoter compldte-
ment le levier d'ormement (5) jusqu'd lo but6e, le romener en po-
sition initiole et d6clencher l'opporeil d I'oide du d6clencheur (7).
Refoire lo m6me chose, puis r6ormer encore une fois. Le compteur
outomotique de prises de vue (21) indique mointenont le chiffre 1.


Gereed moken voor de opnqme
De tronsporthondel (S) heeft een vrijloop von ongeveer 15o en kon
zo in gereedheid worden gebrocht (hondzoom bij serieopnomen),
Tronspbrthondel (5) volledig tot oon ziin oonslog drooien,
terugvoeren en de comero met de ontsponner (7) ontsponnen. Dit
herholen en opnieuw sponnen. De outomotische beeldteller (21)
wijst nu beeld 1 oon.

 't6
                                                                                                                                                              ,"t
View original page 17Page 18 · Read text
www.butkus.us


 Filmempfindlichkeit  einstellen
 Fi.ir die Belichtungsoutomotik muB der Empfindlichkeitswert des
Films eingestellt werden. R<indelri ng des Belichtungszeiten-Einstell-
knopfes (4) onheben und drehen, bis die DIN- oder ASA-Zohl ouf
der Skole (11) der weiBen Morke (10) gegeniibersteht. Beim Los-
lossen rostet der Ring ein.

Setting the film speed
The outomotic exposure system requires setting of the film speed
volue. Lift the knurled ring of the shutter-speed diol (a) ond turn  it
 till the DIN orASA number morked on scole (11) motches the white
mork (10). Releose the ring to moke it engoge.
R6gler lo ropidit6 de lo pellicule
Le systdme d'exposition outomotique demonde un 169loge en fonc-
tion de lo ropidit6 de lo pellicule. Soulever lo bogue molet6e du
bouton de 169loge des temps de pose (a) et lo tourner jusqu'd ce
que le chiffre de l'6chelle (11) qui correspond d I'indice de ropidit6
de lo pellicule utilis6e (DlN ou ASA) soit venu se plocer en foce du
repdre blonc (10). Lo bogue en question s'encronte oussit6t qu'on lo
loche.

Filmgevoeligheid  instellen
Voor de belichtingsoutomotic moet de filmvoeligheidswoorde von
de film worden ingesteld. De getonde ring von de belichtingstijden-
instelknop (4) omhoog nemen en drooien tot de DIN- of ASA-woorde
op de schoolverdeling (11) tegenover het witte merkje (10) stoot.
Bij het losloten springt de ring erin.

                                                                     17
View original page 18Page 19 · Read text
Belichtungszeit ei nstellen
     Symbof t             fiir Aufnohmen mit Elektronenblitz  (co. 11125s),       Einstellung B     frir Longzeitbelichtung. VerschluB bleibt so-
                         longe geoffnet, wie der Ausloser gedriickt wird,
         1 s bis 1/15 s       (orongeforben) fiir Aufnohmen bei geringer
                            Objekthel    I ig keit. Stotiv erforderl ich.
        1/30 s bis 1/1000 s  (weiB) filr Aufnohmen bei guter Objekthellig-
                                      keit.
        Belichtungszeiten-Einstellknopf (4) drehen, bis gewrinschte Zohl
      dem oro ngefo rbenen Dreieck gegen ribersteht.


        Setting the shutter speed
     Symbol t         for toking pictures with electronic flosh (obout
                           11125 sec)
        Setting B         for extended exposures; the shutter remoins
                     open os long os the shutter releose is being
                            pressed
         1 to 1/15 sec       (oronge coloured) for toking pictures in dim
                                 light; tripod is recommended
        1/30 to 1/1000 sec (white) for toking pictures in briEht light.
       Turn the shutter-speed diol (4) till the required number meets with
        the oronge-coloured mork.


I        l8
IlL
View original page 19Page 20 · Read text
www.butkus.us


     R6gler le temps de pose
    symbole t       pour les prises de vue ovec un flosh 6lectro-
                       nique (env. 1/125 s)
    poSe                      pour de longues expositions. L'obturoteur reste           "B"                       ouvert oussi longtemps qu'on oppuie sur le
                             d6cf encheu  r.
    de 1d 1115s        (couleur oronge) pour photogrophier des su-
                       jets d foible luminosit6. Un tr6pied s'ovdre
                           n6cessoire.
    de 1/30 d 1/1000 s  (couleur blonche) pour photogrophier des su-
                           jets dont lo luminosit6 est bonne.
    Tourner le bouton de 169loge des temps de pose (4) jusqu'd ce que
   bI    le chiffre d6si16 soit venu se plocer en foce du triongle oronge.


      Belichtingstijd  instellen
   Symbool t        voor opnomen met efektronenflitsers
                            (co. 1/125 sec.)
    Stond ,,8"          voor longe belichtingstijden. De sluiter blijft net
                 zo long geopend, ols de ontsponner wordt
                           ingedrukt.t   1 tot 1115 sec.       (oronje)lnje) voorvoor opnomenopnomen vonvon objobjecten met een
                    genngeinge netoernetd.helderheid. Stotief)tottet noodzokeltJl(.noodzokelijk.
     1/30 tot 1/1000 sec. (wit) voor opnomen von objecten met een goede
                          helderheid.
     Belichtingstijden-instelknop (4) drooien, tot het gewenste getol
 .   tegenover het oronje driehoekje stoot.

                                                                          19   III
View original page 20Page 21 · Read text
www.butkus.us

Blendenzohl einstellen
Die Blendenzohl om Blendeneinstellring (15) des Objektivs der
Morke ouf der Objektivfossung gegeniiberstellen. Bei Objektiven mit
outomotischer Druckblende (ADB) bleibt die Blende dobei voll ge-
offnet. Erst beim Ausldsen schlieBt sie sich ouf den eingestellten
Wert. Bei der PRAKTICA PLC 2 offnet sich die Blende sofort noch
dem VerschluBoblouf. Durch Driicken der flondobblendtoste (12)
om Objektiv oder Umstellen von A (Automotik) ouf M (Monuell) des
Umscholters fiir die Blendenfunktion (34) konn die Schcirfentiefe im
Sucherbild kontrolliert werden.


Setting the diophrogm number
Turn the diophrogm setting ring (15) on the lens till the diophrogm
number is opposite to the mork on the lens mount. With lenies
hoving on outomotic pressure diophrogm (ADB the diophrogm
remoins fully open ond closes to the set volue when the shutter
releose is pressed. The diophrogm of the PRAKTICA PLC 2 opens
ogoin in the some instont the shutter hos run off. The depth of field
con be checked in the viewfinder by pressing the monuol stop-down
key (12) ot the lens or by chonging the diophrogm operotion selec-
tion switch (34) from A to M.

20
View original page 21
Related documents and language editions
From the M. Butkus archive. Original publisher and archive notices are retained.
Check the model and edition against your equipment.
PDF verified 2026-10-10.