Film cameras
PRAKTICAmat User manual
User manual for PRAKTICAmat. 12 pages in English. Read the original PDF, download or print a copy without registration.
12 pagesEnglish0.7 MB PDF
Loading your manual…Open PDF directly
Document details
- Brand
- Praktica
- Model / document
- PRAKTICAmat
- Document type
- User manual
- Language
- English
- Pages
- 12
- File size
- 0.7 MB
- Category
- Film cameras
- Document date
- Not specified in catalog
Search available document text
Find a term, then jump to its page in the original PDF. Image-only pages may not be searchable; check the PDF for exact wording and diagrams.
Page 2 · Read text
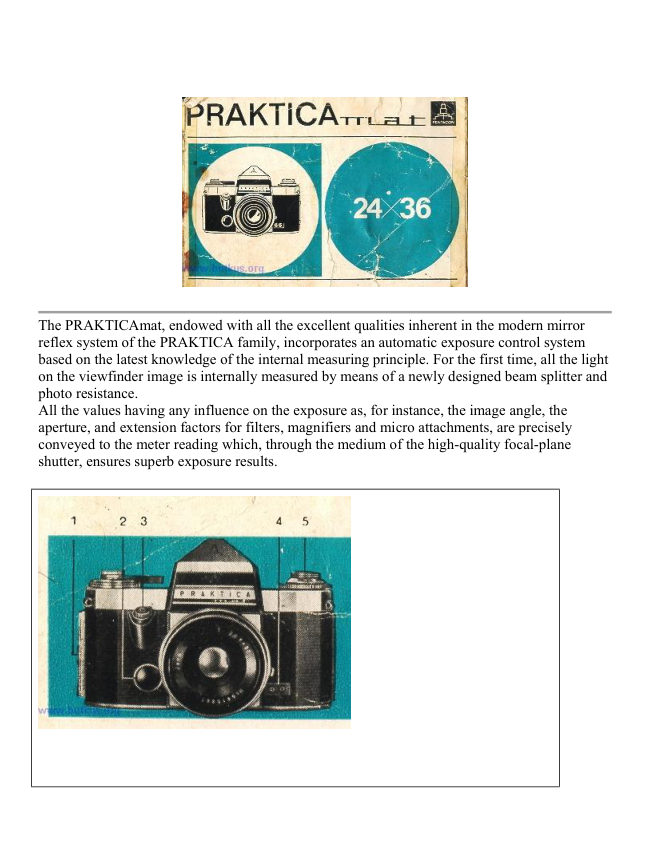
The PRAKTICAmat, endowed with all the excellent qualities inherent in the modern mirror
reflex system of the PRAKTICA family, incorporates an automatic exposure control system
based on the latest knowledge of the internal measuring principle. For the first time, all the light
on the viewfinder image is internally measured by means of a newly designed beam splitter and
photo resistance.
All the values having any influence on the exposure as, for instance, the image angle, the
aperture, and extension factors for filters, magnifiers and micro attachments, are precisely
conveyed to the meter reading which, through the medium of the high-quality focal-plane
shutter, ensures superb exposure results.
View original page 2
Page 3 · Read text
Special features of the PRAKTICAmat

Automatic exposure control, for the first time internal measuring of all the light on the
viewfinder image by means of beam-splitter and photo resistance.

Measuring range from 8 to 64,000 ASA at aperture f/2.

Switch-on key for light measuring system

Current source for light measuring system has a lifetime of approx. 2 years Meter
needle and warning signal in the viewfinder Film speed settings from 9 to 36 DIN or
6 to 3200 ASA.

Two methods of focusing, either in rangefinder lens or in circular focusing screen
(micro screen).

Firmly built-in pentaprism finder Instant return mirror .


Focal-plane shutter from 1 sec. to 1/1000 sec.,   and B
Stationary speed setting dial with click stops Synchronization for bulbs and electronic flash
Rapid wind lever in convenient thumb position Automatic exposure counter Oblique shutter
release with locking device Rewind crank
View original page 3
Page 4 · Read text
Automatic diaphragm control
Interchangeable lenses with focal lengths from 20 mm to 1000 mm with PRAKTICA fitting
Wide range of accessories (PRAKTICA accessories are applicable)

How the Internal Measuring System works


The path of rays leads from the object to be photographed through the lens via surface
mirror, focusing system, beam splitter, pentaprism, and viewfinder eyepiece to the eye
of the photographer. The image is focused by rotation of the distance setting ring on
the lens mount with the aid of the focusing system. T beam splitter, set into the optical
system at the back of an image limiter corresponding to the negative,] reflects an
invariable percentage of the light of the entire image field on to the large-area photo
resistance.
View original page 4
Page 5 · Read text
The light particles outside of the image angle, that would have a negative influence on the
measuring procedure, are completely eliminated. All correcting factors for filters, close-ups,
macro- and micro-exposures, previously forming a mathematical task for the photographer, are
automatically taken into account by this new type of measuring system. The meter reading is
shown in the viewfinder by the needle of a microammeter. Current source of the measuring
system is a mercuric oxide cell in the base of the camera. The measuring circuit is closed by
depressing the, switch-on key or the shutter release.

When the shutter release is depressed, the surface-coated mirror moves into position for the
exposure and returns into viewing position immediately after the shutter has run down. The
diaphragm of the lens is automatically opened to its widest aperture. Thus, the finder image is
almost continuously visible, except for the short moment of the exposure. In the mirror reflex
system there is no danger of parallax error, even with lenses of extreme focal lengths or with
close-up equipment. The finder image is somewhat smaller than the negative format.
Everything that you see in the viewfinder must necessarily appear on the film. The finder image
can, therefore, be utilized to its very edges.

Abridged Instructions for Use


1. Open camera back (6).
2. Pull up rewind knob (5). Place cartridge into cartridge chamber (7).
  Push rewind knob in. Fix beginning of film to take-up spool (10) and
 wind it up tightly until teeth of film transport sprocket (9) engage in upper
  and lower - film perforations.
3. Close the camera back.
4. Adjust film speed indicator (move dial (16) to mark (17).
View original page 5
Page 6 · Read text
5.  Adjust film type setting disk (13).
6.  Actuate winding lever (11) and shutter release (3) until exposure counter
   (14) stands on number 1.
7.  Light measuring:
7.1. Preset either shutter speed (speed setting dial 15) or diaphragm numeral
(diaphragm ring 28).
7.2. Depress switch-on key (2).


7.3. While depressing the switch-on key, readjust either the diaphragm stop (diaphragm ring 28)
or the shutter speed (speed setting dial 15) until meter needle (23) in the viewfinder meets the
marking point (24). Release the switch-on key.
When using lenses without automatic pressure diaphragm, please refer to section on "Automatic
diaphragm release".

8.  Focus for sharpness of image, with the aid of the rangefinder lens or the circular focusing
screen, by moving distance setting ring (26).

9.  Release the shutter.
View original page 6
Page 7 · Read text
Attention!
If red warning signal (20) is visible in viewfinder, first actuate winding lever (11).

10. Exchanging the film:
After the last exposure depress rewind release knob (12). Swing out rewind crank
(29). Rewind film in direction of arrow.

11. Remove cartridge from camera.
Beside these items it is, of course, necessary to study the complete Instructions for
Use carefully.


Inserting the film
Any kind of perforated 35 mm film (black-and-white or color) in commercially available
cartridges may be used. Push the back lock (1) downwards, open camera back (6), pull out
rewind knob (5) as far as it will go. Place full cartridge into cartridge chamber (7). Push rewind
knob in again, at the same time moving it to and fro to cause catch (8)-to engage in core of
cartridge.
Insert beginning of film, until resistance is felt, into slit of take-up spool (10). Rotate the take-
up spool to wind up the film (coating outwards) until the teeth of transport sprocket (9) engage
in the perforations on both sides of the film. On take-up spool with pilot pin (spool with one
flange) connect perforation to pilot pin. Rotate milled edge of take-up spool to wind up the film.
Press back against camera body (locks automatically).
View original page 7
Page 8 · Read text
Setting the type of film
Move the symbol corresponding to the film in the camera on film type setting disk (13) against
the marking point.


  = Black-and-white                   = Negative color film for daylight

                                  = Negative color film for artificial
   = Reversal color film for daylight                                                light

   = Reversal color film for artificial
light

Exposure counter
The exposure counter (14) need not to be adjusted. It is set automatically when the camera back
is closed.

Preparing for the exposure
Swing winding lever (11) around as far as it will go and let it glide back. Release shutter.
Repeat this procedure until counter stands on 1. Swing winding lever only in winding-up
direction until it stops. (Movement by force in the opposite direction would cause damage to the
camera.)
The coupling of shutter wind and film transport makes double and blank exposures impossible.

Setting the film speed indicator
Rotate film speed dial (16) to bring the speed numeral of the film in the camera against the
triangular mark (17) on the speed setting dial. (important for automatic exposure control.)

Setting the exposure speed
The focal-plane shutter of the PRAKTICAmat is designed for exposure speeds from 1 sec. to
I/l000 sec., also for the B setting for exposures of any desired length of time (shutter remains
open as long as release button (3) is depressed, or the locking device of a cable release is fixed).


The   setting is the shortest exposure speed in connection with electronic flash (on release
of the flash the picture gate is completely opened).
Rotate speed setting dial (15) until the speed value clicks in next to marking point (18). Setting
is possible in either direction, before or after the shutter has been released (limit stop at B and 1
sec.). Settings outside of the click-in points cause faulty exposures.
View original page 8Page 9 · Read text
Light measuring
The automatic exposure system of the PRAKTICAmat, when using lenses with automatic
diaphragm release, allows for two possibilities of light measuring:
With preset shutter speed (e. g. in action shots)
Shutter speed is adjusted! Depress switch-on key (2) and rotate diaphragm ring (28) on lens
mount until meter needle (23) meets the marking point (24).

With preset diaphragm stop (e. g. at a certain depth of field)
Diaphragm stop is adjusted! Depress switch-on (2) and rotate speed setting dial (15) - using
only the click-in stops - until meter needle (23) meets the marking point (24). Should the needle
not match the point, choose the most favorable shutter speed and readjust diaphragm ring (28).
Pressure on the switch-on key causes the diaphragm to be stopped down automatically to the
pre-set value.
If, despite readjustment of diaphragm and shutter speed the needle will not center itself, this
means that the lighting conditions are insufficient for the automatic exposure control system,
and you will have to use an extra light source or a more sensitive film.

Checking meter reading immediately before the exposure
On actuation of the shutter release, before the shutter actually runs down, the measuring circuit
is closed once more, thus making it possible to check for correct exposure (centering of needle)
immediately before the picture is taken.

Should the needle refuse to deflect altogether, the current source (32) will have to be tested.
(See section "Testing and exchanging the current source").

Unfavorable taking conditions (glaring side light) may cause false light to fall into the
viewfinder eyepiece and lead to a faulty meter reading. Remedy: Use protective cap supplied
with camera.

 Light measuring with lenses having no automatic pressure diaphragm
With lenses of this type the automatic diaphragm mechanism inside the camera has to be
disconnected (see section "Automatic diaphragm"). With some of the (older) lenses, owing to
the construction of their mounts, the switch-on key cannot be depressed. In this case depress the
shutter release carefully and take the meter reading before the shutter runs down. Focusing
should be performed beforehand, since the diaphragm in these lenses does not reopen
automatically.

There are two possibilities of focusing with the PRAKTICAmat.

Focusing
The viewfinder of the PRAKTICAmat includes a Fresnel lens. In the center of the lens is the
split image rangefinder (21), surrounded by a circular focusing screen (22) (micro screen).
View original page 9
Page 10 · Read text
1st method
The split image rangefinder (21) is used when the subject reveals conspicuous lines in the
horizontal or vertical image. On rotation of distance setting ring (23) the two part images move
towards, or away from, each other. As soon as the conspicuous lines meet to form one complete
picture, maximum sharpness has been achieved.

2nd method
The circular focusing screen (22) is used for action scenes or for objects without distinct lines.
Focusing is performed in the same manner as on the usual ground glass.

The Fresnel lens surrounding the focusing screen serves to brighten up the image but is not to
be used for focusing.

Taking lens and viewfinder lens being one and the same, there is no danger of parallax error.
Persons with faulty eyesight may insert corrective lenses in special mounts into the eyepiece of
the viewfinder, which also accepts other special finder attachments.

Depth of field
The distance figures on the lens refer to the film plane (marking 19 on cover plate).

The limits of the depth of field for the respective apertures can be read from the depth-of-field
scale (27) on the lens mount. Also, critical inspection of the finder image is possible on
actuation either of switch-on key (2), or of stop-down lever (25) after taking the meter reading.

Releasing the shutter
Depress shutter release (3) steadily until the shutter has run down. Rotation of milled ring to
make red dots meet locks release mechanism against inadvertent triggering. Unlocking is
performed accordingly. For exposures longer than 1/30 sec. tripod (connecting socket 33) and
cable release should be used. Body shutter release accepts cable release.


Keeping ready for shooting
After the exposure a signal (20) appears in the upper left corner of the finder image. Renewed
winding of the shutter (lever 11) causes the signal to disappear, and the camera is ready for the
next picture.

Exchanging films
When exposure counter (14) indicates that the number of frames marked on the film roll has
been exposed, depress rewind release knob (12), swing out rewind crank (29) and rewind film
in direction of arrow. Resistance becomes noticeable as winding is completed.
View original page 10
Page 11 · Read text
Exchanging lenses
Catch hold of lens mount and turn it out anti-clockwise. Exchange lens is inserted accordingly.
All interchangeable lenses having the PRAKTICA fitting M 42X1 and focal lengths from 20
mm to 1000 mm may be used.


Automatic diaphragm release

For the use of interchangeable lenses without automatic diaphragm control (and with pre-set
diaphragm) the mechanism for the automatic diaphragm release underneath the instant return
mirror (31) has to be disconnected. (Handle with care, since mounts of older lenses may injure
the diaphragm release mechanism.)
Lift the instant return mirror (31) carefully by its frame (do not touch the mirror surface) and
move knob (30) with red mark to the right as far as it will go. Leave hold of mirror frame - it
jumps back to the 45° position. The automatic mechanism is returned to working position by
moving red-marked knob (30) to the left.
Should the mirror be pushed up too far accidentally while the shutter is wound, it will remain
up, and a blank exposure has to be made to bring it back to 45°.

Flash synchronization
There are two possibilities in the PRAKTICAmat for synchronizing flashlight sources. The
flash cable is connected to the socket (4) corresponding to the flash unit.

F synchronization
For short-burning flash bulbs!
It is of advantage since a shorter exposure speed may be selected than is possible in connection
with the X contact. We advise setting a shutter speed of 1/30 sec. with flash bulbs of the F class.
The F contact releases the flash about 10 ms before the picture gate is completely opened by the
shutter.

X synchronization
For electronic flash!

The shortest shutter speed is 1/40 sec. (    setting). Connection of flash bulbs is possible;
directions regarding exposure speeds are given by the bulb manufactures.
The X contact releases the flash after the picture gate is completely opened by the shutter.


Testing and exchanging the current source
The current source for the light measuring system is a Mallory mercuric oxide cell (32), Type
PX 13.
 See this link on a Wein Air replacement battery.

Owing to the low consumption of current and the short operating period in the measuring
process, the cell lasts for 2 years.
View original page 11
Page 12 · Read text
Operating pressure can be tested as follows:
Set shutter speed on 1/1000 sec.
Set film speed on 17 DIN
Depress check key (34) at bottom of camera
Meter needle (23) must now deflect at least up to fixed point (24), otherwise the cell has to be
replaced

Maintenance and care
Screw out cover plate (32) at bottom of camera. Insert new cell, keeping inscription (+ sign)
visible. Screw cover plate in again tightly.
If you are working chiefly at temperatures under 0 degrees C, you should use the Mallory
Special Cell PX 625 that has a lifetime of approx. 1 year.
See this link on a Wein Air replacement battery.

The PRAKTICAmat, as a high-class precision instrument, must be protected against shock and
dust. From time to time dust and film deposits have to be removed from cartridge- and spool
chamber and from the picture gate with a soft brush.
Do not touch the optical parts (lens, viewfinder, mirror) with your fingers. Should it have
happened, the finger marks must be removed immediately with a soft brush or a soft, smooth
piece of linen.

Accessories for PRAKTICAmat

Everready Case Cable Release Lens Hoods Filters

Carrying Strap, adjustable

Intermediate Rings

Special Intermediate Ring with Double Cable Release Intermediate Rings with Plunger
Attachable Clip for other accessories Close-up Bellows Attachment

Focusing Slide

Focusing Telescope Angle Finder Rubber Eye Cup Universal Tripod Copying Stand

Connecting Piece for microscope

The details given in this booklet are subject to slight deviations which may result from further
development in the manufacturing process. Please read these Instructions for Use carefully
since we can accept no liability
for damage caused by improper handling of the equipment.
View original page 12
From the M. Butkus archive. Original publisher and archive notices are retained.
Check the model and edition against your equipment.
PDF verified 2026-10-10.