Film cameras
US Camera Reflex II / II X User manual
User manual for US Camera Reflex II / II X. 13 pages in English. Read the original PDF, download or print a copy without registration.
13 pagesEnglish0.7 MB PDF
Loading your manual…Open PDF directly
Document details
- Brand
- US Camera
- Model / document
- US Camera Reflex II / II X
- Document type
- User manual
- Language
- English
- Pages
- 13
- File size
- 0.7 MB
- Category
- Film cameras
- Document date
- Not specified in catalog
Search available document text
Find a term, then jump to its page in the original PDF. Image-only pages may not be searchable; check the PDF for exact wording and diagrams.
Page 2 · Read text
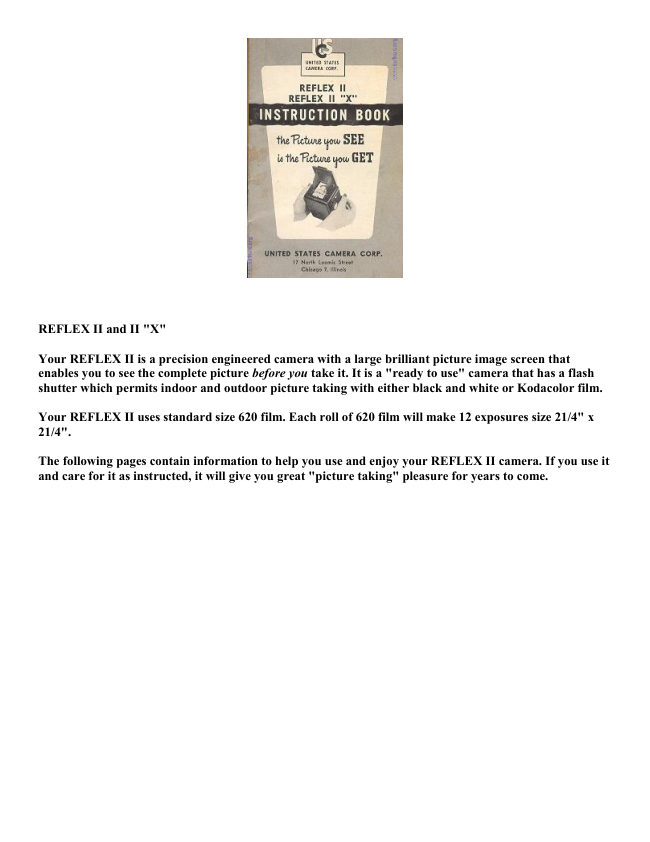
REFLEX II and II "X"

Your REFLEX II is a precision engineered camera with a large brilliant picture image screen that
enables you to see the complete picture before you take it. It is a "ready to use" camera that has a flash
shutter which permits indoor and outdoor picture taking with either black and white or Kodacolor film.

Your REFLEX II uses standard size 620 film. Each roll of 620 film will make 12 exposures size 21/4" x
21/4".

The following pages contain information to help you use and enjoy your REFLEX II camera. If you use it
and care for it as instructed, it will give you great "picture taking" pleasure for years to come.
View original page 2
Page 3 · Read text
1. Winding Knob

                                                         2. Viewfinder Hood

                                                         3. Picture Image Screen

                                                         4. Viewing Lens

                                                         5. Film Door Lock

                                                         6. Double Exposure Preventative

                                                         7. Taking Lens

                                                         8. Film Window

                                                         9. Shutter Release Lever

                                                               l0. Flash Contact Receptacles


1. LOADING THE CAMERA

This camera has been designed to provide a simple and easy method for loading your film rapidly and
securely. Always remember that film should be loaded in dim light. Care should be taken to see that the
film does not unroll loosely during the loading process. Such a condition will cause fogging of the film and
spoiled pictures.


                   A. To load press the film door Sock button down (No. 5, Fig. 1)
                   and when the back cover is slightly open swing the back cover
             DOWNWARD. (See arrows in Fig. 2.)
View original page 3Page 4 · Read text
B. Hold camera upside down and swing film holder up and out
(Fig. 3). Slide roll of film over spool holder. Push film holder
back into film well and pull up 2 or 3 inches of the film paper.


C. Now pull the start of the film paper (See Fig. 3A) until you
have sufficient film paper (colored side up) to permit your
threading it into the larger slot of the "take up" spool at the top of
the camera.


D. Now turn the winding knob (No. 1, Fig. 1) clockwise for 2 or 3
turns to securely anchor the paper into the "take up" spool. M a k
e s u r e that the paper is securely held onto the spool and is
winding straight before closing the camera back. (See Fig. 4.)
View original page 4
Page 5 · Read text
When closing the back be sure that the pin on the camera back
                     locks shut in the film door lock. (See Fig. 5.)


                       E. Now you are ready to wind film into place for the first
                          picture. Turn winding knob (clock. wise) until Figure 1 appears
                       centered under red film window in back of camera. You are now
                      ready to take the first picture. Repeat this procedure for each
                      succeeding picture number.


NOTE. For black and white pictures use No. 620 film (12 exposures to the roll). For color, use No. 620
Kodacolor (12 exposures to the roll). Use Kodacolor Daylight for outdoor snaps and Kodacolor Type A
for indoor snaps.

2. TAKING THE PICTURE

A. Open the viewfinder hood (No. 2, Fig. 1) by inserting thumb under projection at rear of hood, and lift
to upright position. When pointing camera at subject, prior to snapping picture, the image you see on
picture screen will be identical to picture you will have after taking picture. (See Fig. 6.)


                        B. Hold the camera steady, using both hands at waist level,
                          (higher or lower for special effects), and adjust the direction
                          of the camera until you see in the picture image screen, the
                      image you want in the finished picture. Now press the shutter
                           release lever (No. 9, Fig. 1), down with a slow, smooth action
                             until the shutter "clicks."
View original page 5Page 6 · Read text
NOTE. Be sure camera is held steady and does not move
                        while you press shutter release lever; as any movement when
                          the shutter is open will blur the picture.


3. REMOVING THE FILM


                             A. After the last picture on a roll of film has been
                                   taken, (No. 12 in the red window), turn the winding
                            knob clockwise until the end of the colored protecting
                                paper on the film roll passes the film window and is
                                completely wound onto the "Take Up" Spool.

                               B. Open the back of the camera under dim light and
                                                lift film spool out of camera. (Fig. 6A) Fold the end
                                  of the protective paper under and fasten it with the
                        gummed sticker. Now remove the empty spool from
                                   the film holder and place it in winding position at top
                                  of camera. You are now ready to reload camera.


CAUTION. Be sure film roll, when out of camera or when loading and unloading, is kept in tightly
wound position at all times, as any light getting onto film will fog the film and spoil your pictures.
View original page 6Page 8 · Read text
ATTACHING FLASH UNIT TO CAMERA


                             B. Attach your REFLEX II FLASH ATTACHMENT to
                                the camera by inserting the two FLASH CONTACT
                        PINS (No. 5, Fig. 7) into the flash contact receptacles
                             (No. 10, Fig. 1), on the side of the camera. Push pins in
                                       all the way until flash attachment is bearing on the side
                               of the camera. (See Fig. 9.)


INSERTING -FLASH BULBS


                         C. To insert flash bulb into Flash Bulb Receptacle (No. 4,
                              Fig. 7), turn bulb until bayonet pins on sides of flash bulb
                             align with notches cut out in center opening of reflector.
                        Bayonet pins will thus pass through reflector and into flash
                          bulb receptacle of attachment. Bulb will now snap into
                           place and will be held firmly until ejected by Bulb Ejector
                        Mechanism.

                        D. To eject bulbs after flashing, hold flash attachment with
                            face of reflector away from you and press Bulb Ejector
                         Lever (No. 3, Fig. 7) on back of flash attachment handle.
                        Bulb will be automatically ejected and your flash
                          attachment is ready for loading with fresh bulb ( See Fig.
                          10)


"TEST LITE" on your Reflex Flash Attachment will automatically light up any time that there is a short
in the flashing circuit of your flash attachment or your camera. Should the light be on when the flash
attachment is not attached to the camera, you will know that the short is in the flash attachment. Should
the light come on only when the flash attachment is attached to the camera, you will recognize the short
circuit as being in the camera. When the short circuit is connected, the Test Lite will go off.. (No. 1, Fig.
7.) To check the condition of the batteries in your flash attachment, touch any metal object to both flash
contact pins (No. 5, Fig. 7), on the flash attachment. This will light the Test-Lite. If the light glows weakly,
you will recognize your bat" series as being weak, and if the Test-Lite fails to glow, it will indicate that
the batteries are too weak and should be replaced.
View original page 8Page 9 · Read text
CAUTION:

1. When making the above test for batteries be sure that there is no flash bulb in the attachment as it will be
discharged when you make contact between the two flash contact pins.

2. If for any reason the Test-Lite is "on," indicating a short in the circuit of either attachment or camera--DON'T
INSERT A FLASH BULB until short is found and corrected and Test-Lite goes off. A bulb inserted when a
short circuit is present will discharge immediately upon insertion.

3. Occasionally a flash bulb may be defective and will not fire. If bulb fails to flash it is well to try another.

4. Be sure base of flash bulb is clean. If in doubt, rub base lightly across any slightly Abrasive surface, such as
cement, plaster, etc., to clean.

5. Most batteries hare a shelf life of 6 months and must, under normal-limited usage, be replaced after this time.

6. Insert flash bulb after flash attachment has been plugged into camera.

7. Eject bulbs with the bulb ejector lever.

8. Keep a firm grip on BOTH camera and flash attachment when being used together.

With proper care and use, the REFLEX II Camera will serve you well and efficiently for many thousands of
pictures.

             REFLEX 11 FLASH CHART

Approximate distances are given at which flash pictures should be taken for best results, using average
subjects against medium colored back. grounds.

                                 FLASH         LAMPS
             FILM
                                     No. 25 or No. 5     No 5B (blue)

Kodak Verichrome
                                    6~12 ft.
Ansco Plenachrome

Kodak Plus X
                                    8~14 ft.
Ansco Supreme

Kodak Super XX
                                       10-20 ft.
Ansco Supernan Press

Kodacolor Type A
                                         *4-7 ft.
(Indoor)

Kodacolor, daylight
                                                          Under *5 ft.
(Outdoor)

*Use portrait attachment for distances under 5 feet. ( See inside of back cover on this
booklet for price on REFLEX II FILTER-PORTRAIT LENS KIT.)
View original page 9Page 10 · Read text
FILM

If you are going to take pictures out-of-doors on a fairly bright day or flash pictures indoors, orthochromatic
type films such as Plenachrome and Verichrome are satisfactory. If your picture will be taken on a fairly dull
day or if your flash pica lures are going to be made at some distance, use the fast panchromatic type film such
as Super XX or Super Pan Press. For color pictures in bright sunlight, use Kodacolor Daylight film, or indoors
by photoflash bulbs, use Kodacolor Type A film. Your Reflex II uses size 620 film and takes 12 exposures 2
1/4 x 2 1/4.


MISTAKES TO AVOID

DOUBLE EXPOSURE
Be sure to wind film to the next exposure after snapping each picture.

BLURRED PICTURES
Hold your camera steady. Be extra careful when pressing shutter release so as not to jar the camera.

"CUT OFF" PICTURES
Aim your camera at the center of the subject you are photographing and be sure you are not too close.
Don't change the position of the camera after you have looked in the viewfinder. In taking close ups or
portraits, allow a little extra space in your viewfinder above the subject's head to compensate for
difference in position of the viewfinder and lens.

TILTED PICTURES
Hold camera level--don't tilt camera at angle.

FOGGED FILM
Don't aim your camera directly at a strong light or the sun. Use a lens hood or shade the lens with your
hand. Don't load the camera with film in direct sunlight and be sure that the film is tightly wound. Use
the same care when unloading the camera. Avoid using outdated film.

UNSATISFACTORY FLASH PICTURES
Don't stand too close to subject. Be sure batteries are inserted properly and are fresh. See that all contact
points are clean. (Wet the top of the base of the bulb with your tongue to increase electrical contact.) Bulb
must be held firmly. Be sure batteries are fresh.

                ADDITIONAL INSTRUCTIONS FOR REFLEX 11 "X"

Your REFLEX II "X" is loaded and used as described on the previous pages. It is, however, designed to operate
with the new Lifetime Electronic Flash unit. The following instructions apply only to the use of the REFLEX II
"X" with the LIFETIME FLASH UNIT. The Reflex II will not function with this Flash unit.

The Lifetime Flash Unit operates on 110V A.C. current and can be used anywhere there is a 110V 60 cycle
outlet. To use it, merely plug line cord into any convenient outlet, then plug unit into flash contact sockets in the
Reflex II "X" so that your Lifetime Flash Unit is affixed to the camera as the regular flash gun is affixed to the
Reflex II as shown in Fig. 9, Page 10.

This flash unit will provide thousands of flashes and will function best if used frequently. If it has not been used
for a period of a month or more a 10 minute warm up period is necessary.
View original page 10Page 11 · Read text
The Lifetime Flash Unit may be tested by touching the 2 flash contact pins extending from the unit with any
metal object. This will cause the bulb to fire indicating proper function.

Two Battery Packs are available if and when complete portability is desired.

The "Super Pak" which uses (2) 90V and (2) "C" size batteries providing as many as 2500 flashes.

#BFIII - Less Batteries. . . . . . . . at $19.95  Batteries - S6.80

Casual Pak using 4 "D" (Large Flashlite) size photoflash batteries which to the occasional user will
provide as many as 300 flashes.

IBF IV--Less Batteries at . . . . .$19.95

     Batteries--S .80

95% of all flash pictures are taken near an AC outlet. However, if you want to take pictures away from
an AC outlet and do not wish to purchase one of our Regular Battery Packs, it is possible to purchase the
regular Reflex II Flash Unit which when used with an S.F. or S*M. flash bulb will give excellent flash
pictures. (See Page 18.)

                              CAUTION

Never attempt to open or repair your Lifetime Flash. This should be done only by an experienced
repairman

SNAPPING THE PICTURE REFLEX 11 "X"

To take a perfect flash picture with your new United States Camera Corp. Camera and Lifetime Flash
Outfit you must stand the proper distance from the subject (as shown below). Compose the picture in the
finder and when satisfied subject is in the center of the viewing lens, depress the trigger lever, (No. 9, Fig.
1) all the way down.

                      REFLEX 11 "X" FLASH CHART
FILM                                          Distance to Subject

Verichrome
                                          6 to 8 Feet
Plenachrome

Plus X
                                          8 to 10 Feet
Supreme

Super XX
                                         10 to 12 Feet
Super Pan Press

Tri X                                     12 to 18 Feet

Daylite     - Lite
                                          5 to 6 Feet
Kodacolor - Subjects

Daylite      - Dark
                                          3 to 4 ft  - Use Portrait Attachment
Kodacolor  - Subjects
View original page 11Page 12 · Read text
To insure best possible pictures never exceed the distances recommended in the foregoing chart. Use the greater
distance for lite subjects in lite walled rooms--use the shorter distance for dark subjects in dark walled rooms.
For sharper prints with better contrast tell your film processor to over develop your film 25 to 50%.


REFLEX 11 AND 11 "X" ACCESSORIES

REFLEX II FLASH ATTACHMENT $4.95
Your Reflex II Camera has built in synchronization and only requires the Reflex II Flash Attachment for taking
dash pictures.

REFLEX II CARRYING CASE. $2.50
Protect your Reflex II Camera with this specially designed cowhide leather case that permits use of the camera
and flash attachment without removal from the case.

REFLEX II FILTER-PORTRAIT LENS KIT $4.95

Consists of:
1. Sunshade-filter holder for shielding the lens from direct sunlight.
2. Yellow filter for pronounced cloud effects.
3. Portrait lens for taking close-up pictures and portraits under 5 feet.
4. Leather case for storing above lenses.

                              TIPS ON CAMERA CARE

1. Keep your camera clean by occasionally blowing the dust out of the inside.
2. Keep lens clean by gently wiping with lens tissue.
3. Keep camera in a cool dry place. Never store camera in the glove compartment of a car or the back shelf. The
heat of the sun is very destructive to photographic equipment.

                 DOUBLE EXPOSURE PREVENTATIVE LEVER

This device as shown in (No. 6, Fig. 1) will prevent accidental double exposures, and works automatically with
winding knob. Winding knob must be turned before shutter will snap a picture. A double exposure may be
purposely made by depressing the lever in toward camera body. This will allow shutter release lever to be
pushed downs


                                U. S. C. WARRANTEE POLICY

UNITED STATES CAMERA CORPORATION products are produced by skilled craftsmen and the
materials used are of the best obtainable.

U. S. C. CAMERA REFLEX II and STANDARD FLASH UNIT F4 are warrantied for 90 days from date of
purchase against defective workmanship or material. If they should fail to function during this 90 day period,
mail both units to the UNITED STATES CAMERA CORPORATION, and they will be put into first class
operating condition. Include $1.00 to cover handling and postage.

                                  U. S. C. Lifetime Flash Unit
View original page 12Page 13 · Read text
The flash tube in your LIFETIME FLASH UNIT is designed and manufactured to give you a lifetime of
service. If the tube should fail to flash, U. S. C. will replace it free of charge, PROVIDING the failure is not due
to BREAK" AGE of the glass tube or spiral. The smallest crack in the spiral, hardly visible to the naked eye will
make your tube inoperative. All other components of your LIFETIME FLASH UNIT are warranted for 90 days
from date of purchase. If your unit becomes inoperative during the warranty period, pack carefully and mail to
the UNITED STATES CAMERA CORPORATION and it will be returned to you in first class op. crating
condition. Include $1.00 to cover handling and postage.

Should your REFLEX II or II "X" camera become inoperative after the warranty period has expired, send the
unit to our Service Department and it will be completely reconditioned. The charge for this factory
reconditioning service is $3.50 and should be sent together with the unit to expedite handling and save you
C.O.D. charges.

Should your STANDARD FLASH UNIT F4 become damaged after the warranty period return as above and
include $2.00 to cover the factory reconditioning service.

If the camera or flash gun you send us under our factory reconditioning offer cannot be restored to first class
condition, we will return a new camera or flash gun to you without additional charge.

Your LIFETIME FLASH UNIT will be put into first class operating condition after expire. lion of warranty
period for a nominal fee to cover parts and labor.

NOTE: When sending your unit to our Service Department for reconditioning please enclose a note telling us
what you believe is the reason for the improper functioning of your unit;. BE SURE TO INCLUDE THE
NOMINAL SERVICE FEE TO SAVE DELAY IN HANDLING AND C.O.D. CHARGES.

UNITED STATES CAMERA CORP.
17 North Loomis Street
Chicago 7, Illinois
View original page 13
From the M. Butkus archive. Original publisher and archive notices are retained.
Check the model and edition against your equipment.
PDF verified 2026-10-10.