Film cameras
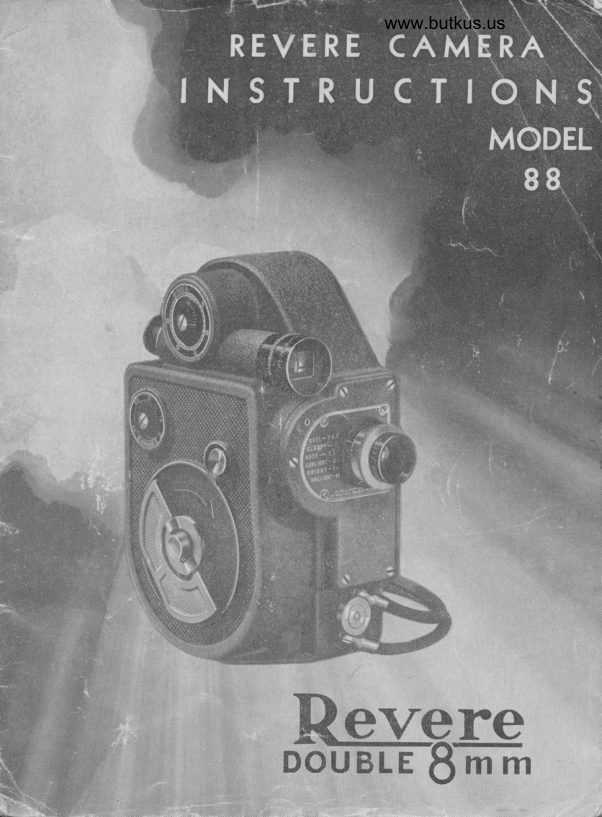
Revere model 88 User manual
User manual for Revere model 88. 37 pages in English. Read the original PDF, download or print a copy without registration.
37 pagesEnglish7.6 MB PDF
Loading your manual…Open PDF directly
Document details
- Brand
- Revere
- Model / document
- Revere model 88
- Document type
- User manual
- Language
- English
- Pages
- 37
- File size
- 7.6 MB
- Category
- Film cameras
- Document date
- Not specified in catalog
Search available document text
Find a term, then jump to its page in the original PDF. Image-only pages may not be searchable; check the PDF for exact wording and diagrams.
Page 2 · Read text
4tgbtzaLLon CooJ
               o

   A Revere Registrqtion cqrd is included with your
     cqmerc. Pleqse check the number on this cqrd
      with the seriql number which you will find inside
     your cqmerq on lower left side of center plcte just
     below tcke-up spindle. Atty vqriqtion in number
      should be noted on your cqrd. Pleqse give complete
      informction requested on the cqrd, cnd, to insure
      qccurqcy, plecrse PRINT. Send card within ten dcys
      qfter mcking purchcse, to the Revere Ccrmerq
     Compcny, 320-336 Ecst Twenty-first Street, Chiccgo,
        Illinois. This is importcnt. The gucrcntee does not go
      into ef{ect until you mcil the reqistrotion cqrd.

     REVERE CAMERA COMPAI{Y
                              Genercrl Oflices crnd FcctorY
                      320-336 Eqst TwentY-lirst Street
                         Chiccrgo, Illinois
       Copyright 1946, Revere Cqmerq Compony   Printed in U.S.A.

                    -AA -

\-       t.*.             :,,..,.          .r,,,:     -      ,-t--<*."    -      r            ,-'-              '  w                     --"ir*                       I
View original page 2Page 3 · Read text
www.butkus.us
                                                               \
    FOREWORD
 Ihe Revere cqmercr compcny desires thcrt you obtcin
 from your ccrmerq the highest possible degree ol
 plecsure qnd satisfqction. Knowing thct it is loremost
 in your mihd to give your c.'mercr proper qttention qnd
 to produce the finest movies easily, Revere hcs pre
 pcred this instruction book for your informqtion qnd
 guidcnce.
 These instructions qre written in non-fechniccl lan-
 guqge. The illustrctions cre recdily understcndoble
and should be referred to while recding. you will find
it beneficiql to hqve your cqmercr in front of you cs
you read this book. It will help you become fcrmiliqr
with the simple threcding mechqnism, the d.iqls, rens,
exposure guide qnd other pcrts belore atternpting to
loqd cnd opercte your                       "o*"ro.
It's ecsy to tcke good movies with ihe "Revere" stcrrting
with your Iirst roll of film iI you will follow these simple
instructions. vl/e believe you will enjoy recding this
book cnd will want to refer to it from time to time. To
know your c.'merq better will give you .,n even deeper
crppreciction of it.

                REVERE CAMERA COMPANY.

                                    -l-
View original page 3Page 5 · Read text
GENENAT CAMENA INSTRUCTIONS

This book gives instructions for the use of the Revere
Cqmercr, Model 88. The instructions regqrding locding,
relocrding, generql opercrtion crnd other photogrcrphic
matters found on Pcges 6 to 29 inclusive should be
reqd ccrefully.
To mqke good moving pictures it is necesscrry for you
to Iamiliqrize yourself with your cqmercr construction
cnd opercrtion. First exqmine the oufside of your ccrm-
ercr. Memofize the nqmes of the pcrrts refemed to in
this book. See Pcges 3 cnd 4. Leorn how to do the
following: (l) wind the motor with the Winding Key;
(2) slide the Opercting Button; (3) turn the Speed Con'
trol Dial; (4) turn the Adjustqble Footcrge Meter; (5)
look through the View Finder; (6) rotcte the tens Bcnel.
Then open the cqmera door cs explcined on bottom ol
Pcae 4. Recrd Pcge 5 crnd lecrrn the ncrmes of the vcrrious
pcrrts inside ol your ccrmercr. After this, you will be pre-
pcrred to reqd further.

                     -2-


                                                                                                                                                                                                                                                                                                                                                                                                I
                                                                                                                                                                                                                                                                                                                                                                                                I
View original page 5Page 7 · Read text
View Stowing Exposure Guide

I5.  Exposure guide
16.  Opticcl eye piece of view finder
17. Door lock lever: To open ccrmerq door move the lever "up."
   To close door, hold the door firmly ia cloged position cmd nove
    the lever "dorYu."

                       -4-
View original page 7Page 8 · Read text
www.butkus.us


                    tasidc Vicw ol Cqaera
A-Cc.tterq door               E-SprocLet gruide
B-A,perture Plcte              F-Film gcte cctch
        (Film trcck)               Cr-Sprocket
LFilm Guides            H_Lower (tcke-up) spindle
D-Upper (feed) spindle       l-Tcke-up spool
Note: For ncrmeg ol  - cgmerg pcrts, refer to this pcge, while
soqdirg tbc lollorring iurtructionl on-..How to-toad d;A;ilil;
               -s-
View original page 8Page 9 · Read text
HOW TO LOAD THE CAMERA
      Locding the film is cr simple operction qnd with a little
        prcrctice it cqn be crccomplished quickly. A 2S-foot,
       double-width Bmm. film is used in Revere 88 ccrmeros.
       Pictures qre mqde on only one-hqll the width of the
        film when the film is run through the cqmercr the lirst
        time. In order to expose the film completely  it is neces-
      scry to run the film through the cqmercr twice. When
       the film is processed, the lcrborqtory slits the {ilm down
      the middle cnd splices the two pieces together cnd
       returns the film to you cts ct 50-foot reel ol 8mm. Iilm.
      Alwcys locrd or unloqd the cqmera in subdued light, or
           if necesscrry, in the shcrde of the body. Never Jocd or
       unlocd the ccrmera in direct sunlight.
     To Locd the Camera: Give the winding key severql
        turns. Hold or lcry the ccrmerq on its side cnd open the
       door. Remove the empty spool. Be sure the edges ol
       the spool qre not bent crs they will cause the lilm to icm.
         II ct crny time the empty spool becomes dcmcged,  it
       should be strcightened or replcced with ct new one. II
      dust or film emulsion is found inside of cqmercr (on
       center plcte or in film gcte), remove it by blowing or
      brushing it out. This should be done frequently to
      keep film from being scrqtched while it is pcssing
      through film gcte. To open film gate see illustration
     on pqge seven. To cleqn lens, unscrew from mount
     and wipe with soft, lintless cloth. Hcndle lens with
      cqre. Don't let your fingers touch the lens elements.
       Finger prints qnd other foreign substqnces on lens will
      bring qbout indistinct pictures.
                          -0-                                                                                                                                                                                                                                                                                                                                               I


                                                                                                                                                                                                                                                                                                                                                                                                                                                                   i.  ;iur:**          ,.,  -      -                                                                .               ,        I
View original page 9Page 10 · Read text
www.butkus.us


          View lllustrating the Opening ol FiIm Gate
Remove spool of lilm from metcl contciner. Saye contqiner cnd
cqrton for mciling film to mcrnulqcturer for processing. Hold lilm
securely qnd unroll about twelve inches oI lilm qs a leader lor thread-
ing purposes. Hold film with both hcnds ond plcce spool on upper
spindle as illustrqted below. Note: the center hole in the spool
is made with 3 notches on one flcnge qnd 4 notches on the other
flange. 15e lcnge oI the spool with the three notched hole openingshould lcce down.


www.butkus.us
View Showing Spool to Be Plaeed on llppet Spindle qnd the
              Film to 8e Placed oa t&e FiIm Trcck
                       -7-
View original page 10Page 11 · Read text
Placing Film on Tro,ck Under Guides "C"
Plqce the film cgoinst the cperture plcte with the upper edge oI
the lilm positioned under the guide pins "C" as illustrated qbove,
qnd with the shuttle finger locqted in c perlorqtion hole. Close the
lilm gcte qs illustroted below. Be sure the film does not slip out oI
plcce while closing the gcte. Pull 3 or 4 inches oI lilm through closed
gcte to be sure of proper film plocement in gcte.


            View Sloring Closiag ol Film Go;te
                       -8-
View original page 11Page 12 · Read text
www.butkus.us


                 Placing FiIm Belween Boller cnd Sproc&et
      Be sure to lecrve c film-loop between the gcte qnd the sprocket us
         indicqted by the "white" line on the cqmeic plcte. Then'plcce the
        film between the sprocket and the sprockbt juide. see illustration
      above. Be sure the sprocket teeth Lngcae itre tum perforotiona.
      Do not twist the film.


                     Thteading FiIm in tbe fc&e-up Spool
                               -9-
Ir
View original page 12Page 13 · Read text
Hold tqke-up spool with flonge lccing you thct is morked with qn
orrow crnd with the wording: FILM WHEN ON THIS SPOOT IS ONLY
HALF EXPOSED. Insert 3 or 4 inches oI the leader (Iilm) into the
slot in the hub of the spool, qs illustrqted on poge 9. Wind 4 inches
of lilm qround the spool qnd then plcce spool on spindle with orrow
qnd wording facing you. Hcnd turn the spool (Clockwise) to wind up
the slqck oI the leqder.


       View Showing Camera Loaded - Closing Door

Keep ccmera open-then slide opercting button ond run obout eight
inches of lilm to determine  if threqding is correct and if film is secured
to tcke-up spool. Close cnd lock cqmercr door. Wind the spring motor
        key clockwise. Be sure speed control diql is set qt 16 lor
-turningnormql speed. To pcss exposed leqder or threqding portion oI lilm,
slide opercrting button qnd run olf one loot of lilm. Set footcge meter
ct zero. Your camerc is now ready lor use

                     -10-
View original page 13Page 14 · Read text
www.butkus.us
            THE FOOTAGE METER      '        Set the                                qt zero qtter eqch looding by                  logtoge-rneter_        turning it IeIt or right. The footqge meter qutomqticci-
       ly indicotes the number of feet of-film used. There qre
      qbout three to four feet of "leqder" film on eqch end '     of eqch 25 foot roll of double Bmm film. During itre
       processing of the film, most of the ,,leqder,, wiil be
       cut off lecving cpproximctely s0 feet of exposed gmm .      film.
        Don't run qll of the film on to the tqke up spool,
      unless yo.., qre ready to remove the spool tiom trre
      cqmerq.                        sprin-g-like qction of the fiim moy force               .The         it to. portially unroll, cnd pcrt of the film mqy- bulqe
      out from under the protecting flanges of the [.rt e ,ip                                 -edgej        spool. _ This might cquse the        of the film to bei_
     come light fogged. when in c scfe plcce, where liqht
        is sufficiently subdued, run bqlqnce bt titm on to tdke
     up spool
            THE VIEWFINDER
       The viewfinder, see pcrge 3, is provided to give you
       crn ecsy view of- your suFject, cnd to show fou liow     much of your subject                                  _will be in the projected picture.    When looking through the opticcl 6ye piece of the
      viewfinder, see pqge 4, you Jee the iize of the field
      thct is be.ing exposed on the film by your stcndqrd.
      "hclf-inch" lens. This is true, excepi when you qre
                        clos_e ups, where tlie subject'is less.     lgking extreme      thqn four feet from the c-crmerq. Then the sirbject must
     be centered with the center of the lens by meqsrrte-
      ment.
 '     The smqll, etched rectangle in the center of the
      viewfinder element_is p!_aced there to help you center
     your subject mcteriql.- This rectcngle akb iepresents
                                                     lt                               -    -
:
View original page 14Page 15 · Read text
the size of the field when using cr one qnd q hqlf inch
 telephoto lens.
        THE IENS AND ITS USE
  The stcndqrd size lens for cll 8mm cqmerct is the
 "hqlf-inch" lens. The lenses used on Revere Cqmercs
hqve been specificclly designed for these cqmerqs.
Eqch lens is checked ccrefully qnd "customed fitted"
 to the cqmerq before it leqves our fclctory. Every
Model 88 Revere Cqmerc is fitted with either qn F3.5,
or F2.5 lens. These lenses qre qutomoticclly in focus
for cll subjects from cr certcin distqnce in front of
the lens to infinity. The tqble qt the bottom of this
-pcge shows the neqrest distqnce qt which cll subject
 mqtter will be in focus when the lens is open to the
 vqrious dicphrcgm stops.
  Eqch of the lenses hcs diaphrcAm openings or stops
 colibrqted on the rotqting lens bqrrel. The purpose of
 these mcrkings is to indicqte the qmount of light thcr


                                                   16    Fg.s 4    5.6  8   11 oooooo       NETATTVE OPENING OF DIAPHNAGM STOPS
  When Universql Focus lens       Pictures will be in shcrp focus
   stops, listed below, cre used:      Irom digtqnces. listed below, to
                                               inlinity.
            F 2.8                             8.35 feet
            F 3.5                       5.95 "
           E4                    5.2 "
            F 5.6                   3,7 "
          F8                    2.6 "
       Fu                       1.85 "
           F16                   1.3 "
                   -12-
View original page 15Page 16 · Read text
www.butkus.us
 :gqy pass_ through the lens opening on to the film. You must leqrn tb control the dmoun-t of light pcssing
 thro.ugh- the lens by cdjusting the dicphrig* barrei
 of the lens to the prop-er cp-erture stop or- opening.
 As can be seen in the piiture 6! pqge 12, qs the rotctin-g                      -from         -FlO, lens bcrrel is turned       F3.S io      the opening oi
 the lens becomes smqller.
        EXPOSING THE FILM
    It rs vitclly importqnt thot tle correct lens cperture
 opening be used in order thct the film mcy be pioperly
 exposed. The setting                      of the lens cpertur-e op'eniirg ii                        -fqctors: determilsd by two            first, tlie emulsibn sp-eed
 of the film which is being used in the ccrmerq,^qnd
secondly, the qmount of light on the subject. The
emulsion spg_eg rqtings of fhe more populcr double
8mm film will be found on pclge 23.
  The emulsion speed rqJing on ecch film is merely c
compcrqtive                     or fqctor set up by the exposure           -numbermeter mqnufqcturers to denote differences between
film emulsions qnd the rapidity with which ecch film
cccepts. the light to whicli it ii exposed. Before you
cqn mqke cl properly exposed pictule you must kriow
the proper rcting of thct film. If you-do not use qn
exposure meter, you must use an exposure guide for
thcrt pcrticular film rcting. Since colbr films- cnd the
more popqlcr black cnd white pcnchromqtic films qre
rqted by Weston qt cr fqctor number 8, on page 24
          p_repcred qnqn exposureexposure quideguide forfor thii Jpeedspeedwe1v-e hcvehcle prepcred
Iilm. On ths sqme pcge, _y_ou wil find crn exposureg_uide          _ for film having a Weston rating of gZ: you
should_gtydy both of tlese exposure guides, cnd test
yourself by studying the liqhi conditions on severql
diffe-rent subjects. Then figure out which in your opinion
would be the proper exposure for eqch subject.
                    -t3-
View original page 16Page 17 · Read text
TIGHTING TIIE SUBIECT
       Light is qs importcnt in photogrcphy cs gcsoline is
     to qn qutcmobile. Alwcys remember, to mqke good
      pictures, you must properly expose the film. The rcpid
     rise in populcrity of color film mckes it imperctive
                                                      to iighting      thqt _ you give-and cqreful thouqht and study     condiiions      the exposnrd of your fihl
       Lighting is of vitcl importclnce regqrdless of which
     film you use. When workingr with-blqck qnd white
     film the form qnd shqpe of your subjects qre mqde
   more interestinq by shqdov,'s. The exqct reversql of
     this is true when you qre working with color fil,m.
   When worling with color film the cblors of your sub-
     jects provide the contrqst, qnd produce the shcpe qnd
    form of the subject. Shcdows, especiclly hecvy blcck
    shqdows, should be qvoided.
      For best results with color film, the source of tiqht
    should be qlmost directly behind the cqmercr. A flct,
     front lighting on your subject is the best. Side lighting
    or bqck lighting should be qvoided when working
    with color films, unless you use q reflector to throw
     light up into the darkened qrecrs of the subject. Also
    avoid making outdoor exposures of people with  cr
     bright sun directly overhecd. The sun, in this position,
   mqkes deep shqdows around the eyes crnd the neck.
    These deep shqdows ccn only be removed through
    the use of q reflector. You will find thqt some of your
    best results with colored pictures will be obtqined
   when the sky is lightly overcqst or when your subject
     is in open shqde, receiving light from the sky but not
     directly in the sun.
                                    :   14-                                 -
                                                                                                                                                                                                                                                                                                                                                                                                                                                                                                                                                                                                                                                                                                    i


                                                                                                                                                                                                                                                                                                                                                                                                                Jv                                                .i-;-,t;t*          . .\*"       .l ..                       -   ,. ,              ,   :.    I
View original page 17Page 18 · Read text
A grect deql more cqre must bewww.butkus.usexercised in deter-
mining the proper exposure for color film thcn is re-
quired with blqck qnd white film. This is becquse
color film hqs considerobly less lctitude for exposure
error. Incorrectly exposed pictures will be slighlly offcolor cnd they will lcck clarity qnd shcrpnels. -The
exposure guide for colored film on pcrge 24 should be
studied with extreme ccrre. The bqsic exposures given
in the toble qre bqsed on the use of froht lighting as
described qbove. When it is obsolutely necesscry to
use side lighting on the subject be sure to use ct l6cst
one diophrcgm opening larger thqn for front lighting.

       FIITERS FOR COTOR FIIJVI
HAZE FILTER
  When working with regulcrr color film outdoors, no
filter is necesscry for close ups cnd medium close up
"lf:ots". When tcking distcnt shots of lqndscqpes or
over wqter it is cdvisqble to use q hqze filter. Atmos-
pheri: hqze or ultrcl-violet light hqs c tendency to
photoi'rcph cs violet. This hcze tends to mqke yo,rt
pictures tuzzy or indistinct, becquse the ultrcr-violet
light is more prevclent in extremely distqnt scenes,
snow scenes, wqter scenes qnd those tqken ct high
qltitudes. When tcking such scenes the hqze filter will
improve the color rendition.
   4_lto, on q grcy day cnd in the shqde, the light is
colder in tone. Tcking color pictures under suchligfrt-
ing conditions is usuqlly not advisable; however, q
hqze filter used under these conditions will help to
bring cbout cr wqrmer tone to the colors.
                      -t5-
View original page 18Page 19 · Read text
TYPE A FITTER FOR COTOR FIIM
   Indoor color film is different from regulcr daylight
 color film. It is especiclly prepcred for use with white
 photoflgod lights. This film cqnnot be used in sunlight
 or dcylight unless c Type A filter is used on the lens.
 This speciql filter is required to chcnge the quclity of
 daylight to thqt of regulcr photoflood illuminqtion;
 therefore the color of the filter is redish yellow. It is
not necessqry to use the hqze filter when using the
Type A filter. When using the Typ" A filter with
indoor color Iilm outdoors, the speed rcting of the film
is then the sqme qs thcrt given the regulcr outdoor
color film. When using the indoor color film with
photofloods, it is not necesscry to use cny filter.
 _ Regulcr color film, prepared especiclly for use in
dcylight, cqn be used with regulcr white photoflood
lights, if the proper blue filter is used in front of the
lens. The use of the blue {ilter is not prccticcl because
of the effect of the filter on the speed of the film. The
speed of the film is cut down to less thqn hclf when
the blue filter is used. Reasonqbly good results cqn
be obtcined with dcy light color {ilm by using blue
photoflood lights. With these blue lights no filter is
required. Blue photoflood lights crre especially useful
when there is q combinqtion of dcylight qnd ortificiql
light.

  FILTERS FOR BTACK AND WHITE FIIM
EttOW FIITERS
  The filters for blcck and white film qre mqde in
vcrying degrees of yellow, red, green qnd blue. The
                _16_
View original page 19Page 20 · Read text
www.butkus.us
 m9$ populcr filter, cs well qs the most useful, is the
 yellow filter. There qre mqny shcdes or intensities of
 yellow filters, but the most widely used. is the "medium
 yellow" filter. The yellow filter helps the lens to
 penetrcte mist,-fog cnd hqze. It helps to shcrpen up y-ou{       pictures
 shcded        qreqs. ffIt reduceigjving thebettergloreaetcilfrom especiillysuir, wqter ori;
 sqnd. It qlso tends to dcrken the blue of the sufficiently to qllow the white clouds to stqnd out more"kt ncturclly.

 NED FITTER
   Another populcr filter is the "red" filter. This filter
 is qlso qvqilqble in q vqriety of intensities of the color.
  The red filter is used for more drqmqtic effects. It
 dqrkens the blue sky more thcn the yellow filter.  It
 will help bring out more detoir in su'blect mqtter in
 the dqrker colors,"rr"lt cs.p-urple, dqrk ied, qnd deepshqdows. It is qlso herpt'rr wrren tcking pictures                                                      I  -       in bright sun light qnd on inow cnd wqter.-
                  q                                 filter                                            you                                                thct       Iou purchqse                                                      it..is_,,filtcrimportqnt               qsobtqrn_,.Y_1"",lntormqtion                    to                      the                                           fqctor,,.                                  Wien
     q filter, it is necessary to increqse the exposure.I$ng-
The filter fcctor, which sliould be *pfti"J by trre
manufccturer of the filter, will tell you h;; much more
light is necessary when using thq't pqrti""i"i filt"{
  Remember, c filter will make objects of its owa
                                        the opposite                                             lr
                                                                                                                                                                                                                                                                                                                                       ticolor::P: ptrotographwitl photogrcphcs white,cs dqrkcnd grayobje"i"oroiblqck.

                                                                                                                                                                                                                                                                                              il                      -t7 -
                                                                      ,i
View original page 20Page 21 · Read text
PTANNING AND TAKING PICTURES
 Now thct you know how to locd your cqmerc, cdjust
the footqge meter qnd set your lens for proper exPosure
of the film, you qre recdy to start plcnning and tcking
pictures.
  Well plcnned pictures crre qlwcrys more interesting
to cn qudience. Whenever possible, try to tell a story,
instecrd of just shooting qt rqndom. For vqriety' it is
                   -18-
View original page 21Page 22 · Read text
www.butkus.us
 well to mix up your "shots" between close up scenes,
 medium close ups cnd q few distcnt .".rr"". When
 tcking pictures of peopl€, you should concentrqte on
 close ups. When tcking close up pictures, remember
 to keep in mind the limitqtions of the lens so thqt the
 pictures will be in focus, qnd the limitqtions of the
 viewfinder so you will get cll of the subject you wcnt
 in the picture.
  Be sure to hold the cqmerc stecdy. Do not move
                                                                                                                                                                                         . the cqmerq from left to right unless it is qbsorutery
necessqry. Let the subjects move in to or out of the
 picture, but don't try to follow them. "Pcnning (moving
cqmerq from side to side) or {ollowing moving objects
tends to blur the bcckqround, qnd becquse of the
movement  it is even diffieult to keep the moving subject
shorp qnd distinct.
  Every scene should be at leqst one qnd q half to
two feet o{ film in length. Scenes of shorter length,
when projected on q screen, will flqsh on qnd off so
quickly thqt it will be qlmost impossible for the eye
to identify the subject mqtter. Since you cqnnot wqtch
the footqge dicl while taking pictures, it is adviscble
for you to count the number of seconds thqt the cqmerct
is running for eqch scene. It tckes five seconds to
run one foot of film. Expose eqch scene qt leqst eight
seconds. Be sure to wind the spring motor qfter eqch
scene.
View original page 22Page 23 · Read text
HOW TO TTNTOAD AND NEIOAD THE
               CAIVIERA
  Only one hqlf of eqch 25 foot roll of double 8mm
film is exposed at a time. Before the entire roll cqn
be completely exposed, recdy for processing, it  is
necessqry to reverse the film qnd run it through the
cqmercr cacin.
  After cll of the first hclf of the roll hqs been run on
to the tcke up spool, open the ccmerq in only subdued
light cnd remove the spool from the tqke up spindle.
Be sure to hold the film on the spool so thqt it will not
unwind. To reloqd to run the second half of the film,
remove the empty spool from the top spindle. Turn
over the spool, which is now filled with film, so thqt


     Bethreoding Operation-Showing IIcII Erposed film Being
                  Plcced on the UPPet SPindle
                     -20-
View original page 23From the M. Butkus archive. Original publisher and archive notices are retained.
Check the model and edition against your equipment.
PDF verified 2026-10-10.