Film cameras
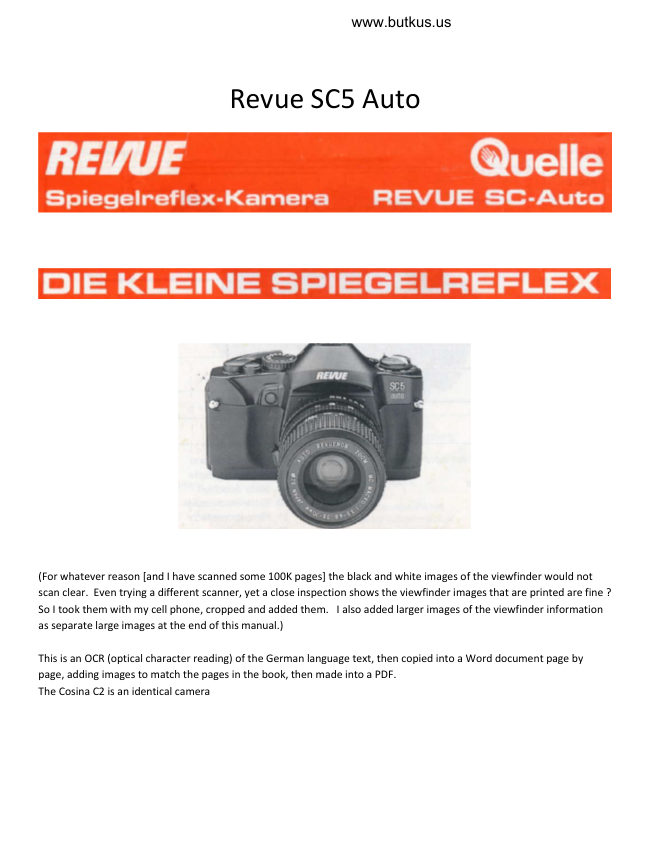
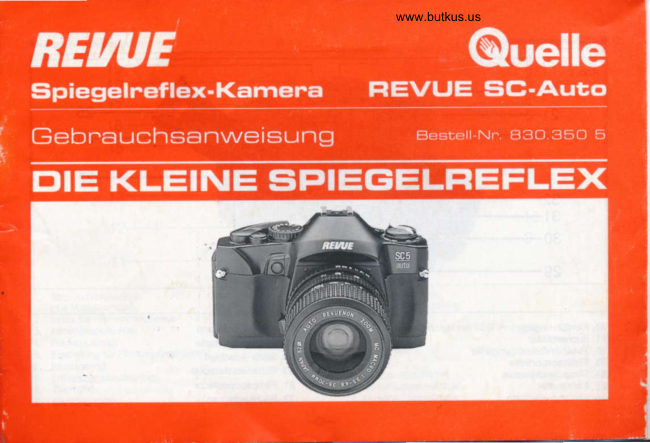
Revue SC5 Auto User manual
User manual for Revue SC5 Auto. 21 pages in English. Read the original PDF, download or print a copy without registration.
21 pagesEnglish4.6 MB PDF
Loading your manual…Open PDF directly
Document details
- Brand
- Revue
- Model / document
- Revue SC5 Auto
- Document type
- User manual
- Language
- English
- Pages
- 21
- File size
- 4.6 MB
- Category
- Film cameras
- Document date
- Not specified in catalog
Search available document text
Find a term, then jump to its page in the original PDF. Image-only pages may not be searchable; check the PDF for exact wording and diagrams.
Page 1 · Read text
www.butkus.us

             Revue SC5 Auto


(For whatever reason [and I have scanned some 100K pages] the black and white images of the viewfinder would not
scan clear. Even trying a different scanner, yet a close inspection shows the viewfinder images that are printed are fine ?
So I took them with my cell phone, cropped and added them.   I also added larger images of the viewfinder information
as separate large images at the end of this manual.)

This is an OCR (optical character reading) of the German language text, then copied into a Word document page by
page, adding images to match the pages in the book, then made into a PDF.
The Cosina C2 is an identical camera
View original page 1Page 2 · Read text
Flash synchronization: Hot shoe, X-contact (1/60 second).
Table of Contents                 Page 1
Technical Specifications            Page 1                 Self-timer: Electronically controlled, with LED indicator (2
Parts Description                 Page 2-3             seconds before release, x: blinks faster), delay time
Inserting the Batteries             Page 4               approx. 10 seconds.
Loading the Film...                Page 5
Setting the Film                  Page 7                Viewfinder: Pentaprism viewfinder. Viewfinder displays:
Speed Shutter...                  Page 8                Split-image indicator and microprism ring LED array with
Exposure Adjustment              Page 8             16 blinking or illuminated elements, illuminated LEDs to
Holding the Camera...              Page 8-10             indicate operating modes AUTO, M, 60 I and B.
Flash Photography                 Page 10             Overexposure warning indicator (OVER).
Setting the Focus                  Page 12              Shutter speed display, consisting of 12 illuminated LEDs,
Changing the Lens                 Page 14            1/1000 to LT. Blinking LED to indicate the recommended
Camera Care...                    Page 15               shutter speed, 1/1000 to LT.
Warranty...                      Page 16
                                                       Viewfinder magnification: 0.86x with 50 mm lens and
To enable you to take full advantage of the many features    infinity setting.
of your REVUE SC 5 Auto, please read the instruction
manual carefully before using the camera to become        Viewfinder coverage: 93% horizontal and vertical. Diopter
completely familiar with it. Fold out the front page so that   adjustment: -1.0 diopter.
you always have the parts diagram in view.
Technical specifications:                                     Light metering: Center-weighted open-aperture metering

Film type: 35 mm film cartridge. Film format: 24 x 36 mm.   Measuring range: ISO 100/21, LW 2 (aperture 2, 1s) - LW
                                                 18 (aperture 16, 1/1000 s)
Lens mount: K-bayonet (compatible with lenses with KA
and KAF bayonet mounts). Lenses with M42 x 1 mm thread  Film speed setting: ISO 25/15° - 1600/33° in 1/3 steps
can also be used with an M42/K adapter.                   Film transport: Single-frame advance by lever operation
                                                       with 135°. Double exposure lock.
Shutter: Vertically traveling metal focal-plane shutter with
fixed speeds of 1 s - 1/1000 and B. X-sync at 1/60 s and     Main switch: Present.
longer. In automatic exposure mode: 8 s - 1/1000, stepless,
with sensitivity limit. Electromagnetic release.            Frame counter: Counts forward with automatic reset
                                            when the camera back is opened.

                                                      Cable release connection: Present. Film rewinding: By
                                                         operating the film rewind button and film rewind crank.

                                                         Film control window: Present.

                                               Power supply: Two 1.5 V alkaline batteries (LR44) or silver
                                                        oxide batteries (SR44)

                                                      Dimensions: 138 (W) x 88 (H) x 58 (D) mm Weight: 370 g
                                                       without lens
View original page 2Page 4 · Read text
Operating elements


20. Film guides                                        27. Camera back cover
21. Viewfinder eyepiece                               28. Film rewind button
22. Accessory mounting groove                        29. Tripod mount
23. Film transport roller                                30. Battery compartment cover
24. Film take-up spool                                 31. Film cartridge compartment
25. Film window                                       32. Rewind spindle
26. Film pressure plate


PG3
View original page 4
Page 5 · Read text
www.butkus.us


Inserting the Batteries
The exposure metering system of the REVUE
SC 5 Auto is powered by two 1.5 V silver
oxide batteries (SR44).

1) Unscrew the battery compartment cover (30)
counterclockwise with a coin or similar object
(Figs. 3+4).


2) Insert the batteries into the battery
compartment cover so that both positive
terminals (+) of the batteries face upwards (as
shown on the battery compartment cover).

3) Reinsert the battery compartment cover and
turn it clockwise until it is securely in place.                   www.butkus.us


Battery Check
1) Prepare the camera for shooting by cocking the
shutter with the film advance lever (17).

2) Set the shutter speed dial (18) to any position
except "LOCK".

3) Press the shutter release button (16) halfway
down. The exposure metering system is now
activated. Look through the viewfinder.

4) If two or three red LED indicators appear in the
viewfinder, the batteries are in good condition. If
none of the indicators light up, the batteries are
dead or have been inserted incorrectly (Fig. 5).    Large view images reprinted at end
5) If the batteries are depleted, both must always                             of the manualbe replaced.

6) Set the shutter speed dial (18) to "LOCK" to
prevent accidental triggering of the camera.


Pg4
View original page 5
Page 6 · Read text
• Always replace both batteries at the same time and   Keep batteries away from children, as they may
use batteries of the same type and from the same      swallow them.
manufacturer. Never mix different types of batteries      If a battery is swallowed, seek medical attention
or old and new batteries, as this can cause batteries    immediately.
to leak.                                            Loading the Film
• Do not open the batteries or throw them into a fire.   Avoid changing the film in direct sunlight. If
• If the camera will not be used for an extended        necessary, shade the camera with your body while
period, remove the film and the batteries. Old          loading the film. To load the film, proceed as follows:
batteries are prone to leaking battery fluid, which       1) Open the camera back (27) by pulling up the film
could damage the camera.                          rewind crank (3) beyond a noticeable resistance (Fig.
• At low temperatures, battery performance              6).
decreases, and the battery life is shortened. If the       2) Insert a film cartridge with the protruding spool
camera is to be used at low temperatures, insert new   axis facing downwards into the film cartridge
batteries and keep the camera warm. Help protect     compartment (32) and, if necessary, push the film
the environment.                                  rewind crank(3) back in completely with a slight
• Used batteries and rechargeable batteries do not     rotation so that the rewind axis (32) engages with the
belong in household waste.                              film cartridge.
• You can dispose of them at a collection point for      3) Pull the film out of the cartridge to the take-up
used batteries or hazardous waste.                    spool (24) and insert it into the slot of the take-up
• Please contact your local municipality for more        spool. Make sure that the film lies flat between the
information.                                              film guide (20). The gears of the film transport roller
• Batteries and rechargeable batteries with the         (23) must engage with the perforations on the top
recycling symbol @ can also be returned to Quelle     and bottom edges of the film (Figs. 7+8).
sales outlets, agencies, and TKD locations. Caution      4) Fold the film rewind crank (3) back down (Fig. 9).
• Batteries must not be exposed to excessive heat,    Do not touch the shutter.
such as sunlight, fire, or similar conditions.              5) Close the camera back (27) so that it clicks audibly,
• Dry cell batteries must not be recharged, as this can  and advance the film by alternately pressing the
cause the batteries to explode.                         shutter release (16) and the film advance lever (17)
                                                              until the frame counter (15) shows "1" (Fig. 10). If you
                                                  observe the film rewind crank (3) during this process,
                                                                                  it serves as a transport control, as it must rotate
                                                    counterclockwise with each transport operation.
                                                         6) The camera is now ready for the first shot.


Pg5
View original page 6Page 8 · Read text
Setting the Film Sensitivity Setting the
sensitivity of the film being used is of utmost
importance, as this is the only way to ensure
correct exposure. 1) The film sensitivity is
indicated on the film packaging and on the
film cartridge in ISO/DIN. 2) Setting the film
sensitivity: Rotate the film sensitivity setting
ring (5) until the desired value is aligned with
the film sensitivity index (2) (Fig. 11).


For intermediate values, two additional
detents are provided between the full values,
allowing for precise adjustment (Fig. 12). 3)
The adjustment dial is equipped with detents
for the individual values. When adjusting,
therefore, care must be taken to ensure that
the dial clicks into place.


Note: Always use the same film material; this setting will then only need to be adjusted once.
However, remember to change the film speed accordingly when switching to a different type
of film!
Only then will proper exposure be guaranteed.


Pg7
View original page 8
Page 9 · Read text
www.butkus.us


Shutter
Cocking When the transport lever (17) is
swung outwards as far as it will go, the shutter
is cocked and the film is advanced by one
frame. Once the shutter is cocked, the
transport lever remains locked and can only be
swung beyond its ready position after the next
shot.

If you do not intend to use the camera further,
or if you want to store it in a bag, swing the
                                             These images are usually printed in color, but
film transport lever all the way inwards to its                                             this is a  B&W manual.  Larger images at last pages.
stop position to prevent damage.


Taking pictures with automatic exposure:
1) Advance the film for the next shot and set
the shutter speed dial (18) to "A" (opposite
the shutter speed index).

2) Press the shutter release button (16)
halfway and look through the viewfinder
eyepiece (21). Two LED indicators will light up:
a) The top LED “AUTO” indicates that the
camera is set to automatic exposure (Fig. 13).
B) The second LED indicates the shutter speed
that will be used when the picture is taken.


Example:                                Example: If, for example, a lens with a focal length of 135
If both the “AUTO” and “250” indicators light  mm is used, camera shake is to be expected if the LED
up, the camera will automatically select a        indicator shows shutter speeds longer than 1/125 of a second.
                                                 In this case, a tripod and a remote release (cable release)shutter speed of 1/250 second when the
                                             should be used.shutter is released.

3) If the “OVER” LED indicator lights up,
overexposure is indicated (Fig. 14). In this
case, the aperture ring (6) must be set to a
larger value.

4) If the “LT” LED indicator lights up, the
shutter speed calculated by the automatic
exposure system is extremely long (2 to 8
seconds).
                               PG8
View original page 9Page 10 · Read text
5) If the shutter speed indicated by the
illuminated LED is longer than the focal length
of the lens being used, there is a risk of
camera shake.


Manual Exposure Shooting

1) Advance the film for the next shot, and set
the shutter speed dial (18) to a value from "1"
to "1000" (opposite the shutter speed index)
(Set "1" for a shutter speed of 1 second and
"125" for a shutter speed of 1/125 second)
(Fig. 15).

2) Press the shutter release button (16)
halfway and look through the viewfinder
eyepiece (21). Two LED indicators will appear
on the left edge of the viewfinder ("M" for
manual exposure and the selected value). In
addition, a blinking LED will usually appear
(Fig. 16). The value indicated by the blinking
LED corresponds to the shutter speed
recommended by the camera's automatic
exposure system. The value of this blinking
LED depends on the brightness of the subject
and the aperture value set on the aperture
ring (6).


3) When the shutter speed dial (18) is rotated
counterclockwise, the blinking LED indicator
moves upward and a shorter shutter speed is
set. When the shutter speed dial is rotated
clockwise, the blinking LED moves downward
and a longer shutter speed is set (Fig. 17).

4) The appropriate exposure in manual mode
is best found by matching the shutter speed
value indicated by the illuminated LED to the
value indicated by the blinking LED.
View original page 10Page 11 · Read text
www.butkus.us


5) After the trigger is partially pressed, the LED
displays the values for approximately 20
seconds, after which an automatic function
switches off the LED display.


PG 9


Long Exposure Photography "B"
1) In the "B" (Bulb) setting, the film is exposed for
as long as the shutter release button (16) is held
down. This setting is particularly suitable when
extremely long exposure times are necessary, e.g.,
for night shots.

2) Advance the film for the next shot and set the
shutter speed dial (18) to "B" (opposite the shutter
speed index (19)).

3) Press the shutter release button (16) halfway
and look through the viewfinder eyepiece (21).
Two LED indicators will light up: a) The top LED
"M" for Manual setting. b) The bottom LED "B" for
long exposure (Fig. 18)

4) For long-exposure shots, a tripod and a remote
shutter release must be used. 5) In "B" mode, the
self-timer is not functional.

Holding the Camera
1) Place the camera on your left palm so that you
can rotate the focusing ring (7) with your fingers.                                       www.butkus.us


2) Hold the camera lightly by the body and
carefully place your right index finger on the
shutter release button (16).

3) Gently press your left elbow against your torso
and look through the viewfinder eyepiece (21)
(Figs. 19+20).

4) For shots with a telephoto lens or with a long
shutter speed (from approx. 1/15 sec.), it is
recommended to mount the camera on a tripod
and use a remote release (cable release).
View original page 11
Page 12 · Read text
5) To take the picture, slowly press the shutter
release button all the way down.
Pg 10


Flash Photography
21 For taking pictures in insufficient ambient
light, the REVUE SC 5 Auto has a hot shoe (1)
with a center contact for the wireless
connection of an electronic flash unit (Fig. 21).

1) Attach an electronic flash unit to the hot
shoe (1).

2) Advance the film for the next shot and set
the shutter speed dial (18) to "60 1" (opposite
the shutter speed index (19)).

3) Press the shutter release button (16)
halfway and look through the viewfinder
eyepiece (21). Make sure that two LED
indicators light up; one for "M" (manual
exposure mode) and the other for "60 1" (flash
mode shutter speed) (Fig. 22). Usually, another
LED will blink, indicating the shutter speed
recommended by the automatic exposure
system (however, the value indicated by the
blinking LED does not affect the exposure of
the flash photograph).
4) When using an automatic flash, the
aperture must be set to the value specified in
the flash unit's instruction manual.
5) For standard flash units, the working
aperture is calculated using the following
formula:


Any modern flash has manual or almost any
modern flash has 1 or 3 auto settings. See you
flash settings.


4) When using an automatic flash, the aperture must be set to the value specified in the flash unit's instruction
manual.
View original page 12
Page 13 · Read text
www.butkus.us
5) For standard flash units, the working aperture is calculated using the following formula: Again see the back
of the flash for settings.


Pg 11


Setting the focus
The advantage of a single-lens reflex camera is
that you don't need to transfer estimated
values to the distance scale when setting the
focus, but can focus optically in the viewfinder
with high accuracy. For this purpose, the
entire ground glass screen of the viewfinder
image is available to you. In addition, the
REVUE SC 5 Auto has two focusing aids in the
center of the viewfinder, which enable
particularly fast and precise focusing (Fig. 23).

1) A split-image rangefinder that creates two
offset partial images as long as the lens is not
focused on the plane in question. Focusing is
required as soon as the subject shows an
offset in the relevant plane. The split-image
rangefinder is particularly suitable for subjects
with clear, vertical lines.

2) A microprism ring around the split-image
rangefinder. Here, a multitude of
microscopically small prisms leads to an
exaggeration of the ground glass effect – the
subject appears "broken up" when out of
focus. The distinct shimmering of the prisms
makes the blur even more noticeable.
However, once you have found the correct
focus, the microprism grid produces a
completely steady, sharp image for the
relevant subject plane. The grid is not tied to
any particular subject structures and is
therefore also suitable for subjects that do not
have clearly discernible lines (Figs. 24 + 25).

3) The viewfinder eyepiece features an
accessory mounting groove, which is suitable
for attaching accessories such as an eyecup,
corrective lenses, or an aiming telescope, etc.
PG 12
View original page 13
Page 14 · Read text
Depth of field
Depth of field refers to the range of distances that
are in focus in the image. The depth of field
depends on the aperture. The wider the aperture is
opened, the smaller the depth of field, and vice
versa (Fig. 26).


Depth of field scale (8)
After focusing, the depth of field scale on the lens
indicates the approximate range that will be in focus
in the image. This range is marked by the distance
between the pair of aperture numbers
corresponding to the selected aperture on the
depth of field scale and can be read on the distance
scale (Fig. 27).


Rewinding the film
If the frame counter shows "36" or "24" (depending
on the film used) and you feel resistance when
advancing the film (28), the end of the film has been
reached. In this case, press the film rewind button
(28) on the bottom of the camera (Fig. 28) until it                                                    www.butkus.us
locks into place, swing out the film rewind crank (3)
from the rewind knob (4), and rewind the film into
the cartridge by turning the crank clockwise until
you feel a noticeable decrease in resistance. Now
you can open the back cover (27) by pulling the
rewind knob (4) upwards against the strong
resistance. Remove the film cartridge and send it for
processing immediately.


Pg 13
View original page 14
Page 15 · Read text
www.butkus.us


Infrared Photography 29
For infrared photography using infrared film and a
special infrared filter, a focus adjustment is
necessary. Since the wavelength of infrared light is
longer than that of visible light, the image is formed
in a different focal plane. An infrared index (red
mark above the aperture number (4) on the depth-
of-field scale (8)) is provided for this adjustment.
Further details can be found in the infrared film's
instruction manual and in specialized literature.

( Black and White Infared film is being made
again - 2025)


Changing the Lens
The bayonet mount of the REVUE SC 5 AUTO allows for
lightning-fast lens changes. To attach the lens, align the
red dot on the lens mount with the red dot on the
camera body (Fig. 30), and then rotate the lens clockwise
until it clicks into place.

To remove the lens, press and hold the lens release
button (11) and rotate the lens counterclockwise as far as
possible. The lens can then be removed from the camera
body.

Notes

• The lens must not be attached or removed while the
camera is in operation.

• In addition to the included lens, other lenses with K or
KA mounts can also be attached to this camera. However,
it must be noted that attaching unsuitable lenses may
cause malfunctions.


Pg 14
View original page 15
Page 16 · Read text
Self-Timer Shots
The self-timer allows you to include yourself in the
picture. It can also be used to avoid camera shake
during longer exposure times.

1) Advance the film to the next frame. In addition,
make sure that all settings, such as focus, exposure,
shutter speed, etc., are correct and that the desired
image is visible in the viewfinder.

2) The self-timer button (13) (Fig. 31) is equipped
with an LED indicator that flashes after the self-
timer button is pressed. The camera will fire after
approximately 10 seconds.


3) Approximately 2 seconds before the shutter is      Please note:
released, the LED indicator (13) flashes faster to      These instructions refer to the use of the camera with
indicate the end of the countdown.                 the standard REVUENON 1:1.9/50 mm lens. Deviations
                                       may occur when using other lenses. Please also refer to
4) The self-timer can still be canceled even after the   the instruction manual for the respective lens.
LED indicator has started flashing. To do this, simply
press the shutter button (16) halfway down.


Camera Care                                                                   ... and the right film to go with it!
The REVUE SC 5 Auto is a precision instrument. If
you handle it carefully, it will provide you with       Of course, your top-quality camera deserves a film from
flawless pictures for many years. Protect your       REVUE. Whether negative or slide film, they are among
camera from dirt, rain, and excessive heat. Avoid     the best in the world. They are incredibly affordable.
touching the lens elements with your fingers. To     The REVUE professional lab will produce REVUE prints
clean the lens elements, breathe on them and         for you with the fantastic REVUE image protection
gently wipe them clean with a soft cloth. Do not use   surface sealing and a beautiful silky-sheen effect.
eyeglass cleaning cloths under any circumstances,
as these can damage the lens coating.


Pg 15
View original page 16Page 17 · Read text
www.butkus.us
Warranty
The warranty period begins upon delivery. Please provide proof of this date with your
purchase receipt (cash register receipt, invoice, delivery note, etc.). Please keep these
documents carefully. Our warranty service is subject to our warranty terms and conditions
valid at the time of purchase. In case of repair, please bring the device to a Quelle service
center/specialist store or customer service point, or send it directly to
Quelle Customer Service
Central Workshop
Löffelholzstraße 21
8500 Nuremberg 70
Germany

Images of viewerfinder - enlarged


Abb 5
View original page 17
Page 21 · Read text
www.butkus.us


Image 22

Just noticed, this image
was printed upside-
down in the manual !


Image 23
View original page 21
Related documents and language editions
From the M. Butkus archive. Original publisher and archive notices are retained.
Check the model and edition against your equipment.
PDF verified 2026-10-10.