Film cameras
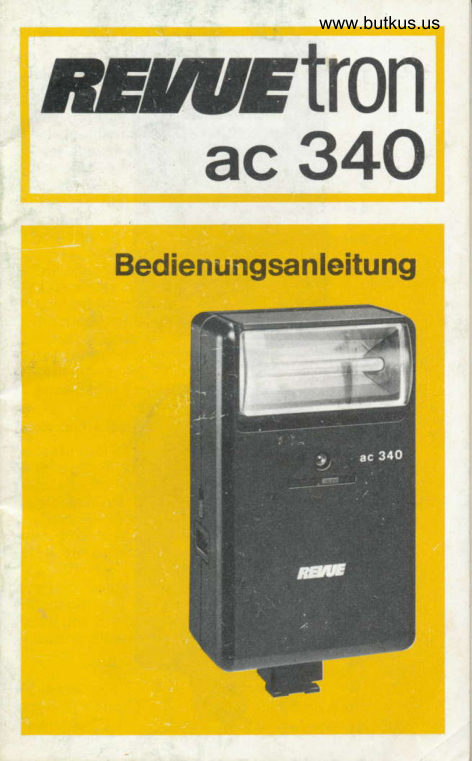
Revue Tron AC340 User manual
User manual for Revue Tron AC340. 29 pages in German. Read the original PDF, download or print a copy without registration.
29 pagesGerman1.8 MB PDF
Loading your manual…Open PDF directly
Document details
- Brand
- Revue
- Model / document
- Revue Tron AC340
- Document type
- User manual
- Language
- German
- Pages
- 29
- File size
- 1.8 MB
- Category
- Film cameras
- Document date
- Not specified in catalog
Search available document text
Find a term, then jump to its page in the original PDF. Image-only pages may not be searchable; check the PDF for exact wording and diagrams.
Page 2 · Read text
Digitally signed by Mike Butkus
                                                DN: cn=Mike Butkus, o=Butkus camera manuals,
                                                     ou=butkus.org, email=mike@butkus.org, c=USMike Butkus      Date: 2024.03.15 16:36:08 -04'00'
View original page 2Page 3 · Read text
www.butkus.usArtikel Nr.2564

Bedienungselemente
 1 Schwenkref lektor
 2 Computer-MeRzelle
 3 Automatikschalter
 4 Betriebsschalter
 5 AnschluR  ftir Ladestecker
 6 Steckf uR
 7 Fenster frlr Filmempf ind
   lichkeit
 8 Schieber zur Einstellung
   der Filmemof indlichkeit
 9 Entfernungsskala
10 Markierung der drei  Arbeitsblendenbereiche  :                                       l
1 1 B  I itzbereitschaftsanzei ge
12 Handausl6ser
13 AnschluR fUr Synchron-
   Kabel
14 Anzeige fUr Testblitz

Technische Daten
 Leitzahl (bei 21 DIN)     34
Blitzfolgezeit          ca. 0,5 - 6 sec.
 Blitzzahl pro Akku-Ladung  ca. 50 - 850
Computer-Typ      Seriencomputer (Thyristor)
Testblitz-Einrichtung eingebaut
Arbeitsblenden/      4/ 1,2 - 8,5 m
Entfernungsbereiche  8/0,5 - 4,2 m
                           16/0,4 - 2,1 m
Au s leu chtw in ke |           45'  / 60'
 Blitzdauer tg.1          1/300 - 1 /25000 sec.
FarbedesBlitzlichtes tageslichtiihnlich
Schwenkref lektor         einstellbar von 0' bis 90'
                           mit Raststellungen  bei
                       0o,30",60',90o I ,30"1NC-Akku             eingebaut
 MaBe (B x H x T)          7,6 x 11,9 x 4,5 cm
Gewicht              345 g
View original page 3Page 4 · Read text
Bitte spenden Sie 2,50 Euro, um diese Website über E-Bay zu unterstützen ... www.PayPal.me/butkusView original page 4
Page 5 · Read text
Achtung!
Der Akku darf nur mit dem mitgelieferten Netz-
 Ladegerdt 014 geladen werden.

Attention!
Be careful to charge the accumulator only with
the included charger 014.

Attention!
Ne rechargez I'accu qu'avec le chargeur 014
fourni avec le flash.

Attentie!
De accu mag slechts met de meegeleverde laad-
stekker 014 weer geladen worden.

Attentione!
L'accumulatore deve essere caricato soltanto
mediante il caricatore 014 in dotazione.
\
View original page 5
Page 6 · Read text
Netz-/Ladegerit  liir              www.butkus.us
 220V /5OHz
 MaRe(BxHxT)             4,5 x 3,8 x 6 cm o. Stecker
 Gewicht                   180 g
 KabellSnge            1m
 Anderu n gen vorbehalten

 Wichtig
 Vor dem ersten Gebrauch muB der Akku geladen wer-
 den (siehe "Akku-Laden").
 AnschluB an die Kamera
 Das Blitzgerdt wird mit dem SteckfuB (6) in den Steck-
 schuh der Kamei'a geschoben. Hat lhre Kamera einen
 Mittenkontakt, ist das Ger6t damit direkt an der Ka-
 mera angeschlossen. Bei einer Kamera mit Kabelkon-
 takt wird das beigef Ugte Synchron-Kabelam AnschluB
 (13) befestigt und mit dem X-Synchronkontakt der
 Kamera verbunden. Die VerschluBzeit fUr Elektronen-
 blitzauf nahmen entnehmen Sie ddr Kamerabedie-
 nungsan leitung.
Computerautomatik
Stellen Sie mit dem Schieber (8) die Fitmempf indtich-
 keit des verwendeten Films in DIN (oder ASA) im Fen-
ster (7) ein. Jetzt k6nnen Sie am blauen, roten oder
ge!bgn Punkt (je nach Entfernungsbereich) die Ar-
beitsblende  f Ur den Computer ablesen, die am Objektiv
der Kamera eingestellt werden muB. Die entspreihen-
de Farbmarkierung  ist dann auch mit dem Automatik-
schalter (3) an der Computer-MeBzelte (2) einzustellen.
FUr den Entfernungsbereich von ci. 0,4 - 2,1 m wAhlen
Sie die blaue, von ca. 0,5 - 4,2 m die rote und von ca.
].,1- 8,5_m die gelbe Markierung (siehe Markierungs-
linien (10) am Blendenrechner). Der Computer dos6rt
in diesen Bereichen die richtige Lichtmenge.
Wenn lhre Kamera jedoch eine Blitzautomatik hat,
dUrfen Sie nicht zusAtzlich die Computereinstellung
View original page 6
Page 7 · Read text
des Blitzgerites verwenden. Es genUgt dann dle Lelt-
 zahl des Blitzgerdtgs (bei 21 DIN) an der Kamera ein-
 zustel len (siehe Kamerabed ienu ngsanleitu ng).
 Arbeiten ohne Computer
 Stellen Sie den Automatikschalter (3) so ein, daR die
 Computer-MeRzelle verdeckt  ist.. Der Blendenrechner
 an der RUckseite des Gerites erspart lhnen jegliches
 Rechnen mit Leitzahlen. Nachdem die Filmempfind-
 lichkeit mit dem Schieber (8) im Fenster (7) einge-
 stellt ist, kdnnen Sie gegenUber der Entfernungsskala
 (9) die  f ur die eingestellte Entfernung bendtigte Blende
 am Schieber (8) ablesen und am Objektiv der Kamera
 einstellen.
'Blltzen
 Schalten Sie das Ger6t mit dem Betriebsschalter (4)
 so ein, daB die rote Markierung sichtbar wird (Pfeif-
 ton). Das GerAt verfUgt Uber einen Schwenkreflektor
 (1), der zum Schutz des GerAtes bei Nichtgebrauch
 nach unten geklappt wird. FUr normalen Gebrauch'
 schwenken Sie den Ref lektor (1) nach vorn bis zum 2.
 Rastpunkt (horizontale Stellung, siehe Abbildung). In
 der 1. Raststellung  ist der Ref lektor leicht nach unten
 geneigt, fUr bessere Ausleuchtung von Aufnahmen
 bei geringen AbstAnden (unter 1 m). Sobald die Blitz-
 bereitschaftsanzeige  (11) aufleuchtet, ist das Gerdt
 blitzbereit. Das Ausldsen des Blitzes erfolgtt automa-
 tisch 0ber den KameraverschluB oder durch den
 HandauslOser (12)
                                          www.butkus.us
 lndirektes Blitzen
 Mit dem Schwenkref lektor (1) konnen Sie auch indirekt
 blitzen, um eine weichere Beleuchtung des Motives zu
 erzielen. Drehen Sie dazu den Schwenkreflektor nach
 oben. Bis zur Senkrechtstellung  stehen lhnen 3 Rast-
 punkte zur Verf Ugung. Als Ref lektionsf ldche eignen
 sich ZimmerwAnde oder -decken, die m6glichst hell
 sein sollen. Beim indirekten Blitzen ist der Computer
zum richtigen Dosieren der Lichtmenge besonders
 wichtig. Beim indirekten Blitzen ohne Computer mUs-
View original page 7Page 8 · Read text
www.butkus.ussen Sie die Blendeneinstellung ca. um 1 - 2 Stufen
weiter 6ff nen als im Absatz "Arbeiten ohne Computer"
beschrieben (2.8. Blende I oder 5,6 statt Blende 11).
Testblitz
Mit dem Testblitz kdnnen Sie prUfen, ob das Licht bei
der eingestellten Arbeitsblende ausreicht. Achten Sie
darauf , daR Sie dabei nicht nAher an das Motiv heran-
gehen, als ftir den jeweiligen Entfernungsbereich  an-
gegeben ist (siehe Absatz "Computerautomatik").
Richten Sie die MeRzelle auf das Motiv und Losen Sie
mit dem Handausloser (11) den Blitz aus. Beobachten
Sie dabei die Anzeige (14) des Testblitzes. Leuchtet
sie beim Blitzen auf , so reicht die Lichtmenge bei der
eingestellten Arbeitsblende aus. Leuchtet die Anzeige
(14) nicht auf , so mussen Sie entweder ndher an das
Motiv herangehen oder auf den Bereich mit der nAchst
groReren Arbeitsblende  - soweit vorhanden - umschal-
ten (auch an der Kamera). Wiederholen Sie den Test-
blitz, um sich zu vergewissern, daR der neu gewdihlte
Bereich ausreicht. Steht kein weiterer Bereich mit
grORerer Arbeitsblende mehr'zur VerfUgung, so kann
wie im Abschnitt "Arbeiten ohne Computer" weiter
gearbeitet werden.
Akku-Laden
Dazu schalten Sie das GerAt mit dem Schalter (4) aus
und schlieRen den dreipoligen Stecker an der Buchse
(5) an. Jetzt verbinden Sie das Ladegerdt mit dem
Stromnetz.
Bei leergeblitztem Akku betrdgt die Aufladezeit 14
Std., bei teilentladenem Akku entsprechend weniger.
Der Ladezustand des Akkus kann mit der Blitzbereit-
schaftsanzeige ungef€ihr ermittelt werden: Leuchtet
diese ca. 10 Sek. nach dem Blitzen wieder auf ist der
Akku voll, bei ca.20 Sek. ist er halbvoll; bei mehr als
40 Sek. leer. Der Akku darf nur mit dem mitgelieferten
Ladestecker geladen werden.
View original page 8
Page 9 · Read text
Der Ladevorgang  ist durchzuf Uhren:
- vor dem ersten Gebrauch
- nach ldngerer Nichtbenutzung
- bei Blitzfolgezeiten von Uber 40 sec.
Blitzen vom Netz
Wenn das Gerdt, wie u nter "Akku-Laden" beschrieben,
ans Netz angeschlossen ist, kann geblitzt werden,
ohne daR dem Akku Strom entnommen wird. Die Blitz-
folgezeit erh6ht sich dann auf ca. 18 Sek. Beachten
Sie bitte das Aufleuchten der Blitzbereitschafts-
anze   I ge.

Wartung
lst lhr Gerdt lingere Zeit nicht benutzt worden, dann
sollten Sie es nach M0glichkeit schon vor dem Blitzen
einschalten und einige Minuten laufen lassen. Bei
sogenanhter Tiefentlidung  (z B. durch versehentli-
ches Liegenlassen in eingeschaltetem Zustand oder
zu langer Lagerung) ist eine Ladezeit von 20 bis 24
Stunden zweckmdBig. Auch wenn das Gerdt nicht
benutzt wird, muR es wegen der Selbstentladung des
Akkus etwa alle 2 Monate ca. 10 Stunden lang geladen
werden.
View original page 9
Page 10 · Read text
www.butkus.us
 Operating Elements
  1 Tilting ref lector
  2 Computer cell
  3 Automatic switch
  4 On/ ott switch
  5 Charging socket
  6 Contact foot
  7 Film speed indicator
   window
  8 Film speed slider
  9 Distance scale
 10 Guide marks for 3 working
   aperture ranges
 1 1 Flash readiness indicator
 12 Manual   f iring button
 '13 Sync cord socket
 14 Trial  f lash indicator

Technical Data
Guide number (for DIN 21) 34
Recycle time             0.5-6secs.approx.
Flash capacity per charge  50 - 850  f lashes approx.
Computer type             series computer (thyristor)
Trial flash feature          bu ilt-in
Working apertures/        4/1.2 - 8.5 m
distance ranges           8/0.5 - 4,2 m
                           16/0.4 - 2.1 m
lllumination angle        45'l60"
Flash duration tg.1            1 /300 - 1 /25000 sec.
Colour of light            close to daylight
Tilting reflector          adjustablefrom0-90',
                            lock-in Positions: 0", 30o.
  a                       60o, goo l  30'JNiCad Accumulator        bu ilt-in
Dimensions                7.6 x 11.9 x 4.5 cm
Weight                   345 g
View original page 10Page 11 · Read text
AC Charger lor 220 V / 5O Hz
  Dimensions              4.5 x 3.8 x 6 cm, without plug
  Weight                 180 g
  Cable length        1m
  Modif ications reserved    !
I
  lmportant!
  Prior to  f irst use, charge the accumulator! (See "Char-
  ging the Accumulator").
  I Mounting the Flash on the Camera
  Slip the flash unit's contact foot (6) on the camera's
  accessory shoe. lf your camera has a hot shoe con-
  tact, camera-flash synchronization is automatically
  provided. For cameras with cable connection, fasten
  the included sync cord to socket (13) on the flash unit
  and connect  it to the camera's X-sync socket. Shutter
 speeds for electronic flash shots are given in the
  camera instruction manual.
  Automatic Computer Operation
  Set the slider (8) to adjust the DIN (or ASA) film speed
  in the indicator window (7). On the blue, red or yellow
  point (depending on the distance range) you can then
  read the working aperture for the computer to be set
 on the camera's lens. With the automatic switch (3),
  set this index colour on the computer cell (2), too.
  For a range of about 0.4 - 2.1 m, you choose the blue
  marking, for 0.5 - 4=2 m the red one, and for about
.1.2 - 8.5 m the yellow one. (see guide marks (10) on
'the diaphragm scale). Within these ranges, the
 computer will adjust the correct amount of light.
 However, if your camera has an automatic flash
 system, do not additionally use the flash unit's com-
  puter system. In such a case, it is suff icierft to set the
  flash unit's guide number (for DIN 21) on the camera
  (see camera instruction manual).
View original page 11
Page 12 · Read text
www.butkus.us
 Operation without Computer
 Set the automatic switch (3) to cover up the computer
 cell. The diaphragm scale on the rear of the unit makes
 guide number calculations unnecessary. Once the  f ilm
 speed is adjusted with the slider (8) and appears in
 the indicator window (Tl, you can read the lens
 opening required for the set distance on the stider (g),
 opposite the distance scale (9). Set this f-number on
 the camera lens.

 Flash Operation
 Operate the on/off switch (4) to turn the unit on until
 a red marking is exposed (humming sound). The  f lash
 unit has a tilting reflector ('t) which can be fotded
 down to protect the unit when not in use. For normal
 use, tilt the reflector (1) forward, to 2nd lock-in point
 (horizontal position, see fig.). ln its first lock-in
 position, the ref lector is slighily tilted downward, for
 better illumination of close-ups (1 m range and less).
 When the  f lash readiness indicator (11) lights up,'eitnertfre flash is ready for firing. The flash is released
 automatjcally by the camera's shutter, or by the
 manual firing button (12).

Bouncelight
The tilting reflector (1) allows soft illumination of the
subject by bouncelighting. For bouncelighting,  turn
the tilting ref lector up. Up to verticaf position, ybu can
choose among three lock-in points. Light walls or
ceilings are suitable reflective surfaces. When boun-
cing the light, the computer provides for proper ad-
justment of the light intensity. For bouncelighting
without computer, the lens opening should be 1 or 2
values larger than described in "Operation without
Computer" (e.9. lens opening 8 or 5.6 instead of 11).
Trial Flash
The trial flash allows to check if sufficient tight is
available for the working aperture set, When  f iring a
trial flash, be careful not to approach the subject
View original page 12Page 13 · Read text
nearer than recommended for the corresponding wor-
   king aperture range (see "Automatic Computer Opera-
   tion"). Now aim the flash unit at the subject and
    fire the flash with the manual  f iring button (12). Watch
   the trial flash indicator (14). lt it lights up when a
   flash is fired, the amount of light is sufficient for the
   adjusted working aperture. lf the indicator (14) does
   not glow, you must either draw closer to the subject
    or, if possible, change over to a range with the next
   larger working aperture (on the camera, too). Fire
   another trial  f lash to  f ind out if this is suf  f icient.  tf no
   further range with a larger working aperture  is
   available, you may proceed as described in "Operation
   without Computer".
   Charging the Accumulator
  Operate switch (4) to turn the unit off and insert the
   3-pole plug into socket (5). Now connect the charger
   to power supply. When the accumulator is completely
II  run down, recharging. takes about 14 hours. For a
   partially discharged unit, it is accordingly shorter.
  The accumulator condition is found out by the  f lash
   readiness indicator: lf it lights up within 10 secs. after
   flashing, the accumulator  is  f ully charged.  lf recycling
  takes about 20 secs., the accumulator is half run
I  down;  if it takes more than 40 secs.. the accumulator
   is discharged. Be careful to charge the accumulator
  only with the included charger.
  Charging is to be made:
    - prior to  f irst use
    - when out of use for a longer period of time
    - when recycle time is more than 40 secs.
  Flash Operation on Power Supply
  When the  f lash unit is connected to power supply as
  described in "Charging the Accumulator", fiash
  operation is possible without battery drain. The re-
  cycle time is then increased to about 18 secs. Watch
  the  f lash readiness indication
View original page 13Page 14 · Read text
www.butkus.usMaintenance
lf the  f lash unit was out of use for a longer period of
time, turn it on a few minutes before use. In case of
over-discharging (when erroneously left in turned-on
condition or when stored over an extremely long
period of time), a 20 - 24 hours' recharging iime is
recommendable. Even when not in use. the unit
should be recharged every 2 months   f or about '10 hours
(as it discharges, when stored).
View original page 14
Page 15 · Read text
El6ments de commande
  1 ref lecteur orientable
  2 cellule de mesure du
   computer
  3 commutateur pour fonc-
   tionnement automatiq ue
  4 commutateur de service
  5 prise pour  f iche-
   chargeur
  6 patin de  f ixation
  7 fenetre deS sensibilit6s
  8 coulisseau de 169lage
   des sensibilit6s
  9 6chelle des distances
 10 marque des 3 domaines de
   diaphragmes dispon ibles
 11 indication "Flash pr6t A
          f onctionner"
 12 d6clencheur A main
 13 prise pour cAble synchro
 14 t6moin pour eclair d'essai
 Caract6ri stiques techniques
Nombre-guide (pour 21 DIN) 34
 Interval le entre 6clairs       0,5-6sec.env.
Nombre d'eclairs par charge
d'accu                      50 - 850 env.
fVRe Oe computer       computer en s6rie (thyristorDispositif pour 6clair d'essai incorpor6
Diaphragmes disponibles/ 4/ 1 ,2 - 8,5 mrayons des distances     8/0,5 - 4,2 m
                             16/0,4 - 2,1 m
Angle d'6clairage       45'160.
Dur6e de l'6clair t6 1       1/900 - 1/25000 sec.Couleur de l'6claii''       semblable A la lumidre
                         du jour
R6f lecteur orientable     r6glable de 0 A 90.
                           avec positions crantOes A
                                               3o'J                                                                                                                   'Accu NC                i^:i";'!to' eoo 1Dimensions  (l x h x p)       7,6 x 11,9 x 4,5 cmPoids                    345 g
View original page 15Page 16 · Read text
www.butkus.us Chargeur sur r6seau pour
 220V /50 Hz
 Dimensions(l xhxp)     4,5x3,8x6cmsansfiche
 Poids                     180 g
 Longueur du cAble      1m
 Sous r6serve de modif ications
 lmportant
 Chargez I'accu avant la premidre mise en service (voir
 chapitre correspondant).
 Raccordement  i I'appareil photo
 Faites glisser le patin (6) du flash dans la griffe de
 I'appareil photo. Si votre appareil est muni d'un
contact central, le  f lash est directement branche.
Dans le cas d'un appareil avec contact par cdble de
 raccordement, branchez le cAble synchro fourni dans
 la prise (13) et reliez-le au contact synchro X de
 I'appareil photo. Reglez la vitesse d'obturation selon
 les indications relatives d la prise de vues au  f lash
electronique   f igurant dans les instructions de service
de votre appareil p6oto.
Flash automatique
A l'aide du coulisseau  (8) , r6glez ta sensibilite du  f ilm
utilise en DIN (ou ASA) dans ta fenetre (Z). Seton le
rayon de la distance, vous pouvez maintenant lire au
point bleu, rouge ou jaune le diaphragme automatiquequ'il vous faut regler sur I'objectif de I'appareil photo.   I
Reportez egalement le repere de couleur correspon-
dant sur la cellule de mesure (2) du computer A l;aidedu commutateur de fonctionnement automatique (3).  I
Prenez le point bleu pour un rayon de0,4 d 2,1 m env.,
le point rouge pour 0,5 A 4,2 m env. et le jaune pour
1,2 a 8,5 m env. (voir les lignes de repere (10) sur le
calculateur de diaphragme). Dans ces rayons, le cer-
veau electronique execute le dosage convenable de la
quantit6 de lumiere. Ne vous servez pas du fonction-
nement automatique par computer si votre appareil
View original page 16
Page 17 · Read text
photo est 6quip6 d'un automatisme de  f lash. Dans ce
    cas, il vous suff it de 169ler le nombre-guide du  f lash
    (pour 21 DIN) sur votre appareil photo (voir instruc-
    tions de service de I'appareil photo).
   Fonctionnement sans computer
    Reglez le commutateur de fonctionnement automa-
    tique (3) de fagon A masquer la cellule de mesure du
   computer. Le calculateur de diaphragme, situ6 au dos
   du flash, vous epargne tout calcul fastidieux de
   nombres-guides. Aprds,avoir 16916 la sensibilit6 du
    film dans la fen0tre (7) d I'aide du coulisseau  (8),
    celui-ci vous indique, en face de l'6chelle des
   distances (9), I'ouverture de diaphragme dont vous
   avez besoin pour la distance choisie et qu'il vous faut
    169ler ensuite sur I'objectif de I'appareil photo.

    Flash
   Mettez I'appareil en service avec le commutateur (4)
  de fagon A ce que la marque rouge soit visible
   (sifflement). Le flash est equipe d'un r6flecteur
   orientable (1). Si vous ne vous en servez pas, rabattez-
     le vers le bas pour m6nager le flash. Pour un usage
   normal, orientez le r6f lecteur (1) vers I'avant jusqu'au
   second crantage (position horizontale, voir  f ig.). A la
   premidre position crant6e, le r6f lecteur est l6gdrement
    inclin6 vers le bas et permet un meilleur 6clairement
   pour les prises de vues d courtes distances (moins
I  d'unlampe-temoinmdtre). Le(11)flashs'allume.est prCt L'6clairA fonctionnerest alorsddsd6clen-que la
   che soit automatiquement par I'obturateur de I'appa-
                               A main (12).I    reil photo, soit par le d6clencheur
   Flash indirect
   Le r6flecteur orientable (1) permet d'atteindre un
   6clairement plus doux du sujet par une lumidre
    indirecte. Pour cela, tournez le r6f lecteur vers le haut.
   Vous avez le choix entre trois positions crant6es avant
   d'atteindre la verticale. Des murs ou plafonds de
    pieces, aussi clairs que possible, conviennent comme
View original page 17Page 18 · Read text
www.butkus.us
 surface de r6flexion. Le computer est particulidrement
 important pour le dosage correct de la lumidre au
   f lash indirect. Pour res prises de vues au  f lash indirect
 sans computer,  il est necessaire de choisir un
 diaphragme de 1 d 2 degr6s env. sup6rieur A celui dont
 le reglage a 6t6 mentionn6 sous la rubrique ,,Fonc_
 tionnement sans computer" (par ex., diaphiagme g ou
 5,6 au lieu de 1 1).
 Eclair d'essai
 Par I'eclair d'essai, vous pouvez v6rifier si la lumi6re
 est suff isante pour le diaphragme 169l6. A cet 69ard,
 vei.l.lez A ne pas vous approcher davantage du iulei qu'il a ete indiqu6 pour le domaine de dlaphragmes
 correspondant (voir alinea,,Flash automatique").
 Maintenant, vous pouvez braquer le  f lash sur le'suj6t
 et declencher I'eclair par le d6clencheur d main (i2)
 tout en observant le t6moin de l'6clair d'essai (14). S'il
 s'allume'lors de l'6clair, la quantit6 de lumidrb est
 suffisante pour le diaphragme choisi. Au contraire,
 s'il ne s'allume pas, il vous faut soit vous approcnei
 davantage du sujet, soit changer de diaphragme,
 c'est-d-dire, regler le  f lash (et I'appareil phoio) s-ur t6
 domaine aff ichant la grandeur suivante - si dispo_
 nible. Renouvelez cet essai pour bien vous assurer
que ce nouveau 169lage de diaphragme est suffisant.
Si vous..ne disposez plus de domline avec un plusgrand      diaphragme,                  procedez                            alors comme                                                      ete                                                                    il a                      ,,Fonctionnementdecrit      sous             la rubrique                                          com_                                    sans puter".

Recharge de I'accu
Coupez le contact par le commutateur  (4) et enfoncez
la.fiche tripolaire dans la prise tdt. naccorOeimaintenant le chargeur au r6seau. Le temps de
recharge d'un accu compldtement vide est de 14
heures et proportionnellement moins, pour un qui ne
I'est qu'en partie. On peut v6rif ier A peu prds l'6iat de
l'gccu      par I'indication "Flash pr6t A fonctionner". Si ce
temoin s'allumeaprds 'tO secondes env. aprds t'6ctair,
f 'accu est pl'ein; s'il a besoin de 20 sec. env. I'accu esi
View original page 18
Page 19 · Read text
A moiti6 plein; s'il a besoin de plus de 40 sec., I'accu
est vide. Ne rechargez I'accu qu'avec la  f iche-chargeur
fournie avec le  f lash.
Une recharge de I'accu est n6cessaire
- avant la premidre utilisation du  f lash
- apres une longue interruption d'emploi
- si les intervalles entre 6clairs d6passent 40 sec.

Flash sur r6seau
Lorsque l'appareilest branch6 sur le rdseau, comme  il
a 6t6 d6crit sous la rubrique "Recharge de I'accu",  il
est possible de faire des flashes sans prendre de
courant A I'accu. Dans ce cas, I'intervalle entre les
6clairs est de 18 sec. env. Veillez A I'allumage du
t6moin "Flash pr6t A fonctionner".
Entretien
Aprds une longue interruption d'emploi, faites fonc-
tionner votre flash pendant quelques minutes, si
possible, avant de vous en servir. Si I'accu est com-
pletement d6charge (pour I'avoir laisse en contact
apres la prise de vues ou ne pas s'en 6tre servi
pendant un certain temps),  il est recommand6 de faire
une recharge de 20 a 24 heures. MOme si I'appareil
n'est pas utilis6, il faut recharger l'accu env. tous les
deux mois, pendant 10 heures, pour 6viter qu'il ne se
decharge de lui-m0me.
View original page 19
Page 20 · Read text
www.butkus.us  Bedieningselementen
   1 Zwenkref lektor
   2 Computer-meetcel
   3 Automatische schakelaa r
  4 Bedrijfsschaketaar
   5 Aansluiting voor
    laadstekker
  6 Opsteekvoetje
  7 Venster voor  f ilm-
    gevoetig heid
  8 Schuif inrichting voor het
     instellen van de film-
    gevoelig heid
  9 Afstandsschaal
 10 Markering van de 3
    arbeidsd iaf rag maberei ken
  1'1 Teken, dat flits klaar is
 '12 Handontspanner
 '13 Aansluiting voor
   synchroonkabel
 14 Teken voor testf lits
 Technische gegevens
 Richtgetal (bij 21 DtN)      94 Flitsvolgtijd               6a. 0,5 _ 6 sek.
Aantal  f litsen per accu-lading ca. Sb _ gSO
Computer-type         seriecomputer (Thyristor) Inrichting voor testf lits      ingebouwd
Arbeidsdiaf ragma's/      4/i,2_ g,5 lnafstandsbereiken        g/O',5 _ 4,2 m
                          mVerrichrinsshoek  1E(?a1(.;2'1
Flitstijd tg,1                1/3OO - 1/25000 sec.Kteur van het  f litslicht     overeenkomend met het
Zwenkrertektor  flXlli#"r. von 0 tot e0.
                         met ruststellingen bij
                                      eo" [  ' 30"[NC-accu             i;"tf";$oo''Maten                      7,6 x i.1,9 x 4,5 cmGewicht                 345 g
View original page 20Page 21 · Read text
N et-l lad   i ngsapparaat voor
 220 voll/ 5O Hz
 Maten            4,5x3,8x6cmzonder
                         stekker
Gewicht               180 g
 Kabellengte        1m

Veranderi  n gen voorbehouden

Belangrijk
Voordat U de flitser de eerste keer gebruikt moet de
accu geladen worden (zie het hoof dstuk "accu
laden").
Aansluiting aan de kamera
De flitser wordt met het opsteekvoetje (6) in het
schoentje van de kamera geschoven. Heeft Uw kamera
een middenkontakt, dan is het apparaat daarmee
direkt aan de kamera aangesloten.  Bij een kamera met
kabelkontakt wordt het toegevoegde synchroonkabel
aan de aansluiting (13) bevestigd en met het
X-synchroonkontakt van de kamera verbonden. De
sluitertijd voor elektronenflitsopnamen ontneemt U
aan de gebruiksaanwijzing voor de kamera.
Computer-automatic
Stelt U met de schuif inrichting (8) de filmgevoeligheid
van de gebruikte   f ilm in DIN (of ASA) in het venster (7)
in. Nu kunt U aan het blauwe, rode of gele punt (al
naar afstandsbereik) het arbeidsdiafragma voor de
computer af lezen, dat aan het objektief van de kamera
ingesteld moet worden. De overeenkomstige kleur-
markering moet dan ook met de automatische schake-
laar (3) aan de computer-meetcel (21 ingesteld
worden. Voor het afstandsbereik van ca. Q,4 - 2,1 m
kiest U de blauwe, van ca. 0,5 - 4,2 m de rode en van
ca. 1,2 - 8,5 m de gele markering (zie markeringslijnen
(10) aan de diafragmarekenschijf). De computer
doseert in deze bereiken de juiste hoeveelheid  licht.
View original page 21From the M. Butkus archive. Original publisher and archive notices are retained.
Check the model and edition against your equipment.
PDF verified 2026-10-10.