Film cameras
RevueFlex SD1 User manual
User manual for RevueFlex SD1. 103 pages in German. Read the original PDF, download or print a copy without registration.
103 pagesGerman6.3 MB PDF
Loading your manual…Open PDF directly
Document details
- Brand
- Revue
- Model / document
- RevueFlex SD1
- Document type
- User manual
- Language
- German
- Pages
- 103
- File size
- 6.3 MB
- Category
- Film cameras
- Document date
- Not specified in catalog
Search available document text
Find a term, then jump to its page in the original PDF. Image-only pages may not be searchable; check the PDF for exact wording and diagrams.
Page 1 · Read text
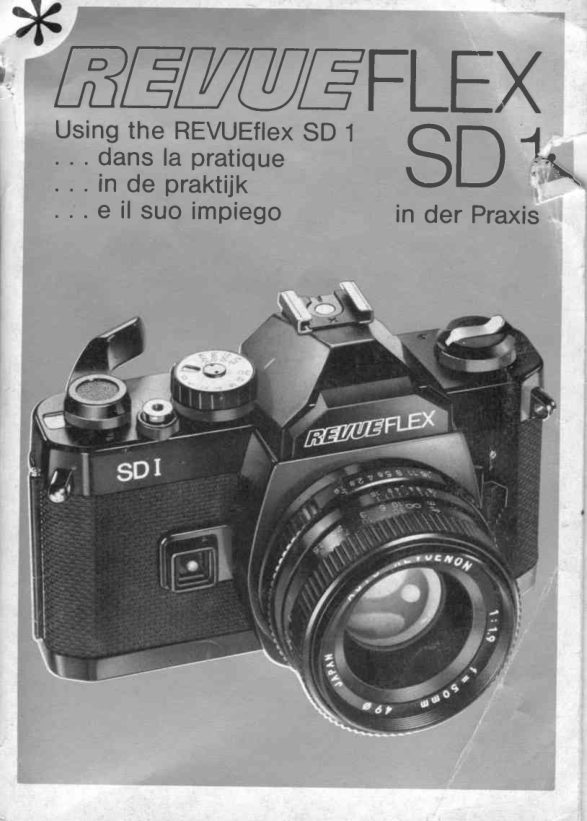
RtrUAtrFLEXUsingthe REVUEflexSD 1
. . . dans la pratique
. . . in de praktijk          SDlt
...eil suoimpiego         in der Praxis
View original page 1
Page 2 · Read text
{,21"ft  %toftcr*d,
eineGebrauchsanweisungvolligneuerArt liegtvor lhnen.
DarumvorabeinigeWorte:
WennSie dieseBroschureweiteraufklappen,findenSie als erstesdie
Kurzanleitungfur lhreKamera.Sie dientlhnenlediglichals Ubersichtund
Geddchtnissttltze,sollaberauf keinenFalldie ausfuhrlicheGebrauchs-
anweisungersetzen.WennSie nun die Gebrauchsanweisungganz
auffalten,sehenSie linksund rechtsuntendie Abbildungenmit den
Teilebezeichnungen.Die Abbildungenoben (A M) dienendem besseren
Verstdndnisder einzelnenKapitelder Gebrauchsanweisung,die jeweilsmit
dem gleichenBuchstaben(A M)gekennzeichnetsind.So passenalso
BildA und KapitelA ,,Einlegender Batterien"zusammen.Fallszu einem
KapitelmehrereAbbildungengehoren,so sinddtesedurcheine
UmrahmungzusammengefaBt.
Wir wunschenlhnenviel SpaBmit lhrer
n'euenREVUEFLEXSD 1.
 lhre FOTO-QUELLE
QuonpUarb,
A completelynew styleinstructionbookletis lyingbeforeyou to whichwe
wouldliketo add a few words:
Whenyou openthe bookletyou willfindthe briefoperatinginstructionsfor
your camera.They are thereonly to give you an overviewand to refresh
yourmemory,in no way shouldthey replacethe completeinstruction
booklet.Whenyou unfoldthe instructionscompletelyyou willsee,on the left
and bottomright,the figureswiththe operatingelements.The picturesat the
top (A-M) are thereto giveyou a betterunderstandingof the individual
chaptersmarkedwiththe same letters(A-M).Thus figureA and chapterA
 "lnsertingthe Battery"go together.lf severalfiguresbelongto one chapter
theyare encircledtogether.
And now we wish you many hoursof enjoymentwith your
new REVUEFLEXSD 1.
YourFOTO-QUELLE

44pr  a,/rLaj",u,'p/Iob
 Vousavezdevantvous un moded'emploid'uneconceptiontoutenouvelle.
 Avantde le consulter,veuilleztenircomptede ce qui suit:
 En ouvrantcettepetitebrochure,vous trouvereztout d'abordun abreg6sur
 le fonctionnementde votrecamera.Elleest uniquementdestin6a vous
 fournirune vue d'ensembleet d vous servirde .pense-b6te',maisne peut
 en aucuncas remplacerle moded'emploid6taille.En d6pliantla feuille                           www.butkus.us
View original page 2Page 3 · Read text
compldtement,vous pouvezvoirde partet d'autredu moded'emploi
 proprementdit des illustrationsindiquantles diff6rents616mentsde-commande            ainsique leurenum6ration.Les illustrationsdu haut(A-M) ont
 butd'assurerune meilleurecompr6hensionde ce qui est expliqu6aux
- diverschapitres.Ceux-cisont6galementmarqu6sdes m6mesleltres
 (A-M).A I'imageA, par exemple,correspondle chapitreA "Mise en place
 Cespiles..Lorsqueplusieursimagesse rapportentd un m6mechapitre,
 ellessontreunresentreellesoar un seulencadrement.
 Nousvous souhaitonsbeaucoupde plaisiravecvotre
 nouveauREVUEFLEXSD 1.
 FOTO-QUELLE
 Eu?  frtt,nit"rz.
 Vooru ligt een geheelnieuwegebruiksaanwijzingen daaromeersteen paar
 verklarendewoorden:
 Wanneeru omslaat,vindtu eersteen kortehandleidingvoor het gebruikvan
 uw camera.Dezedientuitsluitendals kortesamenvattingen als
 ezelsbruggetjebij de bediening,in geen gevalals ,,surrogaat"voorde
 uitvoerigegebruiksaanwijzing.Wanneeru de gebruiksaanwijzinggeheel
 openklapt,zietu linksen rechtsonderaande afbeeldingenmet de
 onderdelen.De afbeeldingenbovenaan(A-M)dienenvooreen beter
 begripvan van de tekst,waarvande opschrifteneveneensvan de letters
 A M zijnvoorzien.AfbeeldingA en opschriftA ,,lnleggenvan de batterijen"
 horendus bij elkaar.Afbeeldingendie betrekkinghebbenop hetzelfde
 onderwerp,zijndooreen dikkelijnomrand.
 VYijwensenu veelpleziermet uw
 nieuweREVUEFLEXSD 1.
 FOTO-QUELLE

   r Z
 YattO    A'u,U{*l
 eccoledelleistruzionid'usocompletamentenouve
 Due parolea questoproposito:
 Aprendoquestolibrettotrova per primole "istruzioniin breve" per la sua folocamera.Questele servonosolo da sommarioe promemoria,non
 sostituisconoassolutamentele vere e proprieistruzionid'usopiu
 dettagliate.Allargandoil libretto,vede a sinistrae a destrain bassole
 illustrazionicon la denominazionedelleparti.Le illustrazioniin alto (A-M)
 servonoper capiremeglioognisingolocapitolodelleistruzionid'uso,che a
 sua voltad contrassegnatodallestesselettere(A-M).QuindiI'illustrazioni
 A si riferisceal capitoloA 'lntroduzionedellebatterie".Se piu illustrazionisi
 riferisconoad un solo capitolo,le stessesono raccoltein una cornice.
 Le auguriamobuondivertimentocon la sua
 nuovaREVUEFLEXSD 1.
 La sua FOTO-QUELLE
View original page 3Page 4 · Read text
Beknoptehandleiding

lstruzioni  breve


D p z o h p k n n n l t eh a n d l e i d i n gi s u i t s l u i t e n bd e d o e l do m u s n e l r n e td e b e l a n g r r j k s tbee d i e n i n g s -
h a n d g r e p e nv e r t r o u w dt e m a k e n V e r z u i m tu e c h t e r n i e t ,d e u i t v o e r i g ei n s t r u c t i e so p d e v o l g e n d e
^u ii ^c ,l -uJl - ;l iJ. u. rE^ I^l c^ ^l d^ l,r{uadr -uhr tr run9    r\ J- nl\ _o .r / \ Jtr er. u  lI e z e n
Q u e s t o b r e v e r i a s s u n t od e l l e i s t r u z t o n rt a p p r e s e n t as o l o u n a g u i d a i n g e n e r a l e E s s o n o n p u o e
n o n d e v e s o s t i t u i r el e d e s c " r z i o ndi e t t a g l i a t er i p o r t a t es u l l e p a g i n e s e g u e n t i


O  tt/itgelieferteBatterien mit Pluspol (+)  nach
r n n e n e i n l e g e n ( S e i t e 5 )
O  Insert the accompanying batteries with the
plus poles (+) inward (page 22)
O  Introduire les piles fournies avec I'appareil,
p 0 l e ( +  ) d i r i g e v e r s I ' i n t e r i e u (r p 4 0 ) .
O Bijgeleverde batterijen met de plus-pool (+)
naar binnen inleggen (zie blz 58)
O  Inserire le batterie di corredo con   il polo
positivo (f  ) rivoltoverso !'interno(pagina 76).


O R u c k w a n d d u r c h H e r a u s z i e h e n d e s R u c k -
s p u l k n o p f e s o f f n e n . R E V U E - F i l me i n l e g e n u n d
R u c k w a n dw i e d e r s c h l i e B e n( S e i t e 6 ) ,
O  Pull out the rewind button to open the back
cover. load the REVUE film and close the back
cover again (page 23)
O Ouvrir le dos en retirantle bouton de rebobi-
n a g e , i n t r o d u i r el a p e l l i c u l eR E V U E e t r e f e r m e rl e
dos (p 41)
O T e r u g s p o e l k n o po m h o o g t r e k k e n ,a c h t e r -
w a n d o p e n e n , R E V U E - f i l m i n l e g g e n e n a c h t e r -
w a n d w e e r s l u i t e n( z i e b l z 5 9 ) ,
O Aprire il dorso estraendo il bottone di riavvol-
g i m e n t o , i n t r o d u r r el a p e l l i c o l aR E V U E e  r i c h i u -
dere il dorso (pagina77)

                             www.butkus.us
View original page 4Page 5 · Read text
Kurzanleitung
Briefoperating i nstructions
Noticeabreg6e

D r e s ek n a pp e Z r . t s a mm e n f a s s un g d e r B e d i e n u n g s v o r g a n gi es t l e d i g l i c ha l s g e n e r e l l e Lr e i t f a d e n
g e d a c h t S r e k a n n u n d s o l l d i e a u s f u h r l i c h e En r l a u t e r u n g eanu f d e n n a c h f o l g e n d e Sn e i t e nn i c h t
e r s e t z e n
T h t s r s a v e r y b r i e fs u m m a r yo f t h e o p e r a t i o n st o b e c a r r i e do u t a n d i s t o b e c o n s i d e r e da s a
g e n e r a lg u i d e l t n e l t r s n o t m e a n t t o r e p l a c et h e d e t a i l e de x p l a n a t i o n os n t h e f o l l o w i n gp a g e s
C e s b r e v e st n s t r u c t i o nsso n t s e u l e m e n td e s t i n e e sa s e r v i rd ' a p e r Q Ug e n e r a ld e s d i f f e r e n t e s
, ' n a n t p u l a t i o an es f f e c t u e pr o u r l a p r o l e c t r o nd ' u n f i l r n E l l e sn e p e u v e n te n a u c u n c a s r e m p l a c e rl e s
e x p l r c a t r o nd se t a i l l e e ds e s p a g e s q u i v o n t s u i v r e


                                 O G e w u n s c h t e V e r s c h l u B z e i t e na m V e r s c h l u B -
                                                   z e i t e n k n o p fe i n s t e l l e n( S e i t e 1 1 )
                                 O Adjust the  desired shutter speed on  the
                                              shutter speed knob (page 27)
                                 O Regler sur le selecteur la vitesse d'obturation
                                           desiree (p 46)
                                 O Gewenste sluitertijdop de sluiterknop instel-
                                               len (zie blz 64)
                                 O lmpostare  il tempo  di posa desiderato sul
                                           bottone dei tempi di posa (pagina 82)


                                 O B e l i c h t u n g s m e s s e er i n s c h a l t e nu n d B l e n d e n -
                                                                            r i n g d r e h e n , b i s d i e g r u n e D i o d e a m S u c h e r e i n -
                                              b l i c k a u f l e u c h t e t( S e i t e 1 1 )
                                 O Switch on the exposure meter and turn the
                                           aperture setting ring until the green light emitting
                                              d i o d e l i g h t s u p o n t h e v i e w f i n d e re y e p i e c e ( p a g e
                                                  28)
                                 O Mettre en marche le posemetre et tourner la
                                              b a g u e d e s d i a p h r a g m e sj u s q u ' a c e q u e  l a d i o d e
                                             verte dans le viseur s'allume (p 46)
                                 O B e l i c h t i n g s m e t e ri n s c h a k e l e n e n d i a f r a g m a -
                                                                            r i n g d r a a i e n t o t d e g r o e n e d i o d e  i n d e z o e k e r
                                           gaat branden (zie blz 64)
                                 O A c c e n d e r e I ' e s p o s i m e t r oe g i r a r e I ' a n e l l od e i
                                              d i a f r a m m i ,f i n c h e s i a c c e n d e  i l d i o d o  l u m i n o s o
                                                   v e r d e n e l m i r i n o ( p a g i n aB 3 )
View original page 5Page 6 · Read text
?  F r l m e m p f i n d l i c h k edi tu r c h A n h e b e n u n d D r e -
 h e n d e s R a n d e l r i n g su m d e n V e r s c h l u B z e i t e n -
 k n o p f e i n s t e l l e n( S e i t e 7 )
 O S e t t h e f i l m s p e e d b y t u r n i n g t h e k n u r l e d r i n g
 on the shutter speed knob (page 24)
 O Regler la rapidite en soulevant et tournat la
 b a g u e m o l e t e e a u t o u r d u s e l e c t e u rd e s v i t e s s e s
 d'gbturation(p 42)
 O F i l m g e v o e l i g h e i di n s t e l l e nd o o r d e g e k a r t e l d e
  r i n g o m  d e  s l u i t e r k n o p e n i g s z i n s o m h o o g  t e
 irekken en te verdraaien(zie blz O0)
 r.) lmpostare la sensibilta della pelicola solle-
 vando e regolando la rotellazigrinatadel bottone
 d e i t e m p i d i p o s a ( p a g i n a7 B )


 O V e r s c h l u B d u r c h B e t d t i g u n g d e s S c h n e l l -
 s c h a l t h e b e l ss p a n n e n ( S e i t e B ) ,
O C o c k  t h e s h u t t e r w i t h t h e  f i l m a d v a n c e l e v e r
 (pag e 25)
 O A r m e r  I ' o b t u r a t e u rp a r  l e   l e v i e r d ' a r m e m e n t
 rapide (p 43)
O S l u i t e rm e t s n e l s t r a n s p o r t h e n d es pl a n n e n ( z i e
 b l z 6 1 )
O Caricare I'otturatore azionando la leva di cari-
camento rapido (pagina 79)


O E n t f e r n u n g s r i n gd r e h e n , b i s d a s M o t i v   i m
S u c h e r s c h a r fe r s c h e i n t( S e i t e 9 )
O A d j u s t t h e f o c u s b y  t u r n i n g t h e f o c u s i n g r i n g
( p a g e 2 5 )
O R e g a r d e rd a n s l e v i s e u r e t t o u r n e r l a b a g u e d e
r e g l a g ed e s d i s t a n c e sj u s q u a c e q u e  l e s u j e t s o i t
mis au point (p 43)
O Afstandsringdraaien tot het motief scherp rn
de zoeker verschijnt(zie blz 62)
O Girare l'anello delle distanze focali, finche  il
m o t r v o a p p a r e b e n d e l i n e a t o n e l m i r i n o ( p a g i n a
B 0 )


                             www.butkus.us
View original page 6Page 7 · Read text
O Ausl6ser  znr Belichtung voll durcharlrcr({n
( S c ; i c 1 3 ) .
O Now completely depress the shuttei release
for exposure (Page 29)
o  Prendre la photo en enfonqant le declencheur
completement (P 47).
O S l u i t e r k n o pg e h e e l i n d r u k k e n( z i e b l z 6 6 )
O P e r  I ' e s p o s i z i o n e , p r e m e r e d e s i c a m e n t e a
fondo lo scatto (Pagina84)'


O A m F i l m e n d e F r e i l a u f k n o pi fn d e r B o d e n p l a t t e
d r u c k e n u n d F i l m m i t a u s g e k l a p p t e rR u c k s p u l -                                 '1kurbel zuruckspulen(Seite  3)
O W h e n t h e e n d o f t h e f i l m i s r e a c h e d ,d e p r e s s
the release button on the camera base, fold out
the rewind crank, and rewind the exposed film
(page 30)
O Presser le bouton de debrayage du rebobi-
nage e  la base cie I'appareil et rebobiner la
pellicule a manivelle rabattue vers  I'exterieur
 ( p 4 8 ) .
O Aan het eind van de film het vrijloopknopje
aan de onderkant van de camera intrukken en de
f i l m u i t g e k l a p t es l i n g e rt e r u g s p o e l e n( z i e b l z 6 6 )
O R a g g i u n t a l a  f i n e d e l l a p e l l i c o l a ,p r e m e r e  i l
bottone di sgancio per il riavvolgimentodisposto
sul  lato inferiore, e  riavvolgere la pellicole a
mezzo della leva riavvolgimento(pagina 85)


 O Z u m E n t n e h m e n d e r F i l m p a t r o n eR u c k s p u l -
 knopf  krdftig nach oben ziehen, so daB die
 R u c k w a n da u f s p r i r r g(t S e i t e 1 3 )
 O For removal of the film cassette, pull out the
 film rewind knob The camery back cover will
  t h e n p o p o u t ( p a g e 3 0 )
 O O u v r i r  l e d o s d e   I ' a p p a r e i l ,e n  t i r a n t s u r   l e
 b o u t o n d e  r e b o b i n a g e e t e n l e v e r  l e c h a r g e u r
 (p  48)
 O Terugspoelknop geheel naar boven ti'ekken,
 zodat de achterwand open springt en de filmpa-
 troon kan worden verwijderd (zie blz. 66)
 O Per I'estrazionedel caricatore,tirare decisa-
 mente verso I'alto il bottone di riavvolgimento,
 d i m o d o c h e a p r e i l d o r s o ( p a g i n aB 5 ) .
View original page 7Page 12 · Read text
Digitally signed by Mike Butkus
                                              DN: cn=Mike Butkus, o=Butkus camera manuals,
                                                   ou=butkus.org, email=mike@butkus.org, c=USMike Butkus    Date: 2024.06.16 13:55:31 -04'00'


                                  www.butkus.us
View original page 12Page 13 · Read text
Teilebezeidrnungen

    Bildzdhlwerkc"rO Schnellschalthebel
@ Ausloser
@ VerschluBzeitenknopfmit Einstellringfur
    Filmempfindlichkeit
@ Zu behorschuhmit Mittenkontakt
@ Ruckspulknopf mit ausklappbarerKurbel
@ Aufnahme-Signal
@ Entfernu ngsring
@ Schdrfentiefenskala
@ Blendenring
@ Beli chtun g smesser E i n-lAusschalter
@ Film-Patronenfach
@ Rtickspulachse
@ Leuchtdiodenzur Belichtungsabstimmung
@ Sucherokular
@ SchIitzverschIUB
@ Zahntrommel
@ Rtickwand
@ Batteriefachdeckel
@ Stativbuchse
@ Ru ckspu l-FreiIaufknopf
@ Aufwickelspule
@ Andruckplatte
View original page 13Page 14 · Read text
,REUUEFLEX
      SD1
Die REVUEflexSD 1 in der Praxis        3
Usingthe REVUEflexSD 1           19

REVUEflexSD 1 dans la pratique       37

De REVUEflexSD 1 in de praktijk       55

La REVUEflexSD 1 e il suo impiego     73
FOTO-QUELLEINTERNATIONAL      91


                     www.butkus.us
View original page 14Page 16 · Read text
{<
   Using the REVUEflex SD 1

   Contents

   Technicaldata                      21
       I nsertingthe batteries                22
   Loadingthe film                     23
   Settingthe film speed                 24
   Cockingthe shutter                  25
   Focusing                          25
   Film plane mark and infra-redindex     26
   Depth of field                       26
   Settingthe shutterspeed              27
   Checkingthe exposure               28
   Releasingthe shutter                29
   Rewindingthe film                   30
   Changingthe lens                   30
   Time exposuresand tripod use         31
   Exposureswith self-timer             31
   Flashexposureswith the REVUEflexSD 1 3 1
   Attachments                        32
   Gareof your REVUEflexSD 1           32
  REVUEprocessinglaboratoryservice    33
   Increasedexposureopportunitieswith
   interchangeablelenses               33


                       www.butkus.us
                                            rE
View original page 16Page 17 · Read text
OperatingElements
   Exposurecountero    Film advancelever@
    Shutterrelease@
    Shutterspeed knob with film speed setting ring@
    Hot shoe contact@
    Film rewindknob with fold-outcrank
   Exposuresignal@o
@ Focusingring
@ Depth-of-fieldscale
@ Aperturesetting ring
@ Exposuremeter on/ott switch
@ Film cassettecompartment
@ Rewind'shaft
@ Light emittingdiodesfor exposuresetting
@ Viewfindereyepiece
@ Focal plane shutter
@ Film sprocket
@ Camera back cover
@ Batterycompartmentcover
@ Tripod socket
@ Rewindreleasebutton
@ Take-upspool
@ Filmpressureplate
View original page 17Page 18 · Read text
The numbers circled in the text refer to the pictures of the camera
 and its operating elements. The capital letters used in front of the
 headings of each section correspond to the illustrationsin the
 folded top cover of the operating instructions.


Technical Data

Camera type:35 mm single lens reflex camera tor 24 x 36 mm
 picture size, with interchangeablelens.
 Shutter:Vertically moving SEIKO metal focal plane shutterwith
 fixed shutter speeds from 1 s-1/1000 s ptus B and X (1/60 s).
Lens mount:.M 42 x 1 mm thread mount.
Viewlinder: Rigid prism viewfinder.
Viewfinder indicators: Split image rangefinder and micro prism
 ring. Three light emitting diodes on viewfindereyepiece for
exposure setting.
Accessory shoe: Hot shoe contact.
Exposure meter: working aperture TTL system with silicon cell for
centerweighted metering.
Fllm speed setting: From DtN 15 to DtN 33 (ASA 25-ASA 1600).
Flash syncfironization:X-contact (1/60 s) in accessory shoe.
Power source: Two 1.5 V silver oxide button cells.
Dimensions: 139 mm x 89 mm x 87.5 mm (l x w x h) (with lens).
Weight:620 g (with tens).


Subject to revision in the event of technical improvements.                   www.butkus.us
                                                                              2'l
View original page 18Page 19 · Read text
Merci de faire un don de 2,50 € pour soutenir ce site via E-bay ... www.PayPal.me/butkus


Als u deze handleiding nuttig vindt, doneer dan $ 3 aan https://www.paypal.com/paypalme/butkus


Bitte spenden Sie 2,50 Euro, um diese Website über E-Bay zu unterstützen ... www.PayPal.me/butkus
View original page 19
Page 20 · Read text
A
    Insertingthe batteries

 The exposure meter of your REVUEflexSD'1 operates on two 1.5 V
  silver oxide batteriesavailablefrom FOTO-QUELLE.lf the batteries
 failand you have no spare batteriesat hand, your camera is not in
 a position to measure the exposure but it is prepared to take shots.

 Two batteriesare deliveredwith the camera. Avoid touchingthe
 battery poles (upper or lower side). Fingerprintslead to corrosion
 and later to contact problems.Therefore ensure that the batteries
 are only touched on their edges. Clean the poles before insertion by
 rubbing with a dry cloth.

 To insert, first unscrew the battery compartement cover @ with a
 coin. Then insert the batteriesso that the poles marked with " *  "
  (bright,flat part) are inward. (Observethe diagram inside the
 battery compartment.)Correct polarity is essentialfor proper
 operationof the camera's exposure system.
 Close the battery compartment cover @ and switch on the exposure
 meter @. This should cause one of the three diodes @ on the left
 of the viewfindereyepieceto illuminate. lf none of the diodes lights
 up, re-checkthe battery polarity. lf the signal fails even after battery
 check,the batteriesare depleted and must be replaced by new ones.

 Replacementof batteriesis necessarywheneverswitchingon the
 exposure meter does not cause one of the three light emitting
 diodes @ on the viewfindereyepiece to illuminate.The shutter
 speed knob @ may be in any position except for "B". When set to
 "8", the camera's exposure meter is ineffective.

 After battery check, switch off the exposure meter in order to save
 the batteries.
 As with every battery powered unit, it is also advisable to carry
 spare batteries for your REVUEflex SD 1 so that you are prepared for
 any eventuality.Rememberthat the strength of a battery is reduced                       www.butkus.us 22
View original page 20Page 21 · Read text
at low temperatures.Therefore protect your camera from the cold
 as long as possible when making winter exposuresin order to
 improve the operation of the batteries-
 Removingthe batteriesfrom the camera and storing them separately
  is only advisable if you do not expect to use your camera for an extended period of time.                                         il

B
   Loading the film


 Your REVUEflex SD 1 is intendedfor 35 mm film (24 x 36 mm picture
 size). For economical prints from the REVUE lab, we recommend
 using REVUEcolor negativefilm.
 Avoid changingfilm in direct sunlight.Shade the camera with your
 body, if necessary,when loadingfilm. To load film, proceed as follows:  1. Open the back cover @ by pullingout the rewind knob @    f
    completely.
  2. Insert the film cassette into the film cassette compartment@ =
    protrudingspool shaft downward - and lock by pushingthe rewind
   knob @ down (if necessary,turn the rewind knob slightly)so that
    the rewind shaft@ engages in the film spool.
 3. Thread the film end - without touching the shutter blades@! - over
    the film gate and into one of the slots on the take-up spool@. With
    the film advance lever@, transport the film until the sprocket teeth
  @ properly engage the perforations.lf necessary,operate the
    shutter release@ and cock the film advance lever @ again.
 4. Unfold the rewind crank @ and tighten the film turning the crank
    clockwise (in the arrowed direction),
 5. Press the back cover closed and advance the film operating the
    shutter release@ and the film advance lever @ alternately until the
   exposurecounterO shows "1".When folded out, the rewind crank@
    serves as a transport control: lt must turn counter-clockwisewith
    every motion of the lever. After film transport, fold the crank in.
                                                           23
View original page 21Page 22 · Read text
The camera is now ready to take the first shot.
 A film memory holder on the back.of the camera will accept a flap of
 the REVUEfilm carton so that you will have a reminder of the film in
 use.

G
   Setting the film speed


 Setting the speed of the film in use is of basic importance,as only then
 can the camera's exposure system provide proper exposure.
 You'll find your film's sensitivityindicated on the film packet,in DIN or
 ASA. On top of the shutter speed knob @, there is a small cut-out with
 the film speed scale which is also graduated in DIN and ASA.To set
 the film speed, move the film advance lever @ until it locks in ready
 position and projects out from the camera back cover. Now lift the
 knurled ring on the shutter speed knob with your thumb and your
 index finger and turn the ring until the correct DIN/ASAnumber
 appearsin the indicatorwindow. Two additionallock-inpositions
 between the whole numbers allow settings as accurate as 1 DIN
 (% stop value). Make sure, however, that the ring really snaps in place.
 When using always the same type of film, the film speed setting need
 only be made once. However,ensure to change the settingwhen
 loading a film with a different film speed. Only then you may rely on
 proper exposure.


                      www.butkus.us
 24
View original page 22Page 23 · Read text
D
   Cocking the shutter

 For easy carrying,your camera allows to fold the film advance lever @
 over the camera back cover. When taking exposures,you can swing it
 out to a ready positionso that your thumb may comfortablyslip
 behind it. A full motion of the lever will cock the shutter and advance
 the film one frame.The film advance lever is under spring pressure
 and will return to its basic position automatically.After cocking, the
 lever is blocked until the next exposure is taken.
 With every full motion of the lever,the exposure counter@ advances
 one number.Upon opening the camera back cover for removalof the
 film, the exposure counter automatically resets to "S" (start).
                                                                                  tfi
E
   Focusing


 The advantage of a single lens reflex camera ist that you do not have
 to set estimated distances on the range scale but can optically focus
 with accuracy in the viewfinder. For this purpose you can use the
 entire ground glass screen of the viewfinder.Besides,the REVUEflex
 SD t has two additionalfocusing aids in the middle of the viewfinder
 which permit fast and accuratefocusing:
 1. A split image rangefinderthat gives two half imageswhich are
    offset to one another as long as the range is not set correctly.
   Focusingis correct when an offset in the image can no longer be
   seen.The split image rangefinderis very useful for subjectswith
    clear vertical lines in horizontal format.
 2. A micro prism ring around the split image rangefinder.Here, a great
   number of microscopicallyfine prismsgive an emphasized
   focusingscreen effect - the subject is literallyruptured when not in
   focus.The flimmeringof the prisms makes the out-of-focuseven
                                                          25
View original page 23Page 24 · Read text
more obvious. lf, however, the correct focus has been obtained, the
    micro prism screen gives a completely still,sharp image of the
    subject.The micro prism screen is not dependent on a particular
    subject structure and is therefore also suitable for subjects having
    no clearly recognizablelines.

F
    Film plane mark and infra-red index


  Focusing is also possible by measuring the distance by sight and
  settingthe focusing ring @ accordingly.The distancesgiven on the
  focusing ring refer to the film plane which is marked on the upper side
  of the camera behind the shutter speed knob @. The film plane mark
  can also be used as a reference when measuring the distance directly.
  For exposuresin black and white with infra-redfilm, you willfind a
  small index mark in red on the depth-of-fieldscale@, just above the
 f-number4, at the left of the central guide mark. This is the reference
  point for the settings to be made when using infra-red film. lnfra-red
  rays focus at a plane somewhat behind the plane at which visiblelight
  focuses. Therefore, a focus correction is necessarv.

G
   Depth of field


 The depth of field designates the nearest and furthest parts of the
  subjectwhich appear sharp in the picture at a given focusingsetting.
 The depth of field is influenced by three factors. lt decreaseswith:
          larger aperture opening
          shorter range
         longer focal lengthwww.butkus.us(telephoto lens).
 26
View original page 24Page 25 · Read text
The following table gives a survey of the interaction of shutter speed
  and aperture.
  Setting                Result            Suitable for
  High shutter speed      wide aperture    good lightingconditions;
                        (smallf-number)  moving objects;
                                        shallowdepth of field;
                                               intentional use of focus
  Slower shutter speed    small aperture    poor lightingconditions;
                           (large f-number)   stationary objects;
                                            great depth of field

 To give you the possibility of determining the depth of field with the
  working aperture set, your REVUEflexSD t has a depth-of-field scale                           f @on the lens,which has f-numbers engraved on both sides of the
  cintral index mark. As shown in the picture, the depth of field extends
  from about 3.5 m to 10 m when the camera lens is focused for 5 m
  a t f 8 .

II
    Setting the shutter speed

  The shutter speed knob @ provides you with 11fixed shutter speeds
  from 1 s to 1/'lOOOs. With the exception of "1", the numbers on the
  knob designatefractionsof a second.125,for example,means 1/125s'
  The setting "60" is marked in red and designates the slowest shutter
  speed for exposures taken with an electronic flash. The shutter speed
  knob must always be held by the catch in a fixed position. Inter-
  mediate positions are not possible. For "B" setting, see section "M".


                                                 27
View original page 25From the M. Butkus archive. Original publisher and archive notices are retained.
Check the model and edition against your equipment.
PDF verified 2026-10-10.