Film cameras
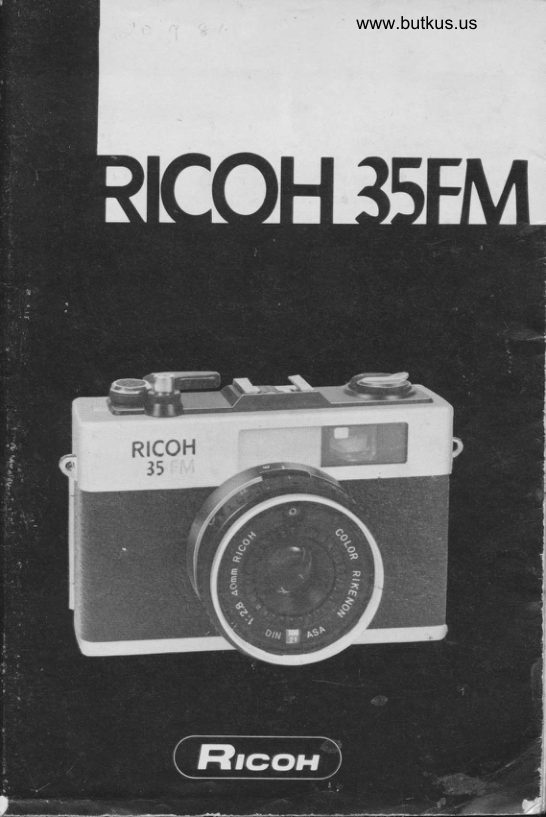
Ricoh 35FM User manual
User manual for Ricoh 35FM. 17 pages. Read the original PDF, download or print a copy without registration.
17 pagesOriginal document2.8 MB PDF
Loading your manual…Open PDF directly
Document details
- Brand
- Ricoh
- Model / document
- Ricoh 35FM
- Document type
- User manual
- Language
- Check the original document
- Pages
- 17
- File size
- 2.8 MB
- Category
- Film cameras
- Document date
- Not specified in catalog
Search available document text
Find a term, then jump to its page in the original PDF. Image-only pages may not be searchable; check the PDF for exact wording and diagrams.
Page 4 · Read text
Venmo @mike-butkus-camera  Ph. 2083
PayPal Name  Lynn@butkus.org      www.PayPal.me/lynnbutkus
View original page 4
Page 9 · Read text
PRINCIPAL PARTS
 1. Film Rewind Crank
 2. Film Rewind Knob
 3. Viewfinder
 4. Film Advance Lever
 5. Cable Release Socket
 6. Shutter Release Button
 7. Film Counter
 8. Strap Eyelet
 9. Distance Index Line
10. Zone Focusing MarVDistance Scale (in meters)
1 1. Focusing Ring
12. Film Speed Window
13. Film Speed Selector Ring
14. Electric Eye
15. Viewfinder Eyepiece
16. Film Rewind Shaft
17. Film Chamber
18. Battery Compartment Lid
19. Tripod Socket
20. Distance Scale (in feet)
21. Film Rewind Release Button
22. Sprocket
23. Film Take-up Spool
24. Back Cover
25. Bright Frame
26. Parallax Correction Mark
27. Exposure Warning Zone
28. Exposure Meter Needle


                                       l-
View original page 9Page 10 · Read text
www.butkus.us

 BATTERY LOADING FOR LIGHT METER
  1. Pull Battery Compartment Lid (19) open by sliding it in
     the direction of the arrow. (Fig. 1.)
  2.  lnseft one battery as shown in the polarity diagram on
     the'inside of the Battery Compartment Lid (19) (Fig. 2.)


                                                                                                                                                                   rX 3* AfterUse oneinserting1.35 Vthemercurybatterybatteryclose H-C,the lidpX(1g).675, EpX 675              A,
     or equivalent.                                              *ai
 Tips for Better Results
  Faulty insertion of the battery will result In an rncorrect ex-
 posure.
  *  Only mercury batteries may be used.  Silver batteries etc.
      will not give a correct exposure.
  *  Before inserting the mercury battery, wipe  it well with a
     clean dry cloth.
    The mercury battery lasts for approximately one year, so
     please be sure to exchange  it then. A good idea would
    be to change it on your birthday as a reminder. lt is
     dangerous to throw the battery into the fire or try to take
        it apart.
    Always remove the battery if you do not use the camera
     for a long period of trme.
         lf it is hard to remove the battery from the compartment,
    push it gently with your finger as shown in the chart (Fig.
      3)
Batteries for use:
JIS H-C 1.35 V, Mattory pX 675. Eveready EpX 675 or
equivalent.

There are various Wein Air batteries
available.  Just make sure they are
fresh.
View original page 10Page 11 · Read text
FILM LOADING
          The film should be loaded in the shade. Avoid direct sunlight.
           1. Pull Film Rewind Knob (2) up until the camera back
                 .clicks open. (Fig. 4)
                2.  Insert Film cartridge into Film Chamber (17) (Fig. 5).
)f             3.  Push Film Rewind Knob (2) back to its original position.
                4.  Insert film leader into slit of Film Take-up Spool (23)
II                  (Fis.6).
                 5.  Advance Film Advance Lever (4), checking that the film
                 perforations have engaged on both sets of upper and
                lower teeth of the Sprocket  .22l', then close Back Cover
                    (Fig. 7).  lf the film is slack, be sure to take the film slack
             up by Advancing Film Advance Lever before you close
              Back Cover (24).
                6.   Lift Film Rewind Crank (1)up and wind it gently in the
                  direction of the arrow to take up the film slack, then put
                         it back into position (Fig. 8)
                7.  Release shutter and wind the film until Film Counter (7)
                  indicates " 1". lJ Film Rewind Knob (2) rotates when you
             wind the film. the film is advancing properly. (Fig. 9)


       SETTING THE FILM SPEED
         The film speed is written as ASA or DIN on the film carton.
           1. Turn Film Speed Selector Ring (13) so that the speed of
                 the film you are using appears in the Film Speed Window
               (12) (Fis. 10).
          Tips for Better Results
           *  You will not obtain the correct exposure unless your film
             speed is indicated correctly.
           *  The Film Speed Selector Ring must be set in click stop
                positions. Setting it at midway positions will result in in-
                correct exposure.

                         -3-
View original page 11Page 12 · Read text
www.butkus.us    ?
                                                                                                                               {tes
  *  For film speeds other than those indicated in the Film                           riS'8#
    Speed Window, please consult the chart below.

 ASA       25           50           100          200          400
  orN         l5             t8             21           24            27                       ,'a:
 ASA    20 25 32      rKl 50 64    80 100 125  160 200 250 320 400 soo
  DIN     14  t5  16     17  't8  19    20  21  22  23 24 25   26  27  2A

FOCUSING
 1. Compose your picture, keeping the subject within the  '     Bright Frame (25) outline (Fig. 1 1).
 2. Rotate Focusing Ring (1 1 ) and set the correct Zone
    Focus MarVDistance Scale (10) against the Distance
    Gauge according to the distance of the subject (Fig. 12).
Tips for Better Results
 * When taking a close-up shot (within one meter or 3.3
      feet), keep the subject within the Parallax Correction
    Mark (26).
 * The Distance Scale may be set at midway positions
    between the numbers marked.
                                                                                                                                    .$
                                                                                                                                                                                                                                                                  .AUTOMATIC EXPOSURE SHOTS
The shutter speed is set at 1/125 sec. The exposure is                          d2a?
automatically controlled according to the film speed and
brightness of the subject.                                                                                     l*
 1. When the Exposure Meter Needle (28) in the viewfinder
      is between F-stops 2.8 and 22, the film is correctly gx-
    posed. Just press the Shutter Release button (6)gently.
 2. lf the Exposure Meter Needle (28) is in the lower Ex-
     posure Warning Zone (27l-. the film is under-exposed and
     flash should be used (Fig. 13).


                        -4-
View original page 12Page 13 · Read text
3.  lf the Exposure Meter Needle (28) is above F-stop 22.
     the film is over-exposed and you cannot obtain a good
      picture. A filter such as the ND filter should be used.
FLASH PHOTOGRAPHY
When the Exposure Meter Needle is in the Exposure Warning
Zone in the viewfinder, there is insufficient light and you
should use the flash. The 3SFM has a flashmatic
mechanism. (Fig. 13)
Using RICOH Speedlite 12O or an eledtronic flash with the
guide number of 12m (ASA1O0) makes flash photography
easy.
  1. Mount the Speedlite 120 or an electronic flash with a
     guide number of 1 2m (ASA 1 00) with a built-in hot shoe
     contact on Hot shoe. (Fig. 14)
 2. Estimate by eye the distance between the camera and
    the subject, and turn Focusing Ring to adjust Zone
    Focusing Mark/Distance Scale with Distance Index
     Line. (Fis. 15)
 3. The aperture is automatically adjusted according to the
     distance and correctly exposed photographs can be
     obtained.
Distance range for the speedlite 120 or an electronic flash
with a guide number of 12m (ASAlOO)

    \       utstance range
     ASA number        \            1   2    3   4    5    6    7  8m        of film to b€ used      \
          25               <F.r{>  1.7m
          50          .-+      2.5m
                               4m   -    100        <___+
        200                                 5.5m
        400                                  7m

                   -5-
View original page 13Page 14 · Read text
%
                                   www.butkus.us
                                                                                          .

 When using an electronic flash with a guide number other
 than 1 2m (ASA 10O) compensate the ASA number following
  the list below.

          number     Guide
        of         rhe                                                1  2345E78m               flash    ASAAdequatenumber             used        to        be
      10-14      100   .r+4m                        \
      16-20      200                        6m
     22-26      400

 Tips for Better Results
   *  Do not insert objects other than the flash into the hot
     shoe. Otherwise, it will result in incorrect exposure
        setting.
   *  Only use a cordless flash with the 35FM.
   * When the flash is not in use, remove the flash from the
      35FM.
.  * When using an auto flash, set tha flash to the manual                         .
      mode.
   * A bulb type flash cannot be used with the 35FM
 UNLOADING THE FILM
 When the set number of frames have been taken, rewind the
 film. Unload your camera in the shade' avoiding direct
  sunlight.
   1. Press Film Rewind Button (21) and the button will lock
       into the down possible (Fig. 16).
  2.  Lift up Film Rewind Crank (1)and rotate it in the direc-
       tion of the arrow {Fig. 17).
  3. The film has been completely rewound when the tension
     on the crank is suddenly released.
   4. Open the camera back, pull Film Rewind Knob (2 ) and
      remove the film cartridge.          40                          -6-
View original page 14Page 15 · Read text
Tips for better Results
   *    lf you wind the film beyond the set number of frames the
      Film Wind Lever sometimes gets stuck midway and the
      Film Rewind Button cannot be locked in the down posi-
      tion.  lf this should happen, rewind the film by keeping
      the Film Rewind Button pressed duwn with your finger.
  * When you advance the Film Advance Lever (4), the Film
     Rewind Button will automatically go back into position.
  *  Never open Back Cover (24l,half way through rewinding
      otherwise the film will be exposed to the light.
  *  Do not press Film Rewind Button (21)while taking shots
     as this will cause double exposure problems.

 THE SELF-TIMER
 Although this camera is not fitted with a self-timer device, you
 can use any ordinary self-timer on the market. lt should br at-
 tached to the Cable Release Socket (5). Please refer to the
 leaflet accompanying the self-timer for instructions on how to
 adjust the length of the release shaft.

 PROPER CARE OF YOUR CAMERA
  * When using a tripod with a long thread length (more than
      5.7 mm),_be careful not to forcibly screw in the thread
      further than the depth of the socket.
  *  Always keep the lens clean. To clean the lens, gently
     wipe it with a lens cleaning paper or a soft. clean and
       lintless cloth.
  *  Do not wipe the camera body with chemicals, such as
      benzine, thinner, etc ....., use only soft cloth or cotton
     swab sprinkled lightly with alcohol on the camera body.
  *  Never expose your camera to excessively high or low
      temperature  for an extended period of time. In extremely
     hot climates, do not leave your camera inside closed
     automobiles during the daytime or indirect sunlight.
  *  Protect your camera from dust, dirt, water, rain,
i'.              _ 7 _
View original page 15Page 16 · Read text
www.butkus.us


    dampness, salt air and rough handing.
 * When your camera is not used for an extended period of
     time, remove the batteries and store it in a dry and cool
      plac.e.
  * Do not attempt to disassemble or repair your camera
     yourself. lf service is necessary, get in touch with your
     dealer or authorized Ricoh service station.
MAJOR SPECIFICATIONS OF RICOH 35 FM
Lens:
    40 mm Color Rikenon t/2.8 lens 3 groups 4 elements
Shutter:
    Mechanical shutter, 'l/125 sec.
Exposure Meter:
    CdS exposure meter, fully automatic control                                            -n
    One 1.35 V mercury battery (JlS H-C, Mallory PX675,
     Eveready           EPX675                             equivalent)                       or
             range                       16 (ASA 1O0)                       I     Coupling              EV                  10-
     Film speed range ASA 25-4OO (DlN 15-271
Viewfinder:
     Bright viewfinder with parallax correction mark
     F-stop scale, exposure meter needle and underexposure
    warning red zone visible
     Magnification 0,49X
    Coverage of actual picture area over 85%
Focusing:
    By distance scale from 0.9 m (3 ft) to infinity with zone-
     focus marks
Film Loading:
      Multi-slit easy loading
Film Advance:                             #
     Single stroke film advance lever
Film Rewind:                                                                                .'q
    Crank Lever

                         -8-                                        ,il
View original page 16Related documents and language editions
From the M. Butkus archive. Original publisher and archive notices are retained.
Check the model and edition against your equipment.
PDF verified 2026-10-10.