Film cameras
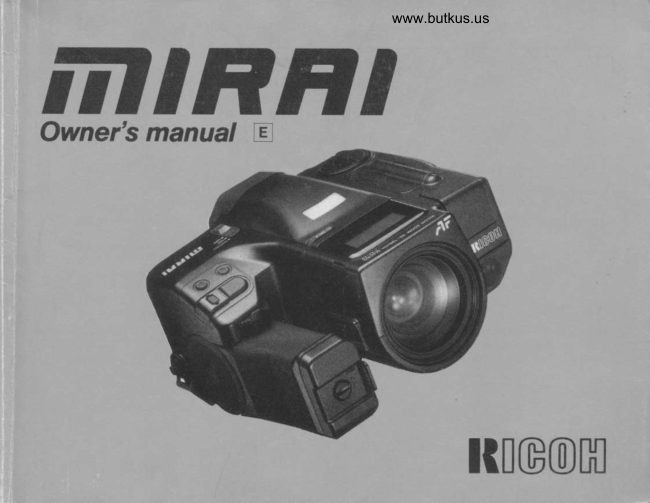
RICOH MIRAI -- direct User manual
User manual for RICOH MIRAI -- direct. 95 pages in English. Read the original PDF, download or print a copy without registration.
95 pagesEnglish12.3 MB PDF
Loading your manual…Open PDF directly
Document details
- Brand
- Ricoh
- Model / document
- RICOH MIRAI -- direct
- Document type
- User manual
- Language
- English
- Pages
- 95
- File size
- 12.3 MB
- Category
- Film cameras
- Document date
- Not specified in catalog
Search available document text
Find a term, then jump to its page in the original PDF. Image-only pages may not be searchable; check the PDF for exact wording and diagrams.
Page 2 · Read text
We are most gntified that you have
selected a RlcoH camerc.
Belore using your camera, please be
sure to read these rnstructions
carefully.
View original page 2
Page 3 · Read text
www.butkus.us
LOCATING THE CONTROTS

When reading this manual, reler to "Locatino the Conlrols'
(Fold oul the tront and back covBrs).

Hot Shoe                                                                  Daylight Fill-in Flash Button

Shutter Release Button                                                             Flash Power Switch

                                                                                                    Built-in Flash Unit

Main Operating                                                    LCD DATA oanel
UD/Down Buttons                                                                 Self-timer Indicator LED
Reset Button                                                       AF Auxiliary Light
Neck Strap Holder

Grio Belt Latch                                                      Remote Control Socket
Grio Lock Release Button                                                   Manual Focus Button
Multi-Position Grip                                                                 Self{imer Button
                                                                                                                                                               DN:email=mike@butkus.org,Date:cn=Mike2024.03.04signedButkus,by17:50:14Mikeo=ButkusButkusc=US-05'00'camera manuals, ou=butkus.org,Zoom Selector              Mike Butkus                Digitally
View original page 3Page 4 · Read text
Venmo @mike-butkus-camera  Ph. 2083
PayPal Name  Lynn@butkus.org      www.PayPal.me/lynnbutkus
View original page 4
Page 10 · Read text
www.butkus.us
1. INSERTING BATTERY


                                                   Fig. 1                                                 Fig.2.A
 .1.  Remove the Battery Holder by turning the         2. Insert fresh alithium batteryorfourAAAsize
   Battery Holder Screw counterclockwise  with              batteries into the Battery Holder, first check-
   a coin. (Fig. 1)                                         ing that+and-on each battery are aligned
                                                accoding to the polarity diagram inside the
                                                            Battery Holder. (Fig. 2. A\ 2-Bl
View original page 10Page 11 · Read text
Fig.2-B                                                Fig.3
3. Resecure the Battery Holderto the Camera      Care of Battery:
  Grip by turning the Battery Holder Screw               1 . Before installing, be sure to wipe all moisture  clockwise with a coin. (Fig. 3)                                                    and skin oil off both battery contact surfaces
Battery Choices:                                               in orderto prevent future problems of corro-
                 (CR-P2  Lithium battery                       or equivalent)*                                                         sion and poor electrical contact.                                                         is         * Dispose of used battery properly. Do not                             (AM-4)  recommended.              FourAAA                                      alkaline baf                                                      throw  it into  f ire or expose to high tem-   teries can be used.
* Condition of battery (batteries) should be                Derature.
  monitored frequently. See section "Monitor-
   ing Battery Condition" on page  1-l for details.
View original page 11Page 12 · Read text
www.butkus.us
2. TURNING THE CAMERA ON
c


                                         Fig.4                                                Fig.5
1. Slide the Main Operating Switch (Power             Main Operating Switch to the OFF posi-
   On/Off and Macro) to ON. (Fig. a)                           tion when the camera is stored.
   t The camera is designed to shut off the         *   lf you set the Sound Switch on the bottom
     main power supply automatically to save            of the camera (FiS. 5) to the sound
      battery energy when the camera is not in           mark rrl)  , beep will be heard whenever
     use for about 15 sec. even if the Main              proper autofocus is obtained, the self-
      Operating Switch is left ON. This willturn                timer is used, etc. This confirms that your
   '    offbut thethe topinformationLCD Panelcontainedand the Viewfinder,in camera               selection has been made.
     memory will be retained. Lightly press the
      Shutter Release Button to turn on the
     power and update the LCD Panel. For
    maximum battery life, always turn the
10
View original page 12Page 13 · Read text
II 3. MONITORING BATTERY CONDITION

                         \
            @,                 =,


                                  Fig' 6                    Fig.7                                Fig.Fig.88
   1. The battery (or set of batteries  if you are us-         *  lf non-Dx-coded film is in your camera     ing 4 AAA-size)  is in good condition when           when the G symbol is displayed, you
     the s  symbol appears on the top LCD          may have to rewind the film using the
      Panel. (Fig.6)                                      Manual Rewind Button (see page 33).
   2. When the battery is nearly exhausted,         *   lf the battery's outline :     is  f lashing do     the c= symbol will be displayed on the top               not use the flash unit until the batterv is
    LCD Panel. (Fig.7)                                         replaced. (Fig.8)
    When the G symbol appears,  it is recom-
    mended to replace the battery with a fresh
      one.  lf there is  f ilm in your camera,   f inish the
        roll as soon as possible and then replace the
     old battery with a  f resh one.


                                                                                                           11
View original page 13Page 14 · Read text
www.butkus.us


               -


                                Fig. 9
 3. When the battery is virtually dead,             Cold temperatures may reduce any bat-
   the L-- symbol willappear  in the LCD panel.                  tery's eff iciency. In freezing weather, only
   Replace with a  f resh battery. (Fig.9)                     the    symbol may show on the LCD   *  lf the c  symbol lights for about one               Panel.-   lf you are taking pictures in ex-
      minute, then disappears, the battery is              tremely cold weather, keep the battery
      only capable of retaining camera memory.            warm and insert  it just before shooting.
     Do not attempt to use other camera  f unc-
       tions, and do not remove old battery until
     you are ready to replace  it with  f resh one.
    The memory of the camera will be re-
      tained for about 30 minutes without bat-
       tery. lf you replace with new battery within
      that 30 minutes, the disptay of ail data in
     the camera memory will reappear in the
    LCD Panel.


12
View original page 14Page 15 · Read text
4. LOADING THE FILM


                                                            :   Film Leader Mark

                                                 Fig. 10                                                          Fig. 11
Always avoid direct sunlight when loading the        2. Load the Film Cassette into the Film Cham-
film.                                                        ber and pull out enough film leader to extend
1. Depress the Back Cover Lock Release But-             just beyond the film leader mark, against the
   ton and slide the Back Cover Latch down.           Take-up Spool. (Fig. 11)
   (Fig.10)


                                                                                         13
View original page 15Page 16 · Read text
www.butkus.us


                                             Fig. 12                                                          Fig. 13
3. Make sure that the film is within the Film         4. Close the Back Cover, making sure that the
   Guides, and that the upper sprocket edge          Back Cover Latch snaps shut. (Fig. 13)
    will pass under the Electronic Frame Coun-          The film will now automatically advance until
    ter Guide Plate. (Fig. 12)                        number "1" appears on the top-deck LCD
                                                             Panel. (Fig. 14)


14
View original page 16Page 18 · Read text
www.butkus.us


  .m\  \U/
                                                 Fig. 16                                                                                                                  Fig. 17
    * The Film Loaded Window on the back of        5.  lf the  f ilm has not advanced correcily or was
       the camera can be used to check whether             not taken up onto the Film Take-up Spool, the
       there is film in the camera or not. (Fig. i6)           Film Cassette Loaded symbol on the LCD
                                                         Panel will blink for about 15 sec. (Fig. 17) and
                                                           the shutter release will lock.
                                                       Reload the film correctly by repeating steps
                                          1-4 shown above.
                                                  Note: lf Non-DX film is loaded in your
                                                    camera, no warning willappearon the LCD,
                                                    and the shutter release does not lock.


16
View original page 18Page 19 · Read text
5. SETTING THE FILM SPEED


                                                 Fig. 18
1. DX Films                                      2. Non-DX Films
  DX-coded film cartridges are marked with                       lf Non-DX Film is used, your camera automat'
   black-and-si lver patterns correspondi ng to               ically sets itself to ISO 100. (Refer to the ex'
  the  f ilm speed and other information. Your           posure compensation (pages 58) when you
  camera reads this pattern and automatically         make manual adjustments while loading
   sets itself for DX-coded   f ilm speeds ranging          Non-DX film in yourcamera.)
  from ISO 25 to 5000. (Fig. 18)


                                                                                         17
View original page 19Page 20 · Read text
www.butkus.us
6. VIEWFINDER INDICATORS (Fis.ls)

1. Auto-Focus Frame
When activated, the Auto-Focus System fo-
cuses automatically on any subject that ap-
pears within this small rectangle.
2. Viewfinder Display Panel


                                                            .l?8 f7 E E E!E.i:l AEr


                                                                                                                  Fig. 19
  Viewf inder information
             t:             The flash unit is fully char.ged.
             t:             The  f lash unit is still charging.
     (blinks one time per
     second)
View original page 20Page 21 · Read text
Subject in focus
                             Distance measureme,rt cannot be made automatically; use manual
                                   focusi n g (see page 42\; or if too close, shif t to macro mode (see page
                                      43).
                          Manual focus shift direction indication (toward near)
                          Manual focus shift direction indication (toward infinity)
                          Macro Mode is set.
                             Too-close warning: Switch to Macro Mode.

                           Exposure Program Shift indicator
                               Shutter Speed


www.butkus.us
                                                                                19
View original page 21Page 22 · Read text
www.butkus.us


                               Overexposure warning        E l:l';1il           :
              (blinks)
                               Underexposure warning              l_ :il              :              (blinks)
                           Hand Shaking warning with 35mm-70mm focal lengths btinks at           !- I I -:l  il          :         (blinks)                                    1/30 sec. or less.
                           Hand Shaking warning with 70mm- 135mm focat tengths btinks            l. -:l; -E ';i        :         (blinks)                                       at 1/60 sec. or less.
     +  or              :  Exposure Compensation is set.
       (blinks after setting)
          Li.l-,:                           i          : F-stop
                         ':                                 ;  Overexposure warning (Actual f-stop numbervaries with focal length.)       C E -l              (blinks)
        Li.l-5.8           :  Underexposure warning (Actual f-stop number varies with focal
         (blinks)             length')
                        AE Lock is set.       AEt             :              (blinks)
   * Viewfinder lllumination
    An auxiliary light turns on automatically when the  f inder LCD is dark and difficutt to see.


20
View original page 22Page 25 · Read text
:   Fill-in Flash Photography Mode              q_|
                                 Continuous Shooting Mode           Ell                 :
                                 Bulb Modeust      El                  :
             lF|                :  Center-weighted Average Mode
            ,$                :  Self-timer Mode
n      +  Or              Exposure Compensation Mode -        {blinks after setting)
       I5           mm -, E 5 mm     :  The focal length (to the nearest smm increment)  is indicated on the
                           LCD Data Panel as you adjust (,,zoom,') the lens focal length. lt ap-
                                    pears for about 2 secnds, then displays the  f rame number.
         l-gE               :  Numberofexposures
                                     :  Thedistanceofyoursubjectisindicated:   1.5m(4.9ft)      @#lf,
                                     : The distance of your subjecr is indicated: Inf inity (o)       @l,alrr:.:.:.!.@
                                          :  Macro Mode   Q*=;


                                                                                      23
View original page 25Page 27 · Read text
Fig. 23-A                                                         Fig. 23-B
2. Make sure your right arm is comfortable, but           * When holding taking  f lash pictures with
  keep it as close to your body possible for              your camera held vertically, always posi-
  maximum steadiness.                                        tion  it with the  f lash side up.
3. Use your left hand to steady the camera. (Fig.           *  lt is important to practice holding the
   23-A.,23-B)                                        camera steady to avoid blurred or tilted
4. Look through the Viewf inder to compose                  pictures.
  your picture.


                                                                                        25
View original page 27Page 29 · Read text
1. TURNING THE CAMERA         2. ZOOMING THE LENS-
 ON FOR FULLY AUTOMATIC
  OPERATION

When you slide the Mirai's Main Operating
Switch to the ON position, the camera is ready
for point-and-Shoot operation.  lt automatically
turns on the basic (or'default") settings for all
functions.
  * Automatic Backlight Control metering
    mooe
  * Standard autoexposure program (with au-
      tomatic shift as you zoom the lens)
   * Single-Shot (one-frame-at-a-time) film
     aovance                                            www.butkus.us
                                                                                                                    Fig. 1
                                             The Mirai's built-in 35-135mm Zoom Lens lets
                                                   you get closer to your sublect without changing
                                                  your position. This lets you easily select the
                                                  composition that best suits your subiect.
                                                       To zoom the lens, just rotate the zoom Selector
                                                                Dial (Fig. 1) untilyoursubiect  is framed properly.
                                                The nominal focal length you've selected will ap-
                                              pear (for about 2 sec.) on the LCD Panel.
                                                   (Although lens zooming action is continuous,
                                                        the focal length is displayed on the LCD Panel
                                                                  in smm increments 35mm, 40mm, 45mm, etc.

28
View original page 29Page 32 · Read text
rI                                                www.butkus.us
    4. SHOOTING


                                                        Fig. 4
      1. Gently press the Shutter Release Button to        We recommend using the built-in flash (see
        take the oicture. The  f ilm advances automat-           page 65), or a tripod or other sturdy support
        ically as soon as the shutter has been               for the best results in these conditions.
        released.
         In dim lighting conditions, the programmed
       shutter speed may be too slow for sharp
       handheld exposures. When this occurs, the
        shutter speed display in the Viewf inder will
         blink. (lf the lens is set to 35-70mm, "L32-
        30" will blink;  if the lens is set to 7O-135mm,
      "L32-60" will blink.)(Fig. a)


                                                                                                     31
View original page 32Page 34 · Read text
www.butkus.us

  @@


                                         Fig.72. When the  f ilmsis fully rewound, the motor            3.   lf you wish to rewind the  f ilm before the end
   stops automatically and "E" appears on the              of roll is reached, push the Recessed Manual
  LCD Panel. (Fig.6) Beep sound will also be          Rewind Button under the Creative Control
   heard if the Sound Switch is set to the rtl)             Panel Coverwith your  f ingernail or a pen, for
   position. You may now open the Back Cover           about 2 seconds. (Fig.7)
   to unload the  f ilm.
  * The shutter release is locked when "E" is
      displayed. However, power zooming and
     autofocus functions  will remain operative,
     and flash (if in up position)will charge.


                                                                                   33
View original page 34Related documents and language editions
From the M. Butkus archive. Original publisher and archive notices are retained.
Check the model and edition against your equipment.
PDF verified 2026-10-10.