Film cameras
Ricoh Motor 3 User manual
User manual for Ricoh Motor 3. 15 pages in German, French, Spanish, English. Read the original PDF, download or print a copy without registration.
15 pagesGerman, French, Spanish, English0.8 MB PDF
Loading your manual…Open PDF directly
Document details
- Brand
- Ricoh
- Model / document
- Ricoh Motor 3
- Document type
- User manual
- Language
- German, French, Spanish, English
- Pages
- 15
- File size
- 0.8 MB
- Category
- Film cameras
- Document date
- Not specified in catalog
Contents
Search available document text
Find a term, then jump to its page in the original PDF. Image-only pages may not be searchable; check the PDF for exact wording and diagrams.
Page 1 · Read text
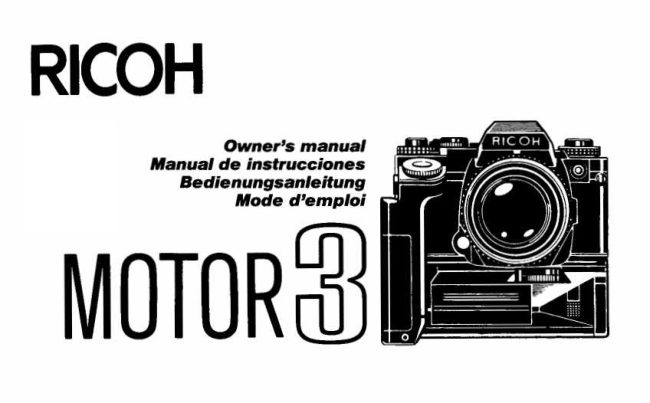
RICOH
                   Owner's manual
             Manual de instrucciones
               Bedienungsanleitung
                    Mode d'emploi
 MOTOR
View original page 1Page 2 · Read text
ENGLISH   Page 1 - 10
ESPANOL   Pagina 11 - 22
DEUTSCH   Seite 23 - 34
FRANI,AIS  Page 35 - 44
View original page 2
Page 5 · Read text
ENGLISH
NOMENCLATURE (Fig. 1, 2)
®  Hi/L  Select   Switch
®  Shutte  Relea e Butt  n
®  F ame Set Dial
®  Attachment Sc ew
   Came a Guide
©  Batte y Ca e
®  Batte y Ca e O en Switch
®  Manual Attachment Dial (with Safety C  ve  )
® Ve tical H  ld G     i
@ Rem te C  nt  l Jack
 »  Shutte  Relea e Butt  n' (f   ve tical h  ld)
@  Shutte  L ck Switch
 13  P     iti  ning Pin
 74  Rewind Switch L ck Butt n
  e  Film Rewind Switch
 t6  P we  Jack
   Back G    i     (f   ve tical h  ld)
  B  Aut  Attachment/Detachment Switch
 1B  P we  Switch
 2  O e ati  n Indicat
 21 C ntact                                         0
View original page 5
Page 6 · Read text
INSERTING THE BATTERIES                fully cha ged  ne     ) .
                                             When the C ve   f the Manual Attachment
 1   .  Pu h  the Batte y  Ca e O  en  Switch           Dial i    ened, the  afety mechani  m func-
    u wa d and    ull   ut the Batte y Ca e .                      ti  n  and the Attachment Sc ew d  e   n   t
2.   In e t 8  enlight (AA  ize, R6) batte ie   in           tate .
    acc  dance with the      la ity diag am           •   If the batte ie  a e in e ted inc    ectly, the
      in ide the Batte y Ca e .                       Attachment Sc ew    tate   at l w   eed . In
3 .   P     iti  n the t iangle ma k in the Batte y         additi n, the leakage     b eakage may
   Ca e u wa d and in  e t the Batte y Ca e        cca     i  nally cau  e .                                                                                                      •     until it click     .                                                                        If   ld batte ie     batte ie   f an the  kind
                                                     a e u  ed t gethe , batte y leakage   b eak-
   Set the P we  Switch t  OFF and check the        age may al    e  ult.
   batte y c  nditi n by   b  e ving the Atta-       •  Batte ie  u ed
   chment Sc ew   eed while  hifting the Aut         8   enlight batte  ie : Alkaline, Mangane  e
   Attachment/Detachment Switch t  the aut          (AA   ize, R6)           Nickel Cadmium
   attachment         iti  n (left) . If the Attachment                            echa geable batte-
  Sc ew   eed i                                                                                                                                                                             l w   d  e  n   t   tate, check                                         ie
   that batte ie  a e c   ectly in  e ted . If the
    batte ie  a e c   ectly in e ted but it d  e
    n   t    e ate,    when the winding   eed
   dec ea e    winding bec me  im      ible,
    e  lace all the batte  ie  with new  ne    (
0
View original page 6Page 7 · Read text
ATTACHING THE MOTOR TO THE            •  Bef  e attaching the m   t      t  the came a,
CAMERA                                         wi  e the b th came a  ide and m   t    ide
                                                    c  ntact and P     iti  ning Pin with a clean d y
Aut  attachment (Fig . 3)                                     cl  th .
  1   .  Set the P we  Switch t  OFF.                       •  Afte  attachment, be  u e n  t t    lide the
2 .  Place a came a    nt   the m   t    while        Aut  Attachment/Detachment Switch t  the
    aligning the P     iti ning Pin   and the       attachment           iti  n (left) . D ing    caulk
   Came a Guide, taking ca e n  t t    t a  the       the came a, making  em  val difficult .                                                                  •          t a    lug   f the came a between the       When the C  ve   f the Manual Attachment
   came a b dy and m   t        .                               Dial i    ened, the  afety mechani  m func-
    Check that the C ve   f the Manual Atta-                ti  n  and the Attachment Sc ew d  e  n   t
    chment Dial i   cl  ed and  lide the Aut             tate                       .
    Attachment/Detachment Switch t  the atta-
   chment         iti  n (left) .                    Manual attachment (Fig . 4)
   The Attachment Sc ew    tate  and the          1   .  Place a came a  nt  the m   t   while align-
   m   t              i   aut matically attached t   the         ing the P      iti  ning Pin  and the Came a
   came a                      .                                          Guide.
4. When the m   t           i  attached t  the came a,    2                      .  O  en the C  ve   f the Manual Attachment
   the Attachment Sc ew    t    , the O e  ati  n         Dial and tu n the dial cl ckwi  e                      .
    Indicat   blink  and a bee   ignal   und     .
   Relea e the Aut  Attachment/Detachment
    Switch.
View original page 7Page 8 · Read text
DETACHING THE MOTOR FROM    * When detaching the m   t     f  m the came a,
THE CAMERA                               be   u  e t  h  ld the came a and m   t    ecu-
                                                           ely t    event them f  m d    ing when
Aut  detachment                                  they a e  e  a ated .
 1  .  Set the P we  Switch t  OFF.
2 .  Check that the C ve   f the Manual Attach-   INSERTING THE FILM
    ment Dial i    cl   ed and  lide the Aut  At-
    tachment/Detachment Switch t  the deta-    U ing m  t
   chment         iti  n ( ight) while   lightly  ai  -          1   .  Set the P we  Switch t ON .
    ing the came a f  m the m   t        .               2 .   Set the F ame Set Dial t  S                      .
3 .  When the Attachment Sc ew i  di engaged     3 .  Set the   we  ON-OFF   witch    f  the
        f  m the t    i   d   cket in the came a,  e-       came a t  ON .
    lea e the Aut  Attachment/Detachment     4 .  L  ad a film in the came a  efe  ing t  the
    Switch .                                                                     In   t ucti n Manual  f the came a .
Manual detachment                          * With the F ame Set Dial   et t  a            iti  n
 1                                                                 .  O en the C ve   f the Manual Attachment         the  than S, the film may be exhau ted .
    Dial and tu n the dial c  unte cl  ckwi  e
    while   lightly  ai ing the came a f  m the    Manual in e ti  n
   m  t       .                                                                                1  .   Set the P we  Switch t  OFF.
                                                  2 .  Set the   we  ON-OFF   witch   f the
                                         came a t  ON .
0
View original page 8Page 9 · Read text
L ad a film in the came a  efe  ing t  the       came a t  ON  .
     In   t ucti n Manual  f the came a .          5. Kee  the Shutte  Relea e Butt n  e  ed .
                                                           The f ame    ecified by the F ame Set Dial
                                                     a e  h t and w und. When the    ecified
SHOOTING                                                                              f ame   a e   h  t, the O  e  ati  n Indicat
                                                                   light . When the Shutte Relea e Butt  n i
 1 . Set the P we  Switch t  ON  .                      elea ed, the O  e ati  n Indicat   g  e       ff
2. Select the winding    eed with the Hi/L          and the m  t   tand  by f   the next  h    t-
    Select   Switch .                                     ing .
     Hi : ab  ut 3 .5 f ame  / ec .                          6.  When the Shutte  Relea e Butt n i    e-
     L : ab  ut 2 f ame  / ec .                            lea ed du ing   h   ting, the O  e ati  n Indi-
   N  te :   When the m   t           i  u  ed with XR-          cat   blink  the numbe   f time   c   e-
             P, u e   f left handed    hutte             nding t  the  emaining f ame . When
               elea e may  cca     i  nally  e  ult        the Shutte  Relea e Butt  n i     e  ed
            in maximum f aming  ate   lightly         again, the  emaining f ame  a e   h   t .
                 le   than 3 .5 f ame   e   ec nd .     7 .   T      t     h   ting  f the emaining f ame     ,
3. Adju t the F ame Set Dial .                        ceed a    f   ll w     .
   C: C  ntinu  u     h   ting             •  Tu n the F ame Set Dial   .
    S  :   Single f ame  h   ting              •  Set the P we  Switch t  OFF.
    2 :   2 f ame  h   ting                 •  The  emaining f ame  a e  e et with a
     5 :   5 f ame  h   ting                            bee    ignal afte ab ut 100  ec nd     .
4. Set the   we  ON-OFF   witch   f the
View original page 9Page 10 · Read text
REWINDING THE FILM                                       t n . At thi  time, u e the Shutte Relea e Butt  n
                                                                                                                                                                                                           l  cated at the   ide  f the m   t        .
 1   .  When the film  eache    it  end, the m   t              1   .  Slide the Shutte  L ck Switch d wnwa d
    aut  matically    t    , the O  e  ati  n Indica-           until the ed ma k can be  een . The Shutte
        t   blink  , and afte  2  ec nd  , a bee    ig-        Relea e Butt  n f   ve tical h  ld can be  e-
     nal   und      .                                          lea ed and   e   ed                                           .
2 . Set the P we  Switch t  OFF.
3 .  While   e  ing the Rewind Switch L ck   POWER CORD FOR SHOOTING IN
    Butt  n,   hift the Film Rewind Switch   COLD CONDITIONS (Fig . 5)
    u wa d. When the  witch i   elea ed, the
     witch  etu n   t  the    iginal            iti  n, but      In c  ld c  nditi  n  (at tem  e atu e  bel  w 0°C),
    the  ewind butt n  f the came a i        l cked .     the batte y  e  f  mance i  n  t a  u ed . At thi
4                                           .  Unf  ld the film ewind c ank  f the came a     time, u e the  we c   d t   ut the Batte y Ca  e
    and tu n it in the di  ecti  n  f the a   w.          int  y u    cket, etc . t  kee  the batte y wa m .
                                                                                                   1  .  Rem  ve the Batte y Ca  e f  m the m   t        .
                                                 2 .  C  nnect the  lug   f the  we  c   d t  the
SHUTTER RELEASE BUTTON               Batte y Ca e .
FOR VERTICAL HOLD                         R  ll the Batte y Ca e in Band Ca e .
                                                 4 .  C  nnect the  the   lug  f the  we  c   d t
When the came a i  held in the ve tical           iti  n,        the P we  Jack  f the m   t        .
 it i   difficult t    e   the Shutte  Relea e But-     5 .   Put the Batte y Ca e int  y  u     cket, etc .
                                                                       t  kee  the batte y wa m                                            .
0
View original page 10Page 11 · Read text
•  Neve  u e a  we   u    ly  the  than the
   Batte y Ca e t  d ive the m   t  . D  ing
  may  e  ult in malfuncti   n .

BATTERIES
•   In c  ld c  nditi  n  , the   ecified batte y  e  -
      f  mance cann t be a   u ed . At thi  time,
   u  e the  we  c  d   ca  y  a e batte ie     .
   At n  mal tem  e atu e , the batte y   e  -
      f  mance will be  e umed .
•  In a c ld   lace, it i   ec mmended that
  Nickel Cadmium  echa geable batte ie  be
   u ed . T cha ge the batte  ie  , be  u e t  u e
   the    ecified cha ge   .
View original page 11Page 12 · Read text
PROPER CARE OF YOUR MOTOR

•  D  n  t u  e a t    i   d  c ew l  nge  than 5 .7 mm .
•  Take ca e n  t t  leave the m   t   f    a l  ng time in y u ca  , t unk   unde di ect  unlight, a  thi
   will cau e malfuncti  n .
•  D  n  t ex      e it t  udden change  in tem  e atu e a  thi may    duce c nden  ati  n in  ide the
  m  t  and cau e malfuncti  n .
•  D   n  t di mantle      il the m  t   y u   elf . All  e  ai    h  uld be  efe  ed t  y u came a deale
   an auth  ized RICOH Se vice Stati  n .
•  Afte   u  e by the  ea     n a beach, wi  e the  alt and  and away ca efully with a     ft cl  th.
•  Afte  u e, clean the du  t, etc . f  m the m  t   with a    ft cl  th and kee   it in a d y, (well-ai ed
     lace) .
 •  When the m   t                                                                                                                                                                                                                                             i  n  t u ed f   a l ng  e    i  d  f time, em ve the batte  ie      et the P we   witch
      t  OFF.


0
View original page 12Page 15 · Read text
RICOH COMPANY, LTD  .
14-6, 6-ch  me, Ginza, Chu  -ku, T ky , 104, Ja  an

RICOH CORPORATION
5 Ded ick Place We t Caldwell, New Je  ey 07006, U .S .A                          .

RICOH NEDERLAND B .V .
Al en R ndweg 102, P.O .B x 114
Am telveen - H lland
RICOH DEUTSCHLAND GmbH
F ankfu te  Allee 45-47
6236 E chb  n 1
We t Ge many
RICOH BUSINESS MACHINES LTD .
2808, Wing  n Cent e, 111 C nnaught R ad
Cent al, H  ng K ng

                                                                             P inted in Ja  an
View original page 15From the M. Butkus archive. Original publisher and archive notices are retained.
Check the model and edition against your equipment.
PDF verified 2026-10-10.