Film cameras
Ricoh Singlex User manual
User manual for Ricoh Singlex. 18 pages in English. Read the original PDF, download or print a copy without registration.
18 pagesEnglish1.6 MB PDF
Loading your manual…Open PDF directly
Document details
- Brand
- Ricoh
- Model / document
- Ricoh Singlex
- Document type
- User manual
- Language
- English
- Pages
- 18
- File size
- 1.6 MB
- Category
- Film cameras
- Document date
- Not specified in catalog
Search available document text
Find a term, then jump to its page in the original PDF. Image-only pages may not be searchable; check the PDF for exact wording and diagrams.
Page 2 · Read text
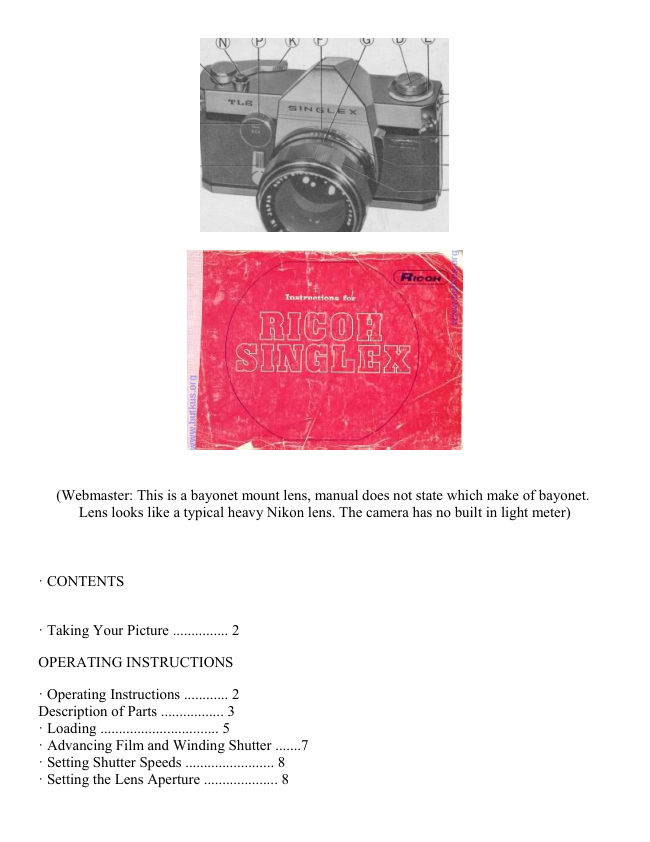
(Webmaster: This is a bayonet mount lens, manual does not state which make of bayonet.
      Lens looks like a typical heavy Nikon lens. The camera has no built in light meter)


· CONTENTS


· Taking Your Picture ............... 2

OPERATING INSTRUCTIONS

· Operating Instructions ............ 2
Description of Parts ................. 3
· Loading ................................ 5
· Advancing Film and Winding Shutter .......7
· Setting Shutter Speeds ........................ 8
· Setting the Lens Aperture .................... 8
View original page 2Page 3 · Read text
www.butkus.us

· Focusing ............................................. 9
· Releasing the Shutter to take Picture .... 10
· Unloading the Film ............................... 11

FURTHER INSTRUCTIONS AND THE USE OF OTHER FEATURES

· Ways to Hold Camera in taking Pictures .... 12
· " Depth of Field " of Photographic Lenses and their Utilization .... 13
· Depth of Field Scale on Lens Barrel ............ 14
· Lever for Previewing Depth of Field ............ 15
· Self-timer ................................................... 16
· Infra-red Marking ...................................... 17
· Changing the Lens ..................................... 17
· Removing the Lens ................................... 18
· Replacing the Lens .................................... 18
· Flash Synchronization ............................... 19
Film Speed (ASA and DIN) Reminder Dial ...... 22


· TAKING YOUR PICTURE


                                                       1. Load and advance film until counter registers
                                               "1"
                                                    (see page...5 ~ 7)

                                                       2. Set shutter speed (see page...8)

                                                       3. Set Iens Aperture (see page...8)

                                                       4. Focus and frame your picture (see page...9)

                                                       5. Depress shutter release button
View original page 3Page 4 · Read text
· OPERATING INSTRUCTIONS


Familiarize yourself with your " Singlex ", before loading your first roll of film. Ex. amine your
camera carefully and operate its controls as you would be doing when actually taking pictures.
A patient study of these instructions will be rewarding.


1. Accessory Shoe for exposure meter               5. Back cover sliding catch

2. Neck strap eyelet                                 6. Aperture scale ring

3. Combined preview self timer lever                7. Focusing ring

4. Rewind lever (folded)                             8. Lens releasing lever


                      Mike Butkus                    Digitally                                                                                                                                                               DN:email=mike@butkus.org,Date:cn=Mike2023.05.17signedButkus,by15:16:57Mikeo=ButkusButkusc=US-04'00'camera manuals, ou=butkus.org,


9. Cartridge chamber
                                             14. Take up spool
10. Slotted rewind shaft
                                             15. Eyepiece
11. Tripod socket
                                             16. Syncro sockets
12. Sprocket release pin
                                             17. Film type reminder
13. Sprocket teeth
View original page 4Page 6 · Read text
18. Distance scale ring                       22. Shutter speed dial

19. Depth of field scale                      23. Shutter release and cable release
                                            socket
20. Aperture distance index diamond mark
                                            24. Exposure counter
21. Shutter speed index dot
                                            25. Rapid advance lever
View original page 6Page 7 · Read text
www.butkus.us


· LOADING


                                                         Place camera face down on a table or other
                                                               solid surface. Release the back cover by
                                                             pulling up its sliding catch. The back cover
                                                               will spring part-way open and may be
                                                   opened fully by hand.


                                                   Push upward on the slotted rewind shaft
                                                               situated inside of the chamber, towards the
                                                              direction of arrow shown in the illustration.


Insert the film tongue into the groove of the " take-up " spool as far as it will go. Secure the film on
the take-up spool by turning take-up spool once in the direction of the arrow on the spool.
View original page 7Page 8 · Read text
Place cartridge into the film chamber. Push back and turn the slotted rewind shaft until it engages
the slot in the cartridge spool.


Make sure that the film is secure and that the film perforations are engaged with the sprocket teeth.
Locking is automatic. Now, take up the slack of loaded film by rotating the rewind lever clockwise
until tension is felt. Advance the "exposed" portion of film by winding the rapid advance lever and
tripping the shutter until the counter registers " 1".
Your camera is now loaded and " ready".


                                A single, full stroke of the film advance lever,
                                                   advances the film, counts the pictures taken and
                                                              sets the shutter for the next picture. This
                                                        operation is done as follows: 1. Put your thumb
                                               on the lever and turn it fully to the right until it
                                                             stops. Do not advance the lever part way only.
View original page 8Page 9 · Read text
www.butkus.us


· ADVANCING FILM AND WINDING SHUTTER


                                                                       2. Place your thumb to original
                                                                  position to catch returning lever.


  · SETTING SHUTTER SPEEDS

The desired shutter speed is set by rotating the shutter speed dial to the black dot on the
camera top cover. This may be done before or after the shutter is wound. When set at " B "
or bulb, the shutter will remain open for as long as the shutter release is held depressed.
Speeds are: 1, 1/2, 1/4, 1/8, 1/15, 1/30, 1/60, 1/125, 1/500 and 1/1000 second
View original page 9Page 10 · Read text
· SETTING THE LENS APERTURE


                                                The desired aperture opening of lens is set
                                                 by rotating the aperture scale ring on the
                                                              lens barrel to the red diamond mark on the
                                                         "depth of field" ring. The diaphragm
                                                           automatically reopens to full aperture after
                                                       each shutter release. Consequently, the field
                                                           of view visible before and after the shutter
                                                                          is released.


· FOCUSING

With your "Singlex", which is a single lens reflex camera, focusing and composing is achieved
through the lens, completely eliminating the problem of parallax. The penta-prism system
incorporates a bright fresnel lens for clear viewing even to the corners for perfect composition
To focus, frame the subject to be photographed in the viewfinder and rotate the focusing ring
either to the left or right until the split images merge into one clear image.
View original page 10Page 11 · Read text
www.butkus.us


· RELEASING THE SHUTTER TO TAKE PICTURES


                            With the subject in sharp focus and properly framed you are
                                ready to take your picture. Press, gently, the shutter release on
                                 top right of camera. Press downward slowly until about half way
                             and then at the precise moment of expression or Of action, press
                                          all the way. A harsh or jerky motion when used to trigger the
                                    shutter release will result in a blurred picture. Always press the
                                    shutter release button in a slow smooth manner.
View original page 11Page 12 · Read text
· UNLOADING THE FILM


                                As each picture is taken it is recorded in the film
                                       exposure counter window. When the counter reaches 20
                                          or 36, depending upon the length of roll in the camera,
                                       proceed as follows:
                                         Press release pin at the bottom of camera Fold out the
                                           rapid rewind lever


                                 Rewind the exposed film back into its film cartridge by
                                            rotating the rewind lever " clockwise" (in direction of
                                     arrow on knob) until no tension is felt. The film is now
                                             fully rewound. Unlock back cover and pull up the rewind
                                              lever.

                                  With the back fully opened and the rewind shaft in the "
                                  up " position, turn the camera over and the film will drop
                                        out of its own accord.


· WAYS TO HOLD CAMERA IN TAKING PICTURES


                                         1. Hold the camera in both hands using right index finger to
                                     operate the shutter release and left thumb and index finger to
                                       adjust focusing. Use either the left or the right eye for
                                  viewing through the viewfinder eyepiece. Stabilize the
                                camera by pressing left elbow against your side.
View original page 12Page 13 · Read text
www.butkus.us


                                        2. Holding camera in upright or vertical position....There are
                              two ways. One is with shutter release above your eyes and the
                                    other with the release below eyelevel. When held in former
                               way, the film winding can be done without moving the camera
                               from its shooting position.


 However, since the camera is held high it is somewhat unstable, ' especially for slow shutter
speeds. When taking still subjects, the latter manner is recommended as this position is more
stable. The shutter release should be pressed with your thumb. Either way is satisfactory.
Choose whichever method suits your picture taking needs.


  · DEPTH OF PHOTOGRAPHIC LENSES AND THEIR UTILIZATION

Photographic lenses are capable of providing sharp focus in front of and behind the subject
actually focused on. For instance, you are shooting at F2, if you focus on a subject 10 feet away
from your lens objects closer than 7-5/8 inches and further than 8-3/4 inches from your main
subject will be in acceptable sharp focus. The front limit to the rear limit in acceptable sharp
focus is called the " Depth of Field " of a lens. This " Depth of. Field" range is shallow in the
foreground and deep in the background and the limits vary with different lens openings and
distances. In actual use the control of the " Depth of Field " serves as a tool to achieve desired
effects and is utilized in the following two ways.

      F2                      F5.6


1. To obtain sharp image of subject located at different distances.

2. To limit sharpness and concentrate attention on a specific part of the scene by having only the
specific " scene " sharp.
View original page 13Page 14 · Read text
Opposite to the distance scale on the lens barrel is
                                                  a depth of field scale with lens openings 16, 11, 8,
                                                           4, 2 engraved. These, in conjunction with the
                                                      distance scale give you the range of the depth for
                                                  a selected lens aperture. The following method
                                                      describes this feature. For instance, when taking a
                                                        picture with your subject at 5 feet (1.5 meter)
                                                  with lens opening at f/16, the range between the
                                            two 16s found on the scale is the distance of
                                                     acceptable sharp focus. As you can see from the
                                                      distance scale the front limit is 4feet (1.2 meter)
                                              and the rear limit 7 feet (2 meters).


· LEVER FOR PREVIEWING DEPTH OF FIELD


                                          Push combined preview-self-timer lever situated on
                                                  the right front of camera in direction of "M" till it
                                                     stops. The lens opening of the camera will
                                              correspond with that which you have set on the
                                                  aperture scale. By looking through the viewfinder
                                         you will note the extent of the depth of field. At first
                                                                         it is somewhat difficult to see the depth, but practice
                                                    will enable you to use this feature.
View original page 14Page 15 · Read text
www.butkus.us

Self-timer


                                        The self-timer is built into the right of camera body.
                                      To set, push combined preview-self-timer lever in
                                                     direction of "S" until it stops. To release it, depress
                                                      shutter release.  In 12 seconds it will trip the shutter
                                               This lapse of time is enough to permit you to get
                                                   yourself into the pictured. The self-timer device is
                                            an excellent means of insuring smooth shutter
                                                    releasing when very slow speeds are used. A tripod
                                               should also be used to insure steadiness when taking
                                                   shots at slow speeds.


 Infrared films
This infra-red marking on the depth of field scale ring is used for resetting the distance when using
Black and White infra-red film.
After obtaining the correct focus, in the usual way, set the distance obtained on the scale to the red
dot, instead of the red diamond. An infra-red filter is, of course, required.

· CHANGING THE LENS

This camera has a bayonet fitting mount on the front which permits removal and replacement of
interchangeable lens with speed and ease.

(WEBMASTER: the manual does not state what bayonet type of lens mount.  It could be the Nikon
type which I have seen sold on E-bay stating that this particular model takes the Nikon lenses)


When changing the lens, do so carefully, especially, in replacing, be sure it is securely fitted to the
bayonet mount. Care should be taken that the rear element of the lens does not strike against the
bayonet mount of the camera body.
View original page 15Page 16 · Read text
· REMOVING THE LENS


                                                          Set the distance scale to infinity by
                                                               rotating the lens barrel. Press towards
                                                            the camera body the lever located at
                                                            the left of the lens mount. This releases
                                                            the catch which holds the lens to the
                                                       camera. Now, turn lens in clockwise
                                                              direction until the red dot on the
                                                   camera body. Pull lens away from
                                                   camera body.


· REPLACING THE LENS

Place lens, line up the red dot on:: the lens barrel with the red dot on the camera body. Turn
lens counter clockwise until a click is heard. This will let you know your lens is properly
seated.


· FLASH SYNCHRONIZATION


                                              Synchronization, here, means the coincidence of the
                                                  flash with the shutter opening. The duration of the
                                                  flash must be long enough to strike the film during
                                                the shutter travel. Now this duration of the flash
                                          depends on the kind of flash bulb you are
                                                using. The table on page 20 shows you what
                                                  shutter speed a certain bulb or an electronic flash
                                                  will synchronize when using the "Ricoh Singlex".
View original page 16Page 17 · Read text
www.butkus.us

Two Standard sockets recessed into the left hand end wall of the camera and are color coded, M in
black and X in red indicating the respective contacts, M in black and X in red. The plug from the
flash unit is inserted into the socket M when using M class flash bulbs and X when using F class
bulb or electronic flash unit. The red 125 on the shutter speed dial indicates the limit of speed when
using an electronic flash unit having zero delay.


Class    G. E. Bulb                                      Permissible Shutter Speeds

M        ( 1 ) PH/5                                  up to 1/1000 sec.

"        (2) PH/5B (for color film)                         "

"          ( 3 ) PH/8                                         " 1/125

"        (4) M 5                                      1/1000

"        (5) M 5B (for color film)                          "

"         (.6 ) PH/M2                                    1/60

"        (7) PH/M2B (for color film)                      "

"        (8) AG 1                                         "

"          ( 9) AG 1B (for color film)                        "

FP      (10) PH 6                                    1/125

"        (11) PH/6B (for color film)                   *

F       (12) PH/SM                                   1/60

X       Electronic flash unit, instantaneous firing         1/125

X       Electronic flash unit, with firing delay            1/60


FLASH SYNCHRONIZATION NOTE

1. Westinghouse PM/5, Sylvania Press 25, Dura No. 5, No. 5A, Amplex No. 5,
No. 5A, Philips PF 38 are also usable

2. Westinghouse PH/5B, Sylvania Press 25C and Press 25B, Dura No. 5B Amplex No. 5 B are
also usable

3. Westinghouse PM/8, Sylvania Bantam 8, Dura No. 8, Amplex PF 4, PF 3 and PF 2 are also
usable

4. Sylvania M 25 and M 5 are also usable
View original page 17
Page 18 · Read text
5. Sylvania M 25B and M 5B are also usable

6. Westinghouse PH/M2, Sylvania M2, Amplex PF 2 M are also usable

7. Sylvania M 2B is also usable

8. Sylvania AG 1 is also usable

9. Sylvania AG 1 B is also usable

10. Westinghouse PM/6, Sylvania FP 26, Dura No. 6, Philips PF 24, Osram S1, S0 are also
usable

11. Westinghouse PH/6B, Sylvania FP26B, Dura No. 6B, Amplex No. 6B
Philips PF 24/97 and Osram S0 B are also usable

12 Westinghouse PH/SM, Sylvania SF, Dura SM, Amplex No. SM are also usable


· FILM SPEED (ASA and DIN) REMIND DIAL

The numbers 10, 25, 32, 50, 100, 200, 400, 800 and 1600 (11, 15, 16, 18, 21, 24, 27, 30 and 33)
on the dial at the camera back are the " ASA " (" DIN ") film speed guide numbers. Setting
the " ASA" (" DIN " number of your film to the black dot on the center piece serves as a
reminder of the kind of film you have loaded into your " Ricoh Singlex ".
The dial is rotated by using the pin on the dial.
View original page 18From the M. Butkus Camera Manual Library. Original publisher and archive notices are retained.
Check the model and edition against your equipment.
PDF verified 2026-10-10.