Film cameras
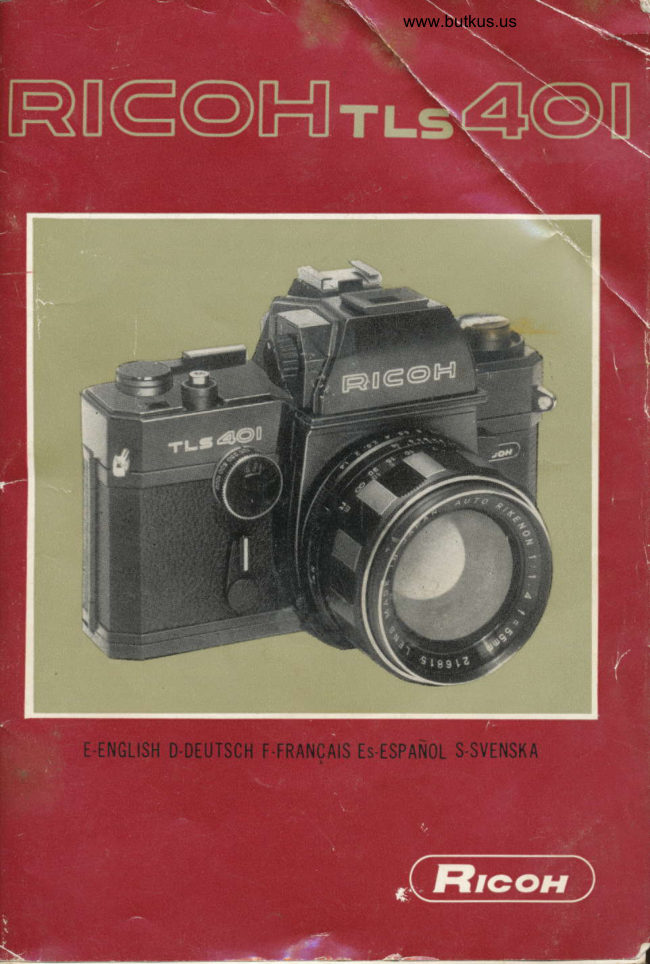
Ricoh Tls 401 User manual
User manual for Ricoh Tls 401. 60 pages in German, French, Spanish, Dutch, English. Read the original PDF, download or print a copy without registration.
60 pagesGerman, French, Spanish, Dutch, English11.2 MB PDF
Loading your manual…Open PDF directly
Document details
- Brand
- Ricoh
- Model / document
- Ricoh Tls 401
- Document type
- User manual
- Language
- German, French, Spanish, Dutch, English
- Pages
- 60
- File size
- 11.2 MB
- Category
- Film cameras
- Document date
- Not specified in catalog
Search available document text
Find a term, then jump to its page in the original PDF. Image-only pages may not be searchable; check the PDF for exact wording and diagrams.
Page 3 · Read text
www.butkus.us
    SUMMARY OF FEATURES


           Dual Viewing System offers flip-of-a.switch selection between con-
             ventional eye-level and top"viewer viewing. New Ricoh exclusivel,            hollow prism with internal moving mirror assures bright precisiont             viewing & focusing with both systems. Rapid critical focus is    'f a.
               cilitated by the micro-prism,  critical focusing, viewfinder image.
           2.  Dual Light Measurement System mounted directly on the reflex
            mirror are two CdS sensors, one which covers the entire mirror
            gives a full screen "average" light reading; the second CdS sensor
            covers just the center of the mirror and gives a "spot" reading.
         The area of the "spot" is defined in the viewfinder by a center
             circle. The viewfinder also displays A and S marks to indicate which
          system you are using. Both systems work with any lenses and
            accessories used.
           3.  Highspeed Focal Plane Shutter of new design, moves across the
             film more rapidly than previous shutter designs, giving sharper
            pictures at all speeds. Also permits the use of higher shutter
            speeds when using flash bulbs or electronic flash, thereby eliminat-
             ing "flash ghosts".
          4.  All Metal Shutter construction eliminates shutter ,'burn through"
          when the sun's rays are concentrated by the lens. Shutter speeds
           from 1 sec. to 1/1000 sec. are more accurately governed than pre-
            vious designs permitted.
       5. single stroke Film Advance lever also cocks shutter, counts ex-
           posures and turns the light measuring systems on and off auto-
              matically.
       6. High Speed Rikenon Lenses are designed for true color trans-
            mission and superior corner to corner sharpness. There is a broad
             range of Rikenon lenses from which to choose, including ultra wide-
           angle to extreme telephoto, including closeup and zoom telephoto
             lenses, plus the accessories which professional photographers find
           most useful.
View original page 3Page 5 · Read text
DIE NEUE RICOH TLS 401 WIRD AUCH SIE
BEGEISTERNIT.
                                                                                                                                                  .
*Der exklusive 4-in-1 Entfernungs-Sucher ermoglicht die horizontale
 Bildeinstellung durch den Prismensucher. Die vertikale Bild'einstellung
 kann aber auch durch die neue patentierte Lichtschacht-Sucherlupe er'
 folgen. Je nach Bedarf, kann man die Punkt- oder Ganzfeldbelichtungs'
 messung wdhlen. lm Sucher liisst sich die gewunschte Messart kon-
 trollieren  ; A-Ganzfeld-, S -Punktmessung.
*Die Bildgestattung durch den Reflexsucher und durch das Objektiv
 hilft die Moglichkeit auszuschalten, dass das Motiv im fertigen Bild ver'
 sehentlich beschnitten wird. Sie sehen im hellen Sucherbild genau das'
 selbe Bild, wie es lhnen die Fotografle wieder zeigt.
*Die Distanzeinstellung durch des Objektiv. Die Mikroprismen- und
 Mattscheiben-Scharfeinstellung ermoglichen leicht, rasch und exakt die
 Bildsch?irfe, d.h. die richtige Distanz zu bestimmen.
*Die Lichtmessung durch das Objektiv ist erwiesenermassen die pra-
 ziseste Belichtungsmessung.
,.Mit dem Schnellschalt- Filmtransporthebel spannen Sie gleichzeitig
 den Versch luss; betdtigen Sie das Filmziihlwerk und die Doppelbelich'
  t u ngssperre.
'r'Der Wippspiegel. Dieser springt nach Betdtigung des Auslosers wieder
 automatisch in die Ausgangsstellung zurtick. Das Sucherbild bleibt des'
 halb immer hell und klar.
'tLichtstarke AUTO-RIKENON Objektive. Diese ermoglichen das Foto'
 grafieren auch bei ungunstigen Lichtverhdltnissen. Die Farbaufnahmen
 von Diapositiven und Negativen, zeichnen sich durch getreue Farbwieder-
 gabe und hohe Qualitiit aus.
,iDie automatische Springblende ermoglicht die Distanzeinstellung und -
 Gestaltung der Aufnahme bei voller Blendenoffnung. Das Sucherbild,
 bleibt auch bei der Wahl von kleinsten Blendeneinstellungen  irnmer hell
 und klar.
'FDer Metallschlitzverschluss.  Die Verschlusszeitenskala  reicht von 1-
  1i 10O0 sek. und B. (B  f rlr Zeitauf nahmen). Schnelle Bewegungen werden
  klar und scharf fixiert. Auf nahmen bei ungrinstigen Lichtverhiiltnissen.


                             D-t
View original page 5Page 6 · Read text
www.butkus.us
LE NOUVEAU RICOH TLS 401 OFFRE DES CARAG-
TERISTIQUES QUE VOUS AIMEREZ . .  ,

 *4 vlseurs t6l6m6triques en 1 seul exclusif vous permet de saisir vo-
  tre sujet aussi bien )  I'oculaire i  la hauteur des yeux qu'it viseur
  d'angle. Et vous pouvez passer de la mesure de la lumidre d'ambi-
  ance ir celle de la mesure par point ou inversement suivant le cas. La
 marque (repdre) A (:average) ou S (:sPot) sur le viseur indique la zone
' de mesure que vous recherchez.
 *Vis6e  i travers I'objectif: 6liminant les d6centrages accidentels du su-
  jet...vous voyez exactement dans le viseur I'image telle que vous la
  prenez.
*Mise au point i travers I'objectif: vis6e par grille ir micro-prismes plus
  depoli avec lentille de Fresnel de mise au point permettant de prendre
  plus facilement des images extrOmement nettes.
*Un posemdtre A cellules CdS a travers I'objectif mesure la lumidre
  avec un degr6 de pr6cision trds 6lev6.
xUn levier rapide d'entrainement du film qui r6arme 6galement I'ob'
  turateur avec blocages contre les doubles expositions et compteur d'i-
 mages couple.
 *Miroir A retour instantand: Revient imm6diatement ) la position de-
  sir6e )  l'instant mdme or) I'exposition est faite-<pas d'6clipse> du vi-
  seur retardant la prise de vue.
 *Objectif AUTO RIKENON i grande ouverture: vous permet de prendre
 des vues dans des situations d'6clairage ou les objectifs plus ferm6s ne
  prendraient rien; produit des diapositives et des 6preuves d'une nettet6
 et d'une Rd6lit6 de couleurs bien sup6rieures.
 *Diaphragme automatique: Vous permet de mettre au point et de com-
  poser avec I'objectif a sa plus grande ouverture-empdche le viseur de
  s'obscurcir quand on choisit des ouvertures d'objectif assez petites.
 *Obturateur plan-focal ultra-rapide: Toute une.gamme de vitesse de
                                                                                                 <<saisir>>  I seconde e 1/1OOO de seconde-plus pose B--vous permet de
  sur le vif I'action rapide aussi bien que de prendre des photos de qua-
  lit6 excellente m€me dans des conditions de mauvais 6clairage.
View original page 6Page 7 · Read text
LA NUEVA CAMARA RICOH TLS TIENE UNAS
GARACTERTSTTCAS QUE A VD. LE ENCANTARAN.
xun sistema especial ocular de alcance 4 en 1 permite la obtenci6n
 de fotos ya sea situando el aparato a la altura de los ojos o de la cintura.
 Adem6s, se puede pasar de medir la luz ambiente a medir la luz de un
 6rea reducida o viceversa, segirn lo exijan las circunstancias. Las letras
 A (average-luz ambiente) y S (spot:luz de un Area reducida), que se
 encuentran en el ocular, sefralan la cantidad de luz que emana de la zona
 que Vd. enfoca.
*visual a trav6s del objetivo que elimina el riesgo de fotos cortadas......
 lo que se ve por el ocular es la justa imagen de la fotografia que Vd.
 toma.
*Enfoque a trav6s det objetivo: una imagen absolutamente clara
 reflejada en el ocular junto con pantalla focal hace m6s fircil la obtenci6n
 de fotografias de extrema nitidez.
*Fot6metro sistema Gds a trav6s del objetivo que registra con gran
 precisi6n la intensidad de la luz.
*Pafanca que hace avanzar la pelicula y al mismo tiempo carga el
 disparador cuenta la fotos y hechas e impide la doble exposicion.
'kEspejo de vuelta instant6nea  : Autom6ticamente se coloca en posi-
 ci6n de enfoque al momento de haberse efectuado el disparo. Ningrin
 oscurecimiento del ocular sin retraso alguno para obtener la siguiente
   f oto.
*La lente AUTO RIKENON de alta velocidad le permite sacar fotos
 con una luz tal donde otras m6s lentas no podrian. Se consigue con
 ella diapositivas y fotos de una superior nitidez y de unos colores exactos.
*Un diafragma automitico permite encuadrar y enfocar con el m6ximo
 6ngulo de apertura de la lente. Evita que la imagen aparezca oscuro
 en el ocular cuando se escogen aberturas menores.
*obturador de plano focal ultrarapido: Una completa gama de velo.
 cidades desde un segundo hasta 1/1000 de segundo mas exposici6n
 continua le permite "paralizar " los movimientos r5pidos asi como ob.
 tener fotografias de una excelente calidad incluso con escasa ruz.


                               Esl
                                                                                       .,-t
View original page 7Page 8 · Read text
www.butkus.us
NYA RICOH TLS 401 HAR EGENSKA PER NI
KOMMER ATT GILLA .  .
*Exklusivt s6karsystem med 4 alternativ: Ni kan finga Ert motiv an'
 tingen  i genomsiktssokaren eller  i liusschaktsokaren pi kamerans ovansida.
 Ni har ocksi mcjitighet att iindra ljusmiitningen frAn allmdnljus till punkt'
 ljus eller tvdrtom alltefter arten av motiv. A' (average) eller S- (spot)
 mdrket i sokaren visar det m?itningsomr6de Ni riktar kameran mot'
*TTL-systemet eliminerar avskdrning av motivet. Ni kan se den exakta
 bilden i sokaren innan Ni kniipper'
*TTL-systemets mikrorastersokare samt den ljusa mattskivan ger extra
 skarpa bilder.
*TTL-systemets cdS exponeringsmStare miiter ljuset exakt.
                                                               oCkSA*Armen Som matar 'fram fllmen en ruta i ett enda drag spdnner
 slutaren, rdknar exponeringarna och forhindrar dubbelexponeringar'
*SnabbgAende spegel som automatiskt itergAr  till sokarl6ge isamma
                                                       Som ogonblick som exponeringen har gjorts-ingen blackout i sokaren
 forsenar fotograferi ngen.
xAuto Rikenon objektiv med hog ljusstyrka medger fotografering Sven under
 daliga ljusforhallanden; Ni far fotografier och diapositiv med fantastisk
 skiirpa och fdrgdkthet.
*Automatisk bldndare gor det mojligt fdr Er att gora skdrpeinstSllningen
 och bildl<ompositionen med full blZindaroppning. Detta forhindrar att
 synfdltet  i sokaren formorkas da Ni arbetar med mindre blSndare'
                                                               sekund*Snabb riddslutare som medger hastigheter frAn 1 till 1/10O0
 samt B. Ni kan ta bilder av forem6l isnabb rorelse och 6ven fotogra'
 fera med utmdrkta resultat under daliga liusforhAllanden'


                              s-t
View original page 8Page 9 · Read text
t
 KNOW YOUR CAMERA
  A) Film-wind Lever
  8) Film Counter
 C) Shutter Release Button And Cable
      Release Socket
 D) Exposure Meter SignalFor "Switch
     On" And "Film-Wound"
  E) Neck Strap Eyelet (2)
  F) Eye-level/Top.viewer Change-Over
     Knob
  G)  Film Speed Selector
  H)  Shutter Speed Dial
     r)  Self-Timer Lever
   J)  F-Stop Ring
  K)  Distance Scale
   L)  Focusing Ring
 M)  Depth of Field Scale
  N)  Exposure Meter On/Off Switch
  o)  Film Reference Dial
  P)  Film Rewind Knob: Plus Back
     Opening Release
  o)  Top-viewer Eyepiece
  R)  Accessory Shoe
  S)  Eye-level Eyepiece
  r)  Average,iSpot Selector Switch
  u)  Flash Socket (2)
  v)  Rewind Shaft
 w)  Film Chamber
  x)  Exposure Meter Battery Compart-
     ment Cover
  Y)  Tripod Socket
  z)  Preview Switch And Automatic/
     Manual f stop control
AA)  Film Rewind Button
BB)  Sprocket Teeth (2)
cc)  Take-Up Spool
DD)  Film Pressure Plate
EE)  Cartridge Retaining Spring


               E-2
View original page 9Page 10 · Read text
www.butkus.us
 BEZEICHNUNG DER         APPRENEZ A CONNAITRE
 EINZELTEILE              VOTREAPPAREIL..I
  A)  Film-Tra nsporthebel           A) Levier d'avancement du fllm
  B)  Filmziihlwerk                B) Compteur de vues
  c)  Ausloser                  C) Bouton de declenchement de I'ob.
  D)  Belichtungsmesser-  Kontrollsignal           tu rate u r
        ftir: eingeschalteten Belichtungs-  D) Signal du posemdtre pour le d6-                                        clenchement et I'avancement du     messer und transportierten Film                                                     fllm
  E)  Tragriemenc.rse                E) Anneau de courroie de cou (2)
  F)  Direkt- und Lichtschachtsucher   F) Bouton de changement de vis6e
      U mstellscha lter                 a viseur d'angle ou a hauteur de
 G) Filmempfi ndlichkeits-Einstellring            la poitrine.
 H) Verschlusszeiten-Einstellring      G) S6lecteur de sensibilite de film
   l)  Selbstausloser              H) Selecteur de vitesse d'obturateur
  J) Blenden Einstellring                      l)  Levier de d6clencheur automati-
 K) Entfernungsskala                       que                                  J) Bague des diaphragmes L) Schdrfeneinstellring                            K) Echelle des distances M) Tiefenschdrf eskala                               L) Bague de mise au point N) Belichtungsmesserschalter                        M) Echelle de profondeur de champ O) Filmmaterial Hinweisring                          N) lnterrupteur du posemdtre  ir cel- P) Film Rrickspulknopf                                                  lules CdS
 a) Lichtschacht-Suchereinblick                          O) Cadran repdre du type de film
       (vertika  l)                   P) Bouton de r6enroulement du film
  R)  Zubehorschu h             Q) Oculaire A viseur d'angle
  S)  Normal-Sucherei  nbl ick         R) Griffe porte-accessoires
      thorizontal)                 S) Oculaire d hauteur de I'oeil  r)  Umschaltknopf fur Punkt- oder                              T) Selecteur de mesure de la lumi-     Ganzfeldmessung                        dre
  U)  Blitzlichtsynchronisation F & X   U) Prise de flash (2)
  v)  R i.ickspu lspindel              V) Arbre de r6enroulement
 w)  Filmkassetten-Ka mmer        W) Chambre du film
  x)   Batteriegeh 2iuse              X) Couvercle du logement de la pile
           rsch lussdeckel                du posemdtre     -Ve  Y)   Stativgewi nde-An sch  I uss        Y) Prise pour 6crous de pieds
  7)  Blendenkontrollknopf  ftlr  Auto-   Z) Interrupteur de pr6-vis6e
     oder Vorwahlblende (Tiefenschdr-  AA) Bouton de r6enroulement
              f e-Kontrolle)               BB) Dents de tambour d'avancement
AA) Rrickspul-Verriegelungsloser                           ttl                          CC) Bobine r6ceptriceBB) Transportzahndder  i2)                          DD) Plaque de pression du filmCC) Film-Aufwickelspule                            EE) Ressort de retenue de la cartou.DD) Filmandruckplatte                                           che
EE) Filmkassetten-Andruckfeder

            o-2                             F-2
View original page 10Page 11 · Read text
coNozcA su MAQUINA     KANN ER KAMERA  .


                                             Frammatningsarm    A) Palanca para Avance de la Pelicula   A)
    B) Contador de Fotos             B) Rdkneverk
    C) Pulsador para Disparo           C) Avtryckare
    D) Senal de Fotometro Encendido y   D) Signal for  exponeringsmdtare
           Pelicula Preparada                     "Switch on" eller "Filmen fram-
    E) Bornes para la Correa                  matad "
     F) Manija para tomar fotos a la al-      E)   F?iste for axelrem (2)          tura de ojos o cintur.a
    G) Control de sensibilidad de la Pe-      F)  Manovreringsarm for viixling fran               licu la                                   prismasokare  till ljusschacktsokare
                                                                                                                                                                       I nstzillni ngsratt for  fi lmkiinslighet    H) Control de Velocidad del Obtura-     G)
          dor                                   H)   Instiillningsring for slutartider
         l) Palanca de Disparo Autom6tico          t)   S jSlvutlosare
          Retardado                                                            t\    Bl2i ndarring     J) Aro del Diafragma
    K) Escala de Distancias                  K)  Avsta nd sska la
     L) Aro para el Enfoque                     L)  Avstandsi nstii  | | n  i ngsri ng
   M) Escala de Profundidad              M)   Skii rped ju psska la
    N) Interruptor del Fotometro            N)  Strombrytare for exponeringsmd-
    O) Circulo graduado para la Pelicula            ta re
    P) Boton de Enrolle de la Pelicula    O) Filmindikatorring
                                                      Returspolningsratt    Q) Ocular para tomar fotos desde la   P)
           altura del pecho                a)  Ljusschacktsokare (visirskiva)
    R) Sujetador para la 16mpara flash    R) Tillbehorsf tiste
                                                                        (genomsiktsscj-    S) Oculai para tomar fotos desde la   S) Prisrnasokare
t,         altura de los ojos                         kare   i    T) Manija para cambio de luz ambi-                                               Manovreringsarm for allmiinljus/         ente a luz de un 6rea reducida    T)
    U) Enchufe para el flash                     pu nktljus-instSlln ing
                                                                                        r2    V) Clavija para Enrollamiento       U) Blixtljuskontakt
   W) Compartamento para la Pelicula    V) Returspolningsaxel
    X) Tapa del orificio donde va la pila  W, Kassetthus
          del fot6metro                X) Lock till batterihuset
    Y) Agujeros para el tripode         Y) Stativgdnga     Z) Mando de Profundidad                                  Z) Ring  f or manuell nedbliindning    AA) Pulsador para Enrolle                                AA) Spdrrknapp for retursPolning   BB) Dientes del Tambor de Avance de           la Pelicula                 BB) Tandhjul
    CC) Carrete Receptor             CC) UpptagningssPole
   DD) Placa para Presionar la Pelicula   DD) Platta som garanterar att filmen
    EE) Resorte Plano para Retener el         ligger plant
           Carrete                    EE) Fjiider som haller kassetten pA
                                                          plats


                             Es-2                              s-2
View original page 11Page 13 · Read text
FILM LOADING
                               Always load your camera in the shade,
                                 never in bright or direct sunlight. Use
                              good quality standard 35mm (20 or 36
                                      exposure) fllm, color transparency, color
                                       negative, or black and white.
                               Press Shutter Release Button (C) . .  .
                                   pull Film Rewind Knob (P) until the
                              camera back clicks open. Swing open
                              camera back and place the fllm cart'
                                     ridge into the Filni Ctramber (W), push
                             ths Rewind Knob back to its original                                      position . . . be certain Rewind Shaft
                                       (V) engages fllm cartridge.
                                        Pull the tapered end of the film across                                the back of the camera, insert it  into
                           and through the Take-up SPool and
                                    position  it to engage the raised gear
                                   tooth on the Take-up Spool through a
                                 sprocket hole in the fllm (CC). This
                                     will prevent the fllm from slipping ofi
                                  the spool. Rotate the Take-up Spool                                      in the direction of the arrow to take
                              up the slack film . . . check to see that
                                  the sprocket holes in the film have en'
                               gaged both sets of sprocket teeth. (BB)
                                         (Fie. 1)
                               Close the camera back and snap it
                               shut. Advance the Film-wind Lever (A)
                                       twice, depressing the Shutter Release
                                 Button (C) each time. lf You want to
                              take a picture at this time, advance
                            the Film-wind Lever once more and                                the Film Counter (B) will be automati-                                   cally set to "1". The camera will be
                                 ready for your first Picture.
                                 Set the exposure meter for the film you
                                    are using by pulling out the Film Speed                                    Selector (G) and rotating it until the
                          ASA number of your film is oPPosite                                  the green indicator line. (Fig. 2)  Also
                               turn Film Reference Dial (O) and set                                  the type of film you are using to the
                                        indicator  line.
                                 This will help to remind You of the
                                   film you are using. Check the inst'                                     ruction sheet packaged with your film
                                      for the correct ASA rating for that par'
                                         ticular film.
                                                    lf vou are using European fllm, please
                                               ref-er to Fie. 3 for the relationship be'
www.butkus.us                       tween ASA and DlN.


                                                                            ,f,   ,3
View original page 13Page 14 · Read text
trIlIVIEINLEGEN                  CHARGtrMtrNTwww.butkus.usDU FILM
 Den Film stets im Schatten einlegen    Ghargez toujours votre appareil I auf keinen Fall an hellem Ort odel    I'ombre, jamais dans un 6clairage im direkten Sonnenlicht. Einen nor.    brillant ni A la lumi6re directe du
 malen 35mm Film (ftir 20 oder 36     soleil.
 Aufnahmen) frir  Farb.oder Schwarz    Employez des films standard (35 mm)
 weissaufnahmen verwenden.            de bonne qualit6 (exposition 20 ou 36,
 Den Ausloser (C) drrjcken. Den Rrjck-   en couleurs ou en noir et blanc.
 spulknopf (P) herausziehen, bis sich    Abaisser I'interrupteur de posemdtre
 der Rtickendeckel offnet.                        (C)..., tirez le bouton de r6enroulement
Den Rr.lckendeckel ganz offnen, die    (P) jusqu'd ce que le dos de I'appareil                                                                               en Filmpatrone  in Cie Filmkammer (W) ein.    s'ouvre avec un declic. Basculez                                                 arridre                                                                                          reste                                                                qui                                                                   I'appareil                                         de                                                         le dos legen     und         den                Rrickspulknopf                                in                                                placez                                    seine    ouvert                                                          rouleau                                                                          dans                                                         de                                                          le                                                                     filmAusgangsstellung                                  Dabei                 eindrricken.                                                            (W)                                                                                rebaissez                                        logement                                          le                                                             fllm                                                                     et                                      dubeachten            Sie,              dass                      die Rrickspulspindel                                                                           jusque                                                      16enroulement                                      bouton                                          le                                     de(V)          Filmpatrone    in die                             eingreift.                                                                         primitive...Assurez-                                                   position                                 dans                                   sa
Das Filmendc ausziehen und in die   vous que I'arbre de r6enroulement (V) linke Seite des Schlitzes an der Auf.    entraine bien le rouleau du film.
wickelspule (CC) stecken. Die Auf-    Tirez le bout aminci du film en travers
wickelspule in Pfeilrichtung drehen und   du dos de I'appareil et introduisez-le
den Film straff ziehen. Kontrollieren,    dans le c6t6 gauche de la fente de
ob die Zahnrader (BB) in die Randper     la bobine debitrice (CC)...Faire tournez
forierung des Films greifen. (Bild 1)       la bobine debitrice dans le sens de la
Achtung! Bei offenem Kameragehduse    fldche en enroulant le film mollement
         darauf achten, dass der     ...Verifiez bien que les perforations du                                          se                                              film                                             sont                                                    engag6es                                                                                                les                                                  bien                                                          dans           Sch litzverschluss nicnt mit                                               jeux                                     deux                                             de                                                      dents                                                                        dent6e                                                  de la roue        den Fingern berrihrt wird.      (BB) (Fig. 1)
Den Rrickendeckel schliessen, wObei    Fermez de dos de I'appareil en le cla-er sich verriegelt. Den Filmaufzugs-   quant. Faites fonctionner deux foishebel (A) zweimal betiitigen und dabei     le levier d'avancement du film (A) enjedes Mal den Ausloser (C) drrjcken    appuyant d chaque fois le boutoh deWird der Filmaufzugshebel noch ein.   d6clenchement de  l'obturateur  (C).
mal betiitigt, zeigt das Bidz2ihlwerk (B)    Faites avancer le ievier d'avancement
 ,,1"  Die Kamera ist schussbereit.      du film une fois encore et le compteur
Den Belichtungsmesser entsprechend    d'images (B) se trouvera automatique-                                                                                            <<1>>, pr6t pour votredem benutzten Film einstellen. Die Ein-      r.-rent plac6 sur le                                         premidre photo.stellscheibe fur Filmempfindlichkeit (G)
herausziehen und drehen, bis die ASA-    Reglez le posemdtre sur la sensibiliteZahl des benutzten Films der grrinen   du film que vous utilisez en faisantMarkieru ng gegenubersteht. (Bild 2)    tourner le s6lecteur de sensibilites du                                                                       jusqu'A                                                 (G),                                                                                    ce                                              en                                                                     le                                                                              tirant,                                          film                                                toutDen     Filmmerkscheibenring                               drehen                         1O)                                         nombre                                                                                    se                                    que le                                      ASA                                                                  votre                                             de                                                                       filmund die        entsprechende Filmart                                         die                            auf                                                    de                                                                          ligne                                                    face                                                                         la                                                                      repdre                                       en                                           trouve                                                                                         verte.schwarze Markierung einstellen. Das     (Fig. 2) Tournez egalement le cadrandient dazu, sich an die Art des benutz-    repdre du type de film (O) et placezten'Filnrrnaterials zu erinnern. Die    sur la ligne repdre noire le type corres-Filnrempfindlichkeit ist in der Gebrau-    pondent 6 votre film. Cela vous aidera
chsanweisung des Films oder auf des-   6 vous rappeler le type de film quesen PackLng angegeben.                 vous utilisez. Verifiez sur la notice d'in-
Das VerhSltnis zwischen ASA und DIN    structions que vous trouverez dans le
 ist auf Bild 3 angegeben.                conditionnement de votre film que vous                                           avez bien reg16 sur la sensibilit6 ASA
                                    pour ledit film.
                                           Si vous utilisez des fllms allemands.
                                           reportez-vous d la flg. 3 pour trouver
                                               les equivalences entre les r6f6rences
                                ASA et DlN.

                D-3                              F-3
View original page 14Page 15 · Read text
COTOCACION DE LA PELICULA    FILMI ANDNING
Guando cargue su miquina h6galo   Ladda alltid kameran i  skuggan,
siempre a la sombra, nunca frente    aldrig  i starkt eller direkt solljus:
a una luz fuerte o los rayos directos   Anvdnd filrn av god kvalitet, standarddel sol.                          35mm (20 eller 36 exponeringar), fdrg Utilice pelicula de buena calidad ta-     eller svart-vit.
mafro 35 mm. t20 o 36 fotos) para   Tryck pa avtryckarknappen  tC)......|yftcolores o blanco y negro.                                              returspolningsratte.n  (P) tills kameransApriete el Pulsador de Disparo (C).    baksida oppnas. Oppna kameran helt,
Tire del Boton de Enrolle iP) hasta que    satt i filmkassetten  i kassetthuset (W)
 al sentir un pequeio chasquido quede   och tryck returspolningsratten  tillbaka
abierta la tapa del aparato. Vuelva la      till ursprungsliiget......Forsdkra Er omm6quina; ponga el carrete de la peli-    att  returspolningsaxeln verkligen tar
cula en el hueco correspondiente (W)   ;   tag i filmen. Drag ut den avsmalnadeempuje el Boton de Enrolle (P) a su   Sndan av filmen over baksidan av ka-
posicion primitiva. Compruebe que la   meran och for in den genom skaran
Clavija de Enrollamiento (V) este en-       i upptagningsspolen 1CC). Vrid upptag-cajada en el rollo de la pelicula. Ex-   ningsspolen ipilens  riktning sa  att
tienda la lengueta estrecha de la peli-   filmen stricks......se  till  att  filmenscula por la parte trasera de la ca-    perforering fastnar ordentligt  i tandhju-mara e introdfzcala en el lado iz-    lets kuggar. (BB) (Fie. 1)              ranura      de                           Carrete            la                   delQuierdo                                                                           den                                                                                          att                                       kameran                                                 och                                                                  kontrollera                                           Stiing           (CC).GireReceptor                        el                      Carrete                              Receptor                                                             ganger                                                                                                                                                t  f                                                                                                 ranr-                                                        Dra                                                                    tva                                                        tillsluten.                                                              iir helten      sentido    el           de                   flecha                 la                    con                              el fin                                                                                         varje                                                   (A)                                                               tryck                                              och                                  matningsarmen              pelicula.                    Compruebe                                                       side   tensar          la                                                                 Dra fram ar-las perforaciones en los bordes de la   gang ner avtryckaren (C).pelicula han engarzado en los dientes   men ytterlingare en gang. Rikneverket                                                       stiills da automatisKt in pa 'tI"  ochque hay a ambos lados del Tambor deAvance (BB). (Fig. 1).                 kameran iir fiirdig for tagning.
                                                                           denVuelva la tapa de la m6quina yci6rrela     Stiill in exponeringsmdtaren efterpresion6ndola ligeramente. Haga fun-    film Ni anvdnder genom att dra ut ochcionar dos veces la Palanca para Avance    vrida pa instiillningsratten for filmkdns-de la Pelicula (A) y apriete cada vez el    lighet (G) tills filmens ASA-tal dr mit-
Pulsador para Disparo del Obturador   temot den grona markeringen. (Fig. 2)                                                                                             (O)(C). Mueva une vez m6s la Palanca   Vrid ocksA pa filmindikatorringenpara Avance de la Pelicula (A) y en  och stiill in motsvarande filmtyp videste momento el Contador (B) marcar6   den svarta markeringen. Pa detta sdtt"1". La pelicula ha quedado prepa-   kan Ni liitt komma ihiig vilken filmtyprada para la primera foto. Regule el   Ni anviinder for tillfiillet.  Filmkdnslig-fotometro de acuerdo con la clase de   heten finns angiven pd den bruksanvis-pelicula que est6 utilizando para lo cual   ning som alltid medfoljer filmen. Om                                                                                                    Fig.debe hacer girar el Control de Sensi-   Ni anviinder tysk film kan Ni pa                                                                           DIN-bilidad de la Pelicula (G) al mismo  3  jiimfora ASA-skalan med entiempo que tira de 6l hasta que coin-    skala.
cida el nfmero ASA de la clase depelicula con la rayita verde. (Fig. 2).
Tambi6n haga girar el Circulo Graduado
(O) hasta que el tipo de pelicula y  la
rayita verde coincidan. Este ultimo
detalle le recorda16 siempre que clase
de pelicula est6 Vd. empleando. Lea
las instrucciones contenidas en la hoia
que acompafra al carrete de la pelicuia
con el fin de que la sensibilidad que
Vd. senale sea la correcta.
Si Vd. est6 utilizando pelicula alemana
sirvase mirar en la Fig. 3 el cuadrcl de
equivalencias ASA y* DlN.
                     LS.J                                s-3
View original page 15Page 17 · Read text
CORRECT EXPOSURE
Correct exposure is achieved by setting
the lens (f stop) and shutter speed in
correct combiirition for the fllm, sub-
ject, and light conditions. Because the
RICOH TLS 4Ol camera has a built-in,
through.the-lens system, CdS exposure
meter, you can adiust the exPosure
!vi.!h q high degree of accuracy in theTollowtng manner:l.  Unscrew Exposure Meter BatterY
   Compartment Cover (X) with a coin   and place a battery with (*) end
                                should   up. ifie. 4)  The- battery    fast foi ab6ut a year. For rePla'
   cement use Ever-eady EPX 625'
    Mallory RM 625R, or equivalent.
2. Check- that the correct ASA fllm    rating number' is set on the Film
   Speed Selector (G).
3. Set the Shutter Speed Dial (H) ac'
    cording to the instructions which
    are given later in this book.
4. Turn the Exposure Meter Switch
    (N) to "ON" by pushing  it uPward.     (Fie. 5) The Exposure Meter Switch
     is the main switch of the light sens'
   ing system.  . When You advance
   the Film-wind Lever (A) a separate
    micro-switch connected to the fllm'
   wind Lever is turned ON automati'
    cally. When you Press the Shutter    Release Button (C), this micro'
    switch is automaticallY turned to   OFF. When the main switch is
     teft at ON Position and the shutter    is left unreleased, the ExPosure    Meter BatterY is being used. Al-   ways make sure that the main   swltch is at the OFF Position   whenever the camera is not in use
    for a long Period of time or make
      it a rule tb alwaYs carrY the camera
    with the shutter released.   When the fllm lever is advanced,
      i.e,, switched on, rhe green sign is     in the window (D). With the release
    of the shutter, i.e., switched ofi, it    turns to red. This Procedure will    sreatlv extend the life of the Ex'
   6osur6 Meter BatterY. When the
    totor showing in the window (D) is    red, the ExPosure Meter is OFF.   When green is showing, the ex-
                                   the                    is ON,           Meter                        Provided  '  oosure                      (N)                               is also ON.                switch   hain meter
5. Generally, it is best to set the shut-    ter speed dial -(G) flrst and make    the flnal light adjustment with'the
     f stop ring (J); read "Setting the
              E'4                                                                                :
View original page 17Page 18 · Read text
www.butkus.us
RICHTIGE BELICH TUNG        EXPOSITION CONVENABLE
Die richtige Belichtung wrrd durch Ein- Une exposition convenable est r6alis6e
stellung der Blende und der Verschluss- en 169lant I'objectif (diaphragme) etzeit in richtiger Kombination mit Film.  I'obturateur dans les combinaisons  cor-Motiv und Lichtverhiiltnissen erzielt.  rectes pour le film pour le sujet et pourDie Ricoh TLS 401 Kamera hat einen  les conditions d'6clairage. Etant donn6eingebauten CdS-Belichtungsmesser que votre appareil RICOH TLS 401 pos-
der das Licht durch das Objektiv misst. sdde un posemdtre incorpord du sys-Die Belichtung wird nach folgenden                            tdme CdS (6 travers I'objectif> vousStufen richtig eingestellt:             pouvez ajuster votre exposition avec la
I.  Batteriegehduse  - Verschlussdeckel  plus haute precision de la faqon sui-
    (X) abschrauben und eine Queck-  vante:
     silberbatterie                           Dabei                                          rich-                einlegen.                                                    1.  D6vissez                                                     couvercle                                                                logement                                                          le                                                du                  positive                                (*)  nach    tet sich           der                       Pol                                                       pile                                                  posemdtre                                                                (X) avec                                  de                                                 la                                  du            (Bild                                    hat   oben.               4t                        Batterie                Die                                             piece                                                                 placez                                      une                                         de                                               monnaie                                                                 et    eine Lebensdauer von etwa L2 Mo-       pile avec le pole+vers le haut. (Fig.la   naten. Benutzbare Batterietypen    4) La pile durera une ann6e en-   sind Everready EPX625, Mallory                                    viron. Quand il faudra la chan-   RM625R und andere gleichwertige.                                       ger utilisez les Eveready EPX 6252.  Prrifen, ob die Einstellscheibe ftir     Mallory RM 625 H, ou des piles    Filmempfindlichkeit (G) die richtige      6quivalents.
    ASA-Zahl anzeigt.                                                2.  Verifiez que le num6ro ASA conven-3. Den Belichtungsmesserschalter  (N)     able est regle sur le s6lecteur de   nach oben drricken und auf ,,ON,i       sensibilit6 du film (G).    schalten. (Bild 5) Dieser Schatrer
     ist der wichtigste Teil des ganzen  3.  Mettez I'interrupteur du posemdtre                                          (N; sur le <ON> (marche) en le po-    Belichturrgssystems. Wenn Sie den                                                                              Cet    Filmtransporthebel (A) betdtigen,      ussant vers le haut. (Fig. 5)
    schaltet diese Bewegung automa-      interrupteur de posemetre est I'in-    tisch durch einen Mikroschalter      terrupteur le plus important dans
                                                                                      a   die Lichtmessung ein.  Betdtigen      llensemble du systdme sensible   Sie den Ausloser (C) wird dieler      la lumidre. Quand vous manoeuv-   den Mikroschalter und somit die      rez le levier d'entrainement du film   Lichtmessung automatisch wieder       (A), un autre micro-interrupteur  est                                                                                                   Si   unterbrechen. Wenn der Hauot-     enclench6 automatiquement.                                     vous appuyez sur le bouton de de-    schalter  f rir den Belichtungsmesser
   (N) auf ElNi,,ON" steht und der      clenchement de I'obturateur (C), le   Verschluss gleichzeitig gespannt      micro-interrupteur est automatique-
     ist, so steht die Belichtu ngsmesser-      ment d6branche. Quand I'interrup-                                         teur principal est laisse sur la posi-    Batterie unter Strom und entladet                                                                              se   sich in kurzer Zeit. Merken Sie      tion ON et que I'obturateur ne   sich; der Hauptschalter sollte bei      d6clenche pas, c'est que la pile du                                        posemdtre est us6e. Prenez tou-   Nichtgebrauch der Kamera immer                                           jours soin que I'interrupteur prin-   ausgeschaltet sein d.h. auf Pos.   ,,OFF". Machen Sie es sich zur      cipal soit sur la position OFF (ar-                                             r6t) quand I'appareil ne sert pas   Regel den Verschluss der Kamera                                                     long                                           moment                                                                               bien                                      pendant un                                               ou    nicht zu           spannen, wenn                                   diese                        Sie                                                                       jamais                                                                rdgle                                             faites-vous                                             une                                                     de ne       gebrauchen.   nicht                               kleine                   Diese   Auf merksamkeit verleingert die      transporter votre appareil sans que   Funktionsdauer der Batterie be-       I'obturateur soit d6clench6. Cette                                              petite pr6caution donnera une nou-    trdchtlrch. Der Mikroschalter kann                                                                  posemdtre   durch ein kleines Signal auf dern      velle vie d la pile du   Kameragehduse, gleich neben dem    On peut voir le deuxidme micro-in-   Filmtransporthebel, stets kontrol-       terrupteur dans une petite fendtre    liert werden. lst der Verschluss     en manoeuvrant le levier. Quand                                                  manoeuvr6, c'est-A-   gespannt, d.h. der Stromkreis ein-      le levier est                                        dire en position d'armement, on   geschaltet, ist das Signal grrin.
             D-4                             F-4
View original page 18Page 19 · Read text
EXPOSICION ADECUADA       KORREKT EXPONERING
                                                                                                  attUna exposici6n adecuada se obtiene   Korrekt exponering fir Ni genom
                                                                                                                                                                                                                                                                                                                                                                    icombinando la abertura del objetivo y   stZilla in bliindarringen och slutarenla velocidad del obturador en confor-    riitt forhdllande till film, motiv och ljus-                                                                 RICOHmidad con el tipo de pelicula, la es-   forhillanden. Tack vare att Er                                                                        inbyggdcena que fotografiemos y las condi-  TLS 401 iir forsedd med en                                                                         N i medciones luminosas. Puesto que su apa-  CdS exponeringsmdtare kan
rato RICOH TLS 4O1 tiene rncluido un   stor noggrannhet stiilla in exponerings-                                                behover bara folja nedan-fotometro sistema CdS que funciona a  tiden. Ni
trav6s de la lente objetivo, Vd. puede   stiende rad:
graduar'la duracion de la exposicion     l.  Skruva loss locket till exponerings-con mucha exactitud del modo sigui-       mZitarens batterihus (X) med hjiilp
ente:                                  av en S-oring och sijtt  i ett batteri
1. Desenropque con una moneda la      m.ed den positiva (f ) Sndan up-   Tapa (X) del orificio donde va la       pat. (Fig. 4) Batteriet rdcker  i  un-    pila del fotometro y coloque una       gefdr ett ar. Anvdnd batterier av
     pila con el polo * hacia arriba. (Fig.      typ Eveready EPX 625, Malloy   q.  La pila dura16 aproximada-     625R eller motsvarande.      RM
   mente un afro. Para recambio    2,  Kontrollera att riitt ASA-tal stAr pi
   emplee Eveready EPX 625, Malory                 fi  I mkiinslighetsinstiilln ingen. (G)
  RM 625R o equivalentes.                                                  3.   Stiill strombrytaren for exponerings-2. Fijese si el numero apropiado ASA      mdtaren (N) pa "ON" genom att
    est6 seleccionado en el Control de      fora den uppat. Strombrytaren  till
    Sensibilidad de la Pelicula (G).          exponeringsmiitaren dr den vikti-
3. Ponga en "ON" el Interruptor del      gaste knappen  i hela llusmiitnings-    Fotometro (N) empuj6ndolo hacia      systemet. Niir filmmatningsarmen
    arriba; asi queda conectado. (Fie.       (A) fors framat sdtts en annan mi-
    5). En el sistema que mide la in-      kro-strombrytare automatiskt pa.    tensidad de la luz este Interruptor    Om avtryckaren trycks ned (C) sa
    del Fotometro es el principal. Cuan-      stdngs denna mikro strombrytare
   do Vd. actua sobre la Palanca       automatiskt av.  Ndr huvudstrom-
    para Avance de la Pelicula (A) otro      brytaren lSmnas pa "ON" och av-
   segundo microinterruptor queda      tryckaren inte dr nedtryckt konsu-   conectado autom6tica mente. Si     meras batteriet trll exponeringsmd-
    ahora Vd. aprieta el Pulsador Para      taren. Var ddrfor alltid noga med
    Disparo (C) este segundo microin-       att strombrytaren star pA "OFF"
    terruptor queda desconectado auto-    om kameran inte skall anvdndas    m6ticamente. Pero cuado el ln-     under en ldngre tid  eller ta for
    terruptor PrinciPal (N) queda en     vana att alltid biira omkring kame-     la posici6n "ON " y Vd. no hace      ran med utlost slutare. Denna  lilla                                    no      6tgiird gor att  batteriet rdcker.   funcionar el obturador, esto es,    aprieta el Pulsador para Disparo      desto ldngre. Den andra mikro-    (C) entonces se est6 gastando la      strombrytaren kan Ni se  iett
     pila del fotometro. Asegurese, pues.       fonster ndr Ni drar fram filmen. Ndr
    de que el Interruptor Principal 1N)      filmen 6r framdragen och kameran    se encuentre en la posicion "OFF"        alltsa star pa "ON" syns en gron    mientras no utilice la m6quina so-      markering i fonstret. Ndr avtryck-
    bre todo si son intervalos largos      aren har tryckts ned och kameran    de tiempo, o mejor todavia, adopte        stir pb "OFF" 6r markeringen rod
     la costumbre de llevar siempre la
   m6quina con el obturador no
     cargado.
    Con esta pequefia precauci6n  la
    duracion de la pila se Prolongara.
     El segundo microinterruptor puede

                     Es-4                              s-4
View original page 19Page 21 · Read text
Shutter" and "setting the Lens"
     sections.
      lf there is not enough light to be
    able to focus the camera after the
     f stop ring has been set, it will be
    helpful to turn the main exposure
    control switch (N) to OFF Position    for focusing. The lens will then
   open to its brightest viewing posi-
    tion, but during the actual instant
   of exposure the lens will close
    automatically to whichever number
   you have set on the f stop ring.
   The main exposure control switch
   should then be turned to the ON
    position again before setting the
   camera for the next photograph.
6.  To make exposure adjustment with
    the built-in automatic systems use
     either eye-level ortop-viewer viewing.
    While looking at the'subiect through
    the viewfinder,rotate  either the shut-
    terspeed dial(H) or the f stoP ring
    (J) until the exposure meter needle
    at the right side of the viewflnder
   comes to a horizontal Position be-
   tween the guide marks. When the
    needle is between the guide marks,
    the correct exposure is set.  lf the   exposure meter needle is above
   the horizontal position,' the subject
    will be overexposed. To correct
   the exposure, change the shutter    speed to a faster sPeed or use. a
    smaller lens opening so that the   correct combination of  shutter   speed and f stop is made. How'
    eVer, if the exPosure meter needle
     is under the horizontal position in-
    dicating underexPosure, You must
    use a ilower shutter sPeed or big-    ger lens opening (f stoP). (Fig 7)
7.  When the exposure indicator needle
     fails to resPond to adjustment:    (a) check to be certain that the
        meter switch is ON'
     (b) make certain the fllm advan-
       ce lever has been advanced.
         (green signal showing  in window  t
      (c)   lf needle remalns In over'ex-
        posure position, select a higher
        shutter speed and.'or a smal'
          ler f stoP setting'     (d)   if needle is in under'exPosure
          oosition, select a slower shut'
         ier speed andior a larger f stoP
         opening.
      (e)  the procedure for setting the
        correct exposure is the same
         for both the "sPot" and "ave'
        raging" systems.
View original page 21Page 22 · Read text
www.butkus.us

    Durch die Betiitigung des Auslosers,      apergoit un signe vert dans cette
    wird der Kontakt am Mikroschaltei       fenOtre. I Quand I'obturateur reste
   wieder unterbrochen, das Signal      plus arme, c'est-i-dire d6branch6,     ist rot.                                   cette fendtre devient rouge.
4.  Die Verschlusszeit oder die Blende  4.  R69ler la vitesse de I'obturateur ou    je nach den Lichtverh6ltnissen ein-      I'ouverteurede I'objectif conform6-
    stellen. (,,Blendeneinstellung,, und     ment d vos besoins exacts pour    ,,Einstellung" der  Verschlusszeit      prendre la photographie.(lire:  le <16-
    aufmerksam lesen)                     glage du diaphragme et le r6glage
    Stellen Sie den Sucher-Umstell-     de I'obturateur avec soin).
    schalter (F) auf ,,1" (Horizontalsu-   5.  Reglez le bouton de selection de vi-
    cherposition) und wdhrend Sie das     s6e ir la hauteur de I'oeil/a la hau-
    Motiv durch den Horizontal Sucher      teur de la poitrine (F) sur la posi-     iS) qBild 6) betrachten, drehen Sie      tion EL (hauteur de l'Oeil) (Fig. 6)    die Einstellscheibe frir die  Ver-      et pendant que vous regardez vo.
     schl usszeit (H)oder den Blendenei n-      tre sujet dans I'oculaire a hauteur     stellring (J) bis der Zeiger des Be-    de I'oeil (S) faites tourner soit le    lichtungsmessers, an der rechten     cadran de vitesse de l'obturateur    Seite im Sucher, in waagrechte     (H), soit la bague de diaphragme    Position kommt. Dies bedeutet    F (J) jusqu'd ce que I'aiguille du     richtige Belichtung. Liegt der Zei-     posemdtre du cote droit du viseur    ger hoher als in waagrechter Stel-     vienne dans une position tout i    lung, so handelt es sich um eine       fait horizontale...    Ueberbelichtung. Die Verschluss-
    zeit muss verktirzt oder die Blende      Maintenant votre sujet est en posi-
    auf einen Kleineren Wert eingestellt       tion correcte. Si I'aiguille du pose.
   werden. Falls der Zeiger dagegen      mdtre est au-dessus de la position
     tiefer als in waagrechter Stellung       horizontale, I'exposition est exces-     liegt und somit eine Unterbelich-     sive. Changez la vitesse de I'ob-                                                                                  plus   tung anzeigt, mrissen Sie die Ver-      turateur vers une vitesse    schlusszeit verliingern oder  die      grande, ou bien utilisez une ouver-   Blendenoffnung grosser wdhlen.       ture plus petite de I'objectif de fa-
    (Bird 7)                           qon a r6aliser la combinaison d'ex-
                                                                              con-6.  M ochte n Sie jedoch den Lichtf       position convenable. Si par                                                tre I'aiguille du posemdtre se trouve      s chachtsucher  (Q) ben r.ltzen, so stel-   len Sie den Sucher-Umstellschal-     en dessous de I'horizontale, ce qui
    ter (F) auf ,,2" iLichtschacht-Posi-       indique une exposition insufijsante,                                                                                  vitesse    tion) und betrachten den Bildaus-      vous devez r6gler sur une    schnitt von oben. (Bild B)  Wir       d'obturateur plus faible ou sur une    empfehlen lhnen, die jeder Kamera       plus grande ouverture de I'objectif   beiliegende Gummiaugenmuschel         (Fie. 7).
   zu verwenden, da diese clas Sucher-      Si vous voulez vous servir du vi-
    bild, durch den verhinderten, sto-     seur d viseur d'angle, r6,glez    renden Seitenlichteinfall. deutlicher        le bouton de s6lection de visee a
    erscheinen ldsst.                     hauteur de I'oeil/viseur d'angle
                                                                                                                        << 2 >> ( vi-                                   (F) sur la  position
                                     seur d'angle )  et  regardez vo-                                              tre sujet par le viseur 2r viseur                                       d'angle (a) sur le dessus de                                               I'appareil (Fig.B).  ll est recom-                               mend6 d'utiliser le capuchon de                                       caoutchouc qui est livre avec le
                                             viseur A viseur d'angle

                D-5                             F-5
View original page 22Page 23 · Read text
verse por una nririlla al mover la    4.   Stiill in antingen slutartiderna  eller
         Palanca.                                 blSndarringen for fotograferingsdn-
       Cuando la Palanca esta cargada,       damalet. (Lds noga avsnitten om
       es decir en situacion de disparo        "bldndarinst2illning" och "slutarin-
       una seial verde aparece en la mi-         stiillning").
           rilla. Al apretar el Pulsador, esto    5.  Stell in knappen for  ogonhojds/
       es con el obturador descargado la        ljusschacktsokare (F) pa ogonhojd
         sehal se vuelve roja.                              ( I :eye-level).  Neir Ni studerar
                                                                                                          (S)      4.  Escoia la velocidad del obturador       motlvet  i genomsiktssokaren      o la abertura de la lente segun las       tFie.6) vrid antingen pa instdll-
        conveniencias fotogr6ficas del mo-        ningsratten for slutartider (H) eller                                                                                     pa       mento  r Lea con atencion "Abertura      pa bldndarringen (J) tills nalen
       del Diafragma" y "Velocidad del       exponeringsmdtaren   i hogra sidan        Obturador"   t.                     av sokaren star  i absolut vagrdttn                                                            Itige......da 5r det dags att kndppa.       5.  Coloque la Manija tF) en " 1 "  si    Om nalen star over horisontalplanet        piensa tomar fotos con el aparato                                                                                    An-                                                Er                                                       overexponerad.                                                              bild                                                 dr      a la altura de los ojos o en " 2 "     da                                                   hogre                                                                          slutartid                                                                                           eller anvdnd                                            dra                                                                                        till                                         la cintura.            va              a                 tomar desde          si las                                            mindre bldndare sa att N i  f ar rzitt           (Fig.                 y                  mientras                             est5 observando               6),
         el objeto a traves del Ocular (S)       exponeringskombination. Om mdta-        gire el Control de Velocidad del      rens nal ddremot star nedanfor                                                                                           un-        Obturador (G) o el Aro del Diafra-        horisontalldget ror det sig om     gma  t J I hasta que la agu ja del       derexponering och Ni maste sZinka        fotometro en el lado derecho del       slutarhastigheten  eller  anvdnda                                                                                                      7)       ocular se srtue completamente       storre bliindarcippning.  (Fig.F       horizontal. En este preciso mo-    6. Om Ni vill anvdnda ljusschaktso-
       mento el objeto se encuentra en      karen st2ill da in knappen for ogon-
          la correcta exposicion. Si la aguja       hojdsiljusschacktsokare  lF) pa  2F       aparece por encima de la horizon-        (waist level) och betrakta motivet
           tal, entonces hay excesiva exposi-     genom visirskivan pa  ka merans
        cion. Cambie la velocidad del ob       ovansida (Q). (Fig. 8)  Nr rekom-
         turador a una velocidad mayor o      menderas anvdnda den ogonmussla
          esco ja u na abertura menor en el      av gummi som medfoljer varje ka-
         objetivo de forma que la combina-      mera. speciellt da Ni anviinder Er
         cion entre ambos nos proporcionen     av ljusschaktsokaren. Ni far da
          la exposicion conveniente. Si por     en klarare och bdttre bild av moti-
         el contrario, la aguja se encuentra      vet  i sokaren.
          ba jo la horizontal la exposicion es
          insuficrente, entonces se debe dis-
        minuir la velocidad del obturador
      o aumentar la abertura del obje-
          tivo. tFig.  7't.
       6.  Si Vd. quiere utilizar el aparato
        desde la altura del pecho o  cin-
         tura, mueva la Manija tF) a " 2 "
       y mire a la persona u objeto a
          travtis del Ocu lar (Q I situado en
          el lado superior del aparato. (Fig.
         8). Se recomienda utilizar en este
        caso la caperuza de goma que viene
       con cada aparato a fin de lograr
       una vision rnas clara.


                            Es-5                              s-5
View original page 23Page 25 · Read text
$ET T ING T${E F STOF
Rotate F Stop Ring (J) until the f stop
number you want is opposite the red
mark. (Fig. 9). Click stops are provid-
ed to prevent accidental movement
from the setting made.
The lens opening (f stop) determines
the amount of light entering the lens
and striking the film. The smaller the
f stop number the wider is the lens
opening, and the greater is the amount
of light entering the lens.
The higher the f stop number (f/11 vs.
f/8), the less the amount of light en-
tering the lens. As the lens opening
is moved, for example, f/11 to fi8 (a
smaller number), the amount of light
entering the lens is doubled.
These instructions are the same regard'
less of which Ricoh lens is used, except
the  f 12.8 55mm lens'
The f/2.8 55mm lens with TLS 401
camera requires special setting.
As per Fig. 10, you will find f-stop num-
bers on the f-stop ring on two sides,
"AUTO" and "MANUAL".
The "AUTO"  is for automatic diaphragm
control, while the "MAN UAL" is for
pre-setting diaphragm control. The lat-
ter device is necessary when you take
special effect photograph using a Bel-
lowscope or an Extension Ring, where
automatic diaphragm control is not
available.
Three f-stop numbers are substituted
by dots, which are those underlined:
    2.8 4.O 5.6 8.O 11 L6 22


                       r,{r
View original page 25Page 26 · Read text
BLENDENEINSTELLUNG        REGLAGEwww.butkus.usDU DIAPHRAGME

Den Blendeneintellring  (J) drehen, bis   Faites tourner la bague de diaphragme
der gewtinschte Blendenwert der roten  F tJ) jusqu') ce que le diaphragme de-
Markierung gegenuberliegt. Rastblen-   sire se trouve devant le repdre rouge.
den dienen dazu, versehentliche Ver-  Pes encliquetages sont prevus pourstellung der Blendeneinstellungen zu   6viter un dereglage 6ventuel.
vermeiden.                              L'ouverture de diaphragme determine
Die Blendenoffnung regelt die Menge   la quantite de lumiere qui pendtre
des in das Objektiv einfailenden LiCh-  dans I'objectif et frappant le film ainsites. Die Kamera hat B Einstellungen  expose. Votre appareil a B reglages qui
von fl:1,4 bis f1:16 (oder von fL:I,7  vont de f:I.4 b f:16 (ou de  f :I,7  it  f:bis f1:16; oder fI:2.8 bis f1:16) Je  16). Plus le nombre f est petit  \f .I,4,
kleiner die f:Zahl (t:14. fI:L,7, fI:2,8   f:L,7, etc.) plus grande est I'ouverture
usw.), desto grosser die Blendenoff-  du diaphragme et plus est importantenung. und die durchlaufende Licht-   la quantite de lumidre qui p6ndtre dans
menge. (Bild 9)                              I'objectif (Fig. 9,.
Je grosser die  f :Zahl (f 1:16,  f 1:1 1 usw.).  Plus le nombre f est grand (f:16, f:11
desto kleiner die durchlaufende Licht-   etc.) plus est petite la quantite de lu-
menge. Wird die Blende von  f 1:16 auf  midre pen6trant dans I'oblectif . Quandf 1:11 umgeschaltet, wird die Licht-  on ouvre le diaphragme de f:16 a f:11
menge verdoppelt; wird die Blende   la quantite de lumidre qui penetre estvon fL:2,O auf fI:2,8 umgeschaltet,  doubl6e; quand on deplace I'ouverture
wird die durchlaufende Lichtmenge hal-  de l'objectif de  f :2,A i;  f :2,8,la quantite
biert.                         de lumidre penetrant dans I'objectif
Die TLS 401 ist nun auch mit einenr  est diminu6e de moiti6.
f:2,81$5mm Standard.Objektiv     I ieferbar.  L'objectif  f .2,8 de 55mm est A pr6sent
Das Objektiv ausgenommen, stimmen   livrable avec le TLS 401.
die technischen Details und die Arberrs.  Comme le montre la figure 10, vouslweise mit den f:1,7 und f:I,4 Stan-  trouverez les chiftres des diaphragmes
dard-Modellen  riberein.               de deux c0t6s, en <AUTO>> et en <<MA-
Wie Sie auf der Abbildung 1O sehen,  N UAL).
sind beidseitig am Blendenring die ein-  La position <AUTO> ferme automatique-
zelnen Blenden angegeben; 1uf  der  ment le diaphragme a l'ouverture d6-einen Seite ,,Auto" auf der anderen  sir6e lors du declenchement, alors que
 ,,Manual".                                la position (MANUAL> est la pre-selec.
Die,,Auto"-Position ist fur die Ein-  tion manuelle de diaplrragme.stellung der automatischen Spring-  Cctte derniere position est necessaireblende. Die,,Manual".position   ist  si vous utilisez un soufflet de reproduc-
 frir die Blendenvorwahl oder frir die  tion ou une bague allonge, dans les- Bestrmmung der Tiefenschdrfe. Die quels cas vous ne pouvez pas vous
Vorwahlposition wird ebenfalls bei der  servir du diaphragme automatique.
 Arbeit mit Balgengerdten oder nicht_  Trois n u meros d'orrverture sont rem- automatischen Zweischenringen ge-  places par des points, ce sorrt ceux
 braucht.                               qui sont soulignes:
 Drei Blendeneinstellungen sind durch                                     2,8 4,O 5,6 8,O 11 16 22 Punkte markiert, welche nachstehend
 unterstrichen sind:
   2,8 4,O 5,6 g,O 11 16 22


               D.6                             F-6
View original page 26Page 27 · Read text
COMO SE GRADUA LA ABER.    BLANDARINSTALLNING
TURA DEL OBJETIVO
 Girese el Aro del Diafragma (J) hasta   Vrid bldndarringen (J)  tills   d'nskat
 que el n[mero que marca la abertura   bldndartal star mittemot den roda mar-
 deseada se halle frente a la sefral roja.   keringen. Tack vare en spdrranordning
 Un ligero chasquido que se oye al en-   dndras inte den gjorda instSllningen
 cajar cada abertura en el sitio evita  av eventuella skakningar eller rubbnin- cualquier falso movinriento posterior.    gar. BlSndaren reglerar den ljusmiingd
De la abertura del diafragma depende  som kommer irr genom objektivet och
 fa cantidad de luz que penetra por la   trdftar filmen......Er kamera har 8 olika
 lente objetivo y que llega a la pelicula.   bliindarinstdllningar fran f:1,4 till f:1,6
Su aparato tiene 8 aberturas que van    (eller frin f:1,8 till f:16). Ju mindredesde f:1.4 hasta f:16 (o desde f:I.7   bldndartal  (f  : 1,4  f :1,8 etc.) desto storre
hasta f:16). Cuanto mayor sea el n0-   bliindaroppning och desto storre ljus-
mero, o sea, mayor profundidad  focal    intEnsitet som tr5fiar filmen. (Fie. 9)
(f:16, f:11, etc.) menor es la cantidad   Ju storre bldndare  (f :16,  f :11 etc.) desto
de luz que penetra por el objetivo.  Si   mindre llusmdngd som kommer in    i
giramos la apertura del objetivo diga-   kameran. Niir bliindaroppningen  iind-mos, de f:16 a f:l1 la cantidad de luz   ras  f ran  f :16 till f:11 fordubblis  ljus-que penetra en la c6mara aumenta al   intensiteten, nar blSndarinstZillningendoble; si seguimos moviendo la aber-   dndras frAn f:2,O till 2,8 minskas ljus-tura desde  f :2.O a  f :2.8 la cantidad de   miingden med h6lften.luz que entra se reduce a la mitad.                                         Objektiv med bldndarinst6llningen  f:2,8La lente objetivo f:2.8 de 55mm. for-                         55mm finns nu att  f a till TLS 401.ma parte ahora de la c6mara TLS 4O1.
Fij6ndonos en la figura 10 vemos que  Utom vad betrdffar objektivet, dr an-
las aberturas para el diafragma est6n  nas forklaringarna och tillvdgagangs-
sefraladas en ambos lados del Aro del    sZittet detsamma.
Diafragma: "AUTO" y "MANUAL".  Som Ni ser i fig. 10, finner Ni bliin.La posici6n "AUTO" sirve para el ci-   dartalen pa bliindarringen pA tvi sidor
erre autom6tico del diafragma, mient-  "AUTO" och "MANUAL".ras que la posici6n "MANUAL"  sirve                              "AUTO" 5r for automatisk bliindarkont-                             preestable-para establecer                    cierre            un                                                    roll, medan "MANUAL" dr for bliindar-                      precisa                              accionarlo                 se      Este riltimocido.                                       forvalskontroll. Det senare behovscuando se hacen fotografias con efec-                                    ndr man skall ta bilder med specielltos especiales tales como lo que ocurre                                           effekt och di man anvdnder ett Bellow-al emplear un fuelle de reproducciones                                     scope eller en forlSngningsring, ddr deto un aro extensible los cuales no lle-                                           el finns automatisk bliindarkontroll.van controles autom6ticos de apertura
diafragm6tica.                        Det finns tre bldndartal, som  har er-
                                                                        (de  u nder-Las aberturas correspondientes a tres   satts med runda prickar;n0meros han sido sustituidas por pun-   strukna;tos, los cuales con los subrayados:         2,9 4,O 5,6 g,O 11  16 22
   2.8 4.O 5.6 8.O 11 16 22
                                      l'              rtt$., ',  '              4;i,
View original page 27Related documents and language editions
From the M. Butkus archive. Original publisher and archive notices are retained.
Check the model and edition against your equipment.
PDF verified 2026-10-10.