Film cameras
Ricoh XR-20sp User manual
User manual for Ricoh XR-20sp. 29 pages in English. Read the original PDF, download or print a copy without registration.
29 pagesEnglish1.7 MB PDF
Loading your manual…Open PDF directly
Document details
- Brand
- Ricoh
- Model / document
- Ricoh XR-20sp
- Document type
- User manual
- Language
- English
- Pages
- 29
- File size
- 1.7 MB
- Category
- Film cameras
- Document date
- Not specified in catalog
Search available document text
Find a term, then jump to its page in the original PDF. Image-only pages may not be searchable; check the PDF for exact wording and diagrams.
Page 2 · Read text
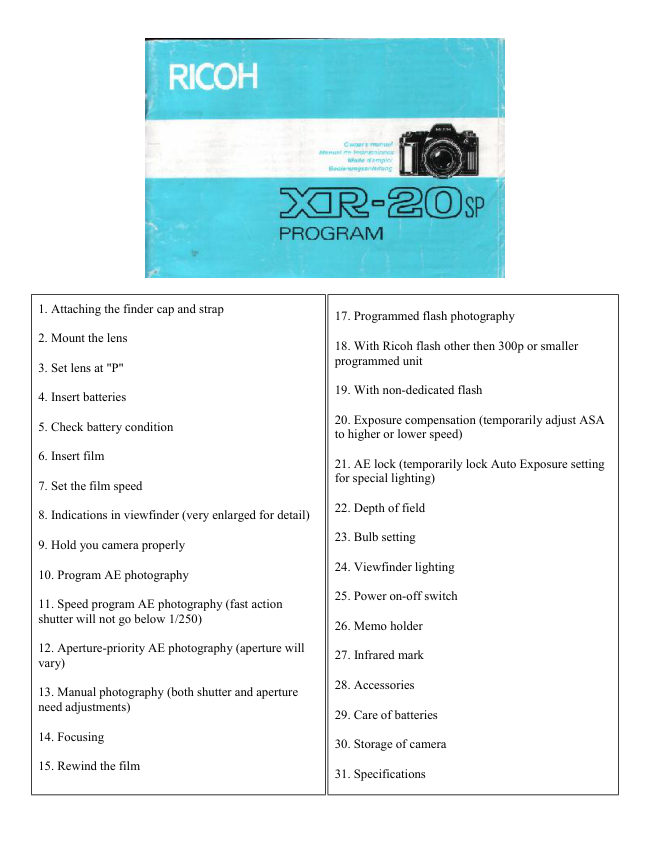
1. Attaching the finder cap and strap
                                                        17. Programmed flash photography

2. Mount the lens
                                                        18. With Ricoh flash other then 300p or smaller
                                              programmed unit
3. Set lens at "P"

                                                        19. With non-dedicated flash
4. Insert batteries

                                                        20. Exposure compensation (temporarily adjust ASA
5. Check battery condition
                                                            to higher or lower speed)

6. Insert film
                                                        21. AE lock (temporarily lock Auto Exposure setting
                                                            for special lighting)
7. Set the film speed

                                                        22. Depth of field
8. Indications in viewfinder (very enlarged for detail)

                                                        23. Bulb setting
9. Hold you camera properly

                                                        24. Viewfinder lighting
10. Program AE photography

                                                        25. Power on-off switch
11. Speed program AE photography (fast action
shutter will not go below 1/250)
                                                        26. Memo holder

12. Aperture-priority AE photography (aperture will
                                                        27. Infrared mark
vary)

                                                        28. Accessories
13. Manual photography (both shutter and aperture
need adjustments)
                                                        29. Care of batteries

14. Focusing
                                                        30. Storage of camera

15. Rewind the film
                                                        31. Specifications
View original page 2Page 5 · Read text
www.butkus.us

MOUNT THE LENS


                                   1. Pull the back lens cap to remove it from the lens.
                                  (Fig. 3)

                                   2. Pull off the body cap (Fig. 4)

                                   3. Align the red dot on the camera with the red dot on
                                the lens and mount the lens on the camera. (Fig. 5)


                                 4. Turn the lens in the arrow direction until it clicks into
                                place. (Fig. 8)

                         * To remove the lens, turn the lens in the arrow direction
                            with the Lens Release Button depressed. (Fig. 7)

                         * The conventional K mount lens can be used as aperture-
                                 priority and manual but cannot be used for programmed
                   AE photography.

                         * Proper performance of camera may not always be
                            guaranteed with lenses other than RICOH. For best
                                   results, use a RICOH original equipment lens.
View original page 5Page 6 · Read text
SET LENS AT "P" POSITION


                                        1. Turn the F-Stop Ring while P Lock Button is
                                     pressed. (Fig. 8)

                                        2. Set it to the locking "P" position as shown for
                             programmed automatic exposure photography.
                                       (Fig. 9)

                              * To unlock "P", turn the F-Stop ring while P Lock
                                 Button is depressed.


INSERT BATTERIES

                               (Webmaster - Note the bumps on the
                                         batteries. They are the negative contacts. The
                               image shows the CR-1/3N type.  If you purchase
                                     the 4 smaller batteries each side will have two
                                         batteries. The bottom left will have both batteries
                                  with their bumps up, on the right side the two
                                        batteries will have their bumps facing down. Note
                                   though, where the tripod screw is on the image. Use
                                  a pen eraser and clean the door contacts and bottom
                                     battery contacts of any dirt, carefully with a turning
                               motion if needed.)

                                        1. Slide the Battery Compartment Cover in the
                                arrow direction with your fingernail to open. (Fig.
                                  10)

                                        2. Place batteries in the battery compartment
                                  according to (+) and (-) shown inside the battery
                               compartment and close the compartment cover.
                                       (Fig. 11)
View original page 6Page 7 · Read text
www.butkus.us


Batteries for use

Four alkaline 1.5V batteries (LR44): Lasting about six months under normal use.

Four silver oxide 1.55V batteries (SR44): Lasting about one year under normal use.

Two lithium 3V batteries (CR-1/3N): Lasting about one year under normal use.

* Also refer to "CARE OF BATTERIES."

CHECK CONDITION OF BATTERIES


                                        1. Turn the Power ON-OFF Switch ON. (Fig. 12)

                                        2. Batteries are in good condition, when a liquid
                                       crystal display such as a Shutter Speed Indicator
                                  appears in the tinder. (Fig. 13)


                               * The BAT (battery low warning) blinks in the
                                       finder to warn against their failure when capacity
                                     of batteries drops below proper operating level.
                               Change batteries as soon as possible. (Fig. 14)
View original page 7Page 8 · Read text
INSERT THE FILM


                             (Do not expose the film to direct sunlight when
                                       inserting the film.)

                                        1. Pull up the Film Rewind Knob until the Back
                               Cover snaps open. (Fig. 15)

                                        2. Insert the film in the Film Chamber and push the
                                Film Rewind Knob down to the original position.
                          You may have to rotate the knob slightly to push it
                           down completely. (Fig. 16)

                                        3. Insert the film leader in the slit on the Film
                                Take-up Spool. (Fig. 17)


                                        4. Advance the Film Advance Lever to wind the
                                    film round the Film Take-up Spool. Check that the
                                    sprocket holes on the film are fully engaged on the
                                  Sprocket Teeth. (Fig. 18)
View original page 8Page 9 · Read text
www.butkus.us


                                         5. Close the Back Cover, unfold the Film Rewind
                                Crank and turn it gently in the arrow direction
                                          until any slack is taken up. (Fig. 19)


                                         6. Advance the film and press the Shutter Release
                                  Button a few times until "1" appears in the
                                 Exposure Counter. The film is properly advanced
                                                   if the Film Rewind Knob rotates when the Film
                               Advance Lever is stroked to advance the film.
                                         (Fig. 20)


* When inserting the film in a cold place, the film leader may be hard and become brittle. Warm the film leader.
with your hand in such conditions.

* When inserting the film, it is more convenient to set the Shutter Speed Dial to a high speed rather than "P"
(Program) while advancing the film to the number 1 position, to avoid a slow shutter speed (the slowest is 16
seconds) When you are ready for shooting, be sure to set the Shutter Speed Dial back to "P" (Program).
View original page 9Page 11 · Read text
www.butkus.us


INDICATIONS IN
VIEWFINDER

(1) Mat Surface

(2) Microprism Band

(3) Split-image Spot

(4) Exposure Adjustment

(5) AE Lock

(6) Manual/Speed Program
Mode

(7) Program Mode

(8) Overexposure

(9) Shutter Speed Indicator

(10) Flash Ready Indicator

(11) Shutter Speeds

(12) Slow Shutter Speed
Range

(13) Long Time Exposure

(14) Underexposure

(15) Bulb

(16) Battery Low Warning
Signal

(17) Programmed F-Stop
Number
View original page 11
Page 12 · Read text
HOW TO HOLD YOUR CAMERA


                                 (Good position for photography)

                                         (1 ) Lightly put your right-hand forefinger on
                                          the Shutter Release Button and hold the
                                   camera body with other fingers.

                                            (2) Make your right arm comfortable.

                                            (3) Cradle your camera in your left hand and
                                      hold it so that the Focusing Ring can be easily
                                        turned with fingers.

                                            (4) Brace your left elbow to your body ||| and
                                        put the camera to your face. Look through the
                                       viewfinder to compose your picture. (Fig. 23)


* It is important to practice correct shooting position to avoid blurred or tilted pictures.


PROGRAM AE PHOTOGRAPHY


                                     In program AE photography, the camera
                                    automatically selects the f-stop number and the
                                       shutter speed according to subject illumination.
                                Programs are best for general photos of figures or
                                     scenery. Special effects shooting etc., can be done
                                   using the XR-20SP's multitude of override options.
                                    Please keep in mind however that for most
                                   shooting you can just focus and snap.

                                        1. Turn the Power ON-OFF Switch ON. (Fig. 24)

                                        2. Set the Shutter Speed Dial to "P". (Fig. 25)
View original page 12Page 13 · Read text
www.butkus.us


                                        3. Set the lens to "P". (Fig. 26)

                                        4. Look through the viewfinder and turn the
                                 Focusing Ring to focus. You can focus either by
                                   using the Split Image or Microprism.


SPEED PROGRAM (SP) AE PHOTOGRAPHY


                             The speed program AE photography is a
                                 combination of the program AE photography and
                                       shutter speed priority AE photography. Use this
                           mode to avoid shutter speeds slower than 1/250
                                   second. (Fig. 27)


                                                                       1. Turn the F-Stop
                                                      Ring to set to "P".

                                                                       2. Turn the Shutter
                                                      Speed Dial to set to
                                                             "SP".


When the subject is bright enough, any shutter speed between 1/250 and 1/2000 sec. will be selected according
to the brightness of the subject, and you can see the selected shutter speed as well as f-stop number in the
viewfinder. If the brightness of the subject is not enough even at full-open aperture, a slower shutter speed is
automatically selected to obtain correct exposure. In this case, the Shutter Speed Indicator blinks to warn that a
slower shutter speed than 1/250 is selected.
View original page 13Page 15 · Read text
www.butkus.us


                                                       2. The pre-set shutter speed is shown
                                         by the Indicator on the LCD meter
                                                     display. A second Indicator blinks to
                                                     indicate a "suggested" speed at a
                                               given f-stop. (Fig. 29)


                                                       3. When the F-Stop Ring is turned
                                           and the Shutter Speed Indicator and
                                                   the blinking Indicator showing
                                                    correct exposure overlap each other.
                                               This indicates that correct exposure
                                                              is set.


(Webmaster - In ENGLISH this means: the solid bar is what the shutter is currently set at, you can change
the camera's shutter speed dial and see the new setting in the viewfinder . You must change the shutter or
aperture to get the solid bar [what the shutter is set on the camera] to overlap the blinking bar [what the light
meter says is the correct exposure]. When the blinking bar and solid bar overlap, that is the correct exposure for
whatever the lens is pointing at that moment. You can then change the shutter one speed and then adjust the
aperture for more/less light so the two bars still overlap. EXAMPLE: if you get the two bars to overlap and the
shutter speed is set at 1/125 at F16, you can change the shutter to 1/250 at F11, 1/500 at F8 or 1/60 at
F22. (Note: you couldn't shoot slower than 1/60 with that lighting situation as this time as most lenses don't go
smaller than F22.  If you do have yet a smaller aperture, it would be 1/30 at F32)

FOCUSING


                                     Split Image Focusing
                         When the split images in the Split-lmage Spot form
                                  a single, clear image, the subject is in focus.

                             Microprism Focusing
                         When the subject loses its "shimmering" effect and
                              becomes very sharp, the subject is in focus.
View original page 15Page 16 · Read text
REWIND THE FILM


                                                         (Do not
                                                                expose the
                                                                       film to direct
                                                                          sunlight when
                                                                   unloading the
                                                                               film.)

1. Push the Film Rewind Release Button. The button stays locked in position (Fig. 31)

2. Unfold the Film Rewind Crank and turn it in the arrow direction. When the film has been completely
rewound, the tension of the Film Rewind Crank is suddenly released and turns freely. (Fig. 32)

3. Open the Back Cover and unload the film. (Fig. 33)

* Never open the Back Cover until film rewinding is completed. Immediately close the Back Cover to save
some of your shots if the Back Cover is opened by mistake during or before rewinding.

* If you wind the film beyond the set number of frames, the Film Advance Lever may get stuck mid-stroke. The
Film Rewind Release Button will not stay depressed in. If this occurs, rewind the film while holding the Film
Rewind Release Button pressed down.


SELF-TIMER PHOTOGRAPHY


                                         The Self-Timer is used to include
                                                    yourself in party pictures or
                                          commemorative shots.


1. Advance the film.

2. Press the Self-Timer Button. The Self Timer Indicator Lamp blinks. In 10 seconds, the shutter is
automatically released. (Fig. 34)

* To cancel the Self-Timer after it is set, press the Self-Timer Button again.

* Use the Viewfinder Cap attached to the strap to cover the Viewfinder Eyepiece when using the Self-Timer in
modes other than "Manual" to avoid incorrect exposure due to incident-light from the Viewfinder Eyepiece.
(Fig. 35)

* B (Bulb) setting is not available when the Self-Timer is used.
View original page 16Page 17 · Read text
www.butkus.us


FLASH PHOTOGRAPHY (PROGRAMMED FLASH PHOTOGRAPHY)


                                     If the RICOH SPEEDLITE 300P or 240 is used on the
                    RICOH XR-20SP camera, the shutter speed and the f-stop
                        number are automatically set with the camera is set to
                         program AE photography.

                                1. Slide the flash unit into the Hot Shoe and tighten it with
                              the lock screw. (Fig. 36)


                               2. Set the Shutter Speed Dial to "P" or "SP". (Fig. 37)

                               3. Set the F-Stop Ring to "P". (Fig. 38)
View original page 17Page 18 · Read text
4. Set the flash A/M selector to "A". (Fig. 39)

                                      5. Turn the flash power On-Off switch ON. (Fig. 40)


                                                           6. When fully charged, the Flash
                                           Ready Indicator (red LED) lights
                                                         in the finder. (Fig. 41)


Focus the subject and press the Shutter Release Button for shooting.

* Refer to Operating Instructions for the flash unit for more creative techniques and technical details.
View original page 18Page 19 · Read text
www.butkus.us

FLASH PHOTOGRAPHY WITH RICOH FLASH UNIT OTHER THAN 300P & 240

1. RICOH flash units (SPEEDLITE 400 and 180) can be used with XR-20SP with the Shutter Speed Dial set to
"P" or "SP" and with the F-Stop Ring set to the designated number. When the flash is fully charged, the Flash
Ready Indicator in the viewfinder will light up.

* Shutter speed is automatically set to 1/125 sec.

* You may set shutter speed and f-stop number manually but shutter speed must be slower than 1/125 sec.,
however, when you select shutter speed faster than 1/125 sec., the shutter speed is automatically set to 1/125
sec.

* Refer to Operating Instructions for flash units for further details.


FLASH PHOTOGRAPHY WITH "NON-DEDICATED" FLASH UNITS
(General use of flash)

1. Set the Shutter Speed Dial to 1/125 sec. when a generic flash unit is used.

Note: Such units cannot be used in P mode.

* Avoid use of flash units other than RICOH with special contact pins, incorrect exposure or other problems
may result.

* The Flash Ready Lamp does not light in the viewfinder if such a "non-dedicated" flash is used.

* Refer to operating instructions for these flash units for further details.

EXPOSURE COMPENSATION


                                        The XR-20SP center-weighted meter
                                            can be "fooled" under very extreme
                                                     lighting conditions.
View original page 19Page 22 · Read text
DEPTH OF FIELD (GENERAL GUIDE LINES)


                                  When you focus on a specific subject,
                                                 often subjects in the near foreground
                                          and in the distance are also in focus.
                                       The region of good focus has some
                                             measurable depth, or "depth of field"
                                                 as shown here.

                                                      1. Focus depth in the near foreground
                                                             is narrow and deeper with distance.

                                                      2. Greater depth of field is obtained
                                              with smaller lens opening and a wider
                                              range of good focus is provided.

                                                      3. A lens of shorter focal length
                                               (wider angle) produces a greater depth
                                                 of field. A greater depth is obtained
                                              with a wide angle lens (E.G. 28 mm)
                                          and a smaller depth is obtained with a
                                                 telephoto lens (E.G. 135 mm).


The depth of field can be checked in the following way.

1. A depth of field indicator is engraved on every lens. When a 50 mm standard lens is set to f-16 and focused at
a distance of 3 meters, the depth of field indicator is the scale of numbers on each side of mark, ranging from 16
to 16 (about 2m to em). Subjects in this distance range will be in good focus.
(Fig. 45)


B (BULB) SETTING


                                       The B (Bulb) setting is used for
                                               shooting night scenes or long time
                                                exposures.

                                                      1. Set the Shutter Speed Dial to "B".
                                                     (Fig. 46)

                                                      2. When the Shutter Release Button is
                                                  pressed, the shutter is kept open as
                                              long as the Button is pressed.
View original page 22Page 23 · Read text
www.butkus.us

* Use a tripod and cable release for Bulb photography to prevent unintentional movement of the camera.


VIEWFINDER LIGHTING


                                                 Auxiliary lighting can be used when
                                                   the finder area is dark and difficult to
                                                      see. Press the AE Lock Button to
                                                      activate the LCD Illuminator. This
                                                    also "memorize" the exposure data.

                                                 Press AE Lock Button once again to
                                              unlock AE, and to return to normal
                                                    operation. (Fig. 47)


POWER ON-OFF SWITCH

XR-20SP is designed to shut off the power supply automatically to save the battery energy, i.e. the electric
supply will be shut off automatically when the camera is not in use for 1 minute even the Power ON-OFF
Switch is ON. Press the Shutter Release Button lightly to turn ON the power. However, we suggest you should
turn the Power ON-OFF Switch to the OFF position when the camera is not used.

MEMO HOLDER


                                    Cut off the flap of the film package to be
                                       loaded and slide it into the Memo Holder on
                                           the Back Cover to remind you what type of
                                          film is loaded in the camera. (Fig. 48)
View original page 23Page 24 · Read text
INFRARED MARK


                                    Use the Infrared Focusing mark when
                                           using infrared film and R60 filter.

                                          This is necessary because infrared light
                                             rays have a longer wave length than
                                                visible light rays, visual focusing will not
                                       be accurate without some compensation.

                                                 1. Attach the R60 filter and focus on the
                                                subject. Read the distance from the lens
                                                   barrel. (Fig. 49)

                                                 2. Shift the distance setting to the infrared
                                          index mark. (Fig. 50) Set the exposure
                                       and release the shutter in accordance with
                                            operating instructions for the film.


* Always refer to infrared film operating instructions when the infrared film is used.
View original page 24Page 25 · Read text
www.butkus.us

XR WINDER 2


                        XR winder 2 is the automatic film winding
                                       device for XR-20SP.

                            When this is used on XR-20SP, you need not
                                           avert your eyes from the viewfinder to
                                    advance the film during fast action
                                      photography. This means fewer missed photo
                                          opportunities and better compositions.

                                      This is very convenient in taking sports
                                             pictures, 2 frames per second can be taken if
                                          the Shutter Release Button is kept pressed.
                              One frame shooting is possible when the
                                         Shutter Release Button is released quickly. 4
                       AA 1.5V batteries (manganese, alkaline, or
                                          nickel cadmium) are used for its power source.
                                            (Fig. 51)


XR DATA BACK

2 When the Back Cover of XR-20SP camera is replaced by the XR Data Back, "Year, month and date" "Hour,
minute, second" and "Stop watch" can be printed on your film.

The automatic dating mechanism is incorporated into the XR Data Back. Once the date is set, no adjustment is
necessary until 1999, because leap years and months with 31 or less days are automatically adjusted. When the
switch is turned OFF, it can be used as digital watch. (Fig. 52) (Mike - I don't have one so I can't tell you if it is
Y2K compliant)


DIOPTRIC LENSES

If a dioptric lens is fitted, you do not have to wear eye-glasses when taking pictures. Slip the lens in the groove
in the finder eyepiece.

Dioptric lenses are available in 7 types: -4, -3, -2, -1, +1, +2 and +3 (Diopters) (Fig. 53)

Note: Some forms of astigmatism etc. may make dioptric eyepiece correction impossible. Please check with
your vision specialist for a recommendation based on your prescription.
View original page 25Page 27 · Read text
www.butkus.us


                                                     1. Align with the red dot and attach it
                                                   into the body mount. (Fig. 56)

                                                     2. Use a ball-point pen, etc. to turn it
                                             clockwise to the limit (65°). It is then
                                             locked and ready for use.

                                                     3. Use a ball-point pen, etc. to press the
                                                spring inwards and turn the P mount
                                               adapter counterclockwise to the limit.
                               Now it can be removed.

                                        * Some thread mount lenses cannot be
                                        mounted on the XR-20SP
                                            camera. Purchase of lenses for XR-
                                      20SP is recommended for optimum
                                                        results.


CARE OF BATTERIES

1. After handling, do not leave sweat or grease on battery surface. This could result in poor contact. Wipe both
ends of the battery with a clean cloth.

2. Do not attempt to disassemble the batteries and do not throw them into fire or expose to high temperatures.

3. When batteries are unloaded from the camera, keep them away from children. If a child should swallow a
battery, immediately consult with a doctor. Battery chemicals are highly poisonous.

4. Unload batteries when the camera is not used for a long period of time.

CARE AND STORAGE OF YOUR CAMERA

* Do not touch the lens or mirror with your fingers to clean them. Blow dust away with a blower or wipe them
gently with soft cloth.

* Shock, humidity or salt may make the camera malfunction. When you use your camera at the beach or in a
place where chemicals are used, wipe it clean carefully.

* Do not use chemically-treated dusters to clean the camera.

* Do not expose your camera to temperature extremes.
View original page 27Page 28 · Read text
* Do not leave your camera in a car or at the beach or in high temperature conditions to prevent possible
trouble. When using a tripod, do not try to force a long screw into the socket. (The screw length should be less
than 5.7 mm)

* Do not store your camera near a television, radio or other magnetic substance.

* Remove batteries f ram your camera before storing it. Store it in a humidity and dust free place.

SPECIFICATIONS

Type: 35 mm SLR with focal plane shutter and automatic electronic exposure control.

Photographic Modes: Program automatic exposure mode, speed program automatic exposure mode, aperture-
priority automatic exposure mode and manual exposure mode.

Film Format and Frame Size: 35mm film, J135, 24 x36 mm

Lens Mount: RICOH system R-K mount

Shutter: Electronically controlled, vertically moving metal focal plane shutter.

 Automatic: 16 sec. to 1/2000 sec.
Manual: 4 sec. to 1/2000 sec.,
B (Bulb)

Self-Timer:

Operating time: 10 seconds View finder. During operation, red lamp blinks.

Viewfinder:

Field of view covers 93% horizontally and vertically.
Magnification: 0.88X (with 50 mm F1.4 standard lens)
Displays in the viewfinder:

Exposure adjustment, AE lock, manual, program mode, overexposure mark, shutter speed indicator, long time
exposure, underexposure mark, bulb, battery low warning signal, and programmed f-stop number. LED
indicator: Flash ready indicator.

Focusing: Diagonal split-image spot in microprism band

Exposure Meter: TTL full open metering for center-weighted average light reading.

Exposure Coupling Range: EV 0 to EV 18 (with ASA 100 film, 50 mm F1.4 standard lens)

Film Speed Range: ISO 12 to 3200

Accessory Shoe: Hot Shoe (with Flash Ready Signal Contact)

Exposure Adjustment: Exposure adjustment system (+2 to -2, in 1/3 steps), AE lock system,
View original page 28
Related documents and language editions
From the M. Butkus archive. Original publisher and archive notices are retained.
Check the model and edition against your equipment.
PDF verified 2026-10-10.