Film cameras
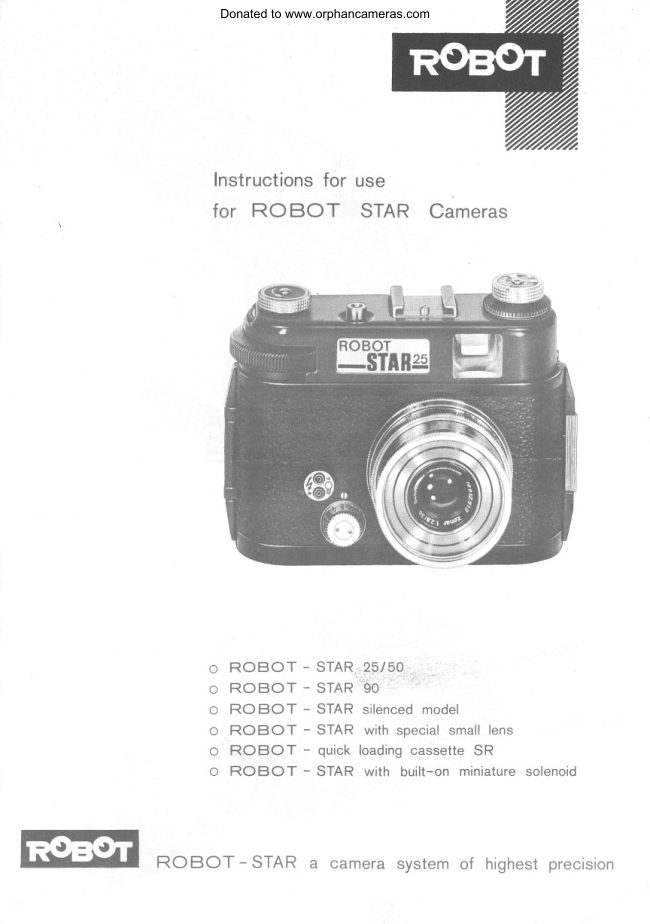
Robot Star / Robot IIA User manual
User manual for Robot Star / Robot IIA. 43 pages in English. Read the original PDF, download or print a copy without registration.
43 pagesEnglish4.5 MB PDF

Loading your manual…Open PDF directly
Document details
- Brand
- Robot
- Model / document
- Robot Star / Robot IIA
- Document type
- User manual
- Language
- English
- Pages
- 43
- File size
- 4.5 MB
- Category
- Film cameras
- Document date
- Not specified in catalog
Search available document text
Find a term, then jump to its page in the original PDF. Image-only pages may not be searchable; check the PDF for exact wording and diagrams.
Page 2 · Read text
RoBor      Qoountec.
   All new RoBor comeros purchosed through retoilers, who hove in
   turn been supplied by RoBoT Berning &  co.  occredited
   importer in eoch country, ore occomponied by o cord which beors
   the number of the comero ond the number of the lens. Buyers of
   noeor comeros should ot once send the cord to RoBoT Berning
  & co., Duesseldorf, to hove it chonged ogoinst the corresponding
   guorontee cord. Rsf  comeros ore guoronteed for one yeor but
   cloims con only be recognized if the guorontee cord, duly endorsed
  by RoBoT  ' Berning & co., is encrosed with the comproint.
   In cose of loss RoBoT . Berning & co. should be odvised, together
  with the retoiler from whom the comero wos bought.
                                                                            I


                                                                                                                                                                                                                                                                          t
View original page 2Page 4 · Read text
Venmo @mike-butkus-camera  Ph. 2083
PayPal Name  Lynn@butkus.org      www.PayPal.me/lynnbutkus
View original page 4
Page 5 · Read text
,4oo/ing tAe &^nto
   The noegr comero will occept ony stondord cortridge of 35 mm. yilm,
   color or block ond white or the RoBor  ll o the speciol RoBoT
   cossette. lt is olwoys odvisoble to lood the comero in the shode
   ond not in direct sunlight, to be sofe from fogging films.
  To open the noeor comero slide the comero bock lolch (14) down-
   word ond swing the bock open on its hinges.
   Insert the   f ilm mogozine in the empty recess under the rewind
   knob (12). Attention should be given thot the points of the guide
   pin ore situoted verticolly to the crosspiece of the spool of cort-
   ridge. The perforotions on the film leoder should run olong the
   bottom side of the comero. The end of the film leoder is to be   ottoched to the spool of the toke-up cossette os follows.    Turn   the inner shell (35), gripping it by the finger support, -in the   direction of the orrow ond then withdrow it from the outer shelt
                                           J
View original page 5Page 6 · Read text
www.butkus.us

     (32\. (The pressure of the springs which push the two shells to-
    geiher to close the cossette mouth (51-fig.6) ond moke it  light-
,    tight is releosed by closing the comero bock when the cossette is
     in the comero.)
     lnside the spool itself (56) is locoted.
   The Roeor loke-up cossette will only toke this ROBor spool. No
    other spool will  fit.
    Fix the film end projecting from the full cossette to this spool.
    Hold the spool between the left thumb ond first finger so thot the
    key slot (57) foces the operotor. Then push the beginning of the
    li|m,emulsionsidefocingthespoo|,underneoththespring(55)
                                                                                                                                                                                                                                                                                                                                                                                                                                                                                                                                  l     until the hook (54) engoges in o petforotion hole of the  f ilm
    ond onchors it. There is no need to trim the beginning of the film
     in ony speciol woy, but if olreody trimmed it will do equolly well.
   Now push the spool into the inner shell of the toke-up cossette
    so thot the slot (37) fits into the operture (57).
    To close the cossette push the inner shell (55) under light pressure,                                                ,
     into the outer (52) so thot the velvet lined lips of the inner ond the
                                           4
View original page 6Page 7 · Read text
outer shells lie on one onother. The light pressure is necessory in
order to prevent the velvet from being domoged ond consequent
 light leokoge.
 Proctice looding ond closing the cossette with o piece of old film.
Never use force
To insert the toke-up cossette into the comero, first pull out the
spool knob (l-fig. 1).Ploce the cossette in the chomber so thot  it
fits into the keywoy, then push the knob bock ond turn in the
direction of the orrow until it engoges in the slot (57) of the spoot
ond pulls the film tout. The sprocket wheel (26) of the film trons-
port shoft must engoge in the perforotion holes of the film. The
pressure plote ensures outomoticolly thot the film lies flot in the
comero when it is closed.
Close the comero bock ond slide lotch (14) upword to lock. Wind
the spring motor by turning the motor spring wind knob (7) severol
times. Move shutter sofety lock (5), toword the motor spring wind
knob os for os possible. Press the shutter releose button (5) three
                                   5
View original page 7Page 9 · Read text
T-cqssettes must neyer be used without the cqssette-holder.
 Reploce the cossette-holder in the comero so thot the end with the
movoble orm lies of the bottom of ihe comero body, ond the end
with the keywoy ot the top next to the viewfinder eyepiece. Lood
the T-cossette with uncut lengths of film in the dorkroom or use
ony commerciol doylight refill.
Breok the seol of the doylight refill, ond corefully unwind the
protective poper leoder until the beginning of the film is reoched.
The film should not be ollowed to unroll itself. Now insert the
spool, with the milled knob first, into the inner shell of the T-
cossette so thot the poper leoder ond the beginning of the film
project from the mouth of the cossette. Then push the outer shell
over the inner, os with the N-cossette, ond turn it until the film
mouth is heqrd to close with on oudible click. Gently pull out the
film with the poper leoder until the lotter. comes owoy. Toke core
thot the velvet lips ore not domoged.
                                         7
View original page 9Page 10 · Read text
www.butkus.us

Finolly insert the T-cossette  into the comero. Move the orm of the
cossette holder oside, ond push in the cossette so thot the two
pins slide into the keywoy.  After inserting the cossette, push the
orm bock.
Now fosten the beginning of the film to the toke-up cossette (N-
cossette os described before.
Alwoys lood the cossette ond insert it in the comero in o shody
ploce   even ones own shodow, ond toke core not to press on       -the spring looded film moulh of the looded T-cossette os thot
would open it.

Windlng Mechonlsm
To wind the motor turn the motor spring wind knob (7) os for os it
will go (obout four full turns) in the direction of the orrow. The
comero is now reody to toke os mony os 24 pictures, either singly
or in ropid sequence, without ony further oction on your port to
odvonce the film. Eoch time you "click" the shutter by pushing down
                                         I
View original page 10Page 11 · Read text
on the shutter releose button (5), the film is outomoticolly tronsport-
ed into toking position for the next picture. In order to prevent
occidentol exposures you moy lock the comero mechonism by moving
the shutter sofety lock (6) holf-woy toword "R" so thot the red signol
 is visible in the slot. The red signol octs os o reminder to relurnthe shutter sofety lock to its originol position before moking ony
further pictures.

Shutterc
The mechonism ol the highly occurote, oll-metol, behind the lens
shutter is coupled with the spring motor, moking occidentol double
exposures impossible. Speeds ol 1lZ; 1/5; 1110; 1/25; 1150; 1/100; 11250;
1/500 second ond B ore set by turning the shutter speed selector
diol (17) until the proper number is opposite the index mo,k (1g).
Time exposures ore mode by setting the diol of ,,B,,, pressing down
on the shutter releose button ond moving the shutter sofety lock to
the holf-woy setting. shutter will remoin open without ony further
pressure on the releose button until the shutter sofety lock is re.
                                         I
View original page 11Page 12 · Read text
'1
                                      www.butkus.us

   turned to ifs originol position. With exposures of 1110 second or                     l
   slower, the comero must be on o tripod or other firm support.                            .
   Alwoys ploce the desired speed setting precisely opposite the                  ,l
   index mork, becouse in-between shutter speeds ore not provided.                     l

       opcnir,tg,(ou
   The lens opening ond shulter speed work together to give lhe right                                    i
   exposure. The lens opening is smoller ond lets through less ligth
   'when it is set of on f: operture of high numericol volue. Eoch                             l
   succeeding lower numbered setting lets through twice os much ligth                              I
   os the one before. For exomple, f:11 lets through twice the ligth
   of f:16, f:8 lets through twice the light of f:11, ond so on. Deter-
   mining the correct comero setting depends on the type of film used,
   the prevoiling light conditions, the speed ot which the subject is
   moving ond the depth of field needed for the porticulor shot. There
    is no better oid thon o photoelectric exposure meter to meosure
                                              l0
View original page 12Page 13 · Read text
lig-ht conditions ond indicote possible combinotions of lens openings
  ond shutter speeds. To set the lens for ony given opening, turn the
  diophrogm ring (19) until the desired  f : number is opposite the
   operture index morker (20).
q.r  ocut'tnat
  The third comero odjustment necessory to obtoin fine occurote pic-
  tures is the focus. The exclusive "Zone Focussing" feoture of the
  R9eor comeros enobles you to instonily determine the proper foo-
  toge setting for olmost ony subject distonce.  lt will be noted upon
  exominotion of the RgBqr comeros lens mount thot the f: opertures
  ore morked in vorious colos:€.g., t:4 is yellow, f:8 is green. At
  either side of the block index (20) oppeors o series of morkers
  colored the some os the vorious f: operture numbers. These some
  colors ore olso repeoted in the distonce settings on the lens
  focussing scole (21). To ottqin the greotest depth of field on the
  film lhe following procedure is followed:
                                                     l1
View original page 13Page 14 · Read text
www.butkus.us
     lf the indicoted lens opening is f:8 (green), set the dperture scdle
   to thot number. Now select the green distonce setting (17 ft.) ond   set it ot the btock index (20). you will note thot the distonces
   opposite the two green morkers on the lens mount ore now @    (infinity) ond 81/z ft. All subjects between gl/e feet ond infinity will
   therefore be shorply focussed on the film. For close-ups or distont
   subjects, regordless of the footoge setting selected, oll distonces   indicoted between the lwo green morkerJ will oppeor shorp.
  The obove quick "zone Focussing" method is especiolly useful in   the photogrophy                    _of^moving objecis. lt is not necessory to .,pinpoint,,  the focus; the ngegr comeros unique "zone Focussing,, procedure
   coupled with the extreme depth of   f ield of its lenles, ossures   occurocy ond shorpness.
l/ictt ing an/ T"Ii"g Fietozn
   Your subject is generolly viewed through the direct vision viewfinder
   (25). However, the Roegr comeros olso hove o speciol right ongle
                                            12
View original page 14Page 15 · Read text
viewfinder.(15), which enobres you to toke picrures of the subjecl   without being observed. To chonge  f rom direct to right ongte    viewing, push the viewfinder switch (10) to the forworJ positi6n.
    After your comero settings ore in order ond the imoge is centered
    in the viewf inder, hold the comero in o comfortoble, steody position
   ond press down on the shutter releose button (5). when toking   severol pictures in o ropid-sequence series, it is especiolly ess"n--    tiol to hold the comero steody. A good tripod is on'involuoble oid   towords this end.
Rewinling
  when the film counter diol (2) indicotes thot you hove exposed 5E
   pictures (on o 56-exposure mogozine), or J0 piitures (on o 20-expos-
   ure mogozine), the film must be rewound into its originol cortridge.
   To do this first move the shutter sofety lock (6) into the ,,R,, positi-on.
   Then pull up on the fitm rewind knob 1121 uniil o red line Lpp.ors
                                         t3
View original page 15Page 16 · Read text
www.butkus.us

on its spindle where it enters the comero body housing. Turn this
knob in the direction of the orrow until you hove rewound the film
completely, i.€., until on increose in tension is opporent. Now open
the bock of the comero ond remove the cortridge contoining the
rewound film by cutting, teoring or detoching the film leoder from
the spool of the toke-up cossette. After removol of the corlridge
push the rewind knob (12) down ogoin into its normol position.
wilh the RgBgr llq the film connot be rewound. In this cose, ofter
opening the bock of the comero, remove the toke-up cossette (N-
cossette) with the film in it ond get o photo deoler to develop the
 film. lf, however rewinding is desiroble, e. g., with color films, this
con be eosily effected by meons of the RgBsr Doylight R.ewinder.
Cqution!
Be cqreful when using bodly fitting cortridges!
Unfortunotely commerciol cortridges still differ in their dimensions
from the stondord. There ore. for exomple, cortridges hoving such
                                          14
View original page 16Page 17 · Read text
o wide cossette mouth thot o hopeless jomming of the film occurs
     when closing the bock of the comero, ond the film connot be
     moved either forword or bockword. ln oddition the velvet lining of
      the lips is ofien roveled out, so thot fibers get into the field of
      view. Therefore, be coreful to obtoin perfect cortridges!  lf shells
     ond core spools of dilferenl moke ore fitted together when relooding
      the cortridge, troubles in the film odvonce moy olso occur.

I    Do not opply force when rewinding!
;r!       In porticulor do not go on turning the knob by force when the film
      hos olreody been rewound! Only put the rewind knob bock into its
        initiql position ogoin ofter you hove opened the comero ond the
       film hos been removed.
     And here ore oncemore the steps of the rewinding process in
      sequence: Shift sofety lock knob to positioh "R", pull out wirrdin.3
      knob, lift rewind lever until red onnulor mork con be seen, rewind
       until resistonce is noticeoble, open bock of the comero, remove
                                                  15
View original page 17Page 18 · Read text
www.butkus.us

   film ond ploce rewind lever ond winding knob inlo initiol position   ogoin.
    lf you wont to lock the shutter releose, do not shift the sofety lock
  knob into the position "R" (in this position the film will be disen-
  goged from the toothed rim of the film tronsport roller) but    os   indicoted in the instructions for use    only slide it so for- until  o resistonce becomes cleorly noticeoble.-
T[otL PAotuTtaply
  The noeor comeros ore fulry synchronized for use with either etec-
   tronic high speed flosh equipment or with regulor flosh bulbs. Any
   flosh unit hoving o stondord prontor-compur iord tip moy be used
  with the comero. The flosh unit either fits into the occessory clip (9)
  RogOrllohqsM-red morked - (formerly F) ond X flosh synchronizotion;
  RoBoI STAR hos olso M - red morked - ond X flosh synchronizotion.
                                           16
View original page 18Page 20 · Read text
www.butkus.us

   otop the comero or is ottoched by meons of o brocket to the tripod
   socket of the RoBsr. Note thot there ore two flosh ouilets (16) on
   the front of the comero. One outlet, morked "X", provides o zero
   milisecond deloy ond is to be used with "strobe,, units. The ,,M,,
    outlet, morked in red, moy be used with regulor M type flosh bulbs
   such os 5, 11,22, elc., of ony shutter speed morked in red on the
    shutter speed selector diol (17). With SM bulbs, shutter speeds up
    lo 11250 second ore in perfect synchronizotion. lnformotion on proper
   exposure occomponies oll flosh lomps.

Q  "enttozietLenses
   The schneider Lens on your Roeor comero is removoble ond inter-
   chongeoble. For vorious purposes you moy find it useful to hove
   o wide-ongle or telephoto lens in oddition to your stondord toking
   lens. All Schneider Lenses os provided for the nwr  comero ore
   cooted for        imoge brillonce.
               .greoter
View original page 20Page 21 · Read text
The following lenses ore ovoiloble:
           Schneider Xenogon   f :5.5/J0 mm. (Wide-Angle)
           schneider Tele-Xeno  r t:3.8/ls mm. (Telephoto   zx Mognificotion)           schneider Tele-Xenor  f :4,5/'150 mm. (Telephoto-ax-       Mogrrif icotion)
       For use with the obove lenses, vorious viewfinders ore ovoiloble.
      These ore mounted direcily on the occessory clip (9).
      The procticol sun-shode is orso provided with'o screw mounting,
      ond when not being used con be pushed bock eosily over the leis
       borrel with the polm of the hond ofter o stop hos been pressed      down.                                                                  be       pulled -forwordwhen ondrequiredturnedforuntiluse,thethelockingtubulor stopbodyconmustbeogoinfelt. The      Xenogon                lens                  does                         not ollow                                  the                                   use                                                 sun-shode,                                         of o                                                                                  thot                                                            since Y      would couse                          vi.gnetting               o                                       effect.                                 The                                           speciol                                                design                                                           Xenogon                                                           of the
        lens, however, dispenses with the use of o sun_shode.
       Corrying Coses
   I     R9esr comero coses, monufoctured of the finest top-groin leother
      ore luxurious in oppeqronce ond efficient in use. Ditterent models
                                                      19
  I
t
View original page 21Page 22 · Read text
www.butkus.us

ore ovoilobte for corrying the comero ond o limited number ol
vorious occessories. A cose is truly o necessity for the protectionof your RgBgr comero equipment.
Eleclromqgnetic Remote qnd Series Releqses
Remote control releoses for moking pictures with the noBgr, either
singly or in ropid sequence ore ovoiloble for use with bottery or
with ordinory house current. The comero moy be set up of ony
desired position ond fired from o distont point.
Microscope Attochment
For photomicrogrophy with the noEor, the Micro Attochment offers                                                   rtI'i
o convenient ond occurote method of photogrophing  stilt or moving         I
                                                                                                                                                                                                                                    Ispecimens. The observer con view the subject on the microscope
stoge even while the picture is being token.                                                               l
Cqble Releose                                                                                                                                                                                                                                   a,II.t.
For steody pictures, the use of o tripod ond o RoBor coble reteose                fI
is recommended. Attqch the coble by meons of the threoded cqble
releose socket  (5).
                                     20
View original page 22Page 23 · Read text
&rn oo/ /laintcnance
      The noeor comero is o precision instrument which deserves the
     moximum omount of core. Foremost in importonce is keeping the
      comero cleon. The RoEor should be kept in its corrying cose
      whenever possible to keep it free from dust ond dirt. From time
      to time it is odvisoble to cleon the inside of the comero with o
        soft comel-hoir brush. Never'toke it upon yourself to oil ony ports
 I       of the comero os this moy result in serious dornoge. lf of ony time
     you feel thot some port of your noeor cemero is not in perfect
      working order, bring the comero bock to your deoler ond he will      see to it thot you receive prompt service.
     when cleoning your lens do not use croth or other moteriol os this
I        will scrotch the lens surfoce. Get some lens tissue from your deoter
     ond use this for cleoning purposes.
          lf you need further informotion regording the operotion of your
      RoBgf comero or its occessories, don't hesitote to visit your RoBor
      deoler who will be hoppy to ossist you.
                                                     2l
View original page 23Page 35 · Read text
ou=butkus.
             manuals,
         camerac=US
                         -04'00'   Butkus             o=Butkus                             22:41:38  Mikeby           Butkus,   signedcn=Mikeemail=mike@butkus.org,2023.08.01
     DigitallyDN:org,Date:
Butkus
Mike
View original page 35Related documents and language editions

From the M. Butkus archive. Original publisher and archive notices are retained.
Check the model and edition against your equipment.
PDF verified 2026-10-10.