Film cameras
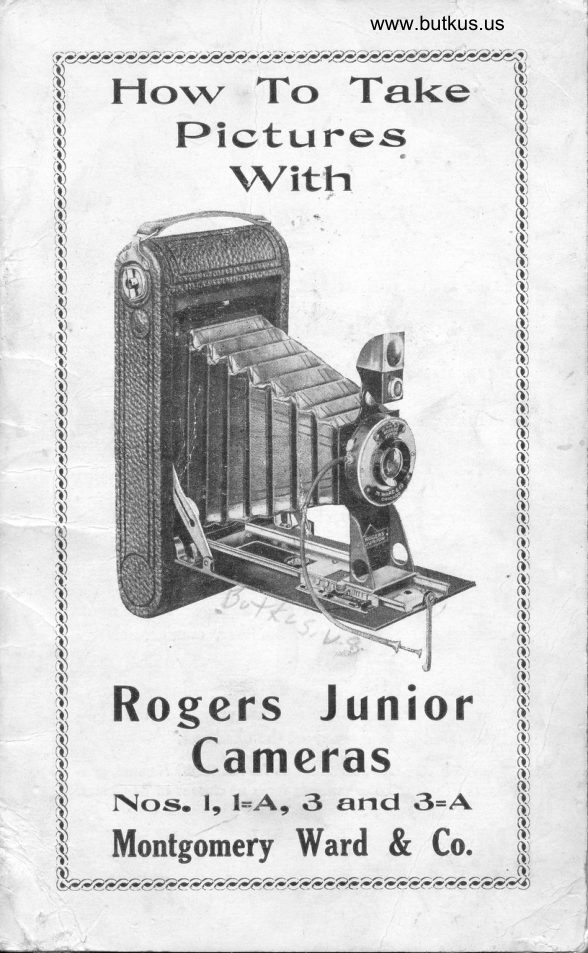
Rogers Junior Cameras User manual
User manual for Rogers Junior Cameras. 19 pages in English. Read the original PDF, download or print a copy without registration.
19 pagesEnglish3.7 MB PDF
Loading your manual…Open PDF directly
Document details
- Brand
- Rogers
- Model / document
- Rogers Junior Cameras
- Document type
- User manual
- Language
- English
- Pages
- 19
- File size
- 3.7 MB
- Category
- Film cameras
- Document date
- Not specified in catalog
Search available document text
Find a term, then jump to its page in the original PDF. Image-only pages may not be searchable; check the PDF for exact wording and diagrams.
Page 1 · Read text
www.butkus.us

it  H ovv To Take(t)t)Q)Oil)     Pi ctLrres
Q)
Q)rl)Q)        Witt.t
(U            %"fiD
Q)
Q)
Q)
 ft)t)
.U
(U
 l)
Q)
(0
il)
e)
 tl)
e)
a)
.U
e)
 ir),u
Q)I[3
View original page 1
Page 3 · Read text
For Rich, Beautiful Pictures
       Make Your Prints On  .\


The New Rapid Guaranteed Developing
    Paper of Distinguished Quality
  No matter what kind of a negative you ha',re there
is a grade o[ Rexo that will produce the most per{ect
pictures possible to obtain. Re*o is supplied in three
distinct grades-R"*o Hard, {or thin, *eaL, Aat nefl-
atives. Rexo Normal, for negatives of normal ot
averagle density or contrast. Re*o So{t, for harsh,
contrasty negatives and for producing so{t effects
with any nepative. Rexo possesses
illarvelous latitude in Exposure and Development
  These {eatures 'eliminate wasted prints and make
Re*o the logical choice of amateur, commercial and
professiorral photographers.
  Rexo is uni{orm in quality and ptod..ces pictures
-arked by beautiful gradations, purity oI the high-
lights, attd tta.tsparency o[ the shado*s.
ENLARGTNG REXO, 35 times as fast as REXO Normal, pro-
duces exquisite Enlargements from all classes of negatives.
Montgomery Ward & Co.
View original page 3Page 4 · Read text
www.butkus.us
        Instructions for 0perating The Rogers
                 Junior Cameras
       Do not attempt to load or take any pictures with the
       Rogcls Junior until you have become tholoughly familiar;
       with every part of the instruinent. Take especial care to
        learn the construction of the shutter; work it for time, bulb
      and instantaneous exposures. Read earefully the following
        instructions. The most important thing to be rememberedI      in picture taking is that no white light (including gas, eleco
          tric or lamp light) should be allowed to strike the fllm, everl
        for a fractional part of a second, until it has been developed
       and fixed. It is therefore best that the loading and unloading
       be done in a subdued light, for after the seal on the film is
       broken there is a possibility of the edges becoming fogged
            if care is not taken to keep the black paper drawn tightly.
           Before loading the camera try the shutter to see that it
         is working properly. Remove all the dust from the lens with
     a soft cloth.
        Films adapted to the Rogers Junior Cameras
         The Rogers Juniors accommodate all standard makes of
         roll films of corresponding sizes as bhown in the following
         table:
          t{0.    Gamora      Slze Erp'r iero fulcan lntco    Earlmrn
       1  Rogers Jr.  2t/+x3Y+ 6 415 240 4.A' 120 (No. 2, Brow_nie)      1A Rog:ers Jr. 2t/ixavi 6 425 232 6.A' 116 (No. 1.{, FPK)      1A Rogers Jr.  Zii"x1l" tZ +Zt ZSZ 6B 116 (No. 1.{, FPK)       3  Rog:ers Jr.  3iTixayi 6 430 236 ?A 118 (No. 3, FPK)       3  Roqers Jr.  3t'/nx4ya 72 43r 236 7B 118 (No. 3, F84)      3A RoFers Jr. 3ljx5t/2 6 445 244 18A 122 (No. 3A, FPE)      3A Rofers  Jr.  3r[x5rL l0 446 244 18B 122 (No. 3A, FPK)
                  *   To Load
         To prepare for loading, back of the camera must be removed.
       This is best accomplished by holding the instrument in both
       hands as illustrated in figure 1. Push the knob located under
        the strap handle, to the right, i. e., in the opposite direction
       from the winding key" This will release the cover catch so
        that the cover can be easily removed. An empty spool will
       be found in position in the winding key chamber.
          Next, break the seal on the film cartridge and plaee the
        spool in the empty chamber as shown in figure 2, taking care
        that the flanges of the film spool are on the insitle of the film
       chamber and that the black paper leads off the top of the
        spool. With the roll resting against the end of the retaining
        spring press the roll into the film chamber. The film is now
        in position to continue loading; the retaining spring prevent'
        ing any loosening of the black paper. Next draw the black
                                           *l-
View original page 4Page 5 · Read text
paper aeross the back of the camera and about tr.r'o inches
beyond the end of the camera. Then thread the end of the
black paper into the wide slot in the empty spool, as shown
in figure 3. Now turn the winding key slowly until the paper
is secured, two or three turns should be sufficient.
   After the film is secured replace the back cover by hooking
it into the end of the camera opposite the strap handle, see
figure 4, using care that the hooked end of the back cover
engages in the U-shaped groorle on the lower end of the cam-
era, however, note that the back cover will not fully engage
until the lock under the handle is pushed to the right, at
the same time pressing on the back cover until  it engages in
the lock.


                . G$ ffi                              Figure 1.
  With the back in place turn the winding key slowly until
the figure 1 appears opposite the ruby rvindow which signifies
that the film is in proper position for thd first exposure. To
open the front of the camera press the hidden button located
on the top of the camera (see figure 5) pult down bed until
the side braces spring into position so that bed of camera is
held rigirlly.
  When fitted with a Rapid Rectilinear Lens, the automatic
                          -2-
View original page 5Page 6 · Read text
www.butkus.us
 focusing lock should be set at the desired distance before
drawing out the standard. To set the focusing lock, grasp
the knob with the thumb and forefinger and pull out to release
 the spring, the iock can then be set for any distanee by sliding
the spring until it engages in the siot opposite to the desired
distance as engrayed on the focusing scale.
   Next, draw out the lens standard until it engages in the
focusing lock. When fitted with a Single Achromatic Menis-
cus Lens (except No.3A Rogers Junior), the camera is now
ready for photographing all objects at a distance of eight feet


                              figure 2.
or more. Note that the 3A Rogers Junior (single achromatic
lens) is equipped. with a focusing scale locking at 6, 8, 10, 15,


                                                                                                Digitally signed by mike butkus           mike              DN: cn=mike butkus,
                                                                           o=orphancameras, ou=29,
                                                                              email=mike@butkus.org, c=US
                                                                                    Date: 2018.09.21 16:55:57 -04'00'            butkus


                             Figure 3.
                              -3-
View original page 6Page 7 · Read text
20 ancl 100; for all distances greater than 20 feet, set the
pointer on 100-foot mark.
    l trVhen it is desired to change the focus, after the camera
has been'set, reset the focusing lock for the desired distanee
and move the standard backward or forward until the notch
again engages in the spring on the focusing lock, as described
above.
   In order to insttre sharp pictures, the distance of the object
from the camera should be carefully estimated.  If  this is
found difficult it will be well to step off the distance. With
the pointer set at the proper distance the picture will then be
in focus.


                                figure 4.

   To close the camera release the focusing lock, at the same
time pushing the standard back into the body of the camera.
Be suie that the standard is pushed back as far as it will go
in order to eliminate any possibility of injuring the shutter
when the bed plate is closed. To close becl plate press down-
ward on, the bed braces and close the bed until the catch
engageE.
                          -4-
View original page 7Page 8 · Read text
www.butkus.us
               The Shutter
   The No. 1A,3 and 3A Rogers Juniors are fitted rvith an
Automatic Shutter' (Ilex Model) working for time, bulb.
Ii2sth, 1/50th antl 1/100th of a secontl. Ihe No. 1 R,ogels
Junior Shutter works foi time. bulb. 1/25th and 1/50th of a
seconcl. All  sliuttcrs ale operaterl by  eitL el the {lexible
u'ire relcase oi' the fingcr lcvcr'.
   The pointcr on the graduated scale at the bottom of the
shutter indicates the apertule at which the lens is working,
the graduated scale at the top of the shutter indicates the
diffefent methods of making eiposures. When the pointer is
set opposite "T" time exposures of any duration are obtained?
by pressing the lever or release to open the shutter and press-
ing it again to close it. When the pointer is placed opposite


                              Figure 5.
''B" bulb ol posures are obtained by a single pressure of the
lever, the lens remaining open so long as the lever is held
down and closing instantly upon the release of the lever.
Bulb exposlrres are especially valuable for rnaking short time
exposures. \Arhen the pointel is placed opposite L/7O0, L/50
or 1/25, an instantancous ()xposule of this duratiqn is ob-
tained by giving the level ori relezrse a single presbure, the
View original page 8Page 9 · Read text
shutter opening and closing in the fractional part of a second,
       as indicated.
          This shutter works automatically and is always set, ready
         for making either tirne, bulb or instantaneous exposures. Before
        attelnpting to take pictures one should become thoroughly
        familiar with the working of the shutter, noting its action
       under the various conditions described above.
                    Stop or Diaphragm
        The stop or diaphragm is the opening which regulates the
      amount of light that is allowed to pass through the lens. The
      diaphragm is to be reduced. or enlarged according to the
       strength of the light. When making exposures under ordinary
       conditions the pointer should be set on "1."
              If the light is very strong set pointer on stop 2. The B,
      4 and 5 stops are to be used for making time exposures only,
      where unusual depth is required.
              If the camera is fitted with a single lens set the pointer
      on stop 1 for all ordinary exposures. See the following pages
       for instructions on the proper stops and exposures for the
       various conditions of light.
            Instantaneous or Snap Shot Exposures
         fn rnaking instantaneous or snap shot exposures never
       use a diaphragm stop smaller than 2. Usually 1 is preferable,
       especially for short range pictures. Snap shots are usually
      made while holding the camera in the hand, the light should
        therefore be bright sunshinc. On bright days snap shots can
      be made at any time during the day from three hours after
       sunrise to three hours before sunset. Earlier or later than
        this short time exposures should be given. It is a good rule
       never to photograph directly toward the sun, the best position
       being to have the light shining from behind the operator or
      over either shoulder and directly on the object to be photo-
      graphed.  If the direct rays of the sun strike the lens during
       the exposure the picture will be blurred. Do not try to pho-
      tograph moving objects at a shorter distance than 25 feet
        clistant from the camera. ft is advisable to endeavor to catch
      them at an angle either coming toward or going from the
       camera, as good results will not be obtained  if taken when
      the object is directly opposite. In photographing tall build-
       ings at close range it is necessary to secure a position as near
      as possible opposite the center of the building, for  if  the
      camera is tilted up'vvards, the lines in the picture will be found
       to converge because of the fact that the top of the building
        is of a much greater'distance from the camera than the bot-
     tom. This same rule applies when photographing small objects
      such as a dog; in this case the eamera should be lorvered
      to the center of the object to be taken, thus avoiding any
       distortion. When ready to make the exposure observe the fol-
       lowing rules:
                                -6-

\
View original page 9Page 10 · Read text
www.butkus.us
        tr'irst, see that the pointer on the shutter is set opposite
  the correct opening and shutter speed.
   ,  Second, see. that the focusing pointer is set opposite the
  proper distance of the object from the camera.
  turned into position.
     Third, be sure that an unexposed portion of the film is
     lVhen ready for making the exposure hold the carnera in
  both hands and as near level as possible so that the picture
   rvill be in true perspective. Locate the object in the finder
  by looking squarely into it, making sure that all of the object
  which you desire to photogrnph falls rvithin the lirnits of the
  firrder. When all is in readiness release the shutter, taking
  care not to jerk or move the caurera during the exposure. A
  pressure of the lever will opcn the shutter for a fractional
  purt of a second, thereby pcluritting the light to pass through
  the lens and forming an image on the sensitive surface of the
  film. After making the exposure turn the winding key to the
   left, watching the ruby lvindow in the back of the camera
  until the next number appears. This is a very important
  point and one should early acquire tlie habit of turning the
  winding key after each exposure, thus avoiding the possibility
  of making two exposures on the snure surface of the film.
               Time Exposures
   When making time cxposures it  is absolutely neeessary
  that the camera be placed upon a tripod, table or firm support
  lvhcre there will be no danger of its being moved during the
  exflosure. Center tlie object properrly in the finder, set the
  shutter on "T"  if a long cxposure is to be made; where an
  exposure of a few seconds is to be marle it  rvill be found more
  convenient to set the pointer on "B." When the pointer is
  set on "T" give a singlc pressure of the lever to open and
 when sufficient time has elapsed an additional pressure to
  close, using care no? to jar the shutter in either opening or
  closing.                                           \
     In making time exposures it  is necessary to use some
  judgmcnt in regard to the length of time the lens should
  remain open. This is governed by thc amount of light which
  falls upon thc object to be photographed at the time of the
  exposure.
          Time Exposures Out-of-doors
     fn making time cxposures out of doors the pointer should
  be set on "B" and the shutter lvorked as quickly as possible.
  WITH SUNSHINII use stop 3, opening and closing the
  ,shutter as quickly as possible"
'  WITH LIGHT CLOUI)S use stop 3, giving from one-half
  to one second exposure.
   WITH HEAVY CLOUDS use stop 3 and give from two to
  five seconds.
                         -7  -
View original page 10Page 11 · Read text
The foregoing calculations are for open air expocures.
     When photographing objects in shadows or on porches, no
       aecurate directions can be given as too much depends upon
      the density of the shadows. Proper exposure can only be
       learned through experience or by using a scientific exposure
      meter such as the Watkins Bee.
       CAUTION. Never attempt to make a time exposure while
       holding the camera in the hand, as a blurred picture is sure to
         result.
                TIME EXPOSURES INDOORS
          fn using the following table the pointer should be set up_on
      1. fn case the 2 stop is used twice as much time must be
      given. With a 3 stop, four times d,s much; and with the 4
        stop, eight times the time shown in the table.
             WHITE WALLS AND ONE WINDOW
          Bright sun outside, three seconds.
        Hazy sun, eight seconds.
           Cloudy-bright, fifteen seconds.
          Cloudy-dull, thirty  seconds.
       WHITE WALLS AND MORE THAN ONE WINDOW
          Bright sun outside, two seconds.
        Hazy sun, five seconds.
           Cloudy-bright, ten seconds.
           Cloudy-dull, twenty seconds.
        MEDIUM COLORED WALLS AND ONE V/INDOW
          Bright sun outside, six seconds.
          IIazy sun, fifteen seconds.
           Cloudy-bright, thirty seconds.
           Cloudy-dull, sixty seconds.
       MEDIUM COLORED WALLS AND MORE THAN ONE
                     WINDOW
          Bright sun outside, four seconds.
        Hazy sun, ten sedbnds.
           Cloudy-bright, twenty seconds.
           Cloudy-dull, forty seconds.
         DARK COLORED WALLS AND ONE WINDOW
          Bright sun outside, twenty seconds.
         Hazy sun, forty seconds.
           Cloudy-bright, eighty seconds.
           Cloudy-dull, two minutes, forty seconds.
     DARK COLORED WALLS AND MORE THAN ONE WINDOW
          Bright sun outside, ten seconds.
         Hazy sun, twenty seconds.
           Cloudy-bright, forty second.s.
           Cloudy-dull, one minute, twenty seconds.
        The foregoing figures are for rooms whose windows get
        light direct from the sky and for any time _duling the day        fr-om three hours after sunrise to three hours before suriset.
                         -a-
iL-.
View original page 11Page 12 · Read text
www.butkus.us
       NOTE-II is advisable when circumstances permit to use
       stop 2, doubling the time of exposure given in the above tables.
                 Home Portraits
         In order to make portraits (large busts and heads) it  is
       necessary to use a portrait attachment. For this-purpose we
       strongly recom-end the Supplementary- Portrait  TrellSr which
        will dn-able you to make portr.aits of the sartre softness that
I      ismarks*o.r^ntedprofessionalin a neatwork.-brassThe cellSupple-menta-r.ywith adjustablePortraitspringsLens                                      lens                                               like a, cap.  Slrecial                    hood                              of the                  the              fits over       antl Ill                                                          lens.                                   each                           accolnpany                             lrse                 for its       directions
                   Bemoving the Film
       No dark room is required for removing the film from the
      camera. Ilowever,  it  is best to perform this operation in
       subdued light, observing the following rules
            X'irst: -When the lait section of the film has been exposed
       turn the winding key until all of the paper has been wound
      on the spool in the key-winding chamber. This can be told
                                              turns.                                   spool                            the                      which          the ease with      by-                           back                Remove                                    the camera as directed on                                   of                        the        Second:
       the preceding pages.
           tni.a   Draw the loose end of the black paper tightly                                '  spool and fasten it with the gummed sticker r,vhich       around the
        will be found in the emPtY reel.
         Fourth: 'Io remove the cartridge from the eamera, turn
       the camera face up and pull out the winding key to its full
        extent, then, with the forefinger of the other hand, pull back
       the retaining spring, located in thc center of the fiIm chamber,
       as far as it will go, which will allow the film cartridge to drop
        into the hand.
            DarkRoomDeveloPment *1 i  UJ
         Films may-securebe*sent to us for  cleveloprrrcllt. Howevel,  -:       in order to       the greatest pleasure antl prolits  f rom
      your camera we advise that the amateur.ilevelop- his own
                                             interesting                                        and                     process                                   is both              for  the                         -least             'easiest                                                                   roll-simple.films                             expensive                            way                                           to clevelop-                       antlI       "fil-s,The
         is bv using trays in a clarkenetl room which  is- lig)iteil -only
I        witl'iis exclutlecl.the ruby'tamp,- The follo.ivingcare beingarticlestakenarethatrecotrnrenrlerlall white lightfor
       the purpose:
      A Ruby Lamp.
        3 Composition Trays, 4x5 or 4x6 (postcalrl).
               |  8-oz. Gracluate.
              I Glass Stirring Rocl.
        1 Amateur Printing Frame and plain glass.
        1 package of Ingento M. Q. Tablets or Tubes.
        1 box of Acid H)'po.
                              -9  -
View original page 12Page 13 · Read text
Select a room or closct u']rt're all rvhite lisht can be easiiv
 exclutletl. \\iht-'n tkrvclopnrcnt is done at night this offers n'o
 dilliculty u'hatcvt'r. 'r'he rcason ilrat n  clrrr-r<cnecl room is
 rcquircd is that tht-. filrn is cxtlernely sensitive to rvhite light
 antl uo.ld_bc spoilcd  if cxPoscrl cither to rlayliglrt or lainp light fo' the fra<'tional par:t of a scconrl. I-Iirving provi<leh
 thc artickrs rncntioncrl abor-c, soclll'c a pair of scissor.i, a pitcher of water and a pail for l'aste.
    Set the ruby larnp on a tablc or shtlf ancl listrt it.   .Ihe
 subdncd rcrl light u,hich it cnrits t'ill  rrot injurc ihe scnsitive
 filnr unle'ss hcltl too closc to it.   rt is flrerciore aclvisable to
 placc thc Iarnp at  le ast 18 in<,hcs a\\,.v   f .orn the trav in
 lt'hich the devcloping is to be done; fiil one of ilrc travs ivith
 water, opcn the box of tablcts arrrl take t.n'o tablcts frlom the
 largc bottle a'cl trvo tablt'ts f.orrr orrc of ilrc s'rrll  vials;  fill
 thc grrtlurtc to thc six-orrnr,<'rrr:rrl< an<l drori all four tabl.ts
 into the l'atcr',  irunrt'rlirrtr'1), r,r'rrshirrg ilrcrn riith a stirring rod


               Developing the Film in a Strip-Figure 6
until rc<lucc<l to a lint' lrou'rlt'r; tlr.n stir ilre solution until
the t*blcts alo tho'.ughly <lissolvt'tl. r'ou' flre co'tcnts of
tht' grad.ate into tlrc st'r'o'tl t.ay; ne,rt l)r'opir.r'c thc fixingbath by rlissolving onLr lrr(,asuling' cup (rvliicli rvill be founti
oll the insi<I. of thc b.-x) lc'el  tirtt of thc fixinq corn-
pound in  t'ight oun('os of u'att'r.  stir. until flre iblution
is conrpl.te ; tht'n lxnrr the <,orrtcnts of ilrc glarrluatc into
thc third   . tray-. (Notc-It  is  trot ncccssaly-  to  nri-x ilresolutions in the darkloorn, as tht'1' a.re  unaffectecl by
liglrt).  It is a<lr,istrblc to rcscrve one tiay for flre fixing batir
only.
  To devclop the filrn brcak the st'nl rvith lvhich the black
pap(fr is hcld anrl unroll until tlre point lvhcrc thc filrn is
                              lo-                              -
View original page 13Page 14 · Read text
www.butkus.us
       attachecl to the black paper, then detach the entire strip -of       fiIm from the black paper and allow the film to roll up loosely.
     Hold one end of th-e i'oll rvith the thumb and finger of the
       left hand and take hold of the free end with the right. Pass
      the film through the tray of clean cold rvater, holding one end'
      in each hand as shown in the cut. Pass it in this mannet'
     through the 'lvater several times so that thcre will be no
      bubbles remaining on thc surface of the film. When it  is
      thoroughly wet the development may be commenced. Hold'
      ing the film in the same manner, pass the film th-roug]r th.g
      developing solution as described for wetting_ it, keeping  .it      constantly in motion. In about one minute dark_ spots rvill
      begin to appear. These are termed high lights, ?1d_ very soon
       afier theii appearance an image of the object u'ill be discern-
      ible. Complete development in the strip by passing_the film
      through the developing solution until all the detail has been
      brought out in the thinest negatives.
             It will be noted that the negatives are of different density.
       This, however, is not an objection as this can be overcorne in
      printing. The difrerence in density does not affect the diIIer'
      ince in contrast. Iieep the strip which is being developed in
      constant motion, allowing the developer to act from live to
      eight minutes, depending upon the rapidity with lvhich the
      negative gathers density. The progress oJ development may
      be-watched by holding the strip up to the lamp from time
      to time.  It   ii  advisable, horvever, to make the exa'rination
      as short as possible
        Note:  'Io avoid transparent spots after having passed the
       film grrough the developef the first ti.re face do'lvn, reverse it
      and pass it through face up, holling tlie film down in the tray
      and hrawing it lightly through the developer under the hand'
      This will break all the air bubbles. Transparent spots are
      caused by air bubbles adhering to the fihn during dcvclopmeTt.
I I         Aftei the development has bccn completed, pass the film     a few times througli the clear water, tlten transferring  it to                         the fixing bath. When all of the creamyI     the tray containing       surface'has disappeared from the unsensitizcd sulface of the
 t      film fixation is practically complete. It  is, hou'ever, advisable                                                                         or                                                                        t'rvo                                               the                   pass                                film through                        th6                      to-      to continue                                                  -solution                                                                            color.                                            crgqmy                                           the                               disappearance                                          of                        the                         af'tcr             rninutes      ihree
          After the films are thoroughly fixcd they slould be washed
       in cold running water from foriy to sixty minutcs. If  run-
          tritrg *ut"t  is n"ot convenient, ten changes of lresh Yufgt should        t"  i,""a, keeping the films constantly in motion all the *'1ile.
      ihu thorongir w:ashing of the films is ve-ry important,in order                       "rll                      t.a.""-of the Hypo or else stains will appear      to remove
       after drying and the negatives y-i{ be ruined'
          Aftei wishing, the fifms should be hung lP to.d.ry, in such      a m&nner 6at ifdoes not touch. the surrounding objects. The
                                              -ll-
View original page 14Page 15 · Read text
for rlryrng  shorrltl bc frce frorn drrst.   If a rnild
                       is  1rrcscrrt  tltr'  1rt'ocr,ss of rllving  rvill bc greatly
                                            bc as
                                                          bath
                                                         being


          Cutting the Film for Separate Development-figure  7
     Separate Development of Each Exposure
      'l'lrt' ulrovr' <lilcr.tiorrs :r1r1rlv to thc  rlt't't'loprrrcrrt of thc lilm
in thc strip.   It  is sorrrctinrcs urlvisalllt' to <1t'r'r'lop citch serction
st,lritt'att,lv. r's1lc<'irrllv ulrt,r't' tlrt'r'c has l)('(,lr it grl.,at vrr,r'iation
in the ('xl)osllr'(,s givt,n.  Irr this t'ase thc follou'itrg dilections
n lrply:
    In  rrrrr'ollirrg tlr<'    f ilnr plcparatory  to  dt'veloping in  this
nlallr)cf. <,ale rnrrst llc tir'l<t'n tlrat thc crrrl should rrot bo allorved
to rclll lll) o\'('l'tlrt'pa1rt'r'.   'I'lrt: cxposult's slrorrlrl bc crrt apart
n ith thc blacl< l)al)('l' orr top -qo that  thc rlivisions betrveen
ea('lr lilrtr <'an llc  leltlilv   t'et'clgnizr:d by  tlrt'rrrrrtrlrt'r's  u,hiclr
                          tz-                          -
View original page 15Page 16 · Read text
www.butkus.us
       appear on the edge of the black paper. Do not let the finge-rs
       touch the face oi the fil.tr' The face is the dull side. The
       proper manner of holding the film is illustrated by figure 7.
           After the film has been cut into sections as indicated above,
        place the sections in the tray containing the clear water, to
        it-ote  air bubbles, covering the tray with a piece of brown
       paper or cardboard to exclude the light of the luqp. Take       bne of the sections from the water ancl immerse it face down
        in the tray containing thc developer; rock the tray gently to
       prevent streaks and air bubbles. In about one minute the
      hlm will begin to darken, representing the high lights- of the
         picture, and in about two minutes the imag-e $'ill be rliscern-
          itt".  The common way of determining when the film has
       been fully developed is to look on the back to ascertain whether
        the objects in the picture have begun to show through. When
       developing lilrns singl1', from five to six minutes is usually                -the         required,                  time varying according to the temperature of
       the solution.
       When development is eomplete transfer the film to the
       tray containing elear lrater and rinse it tu'o or three times,
        after rvhich it should be placed in the trny containing the
         fixing bath. At this juncture the second section of the fiIm
                                                                                   b-een       shouid be put through the same process' eare having
       taken that none of the Hypo has adhered to the fingers, thus
        allowinE  it to come in contact 'with the undeveloped section
        of thr' filrn olwith the developer.
         Three or more negatives may be developed at one time
      by placing the films in the developer face dou'n and alter-
         nititrg each section so as to prevent air bubbles; however' we
       reeomlmend that the beginner develop only one section at a
                                                                   each                                              As                                          been                                     has                                      experierrce                      necessary       time              until the                                                           gained. -                                                                                pla-eed                                               be                                              fixed                                                                          it should                               and                   section        suceessive                           is developed
        in the washing watcr. Aftbr the films have been thoroughly
       washed they s[ould be pinned up separately to dry, care being
 t      taken that their surface is not allorrerl to come in contact
         rvith the sttrrounding objects.
          While fngento M. Q. Developing Tablets are recommended,
     I      the Rogers -De','elopers in tubes will al"o be found, liglty        satisfactory. Complete directions for making up the solution
I'{3      are printed on each tube. For those who desire to prepare
        theif own developer we recornmend the following formula:
                     Hydro Metol Developer.
       Water ...'.                             64   oz.
       Metol                                45   gr.
                                                                                                                                                                    .                             .7t/2 oz.         Socliunr Sulphite (anhvrlrous)  : .       Sodium Carbonate (anhvdrous)                     .1   oz.
        Hvclrochinon                            90  gr.
                                                                                    gr.       b:i;i;;';I^p"i,.'i"-                    LZ
View original page 16Page 17 · Read text
Making Prints
        There are in general use, three classes of paper used. for
      making pictures; namely, blue print or ferro-prussiate  paper,
        printing-out paper such as Solio, Disco, etc., and developlng
       or gaslight paper, such as Rexo, Velox, Argo, etc. The first
     two classes are for daylight printing only, while the last
        class may be printed either in daylight or by artificial light.
                     Printing-Out Papers
        Open the printing frame and place the negative face down
      upon the glass, then place upon this a sheet of blue print
      paper. Replace the back of the printing frame and secure it
      with the springs. It will be noted that the back of the print-
       ing frame is hinged so that a part of the print may be uncov-
      ered for inspection during printing, rvithout disturbing its
        register with the negative. The loading of the paper into the
      frame should be done in a subdued light, that iil, in an ordi-
      nary room, but as far as possible from the window. The
      unused paper should be returned to its package for proteetion
       frorn the light.
        The loaded printing frame should be placed glass side up
       in the strongest possible light, direct sunlight being preferred.         It is allowed to remain until the image from the negative has
      been sufficiently impressed on the sensitive paper. This can
      only be determined by an occasiional examination of the pa,per.
      Print until the shadows become a gray bronze color, or- until
       the high lights are slightly tinged  'rl'ith blue. When this stage
      has been reaehed remove the print from the printing frame,
     wash thoroughly in running water for 15 minutes of in sev-
       eral changes of cold water, allowing the print to remain in
      each bath a few minutes. After having thoroughly washed
      the print as'above indicated, it should be hung up for drying.
     The Ingento Blue Print Paper is espccially iecommcnded as
          it is prepared especi*lly for photographic purposes.
       When using a printing-out paper such as Disco, Solio, etc.,
      the franre should be loaded as directed above for blue print
      paper. The printing shoulrl be allowed to continue until the
      tone of the print is some.what darker than is dcsirable in the
       finished picture. Our Toning and Fixing Solution is highly
     recommended for toning this class of paper. Mix the toning
       solution as rlirccted on the package and pour it into a tray.
     The prints should be immersed in this solution face down so
      as to insure the even action of the solution over the whole
      surface of the print. After a momcnt or so, the print may
     be reversed so that the toning can be watched. Repeat this
      process from time to time during toning. The prints will         4
      begin to change color immediately upon immersion in the             tI      toning bath. At first they are of a reddish brorvn, changing                       i      gradually to reddish yellow, then to brown and then to purple.
                                                                                                                                                                                                                                                                                                                                                               I                       _14_
                                                                                                                                                                                                                                                                                                     i

                                                                                                                                                                                            i
-     ...-                                                                                                                                 ,        ... -";         /4
View original page 17Page 18 · Read text
www.butkus.us
       Toning should be stopped when the desired shade has been
       obtained. At this point the prints should be transferred to
      a salt solution made by dissolving one tablespoonful of com-
      mon table salt in 16 ounccs of l'ater. The prints should be
       allowed to remain in this solution about 5 minutes, after
        rvhjch thcy should be rvashed for onc hour in running water
        or in twelve changes of rvater. They are then ready for drying,
       which r.an be best accomplished by using a blotter book.  Se..,-
         elal prints can be tonetl sinrultaneously.
                Developing on Gaslight Papers
          Developing Papcls, such as Rcxo, Vclox, Argo, etc., are
        very popular with arnateurs becausc of the simplicity in their
        operation, the exeellcnt results obtained and the added advan-
       tage of being able to print them by artificial light.  These
       papcrs can be handled u'ith safety eight or tcn fect away
        fronr an ordinary gaslight. Thcy should not, however, be
        allos'cd to remain uncovered in the direct rays of the light

                        T
       I                       o
                      W
                                                  EL
l1     even at this distance for any considerable time. The paper
        is loaded into an ordinary printing frame in the same man-
      ner as above described for printing-out papers, taking care
       that the emulsion side of the paper is against the dull side
       of the film. The emulsion side of the paper can be deter-
      mined by tendency of thc paper to curl in that direction,
       or by biting a corner of the paper, the emulsion side tending
       to stick to the tccth. With the back of the frame clamped in
        position,  it is exposed by holding it near a gas jet, lamp or
        incandescent light. The length of the exposure depends upon
       the distance at which the frame is lield from the light. and
       the density of the negatir.'e. Exposurc can also be made in
       subdued daylight; however, artificizrl light is preferred, as it
 It      docs not vary in intensity as is the casc with daylight and
           it is thercfore much easier to judgc the length of the exposure
        required.
        With this class of paper no image is seen on the surface,
        until the print has been placed in the developer.
        The larger the negative, the greater the distanee  it should
      be held from the light, the usual rule being that the proper
        distance is equal to the diagonal of the negative. The time of
       exposure varies with the distance the printing frame is held
                       _15_

'l
View original page 18Page 19 · Read text
from the light.   If,  hou'ever, daylight is used, it  will be
found advantageous to coyer all the windows with postoffice
p&per, with the exception of an opening about one foot square.
Over this opening two or three sheets of tissue paper should
bc pasted to diffuse the light, then use a piece of black cloth
or any other opaque medium to cover this opening when the
white light is not desired for printing purposes. In this case
the frame should be held from one to two feet away from
Lhe opening during exposrtl'e. It is impossible to give exact
directions as to the length of exposure on account of the great
difference in the intensity of daylight at various l;imes, the
best method being to make test exposures with small strips
of the paper used.
   Place three trays on the work table as indicated in the
accompanying diagram. Use enough solution to thoroughly
submerge the prints, the temperature of the developing solu-
tion should be about ?0 degrees Fahrenheit, keeping the fix-
ing solution as near as possible to the temperature of 50
degrees. In making up these solutions always follorv closely
the directions accompanying the developer used. We cannot
too highly recommend the Ingento M. Q. Developing Tablets
for use with all developing papers. Having prepared the
developer and fixing bath, the prints should be immtrrsed in
the developer, using care that the solution flows evenly over
the surface, leaving no air bubbles. The image should appee!
in from eight to ten seconds. It  will rapidly gather detail
and density. When the desired tone has been obtained,  it
should be quickly removed from the developer and placed in
the tray containing water, after which it is transferred to the
fixing bath.  tr'or best results, we recommend the use of
Rogers Acicl Hr.po. Directions for nraking the trath a:com-
pany each package. The prints should be kept in motion
u'hile in the fixing bath. From eight to ten minutes is re-
tluired for thorough .fixation, after which they should be re-
moved and washed for an hour in running water or in twelve
changes of clear water. Prints can be best dried in blotter
boohs and  f or this purpose we reconlnletl(1 our Blotter
Books. More explicit directions for printing will be found in
each package of paper.
   For those who desire to prepare their own developer, we
recommend the following formula:
Water, soft or distilled.                       ..40 ounces
Metol                                          .......15   grains
SorliurnSulphite (anhytlrous) ...                     ....7o2.
Hydrochinon                                 .....60  grains
SotliumCarbonate (anhyclrous)                    .....Io2.
Potassium Bromide                                  ....69r.
   Dissolve the chemicals in the order named. The tem-
perature of the solution should be about 70 degrees Fahr.
                  _ 16_
View original page 19From the M. Butkus archive. Original publisher and archive notices are retained.
Check the model and edition against your equipment.
PDF verified 2026-10-10.