Film cameras
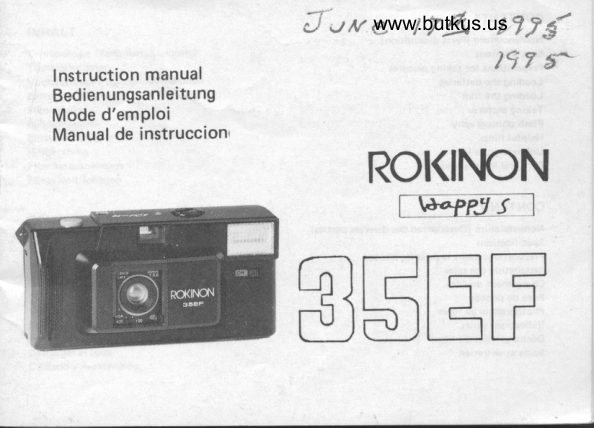
ROKINON 35EF User manual
User manual for ROKINON 35EF. 33 pages in German, French. Read the original PDF, download or print a copy without registration.
33 pagesGerman, French1.4 MB PDF
Loading your manual…Open PDF directly
Document details
- Brand
- Rokinon
- Model / document
- ROKINON 35EF
- Document type
- User manual
- Language
- German, French
- Pages
- 33
- File size
- 1.4 MB
- Category
- Film cameras
- Document date
- Not specified in catalog
Search available document text
Find a term, then jump to its page in the original PDF. Image-only pages may not be searchable; check the PDF for exact wording and diagrams.
Page 1 · Read text
www.butkus.us               J                                                     | 74  l?ri                                        ',rrv e,
lnstruction manual             n7r
Bedienungsanleitung
Mode d'emPloi
Manual de instruccion,
              ROt(NfON
                    lwfisl
    $5EF
View original page 1Page 3 · Read text
INHALT                             www.butkus.us
Terminologie (Teilenbeschreibung)
Technische daten
Vorbereitungen  2um bildauf nehmen
Batterieladu ng
Filmladung
Bildauf nehmen
Bl itzphotographie
Hilf beratung
Film herausnehmen
Pflege und wartung


CONTENIDOS
Nomenclatura  (Descripci6n  de peizas)
Especif icaciones
Preparativos para  f otograf iar
Cargar las pilas
Cargar el rollo
Fotograf  ia r
Fotografiar con flash
 lndicaciones  rltiles
Descargar el rollo
Cuidado y mantencron
View original page 3
Page 4 · Read text
Bitte spenden Sie 2,50 Euro, um diese Website über E-Bay zu unterstützen ... www.PayPal.me/butkusView original page 4
Page 6 · Read text
NOMENCLATURE                       www.butkus.us
l. View  f inder                               6. Film rewind crank
2. Film counter                              7. Built-in flash
3. Shutter release button                       8. Flash On/Off switch
4. Film speed (ASA) setting                     9. Lens cover switch
5. Pre-focused lens                            10. CDS light sensor


NOMENCLATURE
1. Viseur                                             6.  Manivelle de rebobinage du  f ilm
2. Compteur de  f ilm                                 7.  Flash incorpor6
3. Bouton de d6clenchement  de l'obturateur          8. Commutateur OnlOft du flash
4. 56lecteur de vitesse du  f ilm (ASA)                 9. Commutateur de couverture de I'obiectif
5. Objectif pr6-r6sl6                              10. lndicateur de luminosit6 CDS
View original page 6
Page 7 · Read text
TERMINOLOGIE

 1. Sucher                                   6. Filmrckspulkurbel
 2. Filmzdhlwerk                              7. Eingebauter  Blitz
 3. Verstopfenknopf                            8. Blitzschalter Ein/Aus
4. Filmgeschwingdigkeitssetzung   (ASA)            9. Linsendeckelschalter
5. Voreinstellungslenes                          10. CDS-Lichtf  rihler


NOMENCLATURA

1. Visor                                              6. Brazo de re volver rollo
2. Contador de rollo                                  7.  Flash incorporado
3. Disparador                                         8.  Interruptor de falsh
4. Ajuste de velocidad de rollo (ASA)                 9.  Interruptor de tapa de lente
5. Lente preenfocado                            10. Sensibilizador de luz CDS
View original page 7
Page 9 · Read text
NOMENCLATURE
 1 1. Red LED tow light indicator                  18. Back door
 12. Green LED flash reartv indicator             19. Film take-up spool
 13. Film chamber                          20. Film sprocket wheel
 14. Batterycompartment                           21 . Film rewind button
 15. Eack door latch                         22. Flash distance scale
 16. View finder                            23. Back cover window
 '4. Film advance wheel


NOMENCLATURE

11, Indicateur rouge LED de luminosit6 faible     18. Couvercle arridre
12. Indicateur  veit LED d'utilisation du flash      19. Bobine drlnroulemenr du film
13. Compartiment du  f ilm                    2O. Roulette du rouleau de  f ilm
14. Compartiment des piles                     21. Bouton de remobinage du  f ilm
15. Loquet du couvercle  arridre                22. Echelle des distances pour flash
16. Viseur                                23. Fen6tre du couvercle  arridre
17. Roulette de d6roulement du  f ilm
View original page 9
Page 10 · Read text
TERMINOLOGIE                     www.butkus.us

                  1 1. Rote: LED-Lichtzeiger                     18. Rilckwand
           12. Grilner LED-Blitzzeiger                     19. Filmnehmenspulung
          13. Filmkammer                           20. Filmkettenrad
          14. Batteriekammer                                 21 . Filmr0ckspulknopf
          15. Rtickwandklinke                        22. Blitzabstandskala
           16. Sucher                                  23. R0ckwandfenster
          17. Filmtrasportrad


      NOMENCALTURA
    iI              1 1. Indicador de baja luz roja LED             18. Puerta trasera
   '         12. Indicador de listo luz verde                19. carrete oara sacar rollo
          13. C6mara de rollo                        20. Rueda que engrana rollo con cadena
I          14. Compartamento  de pila                  21. Bot6n de revolver roilotl'         15. Pestillo de puerta trasera                22. Escala de distancia de flash
           16. Visor                                  23. Ventanilla de tapa trasera
                 1 7. Rueda de avance de rollo


          l
View original page 10Page 11 · Read text
SPECIFICATIONS

 1. CAMERA TYPE: 35mm Camera with built'in flash
 2. FILM FoRMAT: 24 x 36mm (standard 35mm  f ilml
 3. LENS TYPE: Prefocused 35mm Fs.ti 3-element  lens
 4. FILM ADVANCE: Manual, thumb-wheel advance system
 5. FILM REWIND: Manual, crank rewind system
 6. BUILT.IN FLASH WITH CDS LIGHT SENSOR:
    Approx. 6-second recycle time.
    Approx. 100 flashes per set of alkaline batterle$
   FLASH TO SUBJECT DISTANCES:
   ASA/|SO-100     3-10 ft.      (O.9-3.0m)
   ASA/|SO-40o     3-14 ft.      (0.9-4.Om)
 7. POWER SOURCE: Two "AA" (penlite) alkaline batteries. For best results,
    Use of DURACELL  batteries  is recommended
 8. LENS COVER: One-touch, sliding protective lens cover. When closed, the lens cover automa-
     tically locks the shutter and automatically cuts off the battery power
 9. FILM SPEED: ASA/ISO-1OO or ASA/ISO 400  f ilm may be used.
lO VIEWFINDER: Bright frame (parallax) viewfinder
View original page 11Page 12 · Read text
SPECIFICATIONS                     www.butkus.us
  l. TYPE D'APPAREIL: Appareil de 35mm 6vec flash incorpord.
 2. FORMAT DU FILM: 24 x 36mm (film normal de 35mm)
 3. TYPE D'OBJECTIF: Pr6-r6glage 35mm 55.6: objectif d 3 compdsants.
 4.DERoULEM€NTDUF|.LM:Manue|,systimeded6rou|ementparroulettemanue|ie.
 5. REMBOBINAGE DU FILM: Manuel,parmanivelle.
 6. FLASH INCORPORE AVEC INDICATEUR DE LUMINOSITE  CDS:
    Recyclage d'environ 6 secondes
    Approximativement 100 flashes par jeu de piles alcalines.
   DISTANCES AU SUJET:
   ASA/ISO-100     3-lO pieds     (0.9-3.0m)
   ASA/|SO-400     3-14 pieds     (0.9-4.Om)
 7. SOURCE O'ALIMENTATION: Deux piles alcalines "AA" (penlite).
 8. COUVERTURE DE L'OBJECTIF:  Protection de l'obiectif d glissidre d pression unique. En
     position ferm6e, la couverture d'obiectif bloque automatiquemeflt  I'obturateur  et arrete l'alimen-
     tation 6lectrique en provenance des pilec.
 9. VITESSE DU FILM: ASA/|SO-10O  ou ASA/1SO,400 peuvent  €tre'utilis6s.
10. VISEUR: Viseur (parallax) d cadre brillant.
View original page 12Page 13 · Read text
TECHNISCHE DATEN

 1. KAMERA-TYP:  3smm-Kamera  mit eing€bautem  Blitz
 2. Fl LM-TYP: 24 x 36mm {35mm-Standardlilm)
 3. LENSE-TYP: Voreinstellungslensemir 35mm F5.6}Elemente
 4. Fl LMTRANSPORT:  Handarbeit, Daumen-Rad-Vomertssystem
 5. FILMRUCKSPUL:  Handarbeit, KurbelrUckspulsystem
 6. EINGEEAUTER BLITZ MIT CDS-LICHTFUHLER:
     Ca. 6-Sekunden-Zykluszeit
    Ca. 10O Blitze pro Satz der alkalischer  batterie
   ABSTAND ZWISCHEN BLITZ UND CEGENSTAND:
   ASA/ISO-1OO   3-6 fr.       (0.9-3.Omt
   ASA/|SO-400     3-14 fr.       (O.9-4.Om)
 7. ENERGIEVERSORGUNG:  Zwei "AA"-A|kali-Batterie
 8. LINSENDECKEL: Eine Kontakte, Schiebschutzlinsendeckel.  Wenn gorchloascn,  schliept Lin-
     iendeckel automatisch VerschluP und schaltet er automatisch Batteriestrom.
 9. FILMTRANSPoATGESCHWINDIGKEIT:    Film ASA/lSO-lOO oder ASA/lSO4OO kann gebraucht
    werden.
:0. SUCHER: Hellrahmensuchcr.

                                                  t1
View original page 13Page 14 · Read text
ESPECTFICACIOTTES                    www.butkus.us
 t. TIPO OE GAMARA: Cdmara de 35mm con falsh incorporado.
 2. FORMATO OE ROLLO: 24 x 36mm {rollo standard de 35mml
 3. TIPO DE LENTE: de 3 elementos dc 35mm p5.6 prantocado.
 4. AVANCE DE ROLLO: Manual, dstema de avance de rseda a dedo pulgar.
 5. REVOLVER ROLLO: Manual. sirtema de carrcte de revolver.
 E. FLASH INCORPORADOCON SENSIBILIZADOR DE LUZ CDS:
   Tiemm aproximado de reciclo de 6 aegundos
     El juego de pilas alcalinas dura aproximadamente 1(X) disparos de flash
   FLASH SUJETO A DISTANCIAS:
   ASA/lSO-lOo      3-1O piee     (O.g-3.Oml
   ASA./ISO4OO   314 pies     (O.9-4.&nl
 7. FUENTE DE PTODER: Dospilasalcalina."AA".
 8. TAPA DE LENTE: Un s6lo toque, tapa protectiva de corredera.  Al cstar cerreda,  la tapa'dc
     elnte cierra el disparador automdticamente y corta s6lo el poder de pilas.
 9. VELOCIDAD DE ROLLO: Rollos de ASA/|SO-1m 6 A5A/|SO4OO se pueden urar.
lO. VISOR: Vircrde marca brillante  {paralaiel
View original page 14Page 15 · Read text
PREPARATIONS FOR TAKING PICTURES:
 1. Load the batteries.
 2. Slide open the lens cover, making sure  il  is completely to the right, and locked into place.
3. Open the back cover {the   f ilm counter (2)will  roll to the "s"  position) and load the  f ilm.
LOADING THE BATTERIES
 1. For long life and the prevention of corrosion because of battery leakage, use two "AA"  {penlite)
    alkaline batteries.
2. Open the battery compartment  (14) by sliding the battery compartment cover and lifting gently
    uoward.
3. Load the batteries, making sure to place them in the correct order as indicated on the inside wall
    of the battery compartment.

PREPARATTON A LA PRISE DE PHOTOS
 'l .  Installez  les prles.
2. Placez en position d'ouverture  la couverture d'objectif, en vous assurant qu'elle soit compldtement
    sur la droite, et verrouillez
3. Ouvrez le couvercle  arriire (le compteur de film se mettra sur la position  ,,S,,) et chargez le film.
CHARGEMENT DES PILES
1. Pour un usage durable et 6viter la corrosion du a l'6coulelement des piles, utilisez deux piles
    alcal ines "AA"  (penlite).
2. Ouvrez le compartiment  ri piles {14) en faisant glisser le couvercle  et en le soulevant doucement.
3. Placez les piles, en vous assurant que les polarit6s sont respect6es comme cela est indiqu6  i
    l'int6rieur du compartiment d piles.
View original page 15Page 16 · Read text
VORBERETTUNG ZUM BILDAUFNEHMEN     www.butkus.us
1: ?ffiffilttiXtt,r"""    sie Linsendecket. Bitte machen sie sicher, da(i er vollst6ndis aui der
    rechten Seate liegt und in der Stellung geschlossen wird.
3. 6ffnene Sie RuLkwand (Frlmzdhlwerk  (2) wird zu der Stellung "S" rollen )und laden Sie Film'
BATTERIELADUNG
1. Benutzen Sie zwer "AA"-AIkali-Batterien, um langes Leben zu sichern und um Korrosion wegen
    cles Batterieleckens  zu verhindern.
2. Oftnen Sie Batteriekammer  (14) mittels des Verschiebens von Batteriekammerdeckel und liipt
              nach                   oben aufheben.    ihn       langsam-Sie                      und machen Sie sicher, sie in der richtigen Reihefolge wie dieauf innerem    Laclen               di"                    Butt"ri"3.
   Batteriekammerwand gezeigte zu stellen.

PREPARATIVOS PARA FOTOGRAFIAR
1. Cargar              las Pilad.                          la tapa de lente, asegurarse de que est6 completamente a la derecha y cerrada en    Ab;n corriendo2.
   su lugar.
3.  Abrir"la tapa trasers (el 2 del contador de rollo llegarS a la posicr6n "S") y cargar rollo.
CARGAR LAS PILAS
 1. para durar; m6s y la prevencion de corrosi6n debido al derrame de pila, use dos pilas alcalinas
   "AA"  (penlite)
2.  Abrtr el compartamento de pila (14) corriendo  la tapa de compartamenlo de pila y levantdndola
   suavemenle hacia arriba.
3. Cargar ias pilas, asegurarse de ponerlas en orden correta como se indica en la cara Interior del
   compartamento de Pila.

                                             14
View original page 16Page 17 · Read text
LOADING THE FILM

 1. choose any 35mm Film of ASA/lSo-1oo or AsA/lso4oo   speed, in any cassette size up to 36
    exposures. You may use color print film or black and white   f ilm.
 2. Set the film speed setting (4) to the speed of the film you are using. For AsA/tso-loo   film.
   simply slide the switch to the right to  the indication mark for ASA/lSO-100 film.   For
   ASA/ISO4O0  film, slide the switch to the left to the indication mark for ASA/ISO-4OO  film.
3. Open the back door (18) by sliding down the back door tatch (15).
4. Drop the film cassette into the film chamber (13) so that the protruding end  is facing downwards,
   and the film emerges to your right.
5.  Pull out a suf  f icient length of tilm (3-1 /2 inches or 9cm).
6.  Insert the film into either slot of the film take-up spool (l9l as far as it will go.
7. Turn the film advance wheel (17) making certain that the sprockets on the film sprocket wheel
   (20) properly engage with the film sprocket holes. Ensure that the film winds onto the film
    take-up spool  ( 1 9) before closing the back door.
8. Close the back door making sure  it has clicked shut.
9.  Press the shutter release button (3).  Repeat this action until the film counter (2) shows,,l.,.
   The film rowind crank (6) will turn andicating that the falm is being properly advanced.
View original page 17Page 18 · Read text
CHARGEMENT  DU FILM               www.butkus.us
          1. Choisissez  n'importe quel typc de film de 35mm ASA/|SO-100 ou ASA/ISO4OO de toures
             dimensions en 36 6preuves. Vous pouvez aussi bien utiliser des films couleurs qu'en blanc et noir
          2. R6glez la vitesse de film (4) sur celle du fitm que vous utilisez.  Pour les films ASA/ISO-100,
               faites simplement glisser le commutateur vers la droite ou se trouve l'indication correspondant
           aux films de ce type. Pour les ASA/ ISO-400 glissez le commutateur vers la gauche sur l'indicaiion
             correspondante.
         3. Ouvrez le couvercle arridre (18) en abaissant le loquet (15).
                                                       f ilm dans le compartiment (13) de manidre d ce que la partie protub6rante soit dirig6e versI        4.  Placez le
                  le bas, le fil emergeant d votre droite.
         5. Tirez une longueur  suffisante de film (3-1 /2 pouces ou 9cm).I
         6.  Ins6rez le  f ilm dans l'une des fentes de  f ixation de ta bobine (19) et enfoncez au maximum.
         7. Tournez la roulette de d6roulement du film (17) en vous assurant oue les crans de la roulette (20)
           sont correctement engagds sur les trous correspondant sur le film.   Assurez-vous que le film
              s'enroule sur la bobine d'enroulement (19) avant de refermer le couvercle  arridre.
         8. Refermez  le couvercle arridre en vous assurant oue le loouet est bien enclench6.
         9. Appuyez sur le bouton de d6clenchement de l'obturateur (3). Recommencez  jusqu'd ce que le
           compteur du film (2) indique "1".  La manivelle de rembobinage du film (6) rournera indiquant
           que le  f ilm est correctement embobin6.
View original page 18Page 19 · Read text
FI LMLADUNG

 1. Wahlen Sie bitte irgendeinen Film mit den Geschwindigkeit ASA/|SO-10O oder ASA/ISO-400 in
    irgendeiner bis zu 36 Belichtungen entsprechenden Kasettengrope. Sie konnen Farb- oder
   Schwarz- und Weid'Film benutzen.
2. Setzen Sre Filmgeschwindigkeitssetzung   (41 zu der Geschwindigkeit, die Sie  f 0r den Film brauchen.
   Fur Film mit ASA/lSO-100 verschieben  Sie einfach den Schalter zu rechten Seite an Anzeigezei-
   chen ftir ASA/lSO-100-Film. Fur ASA/lSO-4OO-Film verschieben  Sie den Scalter zu linken Seite
   an Anzeigezeichen    f tir ASA/lSC-40O-Film.
3. Oftnen Sie Ruckwand (18) mattels des Verschiebens von R0ckwandklinke (15) nach unten.
4. Stecken Sie Filmkassette in die Filmkammer (13) ein, damit das hervorspringende Ende nach
   unten richtet und der Film geht zu lhrer Seite hervor.
5. Ziehen Sie eine genijgte Ldnge von Film l3-1 12" oder 9 cm).
6. SreckenSie.FilminrrgendernenSchlrtzevonFilmherausnehmenspulung(lglSisergdhenkann.
7. Drehen Sie Fillntransportrad  {17) und machen Sie sichw, daij Radzahne auf dem Zahnrad (20}
   stecken gerade in Filmzahnradcitfnungen.  Machen Sie bitte sicher, dap Film wickelt auf Film-
   nehmenspulung  (19) vor dem Schlieden des Rockwandes.
8. Schliel3en Sie Rrickwand und machen Sie sicher, dap sie knbckend  geschlossen ist.
9. DrUcken Sie bitte Verstpfenknopf  (3). Wiederholen Sie diese Handlungen, bis Filmz:ihlwerk  (21
   "1"  zeigl.  Filmrtickspulkurbel  (6) wird bis die Stellung, wo Film richtiq vorwertsgeht. gedreht.


                                            17
View original page 19Page 20 · Read text
CARGAR EL ROLLO                 www.butkus.us
1. Elegir cualquier roll- de ASA/|SO-100 6 de ASA/|SO4O0 en cudlquier tamano hasta de 36
    exposic iones.
2. Poner el aiuste de velocidad de rollo (4) en la velocidad del rolto que se usa. Para el rollo
   ASA/lSO-100  corra el interruptor a la derecha a la marca de indicaci6n para rollos de ASA/
   ISO-100. Para rollos ASA/lSO-40O, corra el interruptor a la izquierda a la marca de indicaci6n
    para rollos de ASA/lSO-400.
3. Abrir la puerta trasera {18) corriendo el pestillo de la puerta trasera hacia abajo.
4. Poner el cassette del rollo en la c6mara de rollo (13) para que el punto sobresaliente  mire hacia
    abajo, el rollo sale a su derecha.
5. Sacar un suf iciente largo del rollo (3-112 pulgadas o 9 cm).
6.  Insertar  el rollo ep cualqu-er diente del carrete de rollo (191 hasta lo leiaos que pueda llegar.
7. Girar la rueda de avance de rollo (17) asegur6ndose de que los dientes del carrete de rollo (20)
   engranen bien con los hoyos del carrete de rollo.  Asegurarse de que en el carrete de rollo (191
   antes de cerrar la puerta trascra.
8.  Cerrar la puerta trasera asegurdndose de que haya cerrado bien.
9. Apretar el bot6n disparador (3).  Repita esta acci6n hasta que el contador de roll, (2) demuestre
    "1", el brazo de revolver rotlo (6) girara indicando que el rollo estd avanzado bien.
View original page 20Page 21 · Read text
TAKING PICTURES

1. Slide open the lens cover by moving the lens cover switch (9) all the way to theright.  Make
   sure that the lens cover clicks firmly into place at the right.
2. Make sure that the red L.E.D. low light indicator is not on (indicating that use of the flash is
    necessary  ).

3. Make sure your subject is at the proper distance (see HELPFUL HINTS on page 23).
4. Locate your subiect in the viewfinder (16). The bright frame (parallax) in the viewf inder will
   guide you to the proper iraming of your photograph.

5.  Depress the shutter release button (3) to snap the picture.
6. To advance the film for the next picture, simply turn the film advance wheel (17) until  it stops.
   The film counter (2) will advance to the next number indication. The film counter will clearly
   show the number of pictures that have been taken.
7. Always slide the lens cover closed (clicking shut at the left).  This will lock the shutter button
   and prevent accidental and unwanted pacture taking. Closing the lens cover will also keep the lens
    clean.
View original page 21Page 22 · Read text
PRISE DE PHOIOS                   www.butkus.us
1. Placez le couverture d'objectif en position ouvertir en faisant glisser le bouton (9) compldtement
    vers la droite. Assurez-vous que la couverture d'obiectif est verrouillLie d fond sur la droite.
2. Assurez-vous que l'indicateu.r rouge LED de luminosit6 faible n'est pas allum6 (indiquant que
    l'utilisation d'un flash est n6cessaire).

J.  Assurez-vous que votre sujec est a la distance'correcte (voir indications utiles en page 23).
4.  Visez votre sui€t a travers le viseur (16). Le cadre brillant (parallax) du viseur vous aidera d cadrer
   normalement  votre prise de vue.
5.  Enfoncez  le bouton de d6clenchement  de l'obturateur  (3) pour prendre  la photo.
6.  Pour amener le film sur une autre 6preuve, tournez simplement la roulette de d6roulement du
    film  (17) jusqu'd ce qu'elle soit bloqu6e. Le compteur de film (2) avancera iusqu'au numero
    suivant. Lecompteurdefilmindiqueclairementlenombredephotosquiont6t6d6idprises.
7.  Replacez toujours  la couverture d'obiectif en position ferm6e (verrouillage sur la gauche). Cela
   btoquera le bouton de l'obturateur et 6vitera la prise de vue involontaire ou accidentelle. La
   fermeture de la couverture de l'obiectif permet 4lalement de maintenir ce dernier propre.
View original page 22Page 23 · Read text
BILDAUFNEHMEN

 1. Verschieben und tiffnen Sie Linsendeckel mittets der Bewegung von Linsendeckelscahlter (9)
   nach rechter Seite. machen Sae bitte sicher, daB Linsendeckel richtig in rechter Stellung liegl.
2. Macher Sie bitte sicher, dap roter LED-Lichtzeiger nicht au{ ist (Auf wird nur bea Blitzbenutzung
    gebrauch  t.

3. Machen Sie bitte sicher, dap lhr Gegenstand  geeigneten Abstand hat. {Siehe.HILFBERATUNG
   auf Seate 23).
4. Stellen Sir lhren Gegenstand in dem Sucher (16).  Hellrahmen in dem Sucher wird lhnen zu
    geeigneter Rahmen  lhres Photoapparates  fUhren.

5.  Dri.icken Sre Verstopf enkonpf  {3), um Bitd zu knipsen.
6. Um Film zu ndchstem Bild zu transportieren, drehen Sie einlach Filmtransportrad  (17), bis es
    hielt.  Filmzdhlwerk (2) wird zu nechster Zahl gehen. Filmzdhlwerk wird die 4ufgenommene
    Bildzahl klar zergen.

7. lminer schlieBen Sie Linsendeckel, um Verschlupknopf zu schlieden, um Unfall zu vermeiden
  und um nicht gewitnschte Bald aufnehmen zu vermeiden. Verschliepen des Linsendeckels  kann
   auch Linse sauber behalten-
View original page 23From the M. Butkus archive. Original publisher and archive notices are retained.
Check the model and edition against your equipment.
PDF verified 2026-10-10.