Film cameras
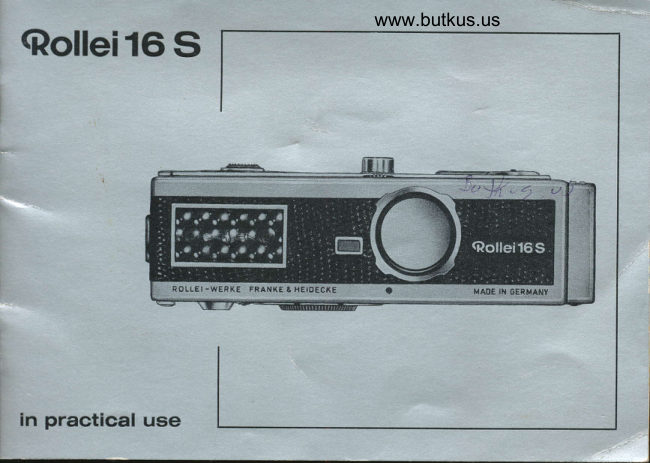
Rollei 16S User manual
User manual for Rollei 16S. 22 pages in English. Read the original PDF, download or print a copy without registration.
22 pagesEnglish6.2 MB PDF
Loading your manual…Open PDF directly
Document details
- Brand
- Rollei
- Model / document
- Rollei 16S
- Document type
- User manual
- Language
- English
- Pages
- 22
- File size
- 6.2 MB
- Category
- Film cameras
- Document date
- Not specified in catalog
Search available document text
Find a term, then jump to its page in the original PDF. Image-only pages may not be searchable; check the PDF for exact wording and diagrams.
Page 4 · Read text
www.butkus.usA. Pull Out the Finder    B. Shoot                   C. Push Bac* the Finder


                                                        as far as it will go.- while pulling          The green finder                                                signal    -the locking catch (a)      means you are
in the same direction.      ready to shoot.             This automatically
                                                advances the film
The large brilliant frame    Fully depress            and tensions the shutter.
in the finder shows         the release button       On pulling out
                                                                             f irmly but smoothly.      the finder you arethe view taken in.          -
                                                   ready to shoot
Get the eye            Do not touch              the next picture.
close behind the finder.    the button too soon.      You can open
Look straight through.    The slightest pressure     and close the finder
Hold the camera         on the button              as often as you like;
horizontally                selects the measured      the film only advances
(watch the skyline).       exposure value.             after an exposure.
View original page 4Page 5 · Read text
Rollei 16 S                                        Lens: 25 mm. Zeiss Tessar il2.8; angle of view 45o.
                                                   Focusing range:   f rom oo (inf inity) to 1.3 feet (40 cm).


 1  Finder lock
 2  Exposure setting: automatic,
     flash, time exposures
 3  Exposure setting lock
 4  Exposure counter
 5  Strap holder
 6 Rewind crank
 7  Distance setting
 8  Film plane (reference point
     for distance setting)
 9  Release button with
    cable release socket
10 Film speed setting (ASA-DlN)
11 Filter value setting


2
View original page 5Page 6 · Read text
www.butkus.us
1. Set for Automatic Operation             2. Set the Distance


Push the locking catch (1) in the         Turn the wheel (3) to set
camera base to one side and turn        the distance in the window (4).
the disc (2) to bring the letter "A"
opposite the index mark.              The red index (corresponding to
A green dot in the  f inder now indicates    10 feet or 3 metres) on the distance
that you are ready to shoot. lf the        scale indicates the most useful setting
green dot does not appear, the light       for snapshots. As the depth of field
is inadequate for an exposure.          depends on the aperture, this setting
                                                       yief ds azone of sharpness from b feet
                                                  (1.5 metres) to infinity in good light
                                          conditions.


                           m
                                                                       ft.
View original page 6Page 7 · Read text
The exposure meter window (1), signal window (2) and the lens (3) must not be obscured.View original page 7
Page 8 · Read text
www.butkus.us
    How to Hold


       Hold the finder with the finger tips                             Now you can carry on.
      :[::J;t H:J;.i:jIer rrame                                 rhese few sreps
      The bright-line frame then appears                                      are the whole secret
         in its full brilliance.                                        ,                       of the Rollei 16 S.
       Hord the camera with the risht hand                            :lilTli ffij,l?,"n.
         like you hold a flute: the seoond finger
       presses the release, the thumb is underneath                      You only have
       the release button to provide the counter pressure,                        to load the titm.
        while the other fingers balance the camera.                            Please turn over.

        In this way you automatically avoid
{      covering the front accidentally.
       For upright shots turn the camera round
     '    without changing your hold.
,       In both cases oress
       your hand against your head for greater steadiness.
View original page 8Page 10 · Read text
www.butkus.us
Your photo dealer                         Unloading the Camerastocks SUPER-16 films
for black-and-white
and colour shots
with your Rollei 16 S.


Avoid loading                                  The exposure counter shows when you have
and unloading the camera                           reached the last shot. After that
in direct sunlight.                                      pressing the button fails to release the shutter
Turn your back to the sun                                another sign that the fitm is finished.and handle the film                                    -
in the shadow                                 o Open the finder.
of your own body.                            o Unfold the crank (5) through 180o and turn it
                                                   about 15 times in the direction of the arrow.
                                                                                                 lf the crank does not lie down flat
                                                          at once, start turning while  it is still
                                                               partly standing up until it lies flat
                                                  under light pressure. The crank now
                                               engages the spool core, which rewinds
                                                       the film in about 15 turns.
                                         o Unlock and open the camera back. Remove
                                                       the cassette and rewrap in original packing.
                                      On opening the back the exposure counter
                                                     automatically returns to its starting point.
View original page 10Page 11 · Read text
Flash Shots


Shutter speed r/so sec.
apertures t|2.8 lo t122.

Set to J for Flash                       Fitting lhe Rolleiflash 16              Inserting the Flash Bulb

Push the locking catch (1)          Swing the strap holder (3)          Push the flash bulb into
sideways and set the index mark    behind the camera.                  the socket: after the shot
of the disc (2) opposite the         Plug the Rolleiflash 16              press the ejector (5).
required aperture on the              into the flash socket (4),
left-hand scale marked '2 .          push against the camera and
(Aperture settings -+ page 9.)        turn to secure.                  To preserve the battery
                                                       in the same                            Remove
                                          pressing                                                 way -(7).        withoutalways storea flashthebulbRolleiflashin  it.    16                                                    the buttonThis sets the shutter to ]/so sec.      while
View original page 11Page 12 · Read text
www.butkus.us
 lf the green finder signal does not appear,
 the flash gun becomes your "portable sun".
 Flash shots are simple and straightforward
 with the Rolleiflash 16 and AG 3 B butbs,
forB * Wandcolourfilm.


Finding the Righl Aperture                                Inserting the Battery
Unless the instructions  for the flash                 Unscrew the screw (6) with a coin
 indicate different values,                          and pull off the housing. Insert a 15 volt
the table (8) of the Rolleif tash 16                     photo flash battery  (it lasts 1-2 years)
shows the required aperture                        between the contact springs.
for any distance setting:                            Note the orientation of the plus pole.
Look up the distance setting and the film speed
in the margins of the table. Trace along                Electronic Flash Shots
the two rows of figures until they meet
and read off the required aperture.                An electronic flash unit can be connected
Example: I feet (7-10 feet), 20 ASA (use the           to the  f lash contact of the camera
25 ASA column): aperture f/5.6.                        or of the tripod adapter (-+ page 10).
lf the same distance figure appears in two columns    The guide number quoted by the maker
of the table, the aperture corresponding                     is the product of aperture x distance
to the greater distance range applies                     for each film speed. To obtain
to dark subjects, and the aperture for                 the required aperture
the nearer distance range to light subjects.             divide the guide number by the distance.
View original page 12
Page 13 · Read text
Time Exposures


Time exposures of anY length,
apertures trom'f12.8 to f122.

With the Rollei 16 S you can       The exposure time depends       The Tripod Adapter
make time exposures from one     on the available light.
second up to several minutes.       Each higher f-number (lens stoP)      Fit it like the Rolleiflash
                                        calls for a doubling                 (* page 8). To remove, pull
 For this purpose set the camera     of the exposure time.               the button (3) sideways.
to the aperture range marked " B"  :                                                   (4): Flash contact
 pull the locking catch (1)                                                       for a flash gun.
sideways and set the index                                                         (5) and (6): Tripod bushes
mark of the disc (2)                                                             for upright and horizontal shots.
to the required aperture
on the right-hand "8" scale.
 Depress the release button
 fo.r the required exposure time.    When a flash gun is connected
                                       to the camera, the flash
Do not jerk the camera.                will also fire in this range.
 Use a cable release (screwed       This provides, for instance,
 into the release socket) and        a foreground  fill-in flash
 mount the camera with the          during time exposures
 tripod adapter on a firm stand.       of outdoor night scenes.

 10
View original page 13Page 14 · Read text
www.butkus.us
      Pictures with Filters


 T


1
          Fit the filter to the                 Using Filters                    The H 1 filter (correction value
       bayonet mount in front of             Filters improve the                  -  0) will absorb UV rays to        the lens and secure by turning       colour rendering:                   improve shots in high mountains
         to the right. Close the finder.          In black-and-white shots           above 6500 ft. or by the seaside,
       Read off the exposure value        the medium yellow filter              (especially by midday sun).
        correction (e. g.    1.5)  f rom            (filter correction value     1.5)                                                                   -                        -                                                                                     1.5)         With colour film  it is often        the filter mount and                            set it          and the green filter (-
       on the camera: press the           darken the sky, make clouds         desirable to subdue the
        button (1) and adjust               appear more brilliant and           predominant blueness of the
        the red index mark                emphasize the modelling of           light on brilliant cloudless
        to the appropriate value on        snow shadows. Subject tones       days and to avoid blue casts
{r       the red scale. Now the camera       of the same colour as the              in the picture. The H 1 filter
I       automatically ensures correctly       filter (yellow and green)               (correction value -  0) and the
 tlIt      exposed shots even with            record lighter. The orange          colour conversion  {ilter                                                                                       (-  0) provide progressive i       the filter.                                     filter (-                                                              1.5 to -  3) darkens      R 1.5                                          the blue sky to dramatic            degrees of correction. With the
        After removal of the filter           thunderstorm effects and        R 1.5 filter the colour rendering
        close the finder and reset         makes yellow and red tones       becomes warmer.
       the index mark to 0 again.          record lighter.                                                                                                                ,                                        fr4k;  "t                                        11
View original page 14Page 17 · Read text
Shooting Hints


Focusing Made Easy                                    Fast Action Shots
The zone of sharpness in a picture               The best way of ensuring sharp pictures
always covers the distance range visible              of fast movement is to shoot
in the scale window. This depth of field                 in bright sunshine.
facilitates estimation of the subject              The more brilliant the light, the shorter the
distance and covers setting errors.                   automatically selected exposure time.
At the normal setting to 14 feet the sharp            With very fast movement or
zone extends from 6 feet to infinity.                  subjects in poor light
As most subjects are at least 6 to 7 feet             you can also slow down the movement
from the camera, you rarely                               in the picture by a few special tricks:
have to change the setting.
To estimate a near distance of 31/2 feet
for portraits, watch the small brilliant              Keeping some distance away from the subject;
frame with the camera held horizontally.          Shooting the movement at an oblique angle
The head should just fill the frame.                 from the front instead of from the side;
To measure close-up distances of 16-24 ins.        With movement across the direction of view,
attach the measuring chain to the strap             by following the subject in the finder
holder and stretch  it towards the subject             (swinging the camera), while releasing.


14
View original page 17
Page 18 · Read text
www.butkus.us


 l'

       Subjects in Colour                                Fun with Colour Slides

       Colours come out most luminous                    Your colour films come back from the
        in brilliant sunlight. The automatic exposure           processing laboratory as colour transparencies,
        control is calibrated for this kind                     ready for projection     either in uncut strips                                                                                   -        of normal illumination. But you can also deal            or, as requested, framed                                                                                          singly in
        with subjects of great brightness range;              cardboard mounts. For mounting between glass,
      go close and point the camera at                         Rollei slide frames are available with clear
       the main subject area or point  it at a                  or surface treated (against Newton's rings)
       surface of similar brightness.                         cover glasses. In these frames you can project
      Depress the release button only until                  your slides in any normal miniature projector.
      you begin to feel a resistance,                    To ensure screen image sizes up to
t       hold the button in this position and                   43 x 63 inches and maximum image brilliance
 I       get back to your intended camera viewpoint           you only have to change the projection lens
       before pressing down fully to take the               and the condenser. Alternative units are
        picture. In this way you get for instance                 available as accessories for most miniature
      a correctly exposed portrait shot                       projectors as well as for the automatic
       without inf luencing the reading by an                   Rollei Universal projector (suitable for

  I
       excessively bright or dark background.                 transparencies from 12x17 mm. to 21/tx21lt inches).


 i                                                                                                                    15
l
View original page 18Page 19 · Read text
The Rollei 16 S                       1 Wrist strap                      6 Filter
and its Practical                   2 Ever-ready case                   7 Tele attachment:
Accessories                        3 Tripod adapter                       Rollei-Mutar 1.7 x
                               4 Rolleiflash 16 flash gun           8 Wide-angle attachment:
                                 5 Measuring chain                      Rollei-Mutar 0.6 x


  ,ffi^w
View original page 19Page 20 · Read text
www.butkus.us
     The Programmed Shutter

T


      The exposure control system        take place in the shown steps       subjects and reduces
          is coupled with the special            (vertical intervals). The             the risk of camera shake
        shutterof the Rollei 16 S.            sub-division  of aperture and        during the exposure.
             It controls the automatic             shutter speed values  is
        selection of shutter speed           closer than with the usual         The aperture and shutter speed
       and aperture according to         programmed shutter systems        cannot be controlled
       the measured exposure value.        (also shown for comparison).        independently. The exposure
                                             Increasing subject brightness       combination used depends
      The exposure range starts           therefore quickly leads to            purely on the prevailing light.
        with ]/so second and aoerture         fast shutter speeds already         For a20 ASA (14 DIN) film
          t|2.8. lncreasing subject               at the beginning of the               for instance and summer I
  I       brightness is automatically          exposure range. This ensures       sunshine the selected
       compensated by reducing the      sharp pictures of moving           exposure value is about 13.
       exposure time and closing the                                       Exposure value        aperture. The exposure range                                  14 15 16 17 18
       goes up to r/soo second at t122.       Shutter speed      1
                                        Aperture      These settings, corresponding
        to exposure values from 8 to 18,                                                                 22
                                                                                                            17
View original page 20Page 21 · Read text
Care of Your Camera


Your Rollei 16 S will always       Occasionally clean out          The Rollei-Werke are
appreciate careful handling      the inside of the body            as interested as you are
and will repay it with              with a fine brush.                   in the perfect functioning of
reliable working and                                              your camera and the success
perfect pictures.             When necessary, clean             of your pictures.
So keep the following             the optical glass surface       So  if you ever come
points in mind.                    with a soft camel hair brush      across any technical problems:
                                    or a piece of chamois leather.
Moisture, wind-blown dust,         In the winter, going
sand and continuous exposure  from the cold air outside        The world-wide Rollei service
to the sun is bad for any            to a warm room may cause          is at your disposal
camera. Remember this           condensation on the lens and     wherever you go.
when storing the camera          finder. Preferably              Photo dealers and
and when shooting  and         wait until this moisture            Rollei agencies abroad                   -especially when you open it        evaporates on its own,               will always be happy to give
to change the  f ilm.                 without wiping  it off.             you advice and information.


18
View original page 21Related documents and language editions
From the M. Butkus archive. Original publisher and archive notices are retained.
Check the model and edition against your equipment.
PDF verified 2026-10-10.