Film cameras
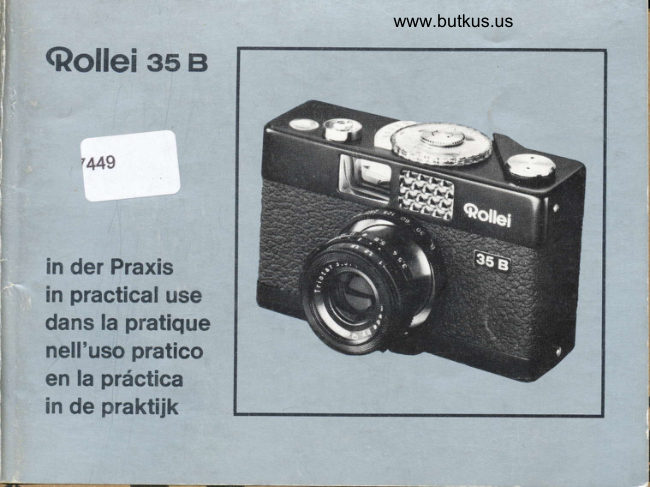
Rollei 35B User manual
User manual for Rollei 35B. 62 pages in English. Read the original PDF, download or print a copy without registration.
62 pagesEnglish4.8 MB PDF
Loading your manual…Open PDF directly
Document details
- Brand
- Rollei
- Model / document
- Rollei 35B
- Document type
- User manual
- Language
- English
- Pages
- 62
- File size
- 4.8 MB
- Category
- Film cameras
- Document date
- Not specified in catalog
Search available document text
Find a term, then jump to its page in the original PDF. Image-only pages may not be searchable; check the PDF for exact wording and diagrams.
Page 1 · Read text
www.butkus.us
   Qollei s5 B

if


          '449


     in der Praxis
     in practical use
    dans la pratique
     nell'uso pratico
    en la prdctica
     in de praktijk
View original page 1Page 2 · Read text
Rollel 35 B
Sie haben sich fiir .,lhre" Rollei entschieden. DaB    Eccovi finalmente proprietari della "vostra" Rollei.
Sie richtig gewehlt haben. werden lhnen schon    Congratulazioni! Siamo sicuri che gia   il  vostro
die gelungenen Aufnahmen lhres ersten Films   primo rotolo di  lotograf ie vr confermerA che  la
beweisen.                                                     scelta non ooteva essere migliore.

Wir wlinschen lhnen viel Freude und Erfolg mit lhrer    Buon diverrrmento e splendrde fotografie.
Kamera.


You have chosen "your" Rollei. The successful    Vd. se ha decidido por .SU" Rollei. El acierlo que
pictures of your lirst     f ilm  will prove that you   ha tenido Vd. en la elecci6n, se lo demostrarAn ya
have chosen right.                                        las primeras totos looradas de su primera pelicula.
We hope you will have much fun and success with   Deseamos que disfrute plenamente con su camara.
your camera.


Vous avez choisi .votre- Rollei. Les photos reussies   U hebt tot .Uw" Rollei besloten, dat U een juiste keus
de vot!.e premier film vous monlreront que votre    hebt gemaakt, zullen de geslaagde opnamen van Uw
choix etait le bon.                                        eerste tilm reeds bewi.lzen.
Nous vous souhaitons beaucoup de joie et de succds   Wij wensen U met Uw camera veel succes en
avec votre appareil.                                   genoegen.
                                              Rollel-Werke  Franke & Heldecke
View original page 2Page 3 · Read text
www.butkus.us
                            Contents                Sommalre
                                    Seile                                  Page                                  Page
   Sofort aufnahmebereit  ....,....  .  2      lnstant Readiness  ..........,...     3     Instantanement pr6t ...........    3
   Laden der Kamera        ,....   4      Loading the Camera ............    5     Chargement de I'appareil  ..,..,   5
   Die Aufnahme           .. .. t....   6    Exposing                  .......   7       Prise de vue .....             .,.,,,   7
  Belichtungsmesser .......,.,.,.    8    The Exposure Meter...........    9     Le PosemCtre       .......  ,..   I
  Entnahme des Films ...........   . 10     Unloading the Film .........,...   11      Enlevement du  f ilm ...........,.   13
   Tios frir die Praxis .............   12      Practical Notes.        .......13      Conseils pratiques       .....13
   Scharfentiefetabelle ...,........   58     Depth ol Field Table ..........   58     Tabledeprofondeurdechamp   .. 58

'  Indlce                           Indlce                     lnhoud
                             Pagina                                    P6s.                                            Blz.
  Sempre pronti a scattare  . .. ,. .. 30      Inmediatamente pronta a disparar 31      Onmiddellijk gereed voor opname 31
   Inserimento della pellicola  .....  32     Modo de cargar la c6mara .....  33     Laden van de camera ...,......   33
  La ripresa           ............   34      Puesta a punto y disparo  .....,  35    De ooname         ,.,.,....,.35
  L'esposimetro       .........36       El exposimetro       .........   37     De belichtingsmeter ...,........   37
   Estrazione della pellicola ......  38    Modo de sacar la pelfcula  .....  39      Film uit de camera nemen .....  39
   Consigli  pratici: .        ......40      Consejos precticos        .....  41      Tips voor de praktijk: .........   41
   Tavola delle profondite di campo 59      Prolundidades  de enfoque ......  59      Scherptedieptetabel  .....,.....   59
View original page 3Page 4 · Read text
Bitte spenden Sie 2,50 Euro, um diese Website über E-Bay zu unterstützen ... www.PayPal.me/butkusView original page 4
Page 5 · Read text
Sofort  aufnahmebereit
Sie tragen eine flache Kamera in der Tasche                                                           -stets mit autnahmebereit gespanntem  VerschluR.
Noch sichert das eingeschobene  Objektiv den Aus-
loser. lhr erster Handgrifl:
a  Objektiv herausziehen und durch Drehen zum
Anschlag verriegeln  (1).
Jetzt konnen Sie im Wechsel auslosen (2) und
spannen (3) Probieren Sie es und ilben Sie gleich
auch den letzlen Handgriti, bevor Sie die Kamera
wieder einstecken. Damit Sie die SchuRbereitschaft
nicht vergessen, laRt sich das Objektiv wiederum
nur bei gespanntem  Verschlull einschieben:
O Kamera spannen (3). Knopl mit Rotpunkt (5)
gedri.jckt halten. Objektiv durch Drehen entriegeln
und einschieben (4).
Sie sehen, ein  ausgeklrigeltes System wechsel-
seitiger Sperren sorgt frir Sicherheit und Schnapp-
schuBbereitschaft. Sie konnen die Kamera nur
 richtig bedrenen.
View original page 5
Page 6 · Read text
I                                          www.butkus.us
I
!r    Instant Readlnses                       Instantan6mcnt pr€t
llE'
      In your pocket you carry a flat camera -  always   Vous avez dans votre poche un appareil plet, donl     ready to shoot with the shutter tensioned. The    I'obturateur est arm6 en permanence, pret A la      retracted lens still locks the release. So is your    prise de vue. Mais le d6clencheur est encore blo-
       firsl step.                                     qu6 par l'objectif rentr6. Votre premidre mano€uyre:
   O Pull out the lens and turn it to its stop (1) to  O Tirez I'objectif et verrouill€z-le €n tournant
       secure.                                               jusqu'A but6e (1).
    Now you cdn alternately shoot (2) and wind (3).   Vou6 pouvez A pr6sent d6clencher (2) et arm€r (g)     Try it out - and practise also one last operation    alternativemenL Exercez-vous A laire cette d6rni6re
     betore putting the camera back in your poaket.    manoeuvre avant de remettro I'appareil dans votre
I!    To make sure that you are always ready to shoot,    poche. D'ailleurs, l'objectif ne peut 6tre rentrd que    the lens can be pushed brck only with the    lorsque I'obturateur est arm6; ceci, afin que voua
t5    shuttsr tensioned:                                   soyez toujours pret A ddclenc{rcr:
,I  O Tension the camera (3). Depress the button with  O Armez I'appareil (3). Ten€z enfonce le bouton
     the red dot (5), unlock the lens by tuming it and   sur lequel est gravd un point rouge (5). D6verrouil-
     push back (4) into the body.                           lez I'objecti, par rotation et rontrez-le dans l'appa-
                                                                            reil ({).
   As you see, an ingenious system of interlocks
     provides both safety and readiness for action. you  Comme vous le voyez, un systdme ingdnieux
     can work the camera only one way - the right way.     d'interverrouillage  veille A la s6curit6 et A ce que
                                                vous soyez toujours pr€t A d6clencher. Vous ne
                                                   pouvez vous sewir cl€ I'appareil que d'une seule                                                           fagon * {a bonnel
                   Itallano -.Espaffol - Nedcrlandrk           + pagina                              - pdglna - bladziide 30
View original page 6Page 8 · Read text
www.butkus.us
Loadlng the Camcra                   Chargcment dc l'epparull
Before loading, fully tension the camera rvith the   Avant de charger l'appareil, t'armei d'un mouve-
winding lever to its stop!                         ment compl€t du levier.
Pull out the lens and lock by turning to its 6top.    Tirer l'ob,ectil et le verrouiller en tournant jtrgqu'a
Unlock the back (5) and pull off.                         butee.
Swing open the pr€sEure plat€ (f) and insert the    D6verrouiller  le dos de I'apparoil (5) et le retiror.
                                                                                                                           et                                                                                       (4)                                                                                                           I'exterieur                                                                               vers                                                            pivoter                                                              le presse-tilmcartridge           (3) -  with the cartridge slot towards the    Faire                                                                                                                                    la                                                                                                vers                                                                                      tournee                                                                                       fente                                                                                               (3), la                                                            introduire                                                                  la cartouchefilm gate.
Push the   f ilm leader well into the slot of the    fen€tre.
take-up spool (2) in the direction of the tour    Introduire I'amorce du film profond6ment dans labroad arrow heads, and wind it up tightly by    fente de la bobine r6ceptrice (2), dans le sens
turning the milled flange (1) in the direction of the    indiqu6 par quatre fldches, et enrouler le film serr6
curvect arrows.                                  en faisant tourner la joue moletee (1) dans le sens
Hold the cartridge (3) tighi while winding up the   de la fldche recourb6e.
film leader.                                 En enroulant I'amorce du film, veiller A c€ que le
Swing back the pressure plate (4), push the bad(    chargeur (3) reste en Place.
on to the camera and lock (6).                      Rabattre le presse-f ilm (4). Replacer le dos de
                                                              I'appareil et le verrouiller  (6).
Setting the Erpolure Countel
(next to the release button):                          R6gl.go du complour d'images
Alternalely release and wind until the film counter    (a c6te du d6clencheur):
shows'No. 1 after tensioning. Rewind crank (7) +    D6clencher el armer altornativement iusqu'a ce que
page 11.                                                            le compteur d'images soit au no 1. Manivelle rabattue
The camera is now ready to shooi.                              (7) + page 1'1.
                                                          L'appareil est prCt e la prise de vue'
View original page 8Page 9 · Read text
Ole Aufnahme
1. Belidrtung  einstellen: Mit Drehskala (1) die ge-
wLlnschte Belichtungszeit und mit Drehskala (2) die
erforderliche Blende auf den gemeinsamen Index
einrasten.
Belichtungszeit:  -  Tip @.Blende: + Seite 8.
2. Enllernung einslellen: Mit Drehskala (3) die
Aufnahmeentfernung  in m (oder feet) auf den Index
ei nstel len.
SchnappschuBeinstellung: + Tip @.

3. Ausldsen: Motiv im Sucher anvisieren (der Leucht-
rahmen begrenzt das erfaBte Bildfeld) und Aus-
l6ser dnlc*en.
Die kurzen Begrenzungsstriche  innerhalb des Leuch!
rahmens begrenzen das Bildfeld bei Naheinstellung
unter 1,5 m.
Selbstausldser  .- Tip @.
View original page 9
Page 10 · Read text
www.butkus.us
    Exposlng                                 Prlse de vue
     1. Scttlng lhe exposure: Rotate the ring with the     t. R6glage du lemps de posr: A I'aide de la
     scalc (l) io set the required exposure tirne and    molette (1) et de la molett€ (2) r6glcr 6ur le nQCr€
     the ring with the scale (2) to set the appropriate   commun respectivement le temps de pose et le
     aperture opposite the index line.                     diaphragme.
     Exposure times: See Note No. @.                  Temps de pose: + Conseil pratique @.
     Apertures: See page 9.                             Diaphragme:+ page 9.
    2. Setting the distance: Rotate the mount (3) to   2. R6glage de la distance: R6gler i  I'aide de la
     bring the appropriate subject distance (in metres or   bague (3) la distance de prise de vue, en mdtres (ou
      feet) opposite the index line.                               pieds) face au repdre.
     Focusing zones: See Note No. @.                   Mise ar.r point d'instantanes: + Conseil pratique @.
    3. Shootlng: Sight the subiect in the tinder (the   3. D6clenchemenl: Centrer le sujet dans le viseur
      brilliant frame outlines the subject area covered)    (le cadre lumineux indique le cadrage de I'image)
    and press the release.                                   et appuyer sur le d6clencheur.
   The short boundary marks within the brilliant   Les traits-repere courts a  l'int6rieur du cadre
    frame show the limits of the field of view at near    lumineux limitent le champ de I'image lors de la
     distances below 5 feet (1.5 metres).                    prise de vue de prds (A moins de 1,5 m).
r    Selttimer exposures:* Note @.                        D6clencheur automatique: *  Conseil pratique @.
View original page 10Page 12 · Read text
www.butkus.us
The Exposure Meter                   Posemetre
Atter setting to the speed ot the film used    AprAs avoir reg16 la rapidit6 du tilm utilis6 (indiquee
{indicated on the film package) the exposure meter   sur l'emballags du lilm), lire sur le posemetre
;hows the required aperture tor any selected     I'indication du diaphragme correspondant au temps
Shutter speed.                                  de pose choisi.
l. Selting the tilm speed: Turn the central milled    1. R6glage de It rapldll6 du lllm: Amener ta sen-
disc to bflng the ASA (or DIN) rating of the film     sibilit6 DIN (ou ASA) du film sur le repere superieur
opposite the upper index mark  (1).                            (l) a I'aide de la molette inferieure.
2. Selting the shutler speed: Irove the index mark ai    2. Roglage du temps de pose: Amener I'index lat6ral
the side {2) on the exposure meter to the shutter   du posemetre (2) €n regard du temps de pose
soeed set on the camera                                 pres6lectionne.
3. Determinlng the aperlure: Point the camera at    3. D6termlnallon du dlaphragmei Diriger l'appareil
the subject and transler the aperture value    sur le sujet et reporter le diaphragme indiqud par
indicated by the meter needle to the camera     I'aiguille du posemdtre.
selting.
lf during a reading the meter needle is outside the   Si I'aiguille se trouve en dehors de l'6chell6 loF
range of the aperture scale, select a dillerenl   de la lecture, choisir un autre temps de pose.
shutter speed.                                        Si l'6clairement est insuffisant, l'aiguille n'indiquera
ll the light is too weak, the needle does not give   aucun chiffre.a reading + Note O.                              *  Conseil pratique O.
View original page 12Page 13 · Read text
Entnahme  des Fllma
                                     Nach der letzten Aufnahme (je nach Filmldnge 20.
                                           oder 36. Aufnahme) wird der belichtete Film zuersl
                                                in die Patrone zurrjckgespult:
                                                Objektiv herausziehen und verriegeln.
                                          Knopf (1) (zum Abschalten des Filmtransports) ein-
                                   mal ganz eindrricken. Kurbel (2) herausklappen,
                                       gegen Kameraboden gedrrjckt halten und in Pleil-
                                                  flchtung drehen, bis lvlitnehmernase (31 in lvlitnehmer-
                                                           schlitz (4) einrastet. Kurbel (2) in Pfeilrichtung  weiter-
                                             drehen, bis der Widerstand des Filmzugs nachlaRt.
                                   Danach Kurbel einklappen. Rrickwand entriegeln
                                    und abnehmen. Patrone nach Entnahme  lichtsicher
                                           aufbewahren. mogljchst in der Originalverpackung.m'@                          Farbfllm so bald wie mdglich zur Entwicklung geben.
                                  Das Laden und Entladen der Kamera mtndesrens
                                    im eigenen Korperschatten, nie in greller Sonne
                                                        durchfiih ren
View original page 13Page 14 · Read text
www.butkus.us
   Unloadlng  the Fllm                       Enl6vement  du fllm
    After the last exposure (the 20th or g6th shot,   Aprds la dernidre prise de vue (20dme ou 36dme,
    according to the length of the film loaded) the    selon la longueur), rebobiner d'abord le film expos6
   exposed film rs first rewound into its cartridge:      dans la cartouche:
    Pull out the lens and lock  it.                             Sortir I'objectif et le verrouiller.
    Fully depress button (1) once (to disengage film   Apres une seule pression A fond sur le bouton  (1)
     transport). Unfold ciank (2) and hold  it pressed    (pour d6connecter I'avancement du film), sortir la
    against camera bottom, then turn in indicated direc-    manivelle rabattue (2), puis la faire tourner dans le
     tion, until driving pin (3) is caught by driving slot (4).    sens de la fldche jusqu'd engagement de I'ergot (3)
    Carry on turning crank (2) in shown direction  until   dans la fente (4). Tourner la manivelle (2) dans le
     resistance of film tension is ceasing. Then fold down   m6me sens jusqu'ir ce que la resistance due au
    the crank again, unlock the back and remove. After    frottement du  lilm  cesse. Ensuite, rabattre  la
    removing the cartridge keep it light-tight,  if possible    manivelle. D6verrouiller le dos de I'appareil et
     in the original packing. Have colour films processed    l'enlever. Conserver la cartouche A I'abri de  la
    as soon as possible.                                    lumidre, si possible, dans son emballage d'origine.
   The camera should always be loaded and unloaded    Faire developper le film couleurs le plus rapide-
    at least in the shadow of your own body -  never   ment possible.    in brilliant sunshine-                         Ne jamais charger ou d6charger I'appareil en plein
                                                                         soleil, mais au moins a l'ombre du corps.


I
View original page 14Page 17 · Read text
@ Kurr,rdtbollchhrng
Dio oinrastenden Zitt€rn 30 bls 5(D dcr Zeitskale
bezcicfinen Sekundenb  rucfrtei le. Zwisdtcnwerte  si nd
nichlvrrCr{f:
DirnDetn|rnr|ffiirmitbestlmmencl  tiir dic Safierfe dts Bild6r.
Um die Aufnahme nicfit zu v6rwed(oln. ist bei Be-
lichtungen aus freier Hand l/so sec als ldngste Zeit
noch moglich. Sicherer und meistbenutzt: r/eo und
l/rus sec.
Bei bswegten Szenen um so korzet b€lictten, ie
schneller das Objekt sicfi bewegt, um ,,Bew€gungs-
unschdrle" zu vermeiden. Zuldssige lAngste Be-
lichtungszeiten (als Anhatt): Sport r/soo, laufende
Kindor r/zso, flottes FuBgengertcmpo   r/res, Spazier-
gilnget r/ro oder- aus elniger Entfcrnung - r/so sec.Dcnn allgomoin gilt die Regcl: Die Sidlerheit der
scharfcn Bewegungswieclergabc  wecfist mit zuneh-
mendem Aufnahmeabstand. AuBerdem  verringerl
sicfi die Gefahr der Bewegungsunschdrfe, wenn das
bewegte Objekt von vorn (statt von der Seile) foto-
grafiert wird.
View original page 17Page 20 · Read text
www.butkus.us

    @ Time Erposurel                 @ Prises de vue ayec pose
  lru  With the shutter speed scale set to "8" you can    L'appareil 6tant rdgle sur .B",  il est 6galementmi-    also expose in poor light: Keep the release button    possible de faire des prises de vue avec un faible re   depressed for the required exposure time. The    6clairement: mainteriir le bouton de d6clenchement
 u.    Shutter closes when you let go again. For time   appuye pendant toute la dur6e de I'exposition. to   exposures a cable release and a tripod (or other    L'obturateur ne se ferme que lorsque le bouton est o).    firm camera support) are essential.                    relach6. ll est recommandd  d'utiliser un d6clencheur
                                                          souple et un pied (ou un autre support stable pour
 h€  @TheAperturesaperture ring engages at intermediate stop     l'appareil).
                                                                                                                         a m    values on the aperture scale. There f/3.5 also  @ Dlaphragme
       counts as a half stop position.                        L'6chelle des diaphragmes comporte aussi des a-   The higher thd aperture number (f-number)  the    valeurs interm6diaires. La graduation f/3,5 compte e     smaller the aperture. At the same time the deoth   comme un reglage interm6diaire.
 n-   oJ field increases (see Note No. @). With every   Plus le chrffre du diaphragme est grand, plus
       two click stops the light intensity through the lens    I'ouverture est petite. Paralldlement, la profondeurma     is halved, requiring a corresponding doubling ol the   de champ augmente (voir Conseil pratique @). gn e    exposure time. For example:                 meme temps, tous les deux crans, la lumination
                                                         diminue de moiti6, de sorte que le temps de pose      Aperture t15.6  Il8    tl11    tl16       ll22       necessaare est doub16. Par exemple:     Time   l/soo llzso  llvs      lleo        l/so sec.
                                        Diaphragme:  5,6    I   11  16  22                                                  Temps de pose:  tlsoo tlzn  tl'tzs tlco  l/ro sec
View original page 20Page 21 · Read text
O Scfiarlenllete
Auch in einem gewissen Bereich vor und hinter
der eingestellten Entfernung wird das l\rotiv in
ausreichender Bildsch?irfe wiedergegeben.  Diese
Zone der .,Scherfentiete wechst mrt zunehmender
Blendenzah   l.
Zur Beurteilung der Schdrfentiele sind beiderseits
des Index je zwei Punkte eingraviert. Die inneren
Punkte gelten frir Blende 8, die euReren Punkte
Irir Blende'16 und zeigen auf der Entfernungsskala
den erfaBten Scharfenbereich an. Beispiel: Bei Ein-
stellung aul 3 m und Blende I  reicht die Scharfe
von ca. 2 m-6 m.
-  Scherfentiefe-Tabelle,  Seite 58.
@ SdlnappscfiuB
Das Ausnutzen der SchArfentiele erleichtert das
Einstellen besonders bei  schnellen Schnaoo-
schtissen. Aut der Entfernungsskala  sind hierfrir die
beiden merstbenutzten Standardeinstellungen  {ab
Blende 8) rot markiert:
6 m f0r Schnaooschisse im Fernbereich iiber 3 m.
2 m trir Sclrnappscitisse im Nahbereich zwischen
1.5 und 3 m.
View original page 21Page 22 · Read text
www.butkus.us

O Depth ot Field                 @ Profondeur de champ
A subiect is reproduced wiih adequate sharpness   Le sulet est reproduil avec une nettet6 suffisante
even if  it is in a certain distance zone in tront ot   dans une certaine zone en avant el en arridre de
and behind the locused distance. This so-called    la distance de mise au point. Plus le diaphragme
depth of field zone increases with higher aperture    est term6. plus la zone de (profondeur de champ'
numbers.                                            augmente.
To show the depth of field available. two sets ol   Pour €valuer la profondeur de champ, deux points
dots are engraved to eac+t side oi the tocusing    sont grav6s de chaque c6te du repere de mise au
mark. The inner sel ol dots applies to aperture t/8    point. Les points interieurs se rapportent au dia-
and the outer set ol dots lo f/16. These dots show   phragme 8, les points exterieurs - au diaphragme  16;
the depth ol field range covered on the distance      ils montrent. sur l'6chelle des distances, la zone de
scale. Example: With the lens set to 10 feet and    profondeur de champ couverte.
aperture  f/8, the depth of field extends from 6r/z feel   Exemple: en mettant au point sur 3 metres et cn
to 20 feet.                                         diaphragmant A 8, on obtient une profondeur de
see Depth of  f ield table, page 58.                    chamo de 2 metros A 6 mdtres environ.                                 + Table de profondeur de champ, page 58.
@ Focusing Zonor
By utilising the depth of field we can simplity  @ Photoc eur le Ylf
distance settings for quick shooting. For  this   La profondeur de champ disponible facilite la mise
purpose the distance scale carries the two mosl   au point. surtout lorsque l'on tait des prises de vue
usbd standard sottings (for use with apertures of   en succession rapide. A cet etfet, deux reglages
tl8 and more) marked in red:                        standard les plus utilises sont marques en rouge
20 f6et tor a distanl shooting zone beyond l0 feet.    sur l'6chelle des distances (A partir du diaphragme  8):
6r/z teet for a near zone between 5 and 10 feet.   6 m pour prises de vue e une distance de plus de
                                                                 t m6tres.
                                                 2 m pour prit€s do vu€ cte prf3, antrcl'5 el 3 rnotres
View original page 22Page 23 · Read text
O Richtig belicfiten
                                              Grundregel: Die Kamera muB:'rbenso wie ein Hand-
                                                 belichtungsmesser  (1) genau in Aufnahmerichtung  (2)
                                                  aui das Objekt gerichtei sein, dem die N,lessung  gilt.
                                                  Ein unabsichtliches Verkanten - etrva bei Landschafts-                                        aufnahmen gegen den Himmel  kann das lvleR-
                                              ergebnis verfalschen und in diesem Fall zu Unter-
                                                     belichtung  fLlhren.
                                                  In Sonderlellen leBt sich die Belichlung dem Motiv
                                      auch individuell anpassen. Das gilt vor allem f0rl,'                        Autnahmen aul Farbumkehrfilm bei slarken Lichf
                                            gegensatzen. Woilen Sie ohne RLicksichl auf das
                                               ibrige Motiv z. B die Schattenseite eines Portrats
                                               heller wiedergeben. gehen Sie zur Nahmessung
                                                                                                    so|           ,,t           dichi an die Person heran i3) und benutzen die                                                      ermittelte Einstellung fur die geplante Aufnahme  (4).
                                                 Gegenlicht: Bei Aufnahmen gegen das Lichi auf
                                             Farbumkehrlilm empfiehll es sich, zugunslen der
                                             Schatten die gemessene Blende bis zur nachst-
                                                klerneren Blendenzahl 2u dltnen      f,'f,'
View original page 23Page 24 · Read text
www.butkus.us

   O Corrccl Erpoeurc                 @ Exporltlon corrccla
      Basic rule: Point the camera accurately in thg direc-   Une r6gle fondamentele:  lors dt la mesure du
       tion (2) of the subject area to be measured- just like   temps de pose, I'appareil dojt Ctre dirig6 pr6cis6ment
      a separate exposure meter (1). Accidental tilting, e. g.   dans la direction du suiet (2), comme un posemdtre
p     skywards with landscape scenes - can l€ad to wrong    ordinaire (1). Une d€viation involOntaire, parexemple,       readings, in lhis case resulting  in under-exposure.      en direction du ciel lors de la prise de vue d'un
     For specral cases the exposure can also be    paysage, peut fausser la mesure et entrainer - dans                                                                    une sous-exposition.      matched to the main object in the scene. This  is    ce cas -      important for instance with 6hots on reversal   Dans des cas particuliers, le temps de po8e peut
      colour lilm of subjects of great brightness range.    6tre adaptd individuellement au suiet. Cela s'appli-
     Thus if you want to reproduce    . the shadow side   gue surtout aux prises de vue sur film couleurs
      of a portrait lighter irrespective of the rest of the    inversible en pr6sence de forts contrastes lumineux.
      scene, take a close-up reading of the figure  (3)    Si vous voulez, par exemple, rendre plus claire la
     and use the setting obtained for the intended    partie ombr6e d'un portrait. ind6pendamment du
       picture  (4).                                          reste du sujet, approchez-vous du sujet pour la
                                                                 lecture (3) et utilisez le temps de poee Obtenu pour
      Against the light: To improve the shadow rendering     la prise de vue envisag6e  (4).
       againsl the light shots on colour film it is advisable
       to open up the aperture to the next lower f-number.    Contre-jour: Lors des prises de vue A contre-jour
                                                        sur film couleurs inversible,  il est recommand6 -
                                                    pour un meilleur rendu des ombres - de ramener                                                              le diaphragme e la valeur directement Inf6rieure A
                                                                        la valeur mesur6e.
View original page 24Page 25 · Read text
@ Btitzticht
                                    lm Steckschuh der Kamera kann wahlwetse han-
                                                     delslibliches Zubehdr mit SteckfuR angebracht  wer-
                                       den: Belichtungsmesser, Enlfernungsmesser oder
                                                      B  I itzgerdt.
                                   Der N,4rttenkontakl ermoglicht den kabeilosen An
                                            schluB des Blitzgerates. (Blitzgerdte mit Kabelver-
                                        bindung erfordern ein zusetzliches Zwischensttck
                                           mit Kontaktnippel.) cezrlndet wird der Blitz durch
                                           Auslosen des Verschlusses.
                                            Verwendbare Vetscfi luRzellen:
                                               Blitzlampen -  r/eo sec oder langer (k0rzefe Zeiten                                    ergeben Unterbelichtungen oder  sogar  untetr
                                                       belichtete Negative).
                                                   Elektronenblilz -  alle Zeiten bis r/soo sec.
                       @ Filtel
                                              In das Gewinde der Objektivfassung kann ein
                                                       Filter eingeschraubt \verden.
                                                       Filter erlordern eine Belichtungskorrektur. Aul der
                                        Fassung ist dieser Wert eingraviert. Er gibt die
                                             Stufen an, um die enlweder die Blende geotfnel
                                                (kleinere Blendenzahlen) oder die Belichlungszeil
www.butkus.us                                 verlengert werden muR. Hierbei entsprichl  jeweils
                                           eine Raslstufe aul der Blendenskala einem halben
                                    und auf der Zeitskala einem vollen Korrekturwerl
View original page 25Page 26 · Read text
www.butkus.us
O Fl.rh Shotl                  @ Rartr
The accessory shoe of the camera takes  all   Dans la grifte de I'appareil, on psut monter tu
available accessories  with a suitable foot: expo3ure    choix des accsssoirqt du commerce avac.un sabot
meter, rang€ilinder, flash gun.                           appropri6: posemotre, tdl6metre, tldsh.
The central contact permits cableless connection    Le contact central permet de brancher un appar€il
of a flash unit. (Flash units with synctrronising lead   flash sans cAble (les appareils flash avec cAble
require an intermediate adapter with coaxial socket.)    necessitent une pidce interm6diaire supplementaire
The flash is fired by releasing the shutter.          avec une douille coaxiale). L'6clair est d6clench6
Permissible  shutter spoeds:                           par le declenchement de I'obturateur.
                                      (shorter                                                                                          utilasables:                                                      Vilesses                                                                   d'obturationFlash                                         speeds      bulbs                             longer            -  r/ro second or                                                                                                                              (les                                          Lampes                                     exposures                                                           at                                                            flash magn6sium    cause           underexposures                         even no                          orwill                                                                                  -  r/ro s ou plusall).                                                vitesses sup€rieures donnent lieu d des sous-
Electronic llash - any speed up lo r/soo second.         expositions et meme A des negatifs non expos6s).                                                Flash                                                              6lectronlque -  toutes les vitesses iusqu'au                                                                                    g,(D Fltters                                                                      l/roo
A tilter can be screwed into the thread of the lens
mount.                      @ Flttrct
Filters require an exposure correction. This is   Un filtre peut etre viss€ dans la monture d'oblectif.
engraved on the filter mount.  lt  indicates the   Les filtres necessitent une correction de la lumina-
number ot steps by which the aperture must be     tion. Cette correction est gravde sur la monture du
opened (lower f-numbers) or the exposure time     filtre. Elle indique de combien il faut ouvrir le
increased. Here one click interval o{ the aoerture   diaphragme ou augmenter le temps de pose. Un
scale corresponds to a half step correction and   cran sur l'6chelle des diaphragmes cgrrespond d
on the shutter speed scale to a tull step correction.   une demi-correction; un cran sur l'6chelle des
                                                  temps de pose correspond a une correction entiere.
View original page 26From the M. Butkus archive. Original publisher and archive notices are retained.
Check the model and edition against your equipment.
PDF verified 2026-10-10.