Film cameras
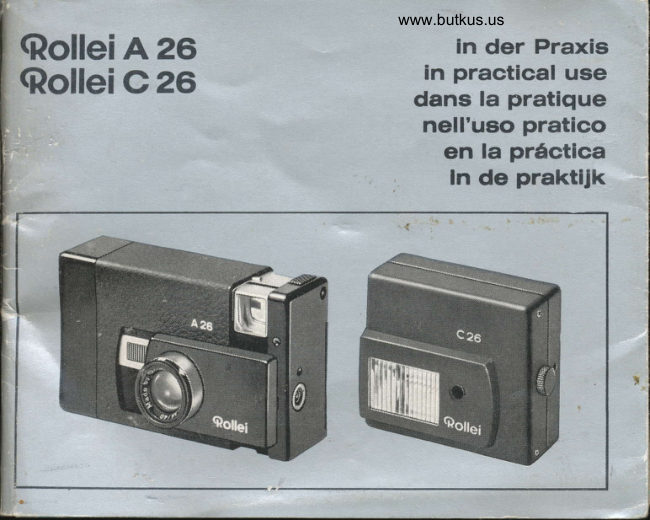
Rollei A26 - C26 User manual
User manual for Rollei A26 - C26. 19 pages in English. Read the original PDF, download or print a copy without registration.
19 pagesEnglish2.6 MB PDF
Loading your manual…Open PDF directly
Document details
- Brand
- Rollei
- Model / document
- Rollei A26 - C26
- Document type
- User manual
- Language
- English
- Pages
- 19
- File size
- 2.6 MB
- Category
- Film cameras
- Document date
- Not specified in catalog
Search available document text
Find a term, then jump to its page in the original PDF. Image-only pages may not be searchable; check the PDF for exact wording and diagrams.
Page 5 · Read text
Elnzeltelle und Funktlon
  1  Fertigungsnummer                     17  Schraubgewinde  f0r Trag- bzw.
 2  Tragschlaufe                             UmhAngeschlaufe
 3  Umhdngeschlaufe                       18  Kontaktkupplung
 4  Sch rau bgewinde  fi.ir Blitzgerdt oder      19   Kontaktstift f0r Bl itzgerdt
    Trag- bzw. Umhdngeschlaufe            20   Befesti g u ngssch rau be  f ii r Blitz-
 5   Griffst[ick                                   gerdtanschluB
 6  Schiebeh[ilse                              21   Ein/Aus-Schalter
 7  Taste mit Rotpunkt frir H0lsen-          22  Rotmarke f0r Schalterstellung,,Ein"
     entriegelung                           23   Kontro    I lampe f0r Bl itzbereitschaft
 I  R0ckwand mit Filmandruckplatte        24  Sensor
 9   Sichtfenster  fiir Filmsorte und           25   Ref lektor
    Aufnahmezahl                         26  Ladesperre  f[ir eingeschaltetes  Blitz-
10  Entfernungssymbole                           gerdt
11   Meter/feet-Skala f0r Entfernungsein-    27  AnschluB ftir Ladekabel
     stellung                               28  Ladegerdt
12 Fenster fur Belichtungsmesser          29  Sch  I itzsch raube ftir Seitenkappe
13 Sucherokular                            30  Seitenkappe
14 Sucherfenster                             31   Batteriefach
15 Griinsignal fUr ausreichendes Auf-      32   Federplatte   fli r Batteriehalteru  n g
     nahmelicht                            33  Taste ftir Filmtransportfreilauf bei
16 Servo-Ausloser                               Kassettenfehlern + Seite 13
                                         34  Objektiv
View original page 5Page 8 · Read text
www.butkus.us
Components and function
 1  Serial number                           17  Strap bush 2  Carrying strap                            18  Contact coupling 3 Neck strap                                19  Contact pin for flash unit 4 Bush for flash unit or carrying and    20   Fixing screw for flash connection
      nect( strap                                   21   Onioff switch 5  Grip                                    22  Red mark for switch "on,, 6  Sliding sleeve                          23   Flash ready light 7  Button with red dot for sleeve release    24  Sensor 8 Camera back with film pressure plate    25   Ref lector 9 Window for film type and exposure    26  Charge lock  for flash switched on    number                                 27  Charger cord connection10 Focusing symbols                       28  Charger
11 Metre/feet focusing scale               29  Slotted head screw for side panel12 Exposure meter window                 30  Side panel13 Viewfinder eyepiece                        31   Battery compartment14 Viewfinder window                      32   Battery spring retainer plate15 Green signal for sufficient subiect    33   Film advance freewheel button for
     illumination                                    cartridge defects   page 2516 Servo release                           34  Lens            -
View original page 8Page 9 · Read text
Crash course for the first film          Switc*r on flash unit                                               Push switch 21 to the right + Fig. H.Cock camera
       upto stop -+ Fig. A.                  Await flash ready signal                                        on ready light 23 and fire -+ Fig. J.Open camera
     depress locking button 7, Pull off   Hlnts for the beginner     sleeve6+Fig.B.                   O Look for lively, brightly illuminated
Insert lilm cartridge                         close-up subjects, avoid draP, low
      open camera back 8, after inserting       contrast subjects.
       re-close -+ Fig. C, Push sleeve 6  O Close-up snap shots are better than
        up.                           posed "souvenir pictures" or pure
Advance lilm to No. 1                      landscape and architecture without      pull sleeve 6 open to its fullest       foreg rou nd.
      extent and push closed again until                      O A few large colour areas are better        .1. is visible in window 9.                                          than a lot of brightly coloured detail.
Focus                   O Your "ideal subject": a small group       set focusing symbol 10 correspond-                                                        in action, at a range of about 6to Bm/       ing to subject + Fig. D.                                          20 to 30 ft, morning or afternoon, with
View subject in finder                         sunlight coming from the side, with
     picture area inside bright-line      vivid colour contrast in  f ront of a      frame -+ Fig. E and F.                    quiet background.
Release on green signal          O When using flash observe a range of
     green light 15:  go ahead bY      approximately 1 to 4 ml3llz to 13  ft,
      pressing down release 16, subject      avoid sharply receding scenes, do not
       illumination sufficient +  Fig. F.      use  f rontal   f lash against ref lective
Where green signal absent                         su rfaces.
      connect flash unit with screw 20  O See other hints and instructions on
      -+ Fig. G.                           pages 20 and 25.

                                                                                    15
View original page 9Page 10 · Read text
The Rollel A 26                      Beforewww.butkus.ustaklng the flrst plcture
A camera for everybody to take good    Serlal numberpictures          right             from                  the                       beginning,                                        faster                                            of the                                                          note and                                                             keep                                                                                      in a safe                                           camera -and more          simply                than                     ever                             before.                                          Rollei   place                                          (number                                                 1/page                                                                      14).                                                                     Statingprecision and full automation permit a   number-facilitates recovery or proofthisofcompletely new type of photography:   ownership in the case of loss.rapid pictures with extremely simpieoperation.                                        lnsert battery
                                   as described on page 21 (if not already
The Rollel C 26                      done by your Photo Dealer).
                                                              strapA pocket size computer flash unit        Fit carrying
together with the A 26 a mini-photo-  As required screw carrying strap 2 or
combination with built-in guarantee  of   neck strap 3 into bush 4.
successful flash pictures.               The carrying strap ensures rapid shoot-
                                       ing when carried on the left wrist; the
We wish you lots of fun in fully automatic   neck strap permits convenient carrying
photography with this miniatuie precision   and even carrying the camera unnoticed
equipment from the                       (under the jacket or coat, or ln the left-
Rollei-Werke Franke & Heidecke           hand inside breast pocket, see also page
                                                          20).
                                                  lnsert film cartridge
                                        Hold camera by the two grips 5 as shown
                                           in Fig. A and pull open sleeve 6. press
                                                  in button 7 with red mark and pull sleeve
                                  6 right off -> Fig. B.
View original page 10Page 11 · Read text
Open camera back 8, insert  f ilm cartridge    Select picture area
(type 126) so that the lettering is visible.   Hold camera as shown in Fig. E: slip
Re-close camera back 8 and hold pressed   strap over left wrist for safety, do not
against the cartridge. Push up sleeve 6   mask window 12, keep eye close to view-
                                                                              13.-is felt.Fig. C and close tight until resistance    Selectfinder eyepiecepicture area                                                     so that it is complet-
Pull sleeve 6 open several times to its   ely within the bright-line frame of view-
fullest extent and fully close again until    finder 14    Fig. F.
the  f rame number .1. appears in the  The area-  surrounding the  bright-line
window 9.                             frame makes it easier to follow rapidly
                                        moving subjects.
Before eacfi picture
Focus                               lmportant for shooting
Pull open sleeve 6, focus according to   The green signal 15 in the bottom right
symbols 10    Fig. D or to estimated   of the viewfinder imagc signiires suffi-distance in metres-     or feet between camera    crent subject illumination and givcs the
and important prcture subject using focus-   "go ahead "  for a correctly exposed
ing scale 11.                               picture with a  light pressure on the
Examples of frequently used settings:        release 16.
                                                                    camera8  Close-up subject or       1.2-1,5 ml     lf no picture is taken: close                                                                                                                                 isportrait head and shoulders   4 to 5 ft   again to fullest extent - no picture                                                       lost, as now no  f ilm advance takes place.
++ Small group of peopte,      2-6 m/   With insufficient subject illumination the
interior shot in living rooms     6to20ft   green signal will not come on - for such                                       cases                                               the C 26 flash unit is orovided --lh  Large groups of people,  6 m--l/                                                                18.                                     Pagebuilding, landscape         20 ft to l.
View original page 11Page 12 · Read text
www.butkus.us
After eaclr plcture                   Flash plctures wlth the C 26
close camera'completely and pull fully   are quite simple, because the built-in
open again to be ready for shooting the   computer automatically e4sures correct
next time -                                exposure. Gamera operation remains theread off exposure number in window 9   same, additional adjustments are not
to permit changing the film in good time.   necessary by virtue of the automatic
                                   diaphragm control. After coupling theDuring intervals between shooting how-                                two units the C 26 will provide aboutever always close the camera: lens and                                 40 flashes for subjects at distances ofviewfinder are then protected, the release
is secured against inadvertent shooting.   approximately 1-4 m/3112 to 13 ft.
                                          Before using for the lirst time
After the last plcture                 Recharge flash unit for several hours in
The exposure No. 12 or 20 is followed   order to compensate for the self-dis-
in window 9 by a number of X's to indic-   charge during prolonged storage (a cha-
ate the film end (and film change):    racteristic of all accumulators)-+ Page 19.
repeatedly close and open camera until   Couple flash unit to camerathe X's are no longer visible.                                                                                         strapPull off camera sleeve 6 (shading the   fromUnscrewcameracarryingand securestrapinorbushneek17, placecamera with the body) after depressing                                        contact coupling 18 on contact pin 19button 7. Open camera back' 8 and  as shown in Fig. G and tighten fixingremove cartridge, insert new cartridge   screw 20.-+ Fig. B.
Have exposed films (particularly colour   Focus
material) developed as soon as possible   to the subject distance in'metres or feet,
as they only have a limited storage time.   but not over approximately + hr/tg tt as
                                             subjects at any greater distance may not
                                   be adequately illuminated.

 18
View original page 12Page 13 · Read text
Swltch on flash unit                       Gonnection for charging
Push switch 21 past initial resistance   Push switch 21 to the left in order to
fully to the right +  Fig. H, red mark 22   switch off charge lock 26. Plug charger
indicates "on".                      cord into connection 27 --> Fig. K,
                                         connect charger 28 to mains plug socket.
Flash ready                        Camera (with or without film cartridge)when ready light 23 comes on: with fully                                can remain coupled to flash unit whencharged accumulator after approximately                                                charging.10 sec.
                                         Charging time
Fire!                                          After normal discfiarge: when the recyc-Note camera position +  Fig. J: do not                                               ling time rises to approximately 30 sec-mask sensor 24 and reflector 25. Vertical                                     onds, recharge as soon as possible forposition (flash unit above camera) is                                           approximately 15 hours to be ready for theadvisable for shadowless flash pictures.                                           next shot. This period may (occasionally!)The     flash           is fired by lightly depressing                            be exceeded by up to  half ;   f requent          16.release                                        overcharging will however damage the
Swltcfr off flash unit                        accumulator.
Push switch 21 fully to the left (red mark                                               Alter extreme dlscfiarge: if ready light 2322 no longer visible), when no further                              no longer lights up (for example afterpictures are immediately intended.                                                 forgetting to switch tfe unit off), recharge
Charglng flaeh unlt (AC only)            immediately for approximately 24 hours.
Ched< malns voltage                         After brlef period out of use (up to a few
Only connect charger (type D) when the  weeks):                                                                        ;
voltage supply agrees with the voltage   before using again cfiarge unit when
stated on the charger plug.                switched off for approximately 20 min-
On chargers with voltage selector (bet-    utes. This will reform the flash capacitor
ween the plug pins): set slot to supply   and the unit will be fully ready for firing
voltage with a coin.                        again without loss of accumulator charge.
                                                                                    19
View original page 13Page 14 · Read text
www.butkus.us
 After prolonged period out of use: re- @ For carrying the camera charge unit at intervals of a few months    tl"  following are available: carrying in order to compensate for the self-dis-   strap and neck strap together with cases
 charge (unavoidable with all accumula-   for camera or camera with flash unit.
 tors).                                         After fitting the strap -> page 16 pull the
                                   end of the loop out through the hole in Practical hints for using the camera   the case. When shooting the case is
                                      pushed back to expose the camera.@ The correct fitm
 for the A 26 is available from your dealer @ Choice of subject
 as "126 cartridge   f ilm" for 12 or 20 square    is of course left to personal preference,
 pictures 2Bx2B mm. According to applica-    but a few rules at the beginnirig will help tion the following are available:              avoid mistakes:
 Colour reversal  f ilm   gives colour trans-
                                                                                                                         in                                                                       subjects
                                                                                             pictorially parencies for projection-    onto a screen,   movementbrightly illuminatedare generallyclose-upbetter Colour        negative  f ilm    tor coloured   than distant small details, a few large prints,                                       colour areas are better than a tot bt
 Black and white negative film    for black    brightly coloured detail,,alively snap shots and white prints.             -           are more rewarding than monotonous
Ask your Rollei dealer for further details    landscapes.
and purchase films as fresh as possible.  A few more hints: unobserved pictures Branded         products                of repute guarantee                                        of children;                                                     close-ups                                                                                        the                                                             of animals                                                                                 in uniform quality                 standard.                                         z9o;                                                 sporting                                                                       groups,                                                           events, hlking                                                                                  boat
                                                                 trip-s, processions, playground scenes, city
                                                           traffic    these are all "live" pictures.                                                  -


20
View original page 14Page 15 · Read text
@ Close-up subjects                        positive symbol in battery compartment                                      31) in under spring plate 32 +  Fig. M;at distances between about 2.5 m/B  ft    in doing so only grip by the edge, do notand 1 m/3112 tt require more accurate    touch back and front. Refit side panel andfocusing in order to take advantage of                                       screw in position.the performance of the lens.
                                        Battery life 1-2 years, changing once
@ Green signal                 a year is recommended. Closing theas indication of sufficient subject illumi-                                   camera when not in use saves batterynation applies only to the camera when                                    energy as the exposure meter is thenready for shooting (closed and opened                                          switched off.again after the last picture).
@ Camera position                      Practlcal hlnts for using the flash
            a.s                         Fig.           shown in                        E, butin general                  @ Save energy                                  positionsaccording            requirements                           other           to                                     Switch unit off after use and duringare also possible or more practical: for   prolonged intervals between firing.example holding above the head in a
crowd or vertically downwards for unob- @ Ready indicationserved snapshots.                         After switching on wait for the ready
                                                  light 23 to come on, and only then fire
@ Battery change                          the unit.  lf the ready indicator only comesUse for example Mallory PX 625 or   on after approximately 30 seconds or not
eouivalent batteries of other makes. Undo    at all, the accumulator must be recharged.slotted head screw 29 by turning anti-
clockwise with a coin and remove side @ Flashing from the mainspanel 30 +  Fig. L. Rub new battery over   permits in an emergency single (!) flash
with a cloth to remove any oxide film.    pictures with severely or fully discharged
Push battery (with positive pole against   accumulator. An AC power socket  is
                                        necessary near the subject:
View original page 15Page 16 · Read text
www.butkus.us
Connect flash unit (with camera coupled) @ Charging during travel
 for charging -+ Page 19 and wait for ready   In some cases other voltages and mains
 light to come on. Then pull charger cord    plug systems will be found abroad.out of connection 27 again and switch   As a precaution:
on flash unit. Takeflash picture immediat-   take a suitable charger or adapter to fitely afterwards as the ready light will   the charger plug for use with ihe plugs
extinguish again after a few seconds.         in use in the country.
@ Flash reflections                                Maintenance and careAvoid shooting from positions where the
flash will be reflected direcily into the   Clean camera according to amount ofcarRera by reflective objects. Choose   use at short or long interval$: clean
position so that frontal reflections (win-   external parts with a soft cloth, glass
dow glass, mirrors or polished surfaces)   components with lens cleaning tissue.
are eliminated.                          Unscrew side panel and dust all internal
@ Fill-in flash in daytight                 components with a camel hair brush.
produces better illumination and more   Remove battery before long periods out
brilliant colours in the. picture foreground    of use --> Page 21.
up to a range of approximately 3 m/10  ft.    Protect camera and flash unit from sand,
Operation of the camera with flash unit    water, strong sunlight and vibration; whenconnected is the same as tor normal   not in use always close and keep in the
flash pictures.                           case provided.
@ Flashing in pubtic               The lnternational Rollei Service withIt is possible to use flash even when a  many authorized and associated photo
numberof other photographers are taking   workshops as well as the Rollei dealersflash pictures at the same time. The    all over the world service Rollei products
automatic flash control is not affected    expertly and will help you with ail ques-by the flashes of other photographers    tions on photography.
(built:in extraneous light trap).
 22
View original page 16
Page 17 · Read text
Speclflcatlon and flgures
426                                    subject illumination; servo release with                                    ribbed pressure plate, release travelPocket camera 28 x 28 mm, with auto-   approx. 0.5 mm.matic programme exposure control for
126 cartridge film.                        Viewfinder system: direct-vision finder
                                                 reflected-image bright-line frameSpecification: enclosed compact cons-   0,6 x;                                       with surrounding area; green signal fortruction; pull-open outer sleeve provid-
ing cover for viewf inder and release,     suff icient subject illumination, coupledcoupled with film advance, shutter cock-    with film speed pick-up.
ing, lens lock, exposure measurement and   Lens: Carl Zeiss Sonnar 40 mm f13.5
fifm speed pick-up 18-27 DIN/50-400   (made by Rollei) recessed with camera
ASA; double and blank exposure prev-   closed and covered by guard plate; 4
ention; indication of film type and expos-   elements, 4 components; aperture range
ure number;   f ilm advance   f ree-wheel   t/3.5-t122; manual focusing on 3 sym-
button; special connection with aperture   bols or metre/feet scale from 1 m/3.5 ft.
input for C 26 computer electronic flash
unit; screw-in bush for carrying or neck   Dimensions: open 112 x 63 x 33 mm,                                           closed 94 x 63 x 33 mm.strap.
Automatic exposure control: exposure    Weight: 280 gllo oz.
meter with CdS photo-conductive cell,   Accessories: carrying strap, neck strap,measurement based on picture fore-   carrying bag, case for camera with flash
ground, measuring range 32-8200 cdlm2,    unit.39 to 9950 cd/sq. yd., automatic cut-out
with camera closed, power supply from
Mallory-type cell in internal battery com-
partment, continuously controlled ex-
posure programme from f/3.5-r/so sec to   Subject to technical modification without
tl22-t/zso sec, green signal for sufficient     notice.
View original page 17Page 18 · Read text
www.butkus.us Specification and figures
 c26                                     Colour temperature: approx. 55000 K.
 Computer electronic flash unit with hori-   Flash power: 15 Ws.
 zontal format reflector and rechargeable
                                                                                 460 x 600. NC accumulator, specially for Rollei A 26;   Angle of illumination: approx.
 quality guarantee in accordance -with   Acceptance angle of sensor: approx.150. DtN 19011.
                             NC accumulator: 2.5 V I ZZS mnn, main_ Shooting aperture: automatically set in    tenance-free, charging time after normal
 camera.                                   discharge approximately 15 hours.
 Effective range: up to approx. 4 nl13 tt.  Gharger: Type D, electrically safe by                             means of  disconnecting transformer, Ffash duration:  to., approx.l/soooo-1 /zsoo sec.                                               protection class  ll.
Recycling time: approx. 10 sec. with fullycharged accumulator.                      Dimensions: 75 x 63 x 33 mm/Zz1lzzx21lzx
                                                      13lto in.
Flash capacity: approx. 40 flashes withfully charged accumulator.                  Weight: 160 gl6tlr oz.
Reflector: colour corrected diff using   Subject to technical modification withoutscreen with UV filter.                            notice.

Handling faults and remedies
                                    I Possible cause                                           I Remedy
         sleeve  jammedSliding                        Sliding sleeve not  previcusly                                                                       First                                                                                   of        open sleeve and thenwhen closing                       op€ned                                                                                  c                                                                      lose
Sliding         sleeve  jammed  Sliding                              sleeve not previously                                                                       First of                                                                                  all fully close, sleeve and thenwhen opening                                 c  I osed                                                     open                                                                     agatn
View original page 18From the M. Butkus archive. Original publisher and archive notices are retained.
Check the model and edition against your equipment.
PDF verified 2026-10-10.