Film cameras
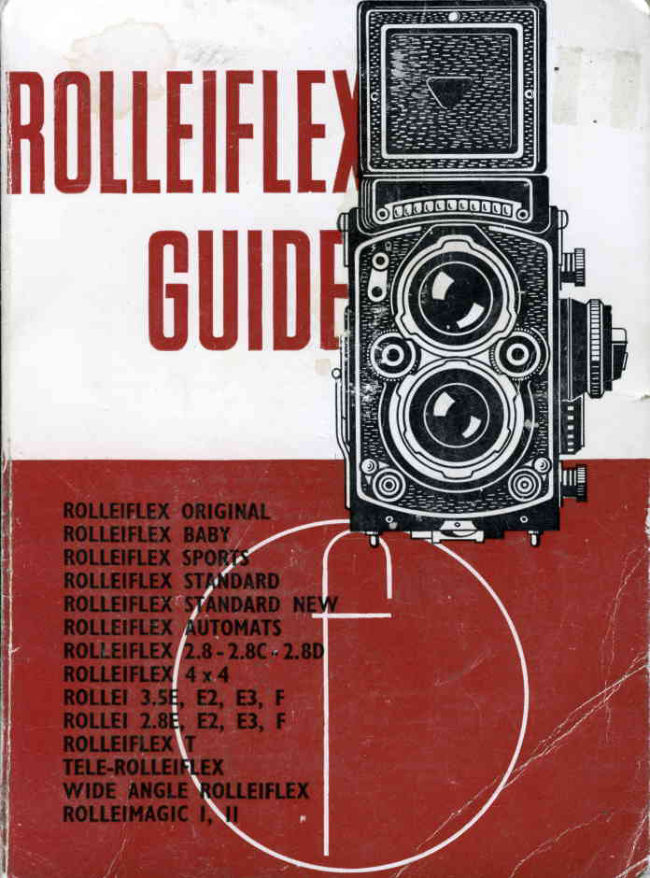
Rolleiflex Guide SINGLE Reference guide
Reference guide for Rolleiflex Guide SINGLE. 119 pages in English. Read the original PDF, download or print a copy without registration.
119 pagesEnglish6.9 MB PDF
Loading your manual…Open PDF directly
Document details
- Brand
- Rollei
- Model / document
- Rolleiflex Guide SINGLE
- Document type
- Reference guide
- Language
- English
- Pages
- 119
- File size
- 6.9 MB
- Category
- Film cameras
- Document date
- Not specified in catalog
Search available document text
Find a term, then jump to its page in the original PDF. Image-only pages may not be searchable; check the PDF for exact wording and diagrams.
Page 3 · Read text
The Green Section betweenpages 24 and 25           Page

THE NOLLEIFLNX:   MODEL  BY MODEL

The Rollaifler F and E Series
  Loading6 - Unloading 8 - Shooting 8 - Using the Rolleiflex E
  Exposuie Meter  f 0 -  Installing the Exposure Meter  I I  -
  Special Controls  | |
The Rolleiflar   T                                             t4
  ioadine" 14 - unioaoini t5 :'sho;iine  tC -  Using the
  RolleiflexT ExposureMeter 18 - Installing the Exposure
  Meter 18- SpecialControls19
The Rollei-Magic I,II                                20
  Loading 0  - Unloading 2   - Shooting  2  - Special Con-
   trols 3
The Rolleifler    lxl                                    2s
  Loading 5  - Unloading  5 -'shooting,2s':Sp"diuf coir-
   trols 6
The Rolleifl.ex Autotnat  Series                          29
  Loading 30 - Unloading 30 - Shooting 30 -  Special Con-
   trols 34
Early Rolleifle* Mo&ls                                    35
  Loading 38 - Unloading 38 - Shooting 38 -  Special Con-
   trols 39
Lens  Attachrncnts     cnd,  Accessories                        40
  Tele and Wide-angle Work with the Rolleiflex 40 - Close-up
  Work with the Rolleiflex 40 -Earlier Close-up Lens Sets4
   Soft Focus Lenses 4 -The  Lens Hood 43 - The Rolleilux
  43 - Filters 43 - The Rollei Micro Adapter 44

Vieuing Accessories        .                               15
  The Binocular Focusing Hood 45 - The Eye-level Prism
  Finder 45 - The Rolleigrid 45 - Rolleiclear Screen 45 - The
  Rolleimeter 45 - The Extension Focusing Knob 46
Cam,era Casesand Eolding Accessories         .                48
  Ever-Ready Cases48 - The Metal Ever-Ready Case 48 - The
   Rolleifix Tripod Head 50 - The Pistol Grip 50 - The Pano-
  rama Head 50 - The Stereo Slide 50 - The Rollei Marin
  Underwater Housing 5 - The Rolleimat 5
View original page 3
Page 4 · Read text
Alurnatioe  Picture Sizes .                                53
  The Rolleiflex Mask Set 53 - The Plate Adapter 53 - The
   Rolleikin  Cine Film  Adapter 54 - The Rolleikin   II 54 -
   Installing the Release Knob 55 -  Assembling the Rollei-
  kin  II 56 - Loading 55 - Film Transport 58 - Rewinding 58
   - The Rolleikin  I 58 - Assembling the Rolleikin   I 58 - Film
  Loading and Transport 50 - Rewinding 60 - Early Designs
   of Rolleikin 62


  Some iterns of equipment or certnin moteriols mentioned in this book moy not be f reely
avoiloble in every country. Import ond marketing conditions vory widely, and ore outside
the control ofthe photogrophicretoiler.
                       1967 Edition
          @ Focal PressLtd., 1959
     Printed  1967 n  Great  Britain  by Staples Printers  Limited,  Rochester,  Kent
View original page 4Page 5 · Read text
THE ROLLEIFLEX  CAMERA
  The  Rolleiflex  is the  original  rollfilm,  twin-lens  reflex
camera design, from which  virtually   all other cameras of
this type are derived.  It  takes 12 exposures 2f x2l    in.
(6x6  cm.) on standard 120 rollfilm  or 24 exposures on
220 film with specially adapted models. A "baby  Rolleiflex
4x4 cm. for 12 exposureson 127 rollfilm is also available.
  Two  lenses-matched   for  focal  length-are   mounted
one above the other on a common panel. The upper lens pro-
jects an image of the subject via a mirror  to a focusing
screen in the top of the camera, while the lower one projects
a similar image on to the film. The focusing screen image,
therefore, shows at all times the full size picture-upright   but
reversed left to right-as     it will appear on the film. To com-
pensate for any parallax between the viewing and taking
lens a mask  is  built  into  the viewing camera below  the
focusing screen.
  The focusing screen on top of the camera is protected in
the closed position by the folded-down  finder hood. When
opened, this forms a light  excluding hood 2$  in. high;   it
carries a magnifier for  critical focusing. A frame finder for
eye-leveldirect vision use is built into the hood.
  The hood on current models is removable and can be
replaced by a pentaprism, which permits eye-level focusing,
showing the image upright and right-way-round.
  The finder lens in all models is faster than the taking lens
and cannot be stopped down. This ensures a bright focusing
screen image and, having rather less depth of fleld than the
taking lens, allows for very critical focusing.
  The interior  of the camera body is fitted with light baffies
which  effectively avoid  scatter of  light and enhance the
brilliance  of the picture.
  The Rolleiflex  is focused by a large focusing knob on the
side of the camera. This  is geared to the front  panel and
smoothly and simultaneously controls both lenses. A depth
of field indicator is incorporated.
   Current models arc available with a built-in photo-electric
View original page 5
Page 6 · Read text
exposure meter which  in most cases is coupled  to  the
aperture setting.
  A film type indicator  is built into the film transport knob.
   Film transport  is effected by a crank situated on the side
of the camera. It locks when the correct amount of film has
been wound  on  to  bring  each new frame  of  film  into
position. A counter registersthe number of exposuresmade.
  A tripod bush is located in the centre of the camera base.
  The back of the camera hinges open for the insertion and
removal of films and can also be removed. It carries a sub-
stantial spring-loaded pressure plate.
  Transporting  the film automatically  tensions the shutter.
The shutter is released by a body release knob on the front
of the camera. When not in use, it can be locked to prevent
accidental release. The shutter cannot be released until the
film has been wound on, thus preventing double exposures.
To avoid blank frames, the film cannot be wound on until
the previous frame has been exposed.
  The shutter on most current models is a Synchro-Compur
with speedsfrom 1 sec. to 1/500 sec.as well as B. It has built-
in delayed action and is flash synchronised.
  Both  the  taking  and  finder  lenses together  with  the
shutter are enclosed in a dustproof casing, which has peep
windows  at the top showing shutter speeds and apertures.
  A wide range of accessoriesis available for the Rolleiflex.
  Both finder and taking lens carry bayonet rings for fitting
filters, close-up lenses and similar attachments.
  The Rolleiflex is about 5$ in. high, 3f in. wide and 3f in.
deep. Its weight is about 341ozs. The body is an aluminium
alloy casting.
  The Rollei Magic models have a few different features
which are detailed in the green pages.

Rolleiflex  Eaolution
  The originalRolleiflexwasintroducedin 1928.It took six exposures
2tx2*  in. on 117film, which is now discontinued.It can be converted
to take 12exposures2|x 2l in. on size620film. A film transportknob
advancesthe film, exposuresare countedin a red window.It is fitted
with a 70 mm. Tessar/4.5 lensin a Compurshutter(1 to 1/300sec.
                         6
View original page 6Page 7 · Read text
ROLLETFLEX EVOLUTION


 0nrG:    t928    sTo.orD193u34 AUT0I,|AIte3Z38   srD.lttw
Thc  firrt   Rolleiflcx   of  t928  started  the  basic system  of the  twin-lens   rollfilm   reflex.  The  standard
moaeiot   t9j2  lo  1934 already incorporated   thi  transport  crank and lenses mounted  on a common
p"nei,  wtrite  *e  Automar   froln  1937'onwards  had apeiture   a-nd sp-eed setting  whejls  and. automatic
foadirig features. The Standard New  of 1939 is a sim'pler  version  of the Automat   of that  time.
          IUI(lMAT       AUT(lMAT           3.5E
            3.5                3.5


          r950           1954            1956

          R0[tEl           T
            lilAGrC


          1960           1958
The oost-war Automa! 3.5 models featured a redesignedfinder hood and flash synchronised shutters.
from  1954 onwards exposure value shutters wer€ built  in, and-since  1956-exposure.meters.
On the model 3.5F of li58 the meter is coupled with the aperture and speed setting. ln the same
ieiri   simpler model T appeared,while the'Rollei Magic of t960 has the exPosure meter coupled
with a fully programmed shutter for automatic control.
                       7
View original page 7Page 9 · Read text
II
I                  !,  T), The finder hood has a built-in mirror for eye-levelreflex focusing.
           Parallax is compensate9.byredlrction of the reflex picture. The takinlg
           lens mount diameter, 24 mm.In  1929 the same camera. but with   i
         75 mm. Tessar /3.8 was marketed; the finder lens aperture is/3.1.
              Rolleiflex Standard of 1932 has a 75 mm. Tessarf 4.5 or f 3.8lens in
        Compur shutter (1 to 1/300 sec., B and T). The lenl mount diameter is
          28.5 mm. Finder lens apertureis/3.1. Finder hood has a frame finder.
           Parallax is compensated by reduction of the reflex picture. Takes 12
         exposures on 120 or 2O film. Film  transport by lever crank. First
         exposure set by red window, thereafter by automatic counter.ln  1934.
          the samemg{glappeared with a 75 mm. Tessar/3.5 and Compur Rapid
           shutter to 1/500 sec. B and T.
          The Rolleiflex Automat 1937 has a 75 mm. Tessar/3.5  in Corirpur
         Rapid sLtltter (1.to 1/500sec.,B, but not T) with built-in delayedactjon
           release.The taking-lens has bayonet mount to accept bayonel mounted
          atlachments. The/2.8  finder lens has push-on mount (iater also fitted
           with bayonet mount). Finder hood contains mirror fof eye-levelreflex
           focusing, also automatic parallax compensation. Film tr.-ansportis by
         a lever crank, coupled with the shutter setting. This mafes double
         exposuresimpossible. Film feed is automatic, there is no red window.
          The Rolleiflex Standard New of 1939 has a 75 mm. Tessar/3.5  in
         Cgmpur_Rapid shutter (1 to 1/500 sec., and B), but no delayed action
           release.It has a window for setting the first exposure, the automatic
            film counter then takes over. Film transport is coupled with shutter
           sgJting.Finder lens (also with bayonet mount like the taking lens) is
              f 3.r.
          The Rolleiflex Automat of 1945has a 75 mm. Tessar or Xenar/3.5
         and bayonet mounts on both lenses; other features are the same as
         on the 1937model.
          The 1950 model has a coated 75 mm. Tessar or Xenar lens in a
        Compur Rapid shutter (l  to 1i500 sec., B), and built-in flash contact.
        The redesignedfinder hood has both an eye-level reflex finder mirror
        and direct vision frame finder. In the same year, a second model of
          the same camera appeared with an 80 mm. Tessarf2.8  and a larger
        Compur shutter with a top speed of 1/400 sec.
             In 1951 both the f 3.5 and the f2.8lens  models appeared^      with a
         Synchro-Compur  shutter  with  MX-synchronisation,  and a  time
         exposurelock.
          Th  Rolleiflex 2.8C of 1953with 80 mm. Xenotar or planar/2.8  lens
          incorporates various improvements over the 1951 model:- internal
           baffiesto eliminate stray light, an extra large focusing knob with built-in
            film indicator, an adjustable focusing mbgnifier, self-locking shutter
        speedand aperture settings, and a fitted counter khob for the Rolleikin
          accessories.The coupling of film transport and shutter setting can be
         disconnected to permit intentional double exposures.
          The Rolleiflex Automat 3.5 of 1954 has a Synchro-Compur shutter
          with exposure value scale, internal baffies anda larger focirsing knob
View original page 9Page 10 · Read text
ROLLEIFLEX EVOLUTION


                                       www.butkus.us

          951

          rH.E-R0il.Et        2.8t


           1959             1960           1956

Specialmodels.with_anf2.8 lens appearedfrom l95l onwards. These became progressivelymore
ela-birate and in- 1956 appeared-with  built-in exposure meter which was couiled-in  the i.8 F of
1960.Two specialmodelsalso belong logicallyro this series;the Tele-Rolleiflexoi 1959with 135 mm.
long focus lenses,and the Wide-angle Rolleiflex of l96l with 55 mm. shorr-focuslenses.


ln addition to the 2t x 2il in. Rolleiflex models small-sizeRolleiflexesalso were made from time to time.
The first of these, the Baby Rolleiflex of 193I and the Sports Rolleiflexf rom 1933 onwardc werc
scaled-downversionsof the current standard models.The'Rolleiflex4x4 ol 1957is in many resDecrs
a counterPart of the larger model T, but has a transport knob instead of a winding crank.
                       9
View original page 10Page 11 · Read text
with  built-in  film  indicator. Models since 1955 have an improved
         aperture-speedcoupling system with a coupling releasebutton.
         The Rolleiflex 2.8D of 1955 has a Synchro-Compur shutter with
        exposure value scale. The XM  synchronising lever is combined with
         the self-timer setting lever. A coupling releasebutton on the aperture
        wheel disengagesthe aperture-speedcoupling for independent settings
       when required.
       *")           -  The Rolleiflex 2.8E of 1956 is similar to the 2.8D model but has
           built-in  photo-electric exposure meter and automatic depth of field
          indicator. It is fitted with an 80 mm. Planar or Xenotarl'2.8  lens.
         The Rolleiflex 3.5E,of 1956 is similar to the Rolleiflex Automat of
         1955, but has built-in  photo-electric exposure meter and automatic
        depth of field indicator. It is fitted with a 75 mm. Planar f 3.5lens and
       was also available with Xenotar f 3.5lens but without exposuremeter.
          - Subsequentinstallation of the meter is possible on the latter model.
-.f                 'T          fitted with a detachable hood and improved extra bright focusing
        screen_
         The Rolleiflex F of 1958 with /3.5  Planar or Xenotar lens is like
        model 3.5E but has the meter coupled to the stop-speed setting, is
           fitted with a detachable hood, and an improved extra bright focusing
         screen.
             Rolleiflex 3.5E3 of l962is a Rolleiflex F without the built-in exposure
        meter. It was replaced iur1967by the Rolleiflex F (both with/3.5 and
         /2.8  lens) without exposure meter. The meter can be built  in and
        boupled to shutter speed and aperture settings.
         The Rolleiflex T of 1958 has a75 mm.f3.5  Tessar, detachablehood
        and improved extra bright screen and facilities for changing the format
         from2lx2ito   2*x1*  or 1*x1$  in.; modelsprior to 1962notfitted
           for the 35 mm. Rolleikin  outfit. A single lever (instead of the familiar
        wheels)controls exposurevalues, stops and shutter speeds.An exposure
        meter is fitted or can be installed by the user.
         The Tele-Rolleiflex, introduced in 1959, is a special model with             '        135 mm. Sonnar f 4 long-focus lenses for professional and feature
         photography. It has disengageablespeed/stop coupling. An exposure
         heter is not fitted, but can be installed by the user. The back is fitted
         -  with a glass film plane.
         The Wide-angle Rolleiflex of 1961 is a special model with 55 mm"
        Distagon /4  short focus lenses for wide-angle photography.  It  is
         otherwise similar to the Tele-Rolleiflex in all other control features.
         The Rolleiflex 2.8F of 1960 with Planar or Xenotar f 2.8 is like the
        model 2.8E,12but has the meter coupled to the speed-aperturesettings.
         3.5F.)
         The Rolleiflex 3.5E3 and 2.8E3, 1963 arc similar to the 3.5F and
        2.8F but without exposure meter. Aperture and shutter speed are
         cross-coupledand indicate exposure values.
                        10
View original page 11Page 12 · Read text
The Rolleiflex F models have also been available without exposure
        meter, since 1964.
         The Rollei-Magic of 1960 has a built-in photo-electric meter which
         automatically setsaperture-speedcombinations on the built-in scaleless
        Prontormat shutter.
            Rolleiflex 2.883 of 1962 is a Rolleiflex 2.8F without the built-in
        exposuremeter.
          Rollei-Magic  II  of 1962 is a Rollei MAGIC   I, but fitted with a
         shutter which permits in addition to fully-automatic operation also
         individual setting of speeds(U30 to 1/500 sec.)and apertures.
         The Rollei-Magic  II, 1963 also permits manual exposure setting. In
          this case the exposure meter indicates exposure values, which can be
          set on the shutter.
              All  Rolleiflex models 2*x2l   in. supplied since late 1964 are fitted
         with  the Rolleiclear Focusing Screen with  split-image rangefinder
        wedge.

        24-exposure  220 Film
        A 220 film has been introduced, primarily  designed for the pro-
         fessional user, giving 24 exposures 2{ x2l   in, on one roll.  Special
         versions of the current Rolleiflex 2+ n. models are made (at extra cost)
         accepting 120 and 22O film,

       The 4 y 4 cm.. Rolleiflex   Models
         The Sports Rolleiflex of 1931 (the first few models were called Baby-
           flex) takes 12 exposures 1* x 1$ in. (4 x 4 cm.) on standard vest pocket
         (size 127 or 27) film. It has a 60 mm. Tessar/3.5 or f 2.8lens, and a
       Compur shutter (1 to 1/300 sec., B and T). The lens mount diameter is
        28.5 mm., the finder lens/2.8. The finder hood has an eye-levelframe
          finder. Parallax is compensatedby reduction of finder picture. A lever
        crank advancesthe film.  One lever sets and releasesthe shutter by a
        two-way action. The first exposure is set in the red window, thereafter
        by automatic counter. Push-on filter and other attachments.
*,          In 1933 this camera appeared with peep windows above the finder
         Iens. In 1934, a 60 mm. /2.8 Tessar in a Compur Rapid shutter (1 to
        1/500 sec.,B and T) replaced the previous lens and shutter, and double
        bayonet mount on both lenses was added in 1938. All these models
       were discontinued in 1940.
         The Rolleiflex 4 x 4 of 1957has a 60 mm. Xenar/3.5 lens in Synchro-
       Compur exposurevalue shutter (1 to l/500 sec.,XM synchronised,with
          self-timer). The finder hood incorporates an eye-level frame finder
       and the shutter cannot be fired while the hood is folded. Film transport
           is by winding knob on the right-hand side; exposure counting  is
        automatic.

                                                       ll
View original page 12Page 13 · Read text
HANDLING  THE ROLLEIFLEX
   In  order  to simplify  the desuiption  and handling  of the
Rolleiflex camera without being confused by dffirent  features
of individual models, this guide has been divided inio a general
sectionwhich applies to all Rolleiflex models while the require-
ments and consequentlydffirent  handling of each model are
found on the green pages.
  For convenience,a symbolicreferencesystemis also usedin the
generalsection.Whereverthe sign I  appears,further detailswill be
found in the camera pages of the gf,eensection for each camera
Epe. Similarly, the signO refersto accessorysections.The appropriate
pagesare markedaccordinglyin the bottom left- or right-handcorner.

Holding
  Hold  the camera as steady as possible, as the slightest
shake, even if  its effect is not  visible in the negative, will
become apparent  in the enlargement. Always  stand with
your legs apart for extra steadiness.
   IUhen working with the reflex finder  at chest-level, place
the camera in the palm of the right hand, with  right index
finger on the release on the front  while thumb and index
finger of the left hand rest on the focusing knob.
  When using the eye-levelfinder or pentaprismhold  up the
camera so that the eye is level with the back sight in the
focusing hood or the eyepiece of the prism.  Grip the body
with both hands, placing the index finger of the right hand
on the release. Press the camera body against nose and
forehead to give it additional  support.
  To release the shutter, press the button with the right hand
index  finger. Use finger pressure only,  keeping the  grip
steady. The pressure must be slow and smooth. The slower
the exposure time, the smoother must be the release, as the
 risk of camera shake is greater.
   For slow speed exposures in the hand at chest-level, hold
the breath and release smoothly to avoid shake.
  When using long exposures while  holding  the cameta  al
eye-level, rest the camera against some support, or at least
                   12
View original page 13Page 14 · Read text
HOLDING


                                                   left:   Support   and  steady   the
                              camera  with   your   right  hand,
                              thumb   on  the  release  button,
                                   while   operating    the   focusing
                                 knob.


                                                    The ideal body stancc. Sling the
                                                   cameraround your neck,support.
                                                                ing it againstthe chest, and stand
                                                               with your feet slightly apart.
Right: The  ever-ready  case  pro-
tects  the  camera,  yet  keeps    it
instantly   ready    for   use.  The
special   neck    srrap,   pushed
through  the eyelets  of the camora
protruding  from  the  case, holds
the camera securely  in  its ever-
ready case as well  as providing  a
steaoy supPort.
      IL         ffi:iit              ffiffiffiiffi

Although  the  standard  hold  for  the  Rolleiflex   is the  steadiest,  yarious  alternatives   are  possible  in
special situations.   You can hold  the camera above your  head  to  shoot  over  crowds,  etc.  (left);  you
can shoot round  the corner  (centre  left); or  for  action  subiects you can use the eye-level  finder  (centre
right), or  the pentaprism  finder.   For time  exposures mount  the  Rolleiflex on a tripod   (right) and
release the shutter  with  the aid of the cable reJease.
                                                               l 3
View original page 14Page 15 · Read text
lean against something stable. In this way li8 sec., or more,
can be risked without  incurring camera shake.
  A tripod is necessarywhen taking exposures of 1/15 sec.
or longer with the delayed action release.
Corrying
  However elegant it may be to carry the camera on a long
strap from the shoulder, this is quite unsuitable for quick
action. A better method is to carry  it on a short strap around
the neck at chest-level-ready   for work.
  The ever-ready case enables tle  Rolleiflex  to be used
without  removing   it and there  is a holding  screw which
prevents the camera from  falling out.
The Refle*  Find,er
  The  reflex finder  is a viewing-cum-focusing  device.  It
consists of a focusing screen on top of the camera, a plastic
screen incorporating  millions  of minute  refracting  optical
elements. This gives an extremely bright image right to the
edges, and high colour  brilliance,  without  any noticeable
pattern.-
  The 2tx2t   Rolleiflex models since 1964 have a focusing
screen with  split-image rangefinder centre, the two halves                                                               'Rollei-of which are lined up to get sharp definition. This
clear' screen can be fitted to some earlier models.
  The image entering the camera through the finder lens is
reflected on to  it by a mirror.   This reflex image remains
visible even during and after the exposure.
    Its purpose is first to show the exact picture area, and
secondly to help in getting the picture sharp on the film.
 Yieuing
  The picture on the screen appears upright  but reversed
 left to right.  Movements  are also reversed left  to  right.
To  follow  a moving  object the camera must be turned
against the apparent movement. A finder hood extension is
available to keep stray light from the screen and so makes
the image appear brighter.
  On the Rolleiflex models since 1960 the focusing hood is
removable and can be replaced by an eye-level pentaprism
                            l4
View original page 15Page 17 · Read text
giving an upright and right-way-round  image even  if the
camera is turned sideways or upside down.
   \ryith the frame finder  built  into the focusing hood you
can  also  fbllow  movement-it   shows an  upright  and
right-way-round  image. The frame finder of the Rolleiflex
(since 1950) has below  its viewing eyepiece a second eye-
piece with a built-in  magnifier. Using the lower eyepiece,
you can focus the image which is reflected by a mirror from
the ground glass and then, by slightly lifting the eye, switch
over to the frame finder. This enables you to focus and view
at eye-level, if not simultaneously so, at least with a mini-
mum of time lag.
  When using the frame finder, do not attempt to turn the
camera to the right  or  left away from the eye, nor  try  to
move the eye from  the  centre  of  the back  sight. This
" spying round  the  corner "  is  deceptive, as only  that
section will appear on the negative which you see in the
finder looking  straight ahead with the eye close to and in
the centre of the opening.
  Although one is likely to hold the camera reasonably level,
make sure that vertical lines of the picture run parallel with
the grid, or on earlier models with the sides of the focusing
screen frame. You can tilt the camera intentionally  but see
that the effect does not look  like an accidental  tilt.
P ar alla x C o nt p en satiom
   All  Rolleiflex models produced since 1937 have a mask
built into the camera below the focusing screen. This moves
automatically  with  the distance setting to compensate the
viewing error on the screen which would occur on account
of the different position  of viewing and taking lens. Your
Rolleiflex  is in consequence free from  any parallax  error
when using the  reflex screen, either  directly,  or  via the
pentaprism.
  The framefinder,however,yieldsa view of its own as it viewsfrom
a point awayfrom the lens.The greaterthe distancebetweenthe two,
the biggerthe differenceof this point of view,i.e. the parallax.Parallax
hardly counts when viewing and taking somethingat a reasonable
distance,as the differenceof viervpointis negligibleas comparedwith
the distancebetweencameraand subject.
                      16
View original page 17Page 18 · Read text
But if we photograph anything at close quarters-take a portrait for
        example-the  parallax may show. The image as seen through the
        tiame finder may include all of, say, a hat worn by the subject of your
          portrait, while quite a portion of it may be cut off in the picture taken.
        So do not use the frame finder at close quarters. If you must use it,
      make allowances by including in the frame finder view a strip on the
        top you can do without in the picture. That strip must be the wider
        the closer you are to the subject.
       Focusing
       The secondpurpose of the reflex finder-obtaining  the
      best possible definition-is  at the same time one of the
      most important meansto ensuregood results.
       The less experienceduser of the reflex screenis apt to
       accept, all too hastily, a seemingly sharp impression of
       the image for satisfactory definition. There are, however,
       different degreesof sharpnessand you can make use of
      thesevery differencesto find the best possiblesetting.
        Turn the focusing knob to and fro while observinghow
      the main objectto be focusedbecomesmore and more sharpk      up to a point beyond which it will againlose definition.
        At this "beyond" stagereversethe movementof the focus-
       ing knob. Slowly narrow down the degreeof to and fro
     movementof the focusing knob until you unmistakably
       arrive at the point of the very best definition.
       You encircle,as it were,the point which you want abso-
       lutely sharpby goingoverand over againits neighbourhood,
         all of which will appearreasonablysharp. Before or beyond
       the point of maximum definition the image still appears
        sufficientlysharp, but do not be deceivedby this fact-the
     imageis not good enoughfor enlarging.
      When watchingthe screenat waist-level,swingthe built-in
      magnifying glass into position; this will help to check
        critical sharpness.The camerais bestraisednear to the eye
     when using the magnifier. When you have finished with it,
      lower it again, otherwise-with  the magnifier in front of
      the screen-you may get excellentdefinition, but may lose
       sight of the picture as a whole. The magnifying lens can be
     changed and users with  defective eyesight can obtain
       alternativelenseswith correctionof * 3 to-3  diopters.
                              t7
View original page 18Page 19 · Read text
The frame finder cannot be usedfor focusing,apart from
the quick change arrangementof the models since 1950
(not'   on Rollei Magic, T and 4x4).
  This procedureis unsuitablefor photograplling.movlng
subjects. The frame finder is, however,more effectivewith
zoie focusing methods (p. 58). These ensure that  all
subjectswithin a certain depth of field will be recorded
sha?p.This last method of focusing-is,in fact, preferable
to any other when dealingwith rapidly-moving-subjectsin
front-of a reflex camera.It  is almost impossibleto catch
and shoot fast motion when you are looking down with
your attention fixed on the mirror that shows directions
and movementthe wrong way round. With a frame finder,
it is quite easyto follow-everything gnd \e9n the other eye
on thb subjecibefore it comesinto the fleld of the finder.
  Alternatlvely for  action shots you can pre-focus the
cameraat a distanceat which the subjectwill be at a given
moment, or focus on a spot-   which the -s-ubjecthas1o P.ass.
  With  subjects liable  to  react self-consciously(e.g.
children),focus on someobject which is the samedistance
from the camera as your feal subject,but in a different
direction.When the rangeis found, swingthe cameraround
and shoot.
Shootingr
  Practiie the following operations first with an gmpty
camerauntil you can do them practicallyautomatically.
1. Work the film transport. This advancesthe film counter
  and tensionsthe shutter.
2. Set the exposure.Adjust the shutter for the 4gqt amount
   of light for the subjectconditionq(p. 31). On Rolleiflex
  modElswith built-ii photo-electricexposuremeter, the
  meter indicatesthe settingor even setsthe controls.
3. Select the aperture-speedcombinationyou qant to use;
   smalleraperturefor greaterdepth of field (p. 31) or faster
  speedto arrestmovement(P. 39).
4. fiocus and determinethe picture area to obtain a sharp
   picture and the view you want.
5. Releasethe shutter gently.
                            l8
View original page 19Page 20 · Read text
LOADING AND TINLOADING
       The Rolleiflexusesthe standardsize 120rollfilm. It gives
     12 exposures2f x2[  in. (6x6 cm.). The Rolleiflex 4x4
p,   uses(4x4 thecm.).sizeTheseL27arerollfilmfilm spoolsfor 12whichexposuresare loaded18x18intoin.
      the camera in daylight. Avoid loading or unloading the
     camerain brilliant sunlight. Choosea shady spot or do it
        in the shadow of your own body  if nothing better is
       available.

       Loading
        L. Open the camera back by holding the camera upside
        down, turn the safety lock with arrow engravedon it in
         the direction of the arrow. Then press the projectingw        end of the latch away from camerabody. Now grip the
        back panel by the two side nipples and pull up.
                  It is important to checkthat the two position pressure
         lock has the inscription "2tx2$"  visible below the film
         pressureplate in the side of the back panel when rollfilm
            is used.If a 35 mm. film has previouslybeen used and                                        'oI         the pressurelock shows   xl$", pressthe pressureplate
         againstthe camera back and push it up until  it stops.
       When releasedit must spring forward into its normal
         position.
        2. Insert the ftlm. The empty spool in the bottom chamber
        has to be transferred into the top chamber.Pull out the
         spring-knob on the cameraside wall and turn it a little,
        so that it locks in the out position. Removethe empty
         spooland insertit into the top chamber.For this purpose,
           pull out the spring knob of top chamber, and turn to
            fix it in the open position. Place the empty spool with
         the grooved end towards the film transport into the top
        chamberso that the groove engagesin the film transport
         crossbar. Now allow the spring catch to spring back by
          turning it back into its original position: this will engage
         the empty spool in the chamber. $          Insert the roll of film in the bottom chamber after
                          19
View original page 20Page 21 · Read text
LOADING


 lob row: Unlock and open back latch (left); open back and insert empty spool in take-up chambcr
 (centre)lturn crank to make the wide slot in spool facc outwards (right),
Secondrow: Insert full spoot of film in the feed chamber (Jef0; feed.end of backing paper throu,Sh the
 feeler rollers (centre);pull paper over picture aperture and thread into the take-up sPoolslot (right).
 Third row:On RolleiflexT, Rotlei Magicll, 4x 4 and early modelswithout feeler rollers, d raw backing
 piJer offfeed spool and thread straight into take-up spool slot (left); on model Tand Rollei Magicll'
 i"ihO untit i..ows on backing paper ire opposite marks on the film channel(centre);on all models,
 tighten backingpaper by winding the film slightly (righO.
 Eottom row: Close and lock camera back (left); wind on until filtn counter shows No.  | (right).
                       20
View original page 21Page 22 · Read text
r                                            U NLOADING


#


      Top.left:.Whenall twelve exp-osureshave been taken, the crank can be turned freely  Wind- off-  the-
     end of t h e p a p e r o n t o t h o t i k e - u p s p o o l. o n th e Ro lle ifle x4 x4 tu rn th e win d in sknob.
     Top right: Unlock and open the latch, swing open the camera back.
     Bottomleft: Remove the full take-up spool from the camera, taking care not to unroll the film.
     Eottom right: Close the camera or reload with a new film.
                              2t
View original page 22Page 23 · Read text
breakingthe sealso that the pointed end of the ba*ing
  paper pbints upwards towards the empty -spool. Turn  ^Uuit          tlie spring knob, it rvill engageand hold the roll of
   film in its correct position.
    Draw the papei end betweenthe two feeder rollers
  over the fih  lperture to the empty take-upspgol. Insert
   the wedge-shafedend of the paper into the wide slot of
   the take-up spool.
3. Closethe iamera by pushing the back panel against the
  camerabody until-the latc[ engages.Now turn safetY
   lock back against the direction of the arrow engraved
   there.
4. Get the film ready for the first exposureby cranking the
   film handle untilit comesto a definite stop shortly after
  a slight resistancehas been overcome.Now turn the
  handle anti-clockwiseback to the stop and fold it over
   into rest position. The film counter will have set itself
   automatically,showingNo. 1 in the window.
5. Set the film speedand tYPe.

 Unloading
   After  all 12 exposures-freely. have been taken, the film transport
can be cranked      The film counting window shows a
white circle in place of a number.
 1. Wind off the paper by turning the crank five times.
2. Open the camera back.
 3. R6move the exposed film, then close camera back or
   reload with a new film.


                    22
View original page 23Page 24 · Read text
FILMS AND FILTERS
  There are two kinds of films availablefor the Rolleiflex:
black-and-whiteand colour.
Black - and - White Filrn'
  This producesa negativein which the coloursand bright-
nessrangeof the subjectare translatedinto black and white.
From it, prints or enlargementson paper (or, in special
cases,black-and-whitetransparencies)can be made.
  The black-and-whitefilm usednormally is panchromatic,
that meansthat it is sensitiveto all colours.Thereis a choice
of several types differing mainly in sensitivity as well as
certainother characteristics.
 SLOW FILMS are of low sensitivity,requiringcompara-
tively great exposure.Their main advantageis the extremely
fine gr-ain,permitting a high degreeof enlargemg+lwithout
its gianular structurebecomingunpleasantlyvisible. Such
films also yield imagesof the greatestsharpness.On the
other hand, theseslow films are not very suitablefor coping
with fast movementin other than exceptionallygood light-
ing, nor for generalwork in poor light. Suchfilms are rated
at 40-80 ASA or 17-20 DIN.
 MEDIUM SPEED FILMS  still yield a reasonablyfine
grain with good gradation. They are the most suitable
material for all-round photography, other than in poor
light. Thesefilms are rated at 80-160ASA or 20-23 DIN.
  FAST FILMS with somewhatcoarsergrain (still accept'
able for reasonabledegreesof enlargement)will cope with
most light conditionsincluding poor light and interiors in
favourableconditions.This is the right film for the photo-
grapherwho wants to be preparedfor the unusual,to arrest
fasf movementwith high shutter speeds,as well as shotsin
poor light. The speedsare 200-400ASA or 24-27 DIN.
 ULTRA FAST FILMS are primarily intended for high-
speedsportsshotsin dull weather,interior snapshotsinaoor
light, night photography and ill-lit stage pictures. These
                     23
View original page 24From the M. Butkus archive. Original publisher and archive notices are retained.
Check the model and edition against your equipment.
PDF verified 2026-10-10.