Film cameras
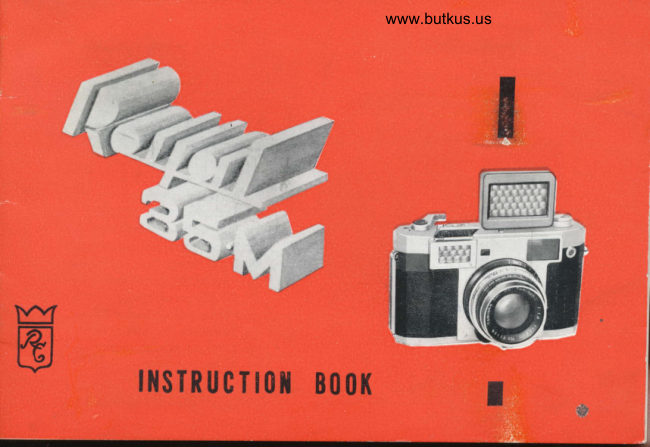
Royal 35-m User manual
User manual for Royal 35-m. 17 pages in English. Read the original PDF, download or print a copy without registration.
17 pagesEnglish2.6 MB PDF
Loading your manual…Open PDF directly
Document details
- Brand
- Royal
- Model / document
- Royal 35-m
- Document type
- User manual
- Language
- English
- Pages
- 17
- File size
- 2.6 MB
- Category
- Film cameras
- Document date
- Not specified in catalog
Search available document text
Find a term, then jump to its page in the original PDF. Image-only pages may not be searchable; check the PDF for exact wording and diagrams.
Page 5 · Read text
FILM LOADING
                       The Neitv ROYAL 35-M accepts any standard
                            35 mm cartridge in either 20 or 36 ocposure
                                        roll.
                            1. Pull out the back lid release lever @ and
                                                 lift the back lid.
                           2. Pull up the rewind knob @ and place a
                                    35 mm film cartridge in the film chamber
                            with the protruding end of the cartridge
                                 facing down. Reinsert the rewind knob'
                           3. Pull out enough film to reach across to
                            the winding spool and insert the narrow
www.butkus.us                end of the film into the cliP @ of the
                             winding spool. At the same time' secure
                                the perforated edges into the sprocket @'       Fig. 4                        Move the film advance lever @ a few short
                                strokes to be sure the perforations mesh
                         wi6 the sprocket. When this is secure'
                                   close the rear lid.
View original page 5Page 6 · Read text
www.butkus.us
4. At this time, the exposure counting indicator @ will show ..S.,, Now
   move the rapid wind lever as far forward as possible and push the
   shutter release button. Repeat the process. The third winding will
    indicate number 1 on the exposure counting indicator.
5. Turn the AsA indicator on the light meter dial @ to match the ASA
   rating number of the loaded film.
Remarks:
* Because the shutter mechanism of the ROYAL       For oraraple in
   35-M guards against double exposures, it  is       case of ASA 100:
   necessary that the shutter button be pressed
   each time the film is advanced. The shutter
   button also cannot be released unless the
   film winding lever is returned to its original
    position.
*  While winding the film, note that the rewind
  knob turns counter-clockwise. If this action
                                                       Fig. 5   does not occur, the film is not meshed in the
   sprocket-reopen the lid and reset the film.
View original page 6Page 7 · Read text
TAKING THE PICTURE
The shutter speed and lens opening regulates the amount of light reaching the
film. The smaller numbers on the F-stop dial represents larger lens opening'
By turning the F-stop dial to the nent larger number, the size of the leng opening
is reduced by one'half of previous lens opening'
The correct combination between the shutter
speed and F-stop can be attained by the use of
the built-in light meter.
                                                         g5f,By directing the light meter to the
        the reflective intensity of tight              tri,'l;
".rUj*t,be determined readilY.can
                                                 theThe correct brightness can be measured in
following way:
  1. By closing the multi-filter flap when the
      subject is bright.
  2. By opening the multi-filter flap (push the                Fig. 6
      side button) when the light conditions are
     dim.
View original page 7Page 8 · Read text
www.butkus.us

  3. By attaching the amplifier to the accessory
     shoe with the multi-filter flap open for extra
     dim conditions.
The arrow of the light meter dial @ must be set
to the guide line to which the meter needle is
 pointed.
  1. Use the red arrow (H) when multi-
       filter flap is closed (Fig. 6).
  2. Use the green arrow (L) when multi-filter
      flap is open (Fig. 7).
  3. Use the black arrow (A) when amplifier is
      used.
When this is accomplished, the shutter speed and
F-stop readings on the light meter dial will reveal
all possible combinations such as Il2S0 sec at F: 2,
                                                        Fig. 71/50 sec at F:4 as revealed in figure 7. Now set
the aperture according to this reading.
View original page 8Page 9 · Read text
FOCUSING THE CAMERA
Grasp the camera as illustrated in figures 8
and 9 and sight the subject matter through the
viewfinder-rangefinder eyepiece @. That por-
tion within the golden frame will be within
the scope of the photograph.
Further, encircled part by near distance adjust-
ing mark can be photographed, when 80 cm or
shortest distance is talien by you.  (Fig. 10)
Note that a double image appears in the center
of the field of vision. With the left forefinger,
slowly turn the knob of the rangefincler until
the double image is superimpcs--d. When this                Fig. 8
                                       is accomplished, the camera is ready for photo-
                                                the camera steady with both         f_                graphing. I{old
                             hands and slowly release the shutter button.
                               Repeat the afore-mentioned process for different
                                        settin.gs. This operation can be accomplished
        \r                     very swiftly and accurately by the automatic
                              mechanisms incorporated in the new ROYAI-        \-              ar\.t
                     b$            35-M such as the synchronized view and range-
                ",J            finder, rapid winding-'ilever, and the built-in
          Fig. 9                   light meter.
View original page 9Page 10 · Read text
www.butkus.us

          Remarks  : I
              Once                      the shutter                                                   released,                                 button                                              is il           *                the button                           remains                                                           posi-                                         in the                                 down
                  tion until the film is wound again.
              * The film winding lever must be
             moved as far forward as possible so
               as to prevent imperfect winding.

            UNLOADING THE FILM                     Fig. l0
          When the exposure counter dial shows that all frames have been exposed, lift the
                                            rewinding knob handle @. While pressing the
                                                              , rewind button @, crank the rewind knob in
                                             the direction of the arrow. Do not rewind theI                                                 film too rapidly as it may cause scratches on
                                             the film.
I                                When a marked degree of resistance occurs,
                                                  the rewind knob a few more times thus                   Fit                 turn
                                              assuring that all the film is returned into the
                                             cartridge. Now open the rear lid, lift the re
                                          winding knob and take out the cartridge.
View original page 10Page 11 · Read text
HOW TO USE THE BUILT-IN LIGHT METER
The built-in light meter of the RoYAL 35-M measures the amount of light re-
flecting from the subject towards the camera' Theoretically  it is enough to face
the multifilter towaris the subject from the camera position' However in prac-
tice, the correct exposure reading cannot be obtained without considering the
light reflecting from the background, the sky, and the ground in addition to those
from fhe subject.
CLOSE UPS  :
Take the meter about four inches from the person to be photographed and take
readings for the hair, face, and clothing. Set the dial to the average reading
thus obtained. Be careful so as not to cast your own shadow over the subject'
GENERAL SCENERY:
W'hen reading the light value of outdoor scenes'  it is recommended that the meter
be pointed slightly downward so as to exclude  the light entering from the skY'
This will reduce the exposure time slightly and  will imProve the tonal qualitY
of the picture.
For open sceneries such as far off mountains, reduce the shutter speed by one-
 half for reason that the contrast of the object is reduced by the dispersed light
 from the horison,
View original page 11
Page 12 · Read text
/                                             www.butkus.us
        PEOPLE ON BEACHES OR SNO\M:
         When photographing people on beaches or snow, double the exposure time as read
          on the meter so as to compensate for the strong reflecting light of the surround-
            ings. This need not be done for closeups.

        COLOR PHOTOGRAPHY:
           There is essentially no difference between black and white and color photography.
             Set the ASA index on the light mr:ter and measure the light value of the subject
             carefully as color films have less latitude than do black and white films.
        PHOTOGRAPHING IN EXTRA DIM CONDITIONS:
                 If the meter needle does not swing over even with the amplifier attached, point
            the meter directly to the source of light. Now set the shutter speed at ten times
            the meter reading. For instance, with a reading of 1/10 sec at F: 5.6, set the
            shutter speed at 1 sec using F: b.6.
       ZERO ADJUSTMENT SCREIV:
        When the meter needle slips from the zero position even when the multi-filter
              baffle is completely covered, turn the adjustment screw either left or right until
           the needle is set on zero.
View original page 12Page 13 · Read text
FLASH PHOTOGRAPHING
Irserttheflashguncordintotheterminal@ofthecamera.Theflshattach.                                                               select the correct                                            on                                               a tripod'                                          separately                          camera or                         to the                    iixed         be used      canment                                                                          to the                                               which corresponds                                               lever                       @                                           .tra.,!i'g                          terminal                     flash           the MX         ofterminal
flash lamP being used' SYnchron'           Svnchronized SPeed Range
ized photograPhing can be accom'
plished in the shutter sPeed range    Soeed light
as illustrated in the diagram' On  F Class Bulb
                      the expo'  M Class Bulbthe flash PhotograPhing'
                      burning                 by the            decided            is     timesure                                                                     the iris                                                by opening                                                          rlated                                                        ls regt                                      exposure                                 the                      Therefore                bulb'              flash        .t theif"r"                                                    The relation                                                     the object'                                           and                                             fiash bulb                                 the                        between                    distance              the           to   relationin
betweendistanceu,,dl",'"openingisclecidedbytheguidenumber(distancexFnunrber) on the n""r' r"rr, cu.to.,. Wh",, the self.timer is used, only the X ter.
minal can be used'
            When the terminal changing  lever has been set at X, and theSELF'TIMER:                                                            button' The          lever @ has been depressed' push the shutter release *"t*t*"t
              click in 8 seconds'         willshutter                     Screw iir the plug type cable release cord on the upper      RELEASE:.ABLE
part of the shutter release button'
FILTERANDHooD:Useeitherthe40.5mmfilterscrew-inframeorthe
 42mm cover frame and the 42mm hood cover frame'
View original page 13Page 14 · Read text
www.butkus.us
 TRIPOD: Screw in the male screw on the top of the tripod into the bottom
 of the camera. This can be done with the camera in its case.
STRAP: When the camera is carried without the case, attach the shoulder
 slrap to the retainer rings @ on both sides of the camera.
DEPTH OF FIELD:  When the subject to be photographed is brought into
 focus, there will be some range, both in front of and behind the main subject
which can be photographed. The sharpness of these images depends directly on
 the aperture setting. This range of sharpness is
known as the depth of field.
The following formula can be applied to the
depth of field:
1. The greater the distance, the greater the depth of field.        Fig. 72
2. The smaller the F-stop, the greater the depth of field.
3. The depth of field behind the subject is greater than that in front of the subject.
The depth of field scale @ shows this relationship. For example, if the distance
between the camera and subject is 2 m (6 feet 6 inches) and the aperture setting
is F:8, the depth of field will be from 1.6m (5 feet 3 inches) to 2.7 m (9 feet).
When it is desired to obliterate images in front of and behind the focused subject,
open the F-stop to a smaller number.
View original page 14
Page 15 · Read text
HANDLING THE CAMERA
   The ROYAL 35-M is a precision instrument and should be handled with care'
   l.Donothandlewithdirtyhands,orputincontactwithharmfulmatters
     such as salt, acid, or oil'
      Do not expose camera to sand or salt water'
    3. Do not touch the lens with the fingers. when lens is soiled, wipe lightly
      with lens Paper and alcohol'


t
View original page 15Page 16 · Read text
www.butkus.us


4. Do not expose the camera to extreme temperatures.
5. When storing the camera, wipe off all fingerprints and replace the lens cap.
  Discharge the shutter reiease button so as not to cause undue strain on the
  shutter spring.
6. Do not tamper with the mechanisms-should  the camera need adjustrnents,
  take it to a camera repair shop.
View original page 16
Page 17 · Read text
10 FEATURES OF THE ROYAL 35'M

 l.  Needle sharP Tominor lens'
 2.  ReputedcoPALl/500secshutterwithself.timerandMXflashterminal.
 3.  Bright viewfinder with 0.8 magnification'
 4.   Built-in Sekonic light meter'
                                                                                                                                                                    ' 5.  Synchronized rangefinder effective to 0'B m (31 inches)
 6.   Single stroke film winding lever with automatic shutter cocking mechanism'
 n   Shutter release button with film wind indicator'
 8.  Automatic return film counter'
 9.  Crank-type film rewind knob'
10.   All indicators visible from top of camera'

                           ROYAL CAMERA CO., LTD.
                                                                           srinted in Japan
View original page 17From the M. Butkus archive. Original publisher and archive notices are retained.
Check the model and edition against your equipment.
PDF verified 2026-10-10.