Film cameras
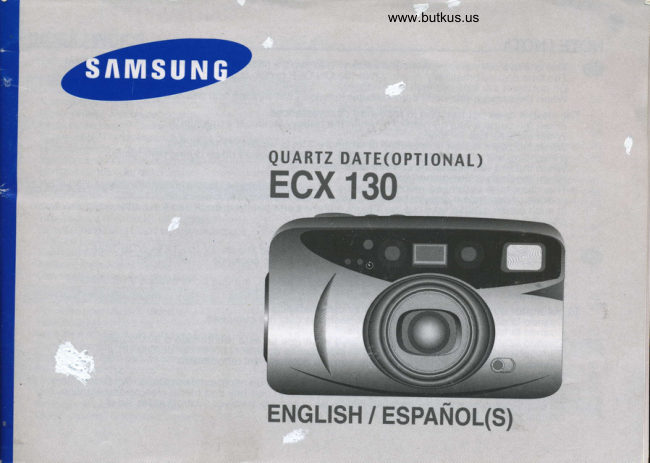
Samsung ECX 130 User manual
User manual for Samsung ECX 130. 57 pages in Spanish. Read the original PDF, download or print a copy without registration.
57 pagesSpanish13.7 MB PDF
Loading your manual…Open PDF directly
Document details
- Brand
- Samsung
- Model / document
- Samsung ECX 130
- Document type
- User manual
- Language
- Spanish
- Pages
- 57
- File size
- 13.7 MB
- Category
- Film cameras
- Document date
- Not specified in catalog
Search available document text
Find a term, then jump to its page in the original PDF. Image-only pages may not be searchable; check the PDF for exact wording and diagrams.
Page 2 · Read text
@
 NOTE / NOTA
  ([     This camera will not work without a battery. Use two 3V lithium batteries(CR-123A  or DL-123A).               ' The lens cap automaticallv opens when tlie ON/OFF button is turned on.   -    Do not ooeri the lens cao with vour finoers.
      When thb camera has nb film, ihe shuiter functions but winding and rewinding does not.
     The shutter does not function in followinq circumstances.              ' When the camera has no batterv or whdn the batterv is almost exhausted.           . When the lens cap is closed.
              ' When the zoom button is operatinq or when the film is windino or rewindino.
        (Rewinding  will stop as long as thdON/OFF button is presseddown'               durin$'rewinding.)           . When the lilm remains in th.-e camera after rewinding.           . When the flash is beino charqed.
       x'This camera is controlled el6ctronically by a built-in microcomputer. Although unlikely, it may fail to
         operate under ceftain circumstances in-which there is stronq stdtic electricitv.'
                lri such cases, please take out the lithium batteries and putlhem back into the battery chamber again
          after 2-3 minutes.
 Gf   . Esta Cdmara no funcionard sin una pila. Use dos pilas de litio de 3V (co-123A o DL-123A).  riDz  ' 16 tapa del obietivo se abre automaticamente  cuando se enciende el'boton ON/OFF.          . No abra la tapb de obietivo con sus dedos.
       Cuando la cd'mara no-tiene pelicula, el obturador funciona, aunque no el avance y rebobinado
         del carrete.
       El obturador no funciona en las siquientes circunstancias.
       Cuando la cdmara no tiene pilas-o estd gastadas casi por completo.           . Cuando  la tapa del obietivo'estd cerradal
              ' Cuando estd'operando el boton del zoom o el carrete se est6 rebobinado o avanzando.
          lEl rebobinado se detendrd durante el tiempo que se apriete el bot6n del obturador).             ' Cuando la pelicula se deje dentro de la cAmara despu6s del rebobinado.          . Cuando se'est6 carqandb elflash.             ' Esta c6mara estd colntrolada electronicamente  mediante un micro-procesador  incorporado. Aunque es
         improbable, puede fallar baio ciertas circunstancias en que hav una fuerte electricidad  estdtica.
       En estos cados, debe sacai las pilas de litio de la c6mar'a y volver a introducirlas en el
        compartimento de la cdmera debprles de 2-3 minutos.
View original page 2Page 4 · Read text
Bitte spenden Sie 2,50 Euro, um diese Website über E-Bay zu unterstützen ... www.PayPal.me/butkusView original page 4
Page 6 · Read text
www.butkus.us


                     En                                            Es
  1    Zoom button(TELE)                                       Bot6n de zoom (tele) (telefoto)
 2      Shutter button                                         Boton disoarador
  .t      trxposure sensor                                      Sensor de exoosici6n
 4     Remote control sensor                                 Sensor del mando a distancia
        Self-timer lamp                                                  Piloto del autotemporizador
 o     Lens & lens cap                                            Objetivo y tapa
 7    Zoom button(WIDE)                                   Bot6n de zoom (wide) (gran angular)
 8     Flash mode selection button                               Boton de selecci6n del modo de flash
 I      Function mode selection button                          Bot6n de selecci6n del modo
10    LCD Panel                                            Pane| LCD                                                                                 +
11     Autofocus windows                                   Ventana de auto-enfoque
12      Finder window                                       Ventana del visor
13     Rewinding button                                      Boton de rebobinado a mitad del carrete
14      Self-timer mode selection button                           Bot6n de selecci6n de modo del autotemporizador
15      Flash                                                        Flash
16     Landscaoe mode button                              Bot6n del modo de paisaje
17     Back cover release knob                                          Pestillo de tapa posterior
View original page 6Page 10 · Read text
www.butkus.us       @


                     En                                            Es
 1     Back cover                                        Tapa posterior
2      Film pressure plate                                      Tabla de apretar el carrete
3     Quartz Date battery chamber cover                    Tapa del compartimiento de la pila de la fecha
4      Film sensor                                           Sensor del carrete
5     Film chamber                                          Compartimiento del carrete
o    DX contact                                              Contacto de c6digo DX
7     Quartz Data contact pin (Q.D model only)                        Alfiler para Quartz Date (S6to etmodeto e.D.)
I     Quartz Data contact (Q.D model only)                      Cortacto de Quartz Date (Solo el modelo e.D.)
I     Film pressure roller                                          Rollo de apretar el carrete

                                                                                 +
View original page 10Page 12 · Read text
www.butkus.us              4k


                      En                                            Es
   I   Snap mode                                       Modo de fotografia instantanea (SNAP)
 2    bilow speed shutter release                                   Disparo del obturador a baja velocidad
       Self-timer, Double self-timer,                                  Autotemporizador  doble, Autotemporizador,
     2 sec delayed release                                        Disparo del obturador con 2 segundos de retraso
 4    Bcklight control                                                 Control de la luz de fondo
 c   Remote control                                                 Control a distancia
 6   Red-eye reduction                                        Reduccion del efecto de ojos rojos
 7   Flash mode indication                                           Indicador del modo de flasn
 8   Back-cover open indication                                      Indicaci6n de comprobaci6n de avance del carrete,
      Film winding check indication                                    Indicaci6n de tapa posterior abiefta
 I    Film rewinding indication                                 Macro de rebobinado del carrete
 10   Exposure compensation                                 Compensacion de exposici6n
 11   Macro mode Super macro mode                       Modo macro, Modo super macro
12   Bulb mode                                       Modo de obturador abiedo
13    Pofiait mode                                      Modo de primeros planos
14   Multi-exposure shooting                                            Fotograf ia de exposiciones multiples
15    Intelligent shooting                                  Modo " Fuz4'
16   Step zoom mode                                   Modo de zoom por planos
17   Continuous shooting                                             Fotografias continuas
18    Interval shooting                                             Fotografias intervalos
19   Battery condition indicator                                       Indicador de la carga de las pilas
20   Film loading indicator                                            Indicador de la carga del carrete
21   Focal length, Exposure counter,                                 Distancia focal, Contador de exposiciones,
      Film winding check indication                                    Indicacidn del comporbacion de avance del carrete
View original page 12Page 13 · Read text
ffi
  REPLACING THE BATTERY / CAMBIO DE LAS PILAS


                                  cover by pressing the hole with a pin as shown above.    f[    Open the battery chamber                                              place                                                                        in                                                          the correct position.                                          them                                      sure to            Insert new                         and be                       batteries
                                         you                                                                                                                it click.                                                hear                                                          until                                   cover    -     .. Close                the battery                       chamber
      NOTE. Use CR-123A or DL-123A battery only.
            . Be sure to place them in the correct position.
            . You do not need to remove the batteries when the camera is not in use. This model has an
          automatic shut down ihat switches the camera off after 3 minutes of inactivity.
           .  lf you remove and replace the batteries when a film is in the camera, the film will remain in the same
         frame before taking out the batteries.

                                                                                                         se @   Abra la tapa del compartimiento de las pilas presionando  el orificio con un objeto en punta, segun
           . muestralntroduzcaaniba.pilas nuevas y compruede que las ha colocado en la posicion conecta.
            . Ciene la tapa del compartimiento de las pilas hasta ofr un 'blicK'.
     NOTA
            . Utilice fnicamente  pilas CR-123A o DL-123A.
            . Asegfrese de colocarlas en la posicion correcta.
            . No ti-ene que sacar las pilas cuando no utilice la cdmara, ya que 6sta posee una funci6n de desconexi6n
          automdtica, por lo que las pilas no se descargaran.
            . Si saca las filas y las vuelve a introducir en uha cdmara cuando tiene un carrete, la pelfcula quedard
         en misma posicion.
View original page 13Page 15 · Read text
FILM LOADING / CARGA DEL CARRETE


([    1. Open the back cover by sliding the release knob as shown above.
      2. Insert a roll of film in the film chamber. Do not force the film into position.
      3. Pull the end of the film to the film tip position as shown above.  lf you have pulled the film too far, rewind
        the film a little. The film should lie flat.
@  t. Abra la tapa posterior deslizando el pestillo de apertura como se indica arriba.
      2. Introduzca un carrete de pelicula en elcompartimento destinado al mismo.
      3. Tire del extremo de la pelicula hasta posici6n de la punta de la misma que se muestra afiiba.
        Si ha sacado demasiada pelicula, rebobine elcarrete ligeramente
       La pelfcula debe quedar en posici6n plana.
View original page 15Page 17 · Read text
ffi
  STRAP ATTACHMENT / FIJACION DE LA CORREA


           Attach the camera strap as illustrated. @    .
          Coloque la correa de la c6mara como se ilustra en la figura. @   .
View original page 17Page 18 · Read text
www.butkus.us
USING THE CAMERA / USO DE LA CAMARA
         @    Press the_ONiOFF button to turn the power on. The iens cap opens                                  and the LCD indicator appears.
                                                             ' The lens cap closes and power switches off automatically after 3 minutes  if
                                                . theWhilecameralookingis notthroughin use. the viewfinder, aim the camera at the subject
                                                                           'W                                            . andPressoperatethe T'the(Tele)zoombuttonbuttons.to move the lens out @ and press the
                                         (Wide) button to move the lens in @.                                            . During. this operation, the LCD panel shows the focal lengths in
                                   the following sequence : 38, 45, 50, 60, 70, 75, 80, 90, 100, 105, 115,
                                 130mm.

                              (!)    Presione el bot6n de encendido ONIOFF para encendor la c6mara.
                           Se abri16 la tapa del objetivo y aparecerdn las indicaciones del
                                      panel LCD.
                                                   . La tapa del abjetivo se cierra y la c6mara se desconecta
                                    automaticamente despu6s de 3 minutos sin usarla.  +.                                                   . Mientras mira por dl visor, apunte la cdmara al objeto que va a
                                             fotografiar y utilice los botones del zoom.
                                                . Presione el bot6n T (telefoto) para mover el abjetivo hacia fuera O y el
                                     bot6n w (gran angular) para mover el objetivo hacia dentro @.                                                     . Cuando el objetivo se mueve hacia dentro o hacia fuera, el panel
                            LCD muestra la distancia focal de acuerdo con la siguiente secuehcia    :
                                           39, 45, 50, 60, 70,75,90, 90, 100, 105, 115, 130mm.
View original page 18Page 19 · Read text
ffi,
  HOLDING THE CAMERA  / COMO SUJETAR LA CAMARA
 @ N In order to avoid camera shake, hold the camera steadily, especially when using           longer focal lengths(Tele).
            . Hold the camera strap in your wrisl.
            . Both elbows(horizontal  picture) or one elbow (vertical picture) should be held
          . closeKeep toyouryoureyebody.close to the viewfinder when using the camera.

      NOTE
                ' Avoid obstructing the lens when you take a picture. Pictures can be spoiled when
        a finger, hair, or camera strap falls in front of the lens, exposure sensor or
          autofocus windows.
            . When you take vertical pictures with flash, the flash should be above the lens.

                                                             agdrrela firme, especialmente @   Con objeto de evitar las vibraciones de la cdmara,
         cuando tome fotografias a una distancia focal mayor (telefoto).
               ' Sujete la correa de la cdmara en la muneca.
        Debe pegar ambos codos (fotografia horizontal) o uno (fotografia vertical) al
           cuerpo.
            . Mire por elvisor acercando el ojo a una distancia mfnima del mismo.

      NOTA
             . Tenga cuidado de que no caiga nada delante del objetivo que lo tape cuando
         toma una fotograffa.
               ' Las fotografia-s pueden estropearse cuando los dedos, pelos, o la correa de la
         cdmara caen delante del objetivo, del sensor de exposici6n o de la ventana de
           auto-enfoque.
             . Cuando toma fotograf(as verticales con el flash, 6ste debe estar colocado en la
            parte superiot.
View original page 19Page 20 · Read text
www.butkus.us                                                                                             ffi
TAKING PICTURES / REALIZACION DE FOTOGRAFiAS
                                ([      Aim tre Autofocus frame at the subject.
                                                  . Press the shufter button half way down. The lens is focused when he green lamp
                                                  . urnslf the on.subject is 1m(3.28ft) or closer, the green lamp blinks quic*ly and the shufter
                                                  . locks.Press theIn thisshuttercase,bi.rttonVou canallthestill wayMacrodownmode.to take a picture.
                                                  . Press the shutter button carefully to avoid camera shake.
                                                                     ' The film will automatically advance after shooting and the frame counter will
                                               advance.
   NOTE
         After taking pictures, turn the camen off. This will protect he lens and prevent unintended shob.
   N This model has a 'Uiopter" controlon the vtewfinder which adjusts'for  individual eyesight requirements. Slide the diopter
        mntrol etther up or down whilst looking through the viewfinder to obtain the optimum s6tting.
         O_rr1a el encuadre de autoenfoque el objeto que va a fotogr:afiar.@        ' Presone  el boton de disparo del obturador hasta la mitad de su recorrido. El objetivo comienza a enfocar y se enciende el
          piloto verde cuando ha quedado enfocado elobieto.
                                                    1 .48 pies - 3.28 pies  ) se puede fotografiar con el modo MACRO o SUpER MACRO.         !,n gbptggtre 0.45m - 1.qt  (
         Elpiloto LED verde Pprpadea 9gsp.a9lo^.!qndo elobjeto estd_ertrd0.45m - 1.0m (1.4B pies - s.zA pies) y puede reatizar
           la fotogafia en el modo automdtico MACRO o SUpER MACRO.        ' Presione el boton d.e disparo del.obtur:ador hasta elfondo para.tomar la fotognfia.       . Presione dicho boton con cuidado para evitar que la cdmdra vibre.
        ' El canete avanzar| automdticamente despu6b de tomar la fotografia y elcontador de pelicula se incrementard en una
        unidad.

   NOTA
      Despu6s de realizar las fotogr:afras, apague la cdmara. Esto protegerd el objetivo, impedird que se dispare la cdmara
       inintencionadamente, y ayudard a que las pilas duren mds tiemoo.
                 posee uri crjntrol de. dibptriias'en  el visor que se ajusta a caracterbticas  individuales de la visi6n del fotografo.       fisq.modglq
       feslice el intem.rptor de control de dioptriras hacia derecha o i2quierda mientras mira por el visor para conieguir et-aiuste
       optimo.
View original page 20Page 21 · Read text
ffi

                               Gf.f . The camera can focus                              r-v   . The subject between 0.5m(1.64ft)-1m(3.38tt)on subjects between 0.5m(1.64ft)can be takenandbyinfinity.automatic
                                  MACRO or SUPER MACRO MODE.
                                                          . Flash automaticallyfiresto  proMde conect expcsure in low light.
                                                                         ' Flash coveftUe (lSO 100)
                                       WIDE  : 0.$5.0m(1.64-16.4ft) TELE   : 0.9-3.0m(2.9$9.48ft)
                                                                . When you press he shutter button hatf way down in low light, the Red LED
                                                                                will turn on  if the flash is fully dtarged.
           1. The Red LED blinks r:apidly when he flash is not fully charged. (Shutter locks automatically)
          2. When tfre Red LED blinks slowly, use a tripod or steady support to avoid camera shake.
      NOTE
            . In orderto avoid camera shake, hold the camera steadily and press tre shutter button genfly, particularly when using
             longer focal lenghs(telephoto).
              . To take clear pictures witfr flash, refer to the above flash coverage.
  .*
                                              puede ser enfocado.   \.rz   Cualquier objeto entre Q.Sm (1 .64 pies) y -             . Seleccione el modo macro para fotografiar objetos entre 0.5m y 1.0m (1.64pies-3.38pies)
            . Elflash se dispara autom6ticamente para proporcionar la exposicion conecta en mndiciones de iluminacion insuficiente.
             . Cobertura delflash con pelicula de sensibilided ISO 100  :
        GRAN ANGUT-AR : 0.5-5.0m (1.6+16.4 pies), TELE FOTO  : 0.9-3.0m (2.95-9.84 pies)
             . Si presiona el boton de disparo del obtur:ador hasta la mitad de su reconido en condiciones de iluminaci6n insuficiente, se
           encenderd el piloto LED rojo cuando elflash est6 totalmente cargado.
             1 . El piloto LED rojo papadea rdpidamente cuando el flash afn no esta cargado (el obturador se bloquea
            automdticamente).
         2. El piloto LED rojo pandea despacio cuando es aconsejable  utilizar un tripode para evitar que la c6mara vibre.
      NOTA
             . Con objeto de evitar la Mbraci6n de la cdmara, suj6tela con firmeza y apriete el bot6n de disparo con cuidado,
            especialmente cuando utilice una distanciafocal muy larga (telefoto).
            . Para tomar fotografiras nitidas con el flash, consufte el cuadro que se muestra aniba.
            . Si el flash de su cdmara no funciona, cambie las pilas antes de preguntar al SeMcio T6cnico.
View original page 21Page 22 · Read text
www.butkus.us                       ffi
USING THE FOCUSLOCK  / USO DEL BLOQUEO DEL ENFOQUE
    1\."        ([     focuslf you.lockwantfu nctionto_ focusdescribedq.n a.subjectbelow.   that is not in the center of your picture, use the     ''f':/,fr),                  1 . Aim the camera witr he autofoq.rs frame superimposed over fre target.
                                2. Press tte sftutter button half way down.fl-he green LED illuminates or Otinta slourty.;
                                               ' Be careful not to press the shutter button all the way down to avoid't'aking an
                               unwanted picture.
                                3. Keepilg he shutter button depressed, recompose your picture as desired.
                                       . Hold he camera steadily and genty press tre shutter button completely down.
                                                   ' The focus lock can be released at any time by lifting your finger fr6m tr6 shutter button.
                      Some subiects are dfficult to focus on.
                                  1. ttems tnt have a briqht liolrt in tre backoround.
                               2. Firewoda and smok6.
                               3. Shining or glossy surfaces such as a car body or tre sufface of water.
                               4. Subjects taken hrough windows.
     1V"-.,                              Si quiere                                                         u.n                                     enfocar                                                  objeto                                              gue                                                                           rlo estd                                                        en                                                                              centro                                                                                    el                                                                  de la fotograffa que va a         GD    '$ii(                                   tomar,                                                                   que                                     use                                                                  la tunciOn cle                                                                             del                                                      bloqueo                                                                enfoque                                                                          se                                                                                            explica                                                                                                 abaio.
                                    1. Apunte la cdmara alobjeto que quiere enfocar.
                               2. P'resione el boton_d'e OiSpaio Oel-obturador hasta la mitad de sti recorrido (se
                                enciende el pilolo LED verde o parpadea despacio).
                                                     ' Tq.n0a cuidado de- no presionar el bot6n de disparo hasta el fondo, con objeto de
                                            evitar tomar fotograf iras accidenhlmente.
              de disparo del obtrirador presionado, recomponga  la nfotografia segrin sus prefererrcias.S $1.el.Ootgn
 ' QyjeteEl bloqueola cdmaradel enfoquefirme ysepresionepuede soltarel bot6npordelevaritardisparoel condedosuavidaddel bot6nhas6de disparoelfondb.
Algunos objetos son dificiles deenfocar.
1. Elementos que tienen una iluminaci6n brillante en el fondo. (iluminaci6n de fondo completa.)
2. fuegos artificiales, humo u otros elementos suspendidos.
3. Superficies brillantes y con reflejos, por ejemplo, la canoceria de un autom6Ml o la superficie del agua.
4. Objetos detr6s de ventanas de cristal.
View original page 22Page 24 · Read text
www.butkus.us                       *,
REWINDING THE FILM / REBOBINADO DEL CARRETE

                                                                                                                  I€It-l
                    fo.*135J-_|-4.                                    :     ffF"

@  r. AUToMATTc REwTNDTNG
        After taking all the pictures on a roll of film, the camera will automatically rewind the film.
      The motor stops when the rewinding is completed.
         ' When the rewinding is completed, the back cover and film indicator on the LCD will blink at the same time.
             lf you press the ON/OFF button during film rewinding, the rewinding is interrupted until the ON/OFF button
        is released.
@r. REBoBTNADo AUToMAnco
     Despues de tomar todas las fotografias y terminar un carrete de pelicula, la cdmara lo rebobina
       automdticamente.
       . El motor se detiene cuando el rebobinado ha terminado.
         ' Despu6s de terminar el rebobinado, las marcas en el panel LCD del carrete y de la tapa posterior
      parpadean al mismo tiempo.
        ' Si presiona el bot6n de ON I OFF durante el rebobinado del carrete, este se detiene v vuelve a empezar
      cuando levanta el dedo del bot6n.
View original page 24Page 25 · Read text
ffi


                                         REWTNDTNG          @  z. MID-RoLL                                                                                ' To rewind the film in the middle of a roll, press the rewinding button.
                             NOTE
                                                          .  lf the motor stops before the LCD shows "0" replace the battery.
                                                                         ' Do not open the back cover until the battery is replaced.
  (p  z. REBoBTNADo A MrrAD DEL cARRETE oe pelicuu
           . Para rebobinar  el carrete en la mitad del mismo, presione el boton de rebobinado.
      NOTA
             . Si el motor se detiene antes de que el panel LCD muestre el "0", cambie la pila.
            . No abra la tapa posterior hasta cambiado la pila.
  REPLACINGTHE BATTERYOFTHE DATE/CAMBIO DE LA PILA
                                                             becomes too faint to read, the battery         @   When the display of the date
                                           should be replaced.
                                      Unscrew and open the battery chamber cover as showrioabove.
                                   Take out the old battery and insert a fresh one, with the negative  (-)
                                              side up.
                                                 After replacing the battery, reset the date.
                                        Power source  : One coin type 3V lithium battery(JlS CR-123A)
                                              Battery life : Approx. 3 years.
View original page 25Page 26 · Read text
www.butkus.us


    NOTE@          ' The date may be difficult to read if it is imprinted on a bright or nonuniform area of the picture.       . The unit is designed for use between 50t and -10C (120'F and 15.F).
         ' TheAt temperaturesQuar2 Dateaboveis equippedor belowwiththisanrange,automaticthe datecalend-armay bewhichdifficultrequiresto'read.no adjustment through the year 2019.
       Once set, the calendar automatically advances the date, adjusting foi tong and short months ani leap years.
(D   ' Cuando la visualizaci6n sea demasiado diffcil para resultar legible, deber6 cambiarse la pila.         ' Desatomille y abra la tapa del compartimiento de la pila como se muestra arriba
         ' 9aque       . Despu6sla depilacambiargastadalae pila,introduzcavuelva unaa ajustarnuevala confecha.ei polo negativo (-) hacia fuera.       . Alimentaci6n  : una pila de litio de 3 v(JlS CR 2025)       . Vida utilde la pila:2afros, aproximadamente.
    NOTA' La fecha puede resultar poco legible  si se imprime en una zona brillante, blanca o no uniforme.
         ' Esta unidad se ha disehado para utilizarla en un intervalode temperaturas de 50t a -1OC(120"F a 15'F).         ' En cualg.uier temperatura superior o inferior a este intervalo, la febha puede resultar poco lelibte.         ' El modelo "Quaftz Date" est6 equipado con un calendario automdtido que no reqr"iiere nin-grin Eambio hasta el
         ' afloUna 201v.qz.9.ajustado, el calendario avanzar1, automdticamente  la fecha, ajustando los meses cortos y largos y los
         afros bisiestos.
View original page 26Page 29 · Read text
FLASH MODE / MODO DE FLASH
      AUTO FLASH            EXPOSURE COMPENSATION                FILL-IN FLASH             SLOW SPEED SHUTTER RELEASE
    (FLASH AUTOMATICO)            (00MPENSACT0N DE LA EXP0STCToN)           (FLASH RELLENO)          (DrPARo DEL 0BIURADoR  A BAIA VELoCIDAD)


   REDEYE.                                                                     REDEYE.                                REOEYET
      Al.ti0.                                                                 AUto.                             AUTO-
      FltL.lNr                                                                                                     FlLL.lNr                                             FILL-lNr
      OFF-                                                                OFF.                                oFFr


                             . You can select the flash mode by pressing the FLASH button.  @
         NOTE
                  .After taking a picture with a particular flash mode, the camera will
                     reset to the normal photography mode automatically.
                                  ' While you continue pressing the flash button, the flash functions
                      rapidly change in the above-described sequence.

                        . Puede seleccionarlo presionando el bot6n de selecci6n del modo de  @
                        flash.
         NOTA
                         . Despu6s de tomar una fotograffa en un modo de flash en particular,        (FLASHFLASHAPAGADO)OFF                    la cdmara se volverd a mostrar el modo de fotograffa normal
                  autom6ticamente.
                             . Cuando sigue presionando el bot6n de Flash, las funciones de Flash      REDEYE-AIJTO.
                 se cambian rapidamente segrin la secuencia explicada arriba.                    FlLllNr
                                                                                                          OFF.
View original page 29Page 31 · Read text
FUZZY INIEI.IIGENT SHOONT{G  / KITOGRA,HA INTEUGENTE
                                                avoid camera shake and under-exposed subjects in your pictures, use          @    To                                 FUZZY mode. The buifi-in intelligent microcomputer enables you to get
                                                 clear and properly exposed pictures by controlling the focal lengh, flash
                                      and shutter in compliance with the surrounding situation.
                             NOTE. ln FUZZ( mode, the subject size of your picture nrAy be reduced as the
                                         lens will automatically adjust to provide the optimum photographic
                                                 conditions.

          @    Para evitar el movimiento de la cdmara y al subexposicion de los sujetos
                                           . enEl microprocesadorlas fotos, utilizar elinteligentemodo difusoincorporado(FUZZY).permite obtener fotos nitidas y
                                 debidamente expuestas controlando la distancia focal, el
                                                   flash y el obturador de acuerdo con la situaci6n del entorne

                             NOTA              Normal                                           . En el modo FUZZ( (difuso), el tamafro del sujeto puedo variarse ya qG
                                                el objetivo se ajustar6 automdticamente proporcionado las condiciones
                                                 fotogr6ficas 6ptimas.


              Fuzzy
View original page 31Page 32 · Read text
www.butkus.us                       ffi
PORTRA'T PORTRAIT ZOOM IZOOM PARA PRIMEROS PLANOS
                                                      Portrait zoom mode to maintain a constant size within the frame,          @   Use
                           t-^\                              . andPositionshouldersyour subjectportrait) in the Center of the vieMinder and press the1ru,-J                                 even though the distance to the subject may vary. (Example : Head                                             shutter button half-way. The zoom will operate automatically to attain ro__jls.J
                                          . thePressdesiredthe shuttershot. button fully to take the picture.


                                                                                                un                 aA   Emplear el modo zoom para retrato con el fin de mantener                                          tamafro constante dentro del recuadro, aunque varie la distancia                               -      entre la c6mara y el sujeto.(Ejemplo  : Retrato de cabeza y hombros.)                                            . Siturar el sujeto en el centro del visor y pulsar hasta la mitad el bot6n
                                            . deSeguidamentedisparo.     el zoom actuard autom6ticamente.                                          . Pulsar a fondo el bot6n de disparo para hacer la foto.


          Normal mode


             Poftrait zoom
View original page 32Page 35 · Read text
ffi*
      MULTT-D(POSURE SHOOnNG  / FOTOGRAFTA DE EXPOSICIONS MULIPLES     t-tu
                                     Use the Multi-Exposure shooting mode to combine multiple images           @    .                                       on a srngre Trame.
                                                         . Press the shutter button after selecting the multi-exposure shooting
     I   I=E                      mode (ft1. fne film will not advance and the Multi-Exposure mark                            (E  ) witt blink to indicate that Multi-Exposure shooting is in progress.   rCs{rl                              TO COMBINE MORE THAN TWO IMAGES  :
                                          Select the Multi-Exposure shooting mode again before the second
                                        exposure, and those succeeding  it. After the last exposure in the
                                        sequence, the film will advance to the next frame.
                                NOTE
                                                               . You are recommended to combine just two exposures on a frame as
                                               too many multiple shots may overexpose the picture.
                                                                               ' You will have more success when you use Multi-Exposure in a dark
                                               background.
                                                                                   ' The date will be imprinted on the last exposure (Q.D model only).
                                                            .                                                                                               combinar                                                                Disparo                                                                             Exposici6n Multiple para                                                              con                                         Emplear el                                           modo de                                  all                                                                                                                                                                                                   '*'                            r=t                                                              un solo                                                       mriltiples                                                im6genes                                                       en                                               fotograma.
                                                                        ' Pulsar el bot6n del obturador despu6s de seleccionar el modo de
                                              disparo de exposicion m0ltiple ([]).
      . La pelfcula no avanzar6 y la sefral de Exposici6n Mriltiple ([!  ) parpadeard indicando que se estdn efectuando
       disparos con exposici6n mUltiple.
      . Recomponer el recuadro y pulsar el bot6n de disparo para el segundo disparo, seguidamente la pilicula
       avanzar1,6ticamente  y se restablecer6 el modo de disparo de fotograma a fotograma.
   PARA COMBINAR MAS DE DOS  :
      . Seleccionar de nuevo el modo de disparo con Exposici6n M0ltiple antes de la segunda exposicion, y las
       sucesivas.
      . Despu6s de la fltima exposici6n de la serie, la pelicula avanzarf al siguiente fotograma.
View original page 35From the M. Butkus archive. Original publisher and archive notices are retained.
Check the model and edition against your equipment.
PDF verified 2026-10-10.