Film cameras
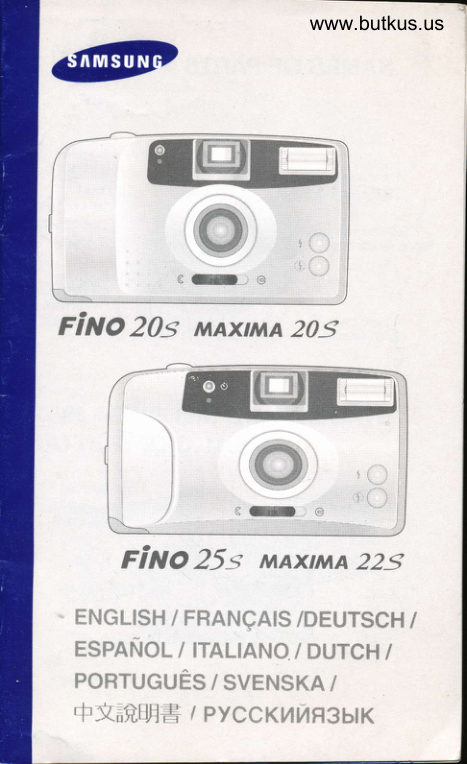
Samsung FINO 20s Maxima 22s User manual
User manual for Samsung FINO 20s Maxima 22s. 18 pages in English. Read the original PDF, download or print a copy without registration.
18 pagesEnglish1.5 MB PDF
Loading your manual…Open PDF directly
Document details
- Brand
- Samsung
- Model / document
- Samsung FINO 20s Maxima 22s
- Document type
- User manual
- Language
- English
- Pages
- 18
- File size
- 1.5 MB
- Category
- Film cameras
- Document date
- Not specified in catalog
Search available document text
Find a term, then jump to its page in the original PDF. Image-only pages may not be searchable; check the PDF for exact wording and diagrams.
Page 1 · Read text
-----------
                        www.butkus.us


pitto zos MAXI,MA 2os


    finO 25 -; nay7na 225
 xr{silsi{  I i:R,qr,{s,&,$ /t3truT$cl-{  /
 nspgr,,**r- I                  I [3{.'TeH I
 pomrN.J*1,*s'TAL!AN*                       r svnrdsp{n I
    ' I -v,,iil ilj,l, pvccKt4rdfi3btK
View original page 1Page 3 · Read text
www.butkus.us


       DXdecoding@
                c0nlacts


             Film sensor @


   REPLACING THE QUARTZ DNIE
   BATTERY (O.D. MODEL)


        CR - 2025  I 3V lithium batterY
tl
View original page 3Page 4 · Read text
LOADING BATTERIES


     o Open              the                    battery                      chamber                                   cover                                                                          [r].GDwffiffiO          Insert              two               new batteries                          and                                be suie -     them in the correct position.            to place
       Ouvrez  la trappe du compartiment piles [r] (D ?     o Inserez deux piles neuves en verifiant qd'alles sont -     en position correcte.
        Offnen               Sie               den Batteriefachdecket                                                                            [r]. @[l.-  o     o       Legen Sie                  zwei                     neue Batterien ein                                                  iihO
        vergewissern Sie sich, daB sie richtig plaziert sind.
Gtt --  o      : Abra.laInserte dostapapilasdet compartimientonuevas, asegurdndosede tas pitas(r).Oe Que tas        coloca en la posicion correcta.
@ : fl3Hi,i S33:.ff ii? t"J,Ff3 3f ::!f, Jr/u,si
        siano posizionate correttamente.          "ne


                                                                                                                                                                                                        j@ : 3t:?  ffi :3    :: ;"i liliJ  fi 3 l] :t    f; :trii:  ilj:iLrll,,,,,.   n,
          Let daarbij vooral op de juiste stand.                           "
                         "f
@ : fl?iailT%x *H: T 39::?#:,  ffi i"1,,? 3 J ?,        elas foram inseridas na posigio coireta.       "
&  o Qppn" batteri luckan  [r].    o Sdtt  i tvA nya batteriei 6ch se  till sA att polerna pA -       batteriet hamnar  rdtt.
                                     .;,?::ilXtjlGD : 3Jil,":-""ff."H,:"T:HXf                       q ro o H,4
         ycraHoBneHbt  c co6nopeHneM  nonrpHocr14.
GD : ilili#*f; ,!^  il, rru,,ui11,
View original page 4Page 6 · Read text
Open de achtenruand [v] door de sluiting  [] ervan, als afgebeetd,  opzij te schuiven.      allli o         a Leg de filmcassette  in het filmcompartiment.  Forceer daarbij  niets.
      -    o Trek de  f lm a s afgebeeld, tol aan het filmlengte-rnsteltebn   [q] uit de cassetle. Zorg ervoor dat de lilm vlak lig.
          o  Sluit de achterwand  tot dre hoorbaar dnhtklikt, Druk de ontspanknop  pl zo vaak rn tot in de opnamelelhr   lbl
                            hel ciiler "l' verschiinl,


                       Abra a tampa do compartimento de lilme (v), deslizando a alavanca   (j) conforme mostrado abaixo.    GE) o         a Insira um novo rolo de filme no compartimento. Nao force o filme na posrQao.
       -   o Puxe o filme ate o indicador de final (ponta) do filme (q) conforme mostradoabaixo.
                  0lilme deve permanecer  liso.
         o Feche a tampa do compartimento  at6 ouvir um "click". Aperte o botAo do obturador
                       (a) diversas vezes para o lilme avangar ate que aparega 0 "i" n0 contador de
                    exoosic0es.

 @ : 3llnff Iffi  fi  ', t[*T:[  il,.'[f  lft :?1, lifl 'ff  |,len r] som visas ovan
         o Dra ut filmen  till laddningsmdrket  [q] som visas ovan Filmen skall ligga plant.
         o Stdngbakty*etsadduhorelt"Klrck'.Tryckpaarltryckaren[a]eflanlalgangertillsduser"l"piraknevakel[bl

                                           xpurLlny [v] nnmno orogauran xxonry  [] TaK, Kat< n0(a3aH0 Bbtue.    GID o Orxporre mgxnn
      -   Oo ylloxl4reBcraarre(0|1eqraccery|]reHxu cgoSoronnexxolrunu  [qj rax, rarIn0MtaH0oTpeneHile.Buuje.  s,leH|(aHe npxnafaffflonxHa lleqbvpelnepnuxp0BH0,     ycunr,tn.
         O 3axpolrrc mqrron xpuury $moannapaTa c tte[rrrlu qenqfiou Haxurre ruonxy  cnycxa laruopa $oroannapn
                          a pl taroe xonuvecruo  pal, rotopoe neoOxopuuo gnR roro !T06H  lta c,leT,ifire  rapoe  [b] nonnu,racu qr,r$pa  '1',
      rlr   o'tnHfl{F*FfiFi$11 (v) 6l:tft, flFf,,F# (i).    Y" O ll'll+.lGllt ),1)+.)G-;' i+,lLnJ.hV{   "
         a  rrtt l.EJtll[f Gt*J,lflIi;d]JE  tq) ,  H*.]6,ytli1ll.tt   "
       O  'llJ I:rir;iir'r.JiUlf,lJitl  "r*tt9,{" ft, li1*1"J14j'fl t"r                                      t'ti.J:t)l:t)  ltt!N!,t!J.ti.rJ.ld  (b ) lNIrl "  l " .frrl:  .
   TAKING PICTURES
       1!ll1 1.Open the lens cover to turn on the power.
      -     2.Look3.Press throughthe shutterthe viewfinderbutton fully andto takecomposea picture.the picture.
         o  ll the subject  is less than 1.5m, the picture may be out of focus.

                   1.0uvrir  le volet protecteur pour mettre I'appareil en marche.      f;
     -      2.A3,Pressezl'aide dule declencheurviseur, composezcompletementvotre cliche.pour prendre  la photo.
         o Si le sujet est A moins de 1,5m, la photo pouna etre floue.
tb
View original page 6Page 9 · Read text
www.butkus.us
DATE IMPRINTING (O.D. MODEL)


                                          q'.        w                          i'Si
         E.lrFt;.1.1 ,'5rnl            rl

.|!h                                                                                   lormats.EI|l' l.Changer preis thethe DateMODEformatbutton  in the back cover to select one of the different
             (Refer to the above sequences    )
              . No Print
             r Year / month  I day (Date mode)
           o Hour  / - / minutes lTime mode)
          2.Setting the Date
        o Selict Date mode by pressing the mode button Press the setting  button
                                           date                                 the desired                 D                          to set              M,and        Y
                                                  the Time mode and adjust time by presslng                                      to access                   mode                                button             Press                   the         r
              the setting  button H and M
z=r   1.                                                           pour choisir un des diff6rents          .Changeriiri*z lelaformattouchedeMODEla Dateau dos de I'appareil l]|
             formats.{Feportez-vous aux s6quences  ci-dessus  )
          r Pas d'imPression
        o Ann6e/mois/jour  (mode Date)
          r Heurel/minutes (mode Heure)

                                                       mode. Pressez  la touche  Yl\,1,          2.- .R6glagec"hoisissezde laleDatemode Date en pressant  la touche
                 et D Pour afficher  la date voulue.
          oPressez|atouchemodepouraccederaumode..Time''(heure)puispressez|es
              touches de reglage H el lV pour afficher  l heure voulue'
 airh Q,l9!tl,Anderungdes. Dr6ckei Si. di.DatumformatsMODE-T.ste auf der Ruckwand, um eines der verschiedenen
              Formate auszuwahlen
                r Kerne Einbelichtung
                r Jahr  / l\4onat / Tag (Datum-Modus)
           ostunde  / - / Minuten  (Uhrzeit-Modus)
           2.Anderung  der Datumsernstellung
            .Wahlen"Sie den Datum-Moduidurch  Drucken der MODE-Taste  Danach
                driicken Sie die EinstelltasteY M und D, um das gewunschte Datum
               einzugeben.
                                                                                    die                                                                   MODE-Taste                                                               Sie ebenfalls                                                   drucken                                     zu eneichen,                    UhrzeifModus                ;dn                  . h                                             M                                                                                                      ein'                                                H und                                                    die Einstelltaste                                                    Zeit uber                              die gewLinschte                        stellen              und
View original page 9Page 10 · Read text
rar    l.Cambiodel  formato de la fecha   S/Z    o Presione  el botdn MODE situado en el respaldo  para seleccionar  uno de los
                      diferentes  formatos.  (Vea la secuencia  mostrada  aniba)
                  o brn rmpresr0n
                     r Ano/mes/dia (Modo fecha)
                  o Hora/  - / minutos (modo hora)
                 2.Ajuste de la fecha
               oSeleccione el modo Date (fecha) presionando   el boton M0DE. Presione  los
                   botones Y (ano). lV (mes) y D (dia) para ajustar la fecha deseada.
                   r Presione  el boton IVoDE para acceder  al modo Time (tiempo) y ajuste  el
                   tiempo presionando  el boton H (horas) y M (minutos).
   lh    l7     l.Oozionir Premeredellail pulsantedata   MODE per selezionare  una delle diverse  opzioni.                              illl
                      {fare riferimento  alle sequenze  sottostanti)
                 o Nessuna stampa
             oAnno /mese  / giorno  (funzioni  data)
                    r Ora / - / minuti  (funzioni  orarie)
               2.lmpostazione   della data
                 o Selezionare  la funzione Date premendo    il pulsante Mode. Premere    i pulsantt
           Y  l\tl, e D per impostare la data desiderata.
                 o Premere    il pulsante Mode per accedere  alla lunzione Time e regolare  l'ora
                oremendo    i oulsanti H e M.

    atl;l  l.Kies de   {17     r Herhaaldge! indrukkenrenste datumnotatie.van de MODE-knop   wijzigt de datumnotatie   in de volgorde:
                    r Geen datumafdruk
                rJaar  / l\,4aand  / Dag (datumfunctie)
                    r Uren / - / lr/inuten  (tijdfunctie)
                 2.Stel de datum  in
                    r Kies de datumfunctie  door op de MODE-knop  te drukken en stel de gewenste
                datum  in met de knoppen Y (jaar),   l\r1 (maand) en D (dag).
                 o Kies de tijdfunctie  door 0p de MODE-knop  te drukken en stel de tijd in met de
                 knoppen H (uren) en I/ (minuten).

   4l    l.Mudando o lormato da data     tft       o Aoerte o botao M0D0 Dara selecionar um dos diferentes
                   formatos.  (Referente a sequencia  abaixo.)
           rSem impressdo
                o Ano-mds-dia  (modo de data)
                   r Hora  / - / minutos (modo de tempo)                                    ,l
               2.Ajustando  a data
                 o Selecione o modo da data aoertando o botao modo. Aoerte os botoes Y
                    (ano), M (mes) e D (dia) para ajustar a data desejada.               .Aperte o botao modo para acessar o modo de tempo e ajuste a hora             l
                 apertando  os botoes H (hora) e M (minuto).


to
View original page 10Page 11 · Read text
www.butkus.us
 @   t l+lJl-t$'nJffiilappen  pa mrsrvcket lor att vilja en av de olika rormaten.
                   (Se ovanstdende  sekvens   )
                      r Ingen inkoPiering
                      r Ar/MAnad/Dag  (Datum  ldge)
               rTimma/-/   l\ilinuter (Tid ldge)
                   2.Stalla  in datum
                      r VAlj datum IAge genom  att trycka pA M0DE knappen. Tryck pa installningsknapparna
                                              datum                    D for att                                                stdlla dagens            Y M och{t
                                                          fdr att komma                                 knappen                     pA MODE I               .Ttyck I                    instdllningsknapparna  H och M.                  till tid lage och  stall tiden med
  III
                                  B|/Aa npeAclaBneHxn                              1 .l4lueHenre                                            AaTU     Ith
                                     BbtopaTb 0At4H  t43      tll9'                                                        BlrA0B npeAcTaBneHfif,  AaTbl, HaxM[t-e |(Honlry pexilM                             . gnr roro r.rT06H
                    iMode), naxonnuynis  Ha 3aAHe14 tlpblLuKe  $otoannapara:(e  cnepynuleI
                      n0CIt8[0B0T0nrF0CTil)
                    rllata He aneqalaercn
                           r l-ogi Mecnu/!eHu (PexuM "!aTa')
                               r Yaci'/Munyru  (Pexr,tu "BPeun')
  '               2.YctaHoeKarBui6epute Iatblpexnu"flala'HaxaTleM  KHonKl{ pexuu HaxuuaR rnonxu Y, l/, D yctameute
                              AaTy                  ,xenaeMyn                                      pexilM Bbl6epl4Te pexnu -Bperirn" u croppertnpyt'lte  opeun, mxuuan                  HaxaTileM KH0nKu                             I
                    xnonru H r M.


  GD   ' 5i'H,.flt r()DE l&r*#f+-  t4frtfrGfr4*3.'ri*&t*Frlri)
                  litIr[
             'FlE/EJ(ESMODE)                            ft+ /-/ ti(fl jllil \()DE)
                    2. B llll,lt',^i
               .tA\,rcDEfd&l+EJtil MODE, li':;jtiiffiv' M, D;t-^iFh*BSl   "
           .& MODE ffi,  14fi11+llll  tvltlue, 14itri H' M ffi"ltl*1F+lljl .

1

 )


                                                                            11
View original page 11Page 12 · Read text
USING THE FLASH MODE
                                                automaticalry                                                                                   fire to                                                                       obtain                                                                            the                                                                                     correct                                                                                    exposure.   Gli)  lnwhenl'w thelrghtflashconditions,is furry frashcharged,wiil                                                the frash indicator                                                                                rights                                                                     green                                                                                       up. This                                                                                                          [r]
   -        wrll remain illuminated  for 90 seconds and is then extinguished  to preserve indicatorbattery
                    life.  lt will re-illuminate  when the shutter  button  is pressed harr way.
              1.FtLL-tN mode
              Hold the flash-on  button  [h] down whilst taking the picture.
           2.FLASH OFF mode
              Hold the ftash olf button  [i] down whilst taking the picture.

          En faible lumidre  le flash tonctionnera  automatiquement   pour assurer une exposition   1fill

            Lofsque                           le                           flash est                             cha196                                                   re t6moin                                            de charge                                                                           temoin                                                      ce                                                                                                   vert s,dteindra                                                                                                                    [r] s'allume.   -       correcte.                g0            aprds                                pour                    secondes                                    dconomiser                                                     res                                                                    railumera                                                                pires.  il se                                                                                                     si                                                                                                 re decrencheur                                                                                                      est
            presse a mi-course.
               1. Mode FtLL-|N  (flash en appoint)
                l,4aintenez la touche flash-on [h] pressde  lors de la prise de vue.
              2. Mode FLASH-OFF  (ftash anet6)
             Maintenez  la t0uche  "flash  off"  [i] pressde  lors de la prise de vue.

        um korrekt belichtete  aillh
             automatisch                          der Blitz oezundet.Aufnahmen  zu erzielen,  wird bei ungrinstigen-           Lichtverhaltnissen
   -       Sobald der Blitz vollstdndig  geladen  jst, leuchtet  die Blitzanzeige    [l] auf. Diese
            grune Anzeige  leuchtet  fur g0 Sekunden,  bevor sie zur Schonuno  der Batterie
             automatisch  erlischt. Wird der Auskiser angetippt, erscheint  sre rireder.
                 1. AUFHELLBLTTZ  (FtLL-tN) Modus
               Halten Sie den "Blitz an lFlash On)-schalter [h] wehrend  der Aufnahme  gedruckt.
               2. BLITZ AUS (FLASH OFF) Modus
               Halten Sie die "Blitz aus"(Flash  Off)-Taste   til wdhrend  der Aufnahme  gedrLickt.

         Con               poca luz, el flash se disparard automdticamente para conseg'ir una exposicidn
              correcla. 6!f,;\-7
         cuando el flash estd t'tarmente cargado,  er indicador  der frash  (r) se encenderd.  Este
             indicador  verde permanecerd  iruminado durante g0 segundos  y a continuacion  se
           apagard para ahorrar energia.Cuando se vuelva a preironar ei disparador  hasta  la
            mitad, se volverd a encender.
                1. I/odo ftash de relleno (FlLL.lN)
            Mantenga  presionado  el boton (h) de flash mnectado (ON) mientras hace  la foto.
            2. l,4odo  llash desconectado  (OFF)
            Mantenga  presionado  et botdn  (i) de flash desconectado (0FF) mientras hace la
                   IOIO.
  alll    qiustaIncondizioniesDosrzione.di scarsaluminosita',ir  flashsi attiva'automaticamenteperottenerela
  -a    Quando    ii frash e'compretamente carico,  r'indicatore  frash  (r) si accende. 0uesta spia
           verde flmarra'accesa per g0 secondi e poi si spegnera'per preservare  ra batteria. Essa
               si illuminera'nuovamente   quando    il pulsante  di scatto viene premuto a meta'.
             1. Funzione  FILL-lN
           2.- FunzioneTenere premutoFLASH-0FFil pulsante  di accensione  del flash (h) mentre  si scafta  la foto.
             Tenere premuto   il pulsante  di spegnimento  del flash (i) mentre  si scatta  la foto.
t2
View original page 12Page 13 · Read text
www.butkus.us

.lhOmdatdeflitserbilweinig|ichtautomatischontsteekt,bentua|tijdvezekerdvaneentuz    juiste  belichting.
         Zodra de flitsei zich helemaal  heefl opgeladen,  gaat de flitserparaat-LED  [l] brande-n'
        O.i. giotn. LEO  blijft ongeveer 90 seionden bianden en dooft dan' om de batterijen  te
         sDaren'DruktUdeontspanknopha|fin,dangaatde||itserparaat.LEDweerbranden.
            l.lnvulflitsen
          Houd terwiil u uw opname maakt de knop  flitser Aan  [h] ingedrukt'
           2,Flitser uit
          Houd terwijl u uw opname maakt de knop  Flitser  Uit  [i] ingedrukt'
 6hEmcondigoesdebaiXaluminosidade,of|ashautomaticamenteird0bteraexposigaoty      correta.
        Quando o flash estlver completamente  canegado' o indicador de flash (l) acenderd'
                                                                            se apagara                                                                 e                                                                          entao                                                         por                                                     90 segundos                                               iluminado                                    manter                                          ire                                se                         verde                 indicador       iiG                                                                                                        lor                                                                  do                                                                                obturador                                                   quando                                                          o botAo                                              reacender                preservar                                                   lrd                            da                                   bateria                       a vida          oira
          pressionado  atd a metade
            1. FLASH EMBUTIDO
           Sequre o botao de flash-ligado (h) enquanto  tira a loto
           2. FLASH DESLIGADO
            Segure o botao de flash-desligado (i) enquanto  tira a f0t0'

                                                                  att ga av 16r ratt€xponering'                                    blixten automatiskt                       ljus kommer                     I            svagt aGtlqD,                                      sa lyser blixtindrkatorn                        ar helt uppladdad                                                                     [] Denna grona  indikator  lyser    i               r,rai                 fiirien
         g0 sekunder och slocknar sedan ior att spara pa batterret. Den lyser upp igen niir
           avtryckaren  trycks ner halwags.
             1. UPPlattningsblixt
              HAll blixtknappen   [h] nere nar du tar bilden
             2. BLIXT AV
              HAll blixt av knappen   [i] nertryckt ndr du tar bilden
                                                 BcnblulKa aBTol\'{aTil!lecKu cpa6arHBaer I o6e   tll    Upu negocrarovHoi  oceeqeHHocT'1  \|9'   cneqilBaeT  npaB14nbH0e  3Kcn0Hilp0BaHIe
           Kor[a BcnHUKa n0nHocTbo  3apffxeHa,  14HA14Karop BcnblulK[   [l] 3aropaeTcf, 3eneH
                   btt4 llHAfiKaTop  ocraercn 3axxeHHblill B TeqeH[e 90 cexyHg  l4 n0T0['l racHer anfr T0
             to, u,o6o npoAnfiTb cpoK cnyx6ur 6araper,r   . 14ngilKaTop cHoBa 3aropaeTcfi' K0rAa
         Bu cnerxa laxuuaeTe Ha KHonKy 3aTB0pa Q0l0annapaTa'
              1, Pexurur npr,lHyAr'lrensuoro  cpa6arueaH[fl  BcnuulKt4
              Ygepxueallie  KHonKy  BKnolleHl4f, ecnuruxr,l [h] B HaxaroM n0noxeH1414  B0 Bpe['/lr
              QoTorPaQtlPoBaHfiF.
              2. PexilM 6eg scnHUrtl
              Ygepxureattre ruonKy oTKnoqeH!4r  ecnururr,t  [i] B Haxaro['1 n0n0xeHil!4 B0
                   eper,rn QororpaQupoeartrn.


                                                                                 f,q                                                              )Et'd F */l {f X "  rlr
                                                                                                                                                               I ).,+  tl9lr   7r.1yg 1I\n  fili+ lU4t,Erif/itiCT,j: rl+,fr H;ff E )t  ili :f'6llI*r-,r i'lit( )t,                                                                            "                                l.:,,  | * ( l'|'ijbF+ il,   !!*+"n   ",; L so V E, F Sll'LF id'
                                                                 jl11'  I  r. ili  jlil +r "          It-- f lt     l " J j;it fl+/,Jit'd
              Liii:l; fl'\:ti'i.t
                   /r {4 Crii  il;rl p! )t i+( h)fl .,i''rs T  }rii ill "
               :.1^1 l|d*)Et,Ir\
              ft.T;;l|tLtlt/(:tl(i)fllfihTFffffi "                           13
View original page 13Page 14 · Read text
SELF.TIMER


                   O   se.p.ruenr  nso.e"e nEouc'or


 GD .Y.ou can setect this mode by pressing the SELF            button(k) one time.
         oY.ou can take a picture of yourself by using this mode.
       oWhen you press the Self-timer button, the ielf_timer lamp
           blinks slowly for 7 seconds. Then the lamp blinks
           rapidly for 3 seconds and the shutter button is released.
        oThe self-timer can be released by closing the lens cover.
         *Self timer (FtNO 25(S) / MAXTMA 22(S) onty)
   (f    .Vous pouvez choisir ce mode en pressant la touche SELF(k) une fois.
        rVous pouvez vous photographier vous_ m6me en utilisant ce mode.
        .Lorsque vous pressez  le retardateur,  le temoin du
           retardateur clignote lentement pendant 7 secondes, puis
         rapidement pendant 3 secondes  et la photo est prise.
        oLe Daleur peur etre en fonction meme si le cache est en place.
        *Retardateur (FtNO 25(S)  / MAXTMA 22(S) uniquement)

                                Sie durch einmatiges Drricken @   . !ies^e1 tr{olus konnen          der SELF-Taste(k) erreichen.
           r Mit dieser Betriebsart konnen Sie Aufnahmen von sich
           selbst machen.                                                                                                                                                                           1
         o Bei Druck auf den Selbstausloser blinkt die Selbstausloser_             ,{
        Lampe fur 7 Sekunden langsam, danach ftjrdrei Sekunden
           schnell und schlieBlich lost die Kamera aus.
       rDer selbstausloser kann durch SchlicBen der
         Objektivabdeckung  ausgeschaltet  werden.
        *Selbstaustoser (Nur FtNO 25(S)/ MAXTMA 22(S))
l4
View original page 14Page 15 · Read text
www.butkus.us
GD. Podrd seleccionar este modo presionando  el bot6n
       SELF(k) una vez.
       o Podrd tomar una folografia de si mismo utilizando este modo.
       o Cuando presione el autodisparador, la l6mpara del
       autodisparador parpadeard despacio durante 7 segundos.
     A continuaci6n comenzar6 a parpadear r6pidamente du-
        rante 3 segundos y el obturador se liberar6.
       oEl auto-temoorizador no funciona cuando se cierre la tapa del lente
      :&Autodisparador (Solo FINO 25(S)/ MAXIMA 22(S))
1fll  . Potete selezionare questa funzione premendo   il pulsante
      SELF (AUTO)(k) una volta.
-     o Usare questa funzione per autofotografarsi.
       o Quando si preme   il pulsante di autoscatto,  la spia
         dell'autoscatto  lampeggia lentamente per 7 secondi.
        Quindi la spia lampeggia rapidamente per 3 secondi
       prima dello scatto dell'otturatore.
       o L'autoscatto puo'essere tolto chiudendo   il copriobiettivo.
      *Autoscatto (Solo FINO 2s(S)/ MAXIMA 22(S))
llG). Deze functie stelt u in door eenmaal op de knop
       SELF(k)te drukken.
     oMet de zelfontspanner  kunt u ook zelf in beeld
        verschijnen.
       o Voordat de sluiter zelfontspanner,  knippert de
       zelfontspanner-LED gedurende 7 seconden langzaam
      en knippert daarna nog eens 3 seconden  snel.
      o In het geval dat u de ingeschakelde  zelfontspanner
         niet wilt gebruiken, kunt u hcm uitschakelen door de
       lensbeschermer  te sluiten.
      *Zelfontspanner (FINO 25(S)/ MAXIMA 22(S) nodig)
llf   oVoc6 pode selecionar este modo apertando o bot6o (k)
       oessoal uma vez.
 -    oVoc6 pode tirar uma foto de voc6 mesmo usando este modo.
     oQuando voc6 pressionar o botSo de disparador
        automdtico, a lAmpada do disparador automdtico
        piscard lentamente por sete segundos.Ent6o  a
       ldmpada piscara rapidamente por 3 segundos e o
       botdo do obturador serd solto.
    oO disparador automdtico pode ser tirado com a tampa
      da lente fechado.
      *Drsparador automdtico (56 na FINO 25(S)/ MAXIMA 22(S))
                                                                                                                                                  l s
View original page 15Page 16 · Read text
(p   .Ou kan vdlja detta ldge genom att trycka pA SELF(k) knappen lgAng.
       rDu kan ta bilder av dig sjdlv med denna funktion.
       oNdr du trycker ner sjdlvutlosare knapp, Blinkar
          sjdlvutlosarlampan     i 7 sekunder. Sedan blinkar lampan
         snabbt   i 3 sekunder innan bilden exponeras.
         oSjAlvutlosaren kan utlosas ndr man stdnger linsskyddet.
         *Sjdlvutlosare (Av FINO 25(S)/ MAXIMA 22(S))
   l!lJ;  oHro6sr eu6paru 3Tor pexilM, HaxMilTe rHonry SELF(k) ograu pas.
           rlcnonu3yq 3ToT pexilv, Vu uoxere cSororpa$r,rpoeaTb cal/oro (cauy) ce6q
   -     oKorpa Vu HaxhMaere rnonxa rar,luepa aBToMarilqecKoro cnycKa
            3arB0pa, raMna ratMepa aBTo[4arhqecKor0  cnycKa 3aTBopa MeAfle
          HHo Mhraer B TerreHhe 7 ceryHp, 3areM MhraeT 6ucrpo e reqeHile
           3 ceryHg, il nocne 3roro ocyqecrBnqercq  cnycK 3arBOpa.
         oPeNuur aBrocnycKa uoNer 6urrs npeKpaqeH nyTeM 3aKpun4n
              KpbrurKh. npnxpueaouler.r oObeKrilB.
      *Taiuep aBroMarhi.recKoro cnycKa 3arBopa
         (Tonuro FINO 2s(SyMAxlMA  22(S))
                                                                                           t h )  . rnh .F HIE**-:RiEJ+ Effi {Srt
                                                                ,irr TtjlEs*  -       ..FT"lL-tl{HHIE**trE+EtFrttrElH,ffAtFjgFfH.+EFfi
       $+E  fl j*ftl  t r1, 3f 0ff41ft18ffi +'jilFl
           . XtffiFFHxffi ;1941i H +EtrHE
      *ElE+Ffi tFlNo 25(S)/MAXIMA 22(S) gH)


 AUTO RED.EYE REDUCTION
  Gli  o The camera  will automalically  select the red-eye reduction leature when  r-u'     flash is selected.
       o When the shutter button is oressed half wav down, the red-eve reduction
             lamp [c]will  light up, The flish will fire wheir pressing the shLner button fully.                    ,


                               le flash                                 est utilis6,                                            cet                                                appareil met automatiquement  en oeuvre  le
                              "dyeux  G|1!"   o syslemeLorsque de                           reduction                                             rouges".
      o Des que le d6clencheur  est presse d mi-course,  la lamoe de reduction  d'
                  efiet d' yeux rouges[c]s  allume. le flash fonctionnnea lorsque  le
              diclcnchcrrr sera nrpsse a fond.
l6
View original page 16Page 18 · Read text
SPECIFICATIONS


                Type          35mm lens shulter camera
             Film Format        35mm DX-coded  film, 24x36mm

              Film Speed              Automatic selting w th DX-coded film, lS0 100 or 400
              Film Winding          Power loadino, aulomalic advance
            Film rewinding         Power rewinding,  Mid-roll rewinding

               LENS          30mm SAMSUNG  lens
                            F 5.6 (3 elements 3 groups)

                Shutter              Mechanically  controlled  shutter
                                      Shutter speed 1/125 sec.
              Focusing              Free focus
                                  Focusing range - 1.5m - inlinity
              Viewfinder             Reverse-Galilean  viewf inder
                                        Field ol view - 80o/o / Magnification  - 0.55x
             Flash Type             Builtin
            Flash Range         ISO 100 1.5 - 2.4m(5.0 - 7.9f1)
        Flash Recycling Time       Approx. 7 sec
             Flash Mode           Auto red-eye reduction,  Fill-in, Flash off
          SELF-TIMER           Self{imer lamp and Red LED ingicator,
                                (FINO 25(S)/ MAXIIVA 22(S) only)
                                  Belease time:Approx. 10 sec
         Date lmprinting        Date or time setting  - 3 dilferent formats
            (Q.D. Model)         (The camera  will set the date until 2029)
          Frame Counter         Counts up during film winding and counts down
                                     during rewinding
          Power Source         2 AA alkaline batteries
        Dimensions (WxHxD)          1 1 7x67x43mm   I 4.6x2.6x1.7in
              Weight                    1 669 (without batteries)
      -Specifications                     are subject to change without prior notice.
       -All         data are based on SAMSUNG's standard test method

l8
View original page 18From the M. Butkus archive. Original publisher and archive notices are retained.
Check the model and edition against your equipment.
PDF verified 2026-10-10.