Film cameras
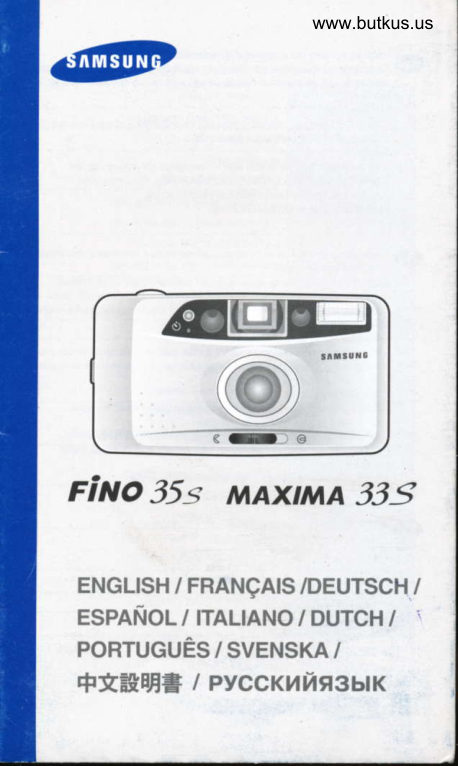
Samsung Fino 35 Maxima 33 User manual
User manual for Samsung Fino 35 Maxima 33. 24 pages in German, French, Italian, Swedish. Read the original PDF, download or print a copy without registration.
24 pagesGerman, French, Italian, Swedish2.7 MB PDF
Loading your manual…Open PDF directly
Document details
- Brand
- Samsung
- Model / document
- Samsung Fino 35 Maxima 33
- Document type
- User manual
- Language
- German, French, Italian, Swedish
- Pages
- 24
- File size
- 2.7 MB
- Category
- Film cameras
- Document date
- Not specified in catalog
Search available document text
Find a term, then jump to its page in the original PDF. Image-only pages may not be searchable; check the PDF for exact wording and diagrams.
Page 1 · Read text
www.butkus.us


             ----?@"""
           -EC--
rino 35s maxma 335

 ENGLTSH / FRANQATS /DEUTSCH /
 ESPANOII ITALIANO/DUTCH/'
 poRrucuEs I SvENSKA  /
                / PyccKxlie3blK +**Erf
View original page 1Page 3 · Read text
www.butkus.us
LCD PANEL


                                   @seFtimer
                                        @Autofocus/Auto flash
                                   @Red-eye  reduction
                                @Rash(ON/OFF)
                @ Exposure counter


                @ Film rewinding indicator
                @ Film present indicator
                @ Slow shutter sync


REPLACING THE QUARTZ DATE
BATTERY (O.D. MODEL)


    CR - 2025 / 3V lithium battery
View original page 3Page 4 · Read text
Merci de faire un don de 2,50 € pour soutenir ce site via E-bay ... www.PayPal.me/butkus


Als u deze handleiding nuttig vindt, doneer dan $ 3 aan https://www.paypal.com/paypalme/butkus


Bitte spenden Sie 2,50 Euro, um diese Website über E-Bay zu unterstützen ... www.PayPal.me/butkus
View original page 4
Page 6 · Read text
CHECKING THE BATTERYwww.butkus.us


 1. The battery  is checked automatically and the status  is displayed on the LCD panel. 2. WhenHHthe banery  is low, replace the battery
LOADING THE FILM


1l!fi) oOpen the back cover [s] by sliding the release knob  [] as shown above.
 -     aa PullInserlthea lilmroll ofto filmthe lilmin thetipchamber.mark [o] asDo shownnot forceabove.the filmThe intofilmoosition.should  lie flat.
       0Close the back cover  until you hear a "Click'. The film will automaticallv
         advance  until the lilm counier reads "1'.
       lOqyre4le                  dos [s]en pousant  la commande  d'ouverture []commellffv          indioudci-dessus.
       alns6rez sans forcer un lilm dans  la chambre.
        OTirez l'amorce du film lusqu'au  reprdre [o]comme indiqud ci.desus.
        Le film doit 6tre a olat.
      aFermez le dos en le presunt  jusqu'  i ce que vous entendiez un 'click".
        Le film avancera automallquemenl  juqu'd ce que le compleur  affiche'1".
1ifi; rOffnen Sie die Ruckwand  [s]. indem Sie.wie oben gezeig-die
-'    llegenRiickwandenlnegelung[]betdtigen.Sie einen neuen Film in die Kammer, ohne ihn mit Gewalt  in die
           nchlige Posnion zu dr0cken.
       lZiehen Sie - wie oben gezeigt  . den Film bis zur Markierung  [o] heraus.
        Der Film sollte llach aut'iieoen
      tshlieBen Sie die R0ckwind, bis sie horbar einrastet. Der Film wird
          aulomalisch  transporliert,  bis das ZahMerk "1" anzeig.
G;lYz 0 comoAbra elserespaldoindica.   (s), desplazando  elseguro delciene 0 del mismo  tal
     O lnserte un rollo de pelicula en su compartimienlo.
      0 Tire de la punta de la pelicula hasla la marca (o), tal como se mueslra mds
          aniba. La pelicula debe quedar totalmente  plana.
        I Ciene  el respaldo hasta que oiga un clic. La pelicula avanzard
          aulomdlicamente  hasta que en el contador aparezu'1'.
View original page 6Page 7 · Read text
alJlv    a Apriresi vedeilcoperchionella fioura.posteriore (s)facendo sconere lo sblocco (j)come
      a Inserire un rullino nello scomparlo, Non forzare durante  l'inserimento.
       a Tirare I'estremita'della pellicola fino al punto indicato  nella figura  (o).
         La oellicola dovra' essere ben tesa,
       tChiudere    il coperchio  posteriore finche'non si sentira'il click dello scatto.
        La pellicola avanzerd automaticamente  finche non comparird un "1"
           sul contafotogrammi.


        Open de achteruand  [s]door de sluiting [j]ervan, als algebeeld,  opzijte schuiven.1ft! r        | Leg de filmcassette  in hel filmcompartiment.  Forceer daarbil  niets.
 -      r Trek de film, als afgebeeld,  tot aan het lilmlengte- instelteken  [o] uit de cassette.
          Zorg ervoor dat de film vlak  ligt.
         I Sluit de achtenruand  tot die hoorbaar  dichtklikt. Nu wordt automatisch de eerste
        opname van de film voorgedraaid  en wordt in de opnameteller  het cijfer "1" zichtbaar.  .

       a Abra a tampa do compartimento de filme  (s), deslizando a alavanca 0 contormeGh
-    a mostradoabaixo.Insira um novo rolo de filme no compartimento,  Nao force o filme na posig6o.
        I Puxe o lilme  atri o indicador de final (ponta) do filme (o) conlorme  mostra'do
           abaixo. 0 filme deve permanecer  liso.
      a Feche a tampa do compartimento  at6 ouvir um "click". 0 filme  ird avanqar
         automaticamente  ate que o contador de poses indique  "l",

4ifu r Oppna bakstycket  [s] genom  att skjuta oppningsknappen   [] som visas ovan.
-     cO SattDra uti enfilmenrulle tillfilmladdningsmdrketi kameran. Tvinga[o] intesom lilmenvisas ovan.pA plats.Filmen skall ligga planl.
        r Stdng bakstycket si att du hOr ett "Klick". Filmen matas fram
          automatiskt  tills filmriiknaren  visar "1".


                    0l4Te                                                                          lt                                                     xHonry                                                                                                  Karr norra3aHo                 3aft00                                                                       Buue                                                                                                                         [i] nx,                                                                                                                                             , HUllry $l nnaono oropuran
                      Kaccery                         CGIIDv      Ia gilBCTaBbre                                                 He                                                                      uux yClililrl                                                                                   rl fimrag                                                     q eile                            @r0rlneHx0[t0TAeneH[e,
       o tmxurc  roreq  nrettxil A0 Merrtl  [o] rax, xax noxaruo Bbtue, snelxa golxHa flg{b 0BH0
         r &r oire mgnnro x uuxy fuiodnna  ara c rcxnu qenvxou,  flmHxa aeToMar[qecKil
            0rLmlaercrBtte  eilAoTexn0,rt0traHacqefl[lteltaA   oercnoreurcnryQ a"l'..

(C;; r ar Ei l+,tr#FFtF&ffi     ( j )  f6r r.+ft , trpaE*  r. I .
     .+tt.llt!ltw.^w68, #rt)tilxra  "
            {lt           lrldiltU[2i6iEfr]t+;dE -     .                               to).                                   Wli:*ffi.# "
             .l,ii.J            l.ril#A.JrtjlnlfU                            €,                               "rf H"
       [tA € FfritsH 9lF" W. r]Efif,Ft€'F.F;rr  "t"
View original page 7Page 9 · Read text
www.butkus.us
TAKING PICTURES
1!h  1 Open the lens cover to turn on the power.v     2,Lookthroughtheviewfinderandcomposelhepicture,Makesurethatthesubject
           should be inside the picture area frame.
         3.Press the shutter button fullv to take a oicture.
        r  lf the subject  is less than 1 .3m, the piciure may be out of focus.

         1.Ouvrir  le volet protecteur pour mettre  l'appareil en marche.1t!f
 -      2.Al'int6rieurl' aide duduviseur,cadre composezde I'imaqevotre cliche, Assurgz vous que le sujet soit A
        3.Pressez  le d6clencheur completement  pour prendre  la photo.
         f Si le sujet est d moins de 1,3m, la photo pouna 6tre lloue.
6lir  1.0tfnen  Sie zum Einschalten  die Objekfivabdeckung.
-'     2,Schauensich lhr MotivSie durchin Bildleldbeorenzunobefindet,den Sucher und qestallen Sie das Bild. Versichern Sie sich, daB
        3.Drucken Sie dann den Ausl-oser duich, um lhr Motiv zu fotografieren.
      a Wenn sich das Motiv ndher als 1.3m enlernt befindet, kOnnen unscharle Fotos
        entstehen.
(f,1 1,Abra la tapa del objetivo para coneclar  la conienle.
        2.Mire a travds del visor y encuadre  la escena. Asegtrese el sujeto debe situarse--      dentro del marco de drba de una toma
        3.Presione  el disparador  hasta el londo para hacer la foto.
        r Si el sujeto estd mds cerca de 1,3 metros, saldrd desenfocado.

          l.Aprire  il copriobiettivo  per accendere  la macchina.llls     2.Guardare  nel mirino e inquadrare, Assicuratevi che  il soggetto  sia all'interno  della
           cornice di inouadratura.
        3.Premere   il pulsante  di scatto completamenle  per scattare  la loto.
      o Se  il soggetto  e' a meno di 1.3m, la loto potra' risultare luori fuoco.

 1fl1[l    l .Schakel de camera  in door de lenskap te openen
 -       2.Kijkbinnendoordedekaderszoekervanen uwkaderzoekeruw opnamebevindt.  al. Let goed op dat uw ondeniverp zich
        3.Maak de opname door de ontspanknop  helemaal  in te drukken.
        r 0p afstanden  kleiner dan 1,3 m worden uw opnamen onscherp.

        1.Abra a tampa da lente para ligar a mdquina.G;lv     2.0lhe pelo visor e componha a foto. 0 objeto deve ficar da moldura da foto.
        3.Aperte o botao do obturador  totalmente  para baixo para tirar a foto.
       r Se o objeto estiver numa distancia menor de '1,30 m, a loto pode licar
            fora de foco.

                                    pA strommen.1$[[ 1.Oppna linsskyddet  for att sdtta
-       2.Tittabildramen.isokaren och komponera  bilden. Observdra  att motivet skall vara inom
        3.Trvck ner avtrvckaren  helt for att ta bilden.
    o 0m motivet Ar ndrmare dn 1.3m sA blir bilden kanske otudlio.
View original page 9Page 10 · Read text
uurxy                                                 nHTaHHe                                                sKno,{[Tb                          o6beKrilBa, qro6u       1.Orx  or.rre x fifillls  2.Ha6nrogan                        es'an4oucxarenu,                                      xaiArre                re                                               Bauei cwuxlr                                      06ten
         Y6eAurecu a roM,,1ro o6reKr cueMKil HaxoAr4Tcf, BHyr u aMKu,
        or aHilqnBaoqefi o6nacruQoror aQn oaaxun
       3.ffn roro vro6br cAenaTb cH14MoK, HaxMHTe KHonKy
        cnycKa3aTBo a$oroanna aTaAoKoHLF
         I Ecnr o6uen Bauefi cteuxu HaxoAliTcf, Ha accToR Hile MeHee
           1.3 (u), ro goror agun uoxer6uru xe egxoi.
(cll       r . llij  ii'r i,ryf   i /,1i.  I )i lrr',v|t|,i  "
        l.id  i0ll'{  i;i'i't  +rtt r,tliid fq{,,
 -           il8,;8. I,.MM  ;ih I r, fi   | Hil ilt {t i*  fil  l+:l  fi t' rtl  lfi i "
                                                         "
                                                                                                      f I  I  I i iiilfiir'l!  llii  I i       ..t.' irl)tI rt1,.liirqtiit'Jfill."Ull"i14itl/t: t..rm r';ll(1f'f..L'/,  I !.    il(i
REWINDNG THE FILM
aE|;Y     1.TheOoenmotorthe backstopscoverwhenandlheremoverewindingthe isfilm.completed.
         2.To rewind the film in the middle ol a roll, ores the
              mid-roll rewind button(c).
      O  lf the molor stops belore the LCD shows "0', reolace
            the battery

                                            nase est€t'  i;?lll!:ff;il:'f J:f :lll''',,:?Tob
         2.Pour rembobiner un film en cours d' utilisation,
          appuyez sur la touche de rembobinage(c).
      O Si le moteur s'arrdle avanl que l'atficheur LCD n'indique "0" remplacer  la pile

                                                                                       S ie dann@'  |:i';lnffj;3tlls  ti{lxffi"x'3l;l':x li'#"'ngeharren ''nen
        2.Um den Film vozeitig zuriickzuspulen,  drucken Sie den Rtjckspulknopf(c).
      O Wenn der Motor abschaltet,  bevor das LCD-Display  "0" anzeig| ersetzen
            Sie bitte die Batterie.

          1.El molor se para cuando  el rebobinado se ha completado,  Abra. el respaldo y6iYrz   saque el rollo de pelicula.
         2.Para rebobinar  la pelicula a la mitad, presione  el boton de rebobinado a la
          mitad de rollo(c).
       a Si el motor se detiene antes de que el panel inlormativo LCD muestre  "0',
         cambie la pila.

a[JD  1.ll molore  sr ferma quando   il nawolgimento e'complelato. Aprire   il coperchio
           posteriore e togliere  la pellicola.
        2.Per riawolgere la pellicola a meti di un rullino, ptemere  il relativo comando  di
         riawolgimenlo(c).
        I Se  il motore si ferma pnma che compaia  "0" sul display, sostituire  la batteria.
View original page 10Page 11 · Read text
www.butkus.us
           jf#r*i'jl,lif,ffisiilXirlsewikkerd'    stopt de motor open de achterwand@   '
        2.0m een gedeeltelijk  belichte  film terug te wikkelen, druh u knop voor het
             terugwikkelen van gedeeltelijk  betichte fitms in(c).
         a Als de motor slopt voordat  in het LCD-venster een '0" verschijnt, dan moet u de
                batlerij vervangen.


                                                                           e@    t fl#J:TdrarQuando  a rebobinagem  for comptelada, Abra a rampa rraseira
         2.Para rebobinar o filme no meio do rolo, aperle o boEo de rebobinamente  no
         meio do rolo(c).
      O Se o motor parar antes do painel de cristal liquido mostrar "0" substitua a bateria.

        l.Motorn stannal niir filmen  iir hell Aterspolad. Oppna bakstycket och ta ul filmenS
 -    02.FOr0m anmotornspolaslannartillbaka innanen filmrulleL0D-panelenmitt  i en viurlilm, trycker"0", byt dubatteri,pA mid+oll knappen(c).

1i{;; 1.ne        ( HuJXyt4AoCTaHUrexaccerycnneHxo[.eMoTKa nnenxx  3aKoHrl,tTcn  aBToMaTx'{ecKil, Orx  or.rre gaAHnn
       2.ppnne eMoTKh nneH(n 0T ce eAxHH ynona HaxMilTe xHonry -
       o6 arxoi ne eMoTxn HeAo*rcroiAo xoHua nnerxn(c).
      O Ecnr,r ne eMoTXa n eK ar[TcnAoT0ro,  xaxgrcnner.r noxaxerqrQ  y
            "0", eaueH[re 6ara en.


DATE TMPR|NT|NG (O.D. MODEL)
                           E      D
                         I[   ]'l*,]'[,*l                             il
Gli  l.Change the Date lormat
       o Press the M0DE bunon  in the back cover to select one of the diflerent formats
             (Refer to the above sequences.)-
             . No print
          o Year / month  / day (Date mode)
          o Hour  / - / minutes (Time mode)
         2.Setling. SelecttheDateDatemode by pressing the mode button. press the setting buflon
         . YPressM,andlheDmodeto set bunonthe desiredto accessdate.the Time mode and adjust lime by pressing
             the setting butlon H and M.
View original page 11Page 12 · Read text
1. Changer  le format de la Date
        o Pressez  la touche MODE au dos de I'appareil  pour choisk un des diff6renls
GII      formats.(Beportez-vousauxsdquencei'ci-Ces!us.)           . Pas d'imoressron
                          (mode             Ann6e/mois/jour                                      Date)
                                    Heure)            Heurel/minutes (mode -       oo
         2. Rdolaoe de la Date
        o Cloilissez le mode Dale en pressaht  la touche mode, Pressez  la touche YM,
          . Pressezet D pourlaatlichertouche lamodedale pourvoulue,accdder au mode "Time" (heure)  puis pressez  les
             touches de r6glage H et M pour atlicher I'heure voulue.

                         Datumformals 1ifi1\tE1'l.Anderungr Drucken desSie die                         MODE-Taste  auf der Ruckwand, um eines der verschiedenen
             Formale auszuwahlen.
            o Kerne Einbelichtung
            o Jahr  / Monat  / Tag (Dalum-Modus)
              r Stunde  / - / Minuten  (Uhrzeit-Modus)
         2.Anderung  der Datumseinstellung
         oWdhlen Sie den Datum-lrrlodus  durch Drricken  der MODE-Taste.Danach   drucken
              Sie die Einstelltaste  Y, M und D, um das gewunschte Datum einzugeben.
              r Um den Uhrzeit-Modus  zu eneichen, dr0cken Sie ebenfalls  die M0DE-Taste
            und stellen die gewunschte  Zeit uber die Einstelltaste H und M ern.
ai,    l.Cambio del formato de la fechaSIZ    o Presione  el boton MODE situado en el resoaldo Dara seleccionar uno de los
               diferentes  formatos.  (Vea la secuencia mostrada  aniba)
              r Sin impresion
          oAno/mes/dia (l/odo fecha)
            o Hora/  - / minutos (modo hofa)
           2.Ajuste de la fecha
            o Seleccione  el modo Date (fecha) presionando   el botdn MODE. Presione  los
             botones Y (ano), M (mes) y D (dia) para ajustar la lecha deseada.
               . Presione  el botdn MoDE para acceder al modo Time (tiempo) y ajuste  el
            tiempo presionando  el boton H (horas) y M (minutos).
alh, 1.opzioni della datallt          . Premere   il pulsante MODE per selezionare una delle diverse  opzioni.
              (lare rifenmento  alle sequenze  sottostanti)
              I Nessuna stampa
              . Anno /mese  / giorno  (funzioni  data)
         oOra / - / minuti (lunzioni  orarie)
         2.lmpostazione   della data
          oSelezionare la funzione Date premendo  il pulsante Mode. Premere   i pulsanti
               Y, M. e D per impostare  la data desiderata.
             r Premere    il pulsante Mode per accedere  alla funzione Time e regolare  I'ora
           oremendo    i oulsanti H e M.
ailh  1.Kies detI17    r Herhadldgewensteindrukkendatumnotatie.van de M0DE-knop wijzigl de dallmnotatie  in de volgorde:
           o Geen datumaldruk
              r Jaar  / Maand  / Dag (datumfunctie)
           o Uren /-/ lVinuten  (tijdlunctie)
          2.Stel de datum  in
           o Kies de datumfunctie  door op de M0DE-knop te drukken en stel de gewenste
           datum  in met de knoppen Y (jaar), M (maand) en D (dag).
           o Kies de tijdfunctie  door op de l\,1ODE-knop te drukken en stel de tijd in met de
           knoppen H (uren) en  l\,,l (minuten).
View original page 12Page 13 · Read text
www.butkus.u
6h    l.Mudantlo o lomato da dala rv      .ADerte o botao M0D0 para selecionar um dos diferentes  formatos.
             (Referente a sequoncia abaixo.)
        oSem rmpressio
              . Ano-m6s-dia  (modo de data)
              . Hora / - / minutos (modo de tempo)
          2.Aiustando  a data
              I Selecione o modo da data aDertando o boleo modo. Aoede 0s boldes Y
              (ano). M (mds) e D {dia) para ajustar a data deselada.
          oAperte o botao modo para acessar o modo de tempo e ajusle a hora
            apertando  os botoes H (hora) e M (minuto).

4!il;1 l.Andra datum tormat
             r Tryck pA M0DE knappen pA baksrycketldf  envefia en dt & }likalomelffi.
                                sekvens.)-       .Ingen(Se ovanstdendeinkopiering
              . Ar/MAnad/Dag  (Datum Hge)
         .Timma/  - / Minuter  {Tid lage)
           2.Stalla  in datum
              . Valj datum lAge genom  att trycka pA MODE knappen.  Tryck pA
              installningsknapparna  Y M och D ldr afl stalla dagens datum.
          oTryck pd MODE knappen  ldr att komma   till tid ldge och  stdll tiden med
              instdllningsknapparna  H och M.

fif,1  1 llwenerm nnn euraJ'w+nwl|rel   rfuR roro uo6u ru6 aru o4nr m angoe n egfiaoneHlg  Aa]u, Hamrfie xtfiry
           exru (Mde), HaxoAgtqyncn  Ha 3a$el x uuxe @roanna ara:(o cne4yrupi
           nocrqmBaTenH0cTx)
           .,UaTa He BneqalaeTcfl
         ofop/MecnfleHu  { exru "[aTa"]
         oYac/y'Mmyru ( exru "B eur')
         2.YcraHooxa aaru
             r Bu6e rre exuu 'ftla' HaxaTl4eu  ffionru.l exlM. Hax[Mal Klonru  Y, M, D
            ycTaH0BxTe xenaeMyn Aary
        rHaxaueuxHonxlt exilMau6e fle exuu"8 errs'[c(0  ert]l vl{reB eiln.
           HaxlMaRffioflxlHlM.

GD' Et'rntr             r fa tr #  ff't MODE  tiffi €f+- &rt frffi ryffiT d E #  ffi fs)
       f{14
         +/,8  / E(BS MODE)
                   trj r/ ri(|l:ifiil N,{oD}l)
       2.81i,l;tii
        old uoop  ffi €l# E s1 uoon, t4-#8fl v, v, o itii.ili4 B H .
         o Jri nloor- te, /ebt[+fifl uonr., fi;til H, N{ }e-#1,#is+Fi .
View original page 13Page 14 · Read text
USING THE MODE BUTTON          6


      red-eve reduction            Flash off                         Fill-in flash        GAutoE  llbbb
  I.rttta  ^,.o ,t;;i,t--I l=_   uua
     Self-timer Fill-in flash and red-eye redution
 oYou can selecl the mode by pressing the MoDE bunon(b).                           €
AUTO RED.EYE REDUCTION
@  o ne camera  will automatically  select the red-eye reduction feature when     G
            llash is selecled.
     o When the shutter button  is pressed  half way down, the red.eye reduction
          lamp [d]will  lighl up. The flash willlire when pressing the shutter button lully.
    O Lorsque  le flash est utilisd, cet appareil mel automaliquemenl  en oeuvre  leGil
             que le ddclencheur  est pressd d mi.course,  la lampe de r6duction  d'     G-   o systdmeD6s    de r6duction "d'yeux  rouges".
               effet d'yeux rouges[d]s'allume. Le flash fonctionnnera  lorsque  le
            d6clencheur sera press6 d lond,
      t                                                  in diesem Modus, sobald         U@t    ?!e,,ffittft:!|flletsichdautomatisch
     o Die Lampe zur Reduzierung  "roter Augen"  [d] leuchtet auf, wenn
             derAusl6ser                          halb gedr0ch                                              wird. Der                                                                  Blilz wird ausgelost, sobald                          G                              gedr0cK              der Ausldser vollstdndig                                                     wird.


           La cdmara seleccionard  automdticamente   la funcion de reduccion de ojosGtt o
            r0i0s cuando se selecciona  el llash. -'     o Cirando se presiona  el disparador  hasta la mitad, la ldmpara de reduccion
         de ojos rojos (d) se ilumina.  El flash se disparard cuando se presione  el
           disparador hasta el fondo.

                                      la lunzione riduzione occhi rossientra in funzione(D  .:lillLXi:lffily,
     o Quando   il pulsante di scatlo viene premulo a mela',  la spia riduzione occhi
             rossi (d)si illumina.   ll flash scattera' quando  si preme completamente     il
           oulsante di scatto.
View original page 14Page 15 · Read text
www.butkus.us

                 u voor een geflitste opname, dan zorgt de camera er automatisch allBr o Kiest
 -   o Druktvoor datu dehetontspanknopverschijnsel hall"rodein, ogen"dan gaatwordtde onderdrukt.LED voor het onderdrukken
           van rode ogen [d] branden. 0p het moment dat u de ontspanknop
            helemaal  indrukt, ontsteekt de flitser.

 1!f,t a A cAmera ird selecionar automaticamente  o recurso de redugao de olhos
 -   o Quandovermelhoso botaoquandodo oobturadorflash for selecionado.for pressionado  pela metade, a lAmpada de
           redugao de olhos vermelhos  (d) ird se acender. 0 flash  ird se acender
          quando o botao for pressionado  completamente.

6i[tD o Kameran anvdnder automatiskt  roda-ogon  reducering  niir blixten anviinds.
     a Ndr avtryckaren  trycks ner halvviiqs  si lyser roda-ooon  redr rcprinoq
 -          tam pan ia1 B|xtei k'm ;e  ; ;ti b?"ilai il,y;Ift"'i;y,;k' il;ii


                      aT                                                         yMeHbuJeHrfl                      aBTOMaTreecKr                              au6e                                                 er QyHxqroGID o Qoroanna         oQ0eKTa "K                          acHbtx                                 ila3" rorga                                    aQr yere                                   e exrMe c0                                       eu Qoror
 -         BcnbruKot.
    O KofAa KHOnKa 3arao a Qoroanna  aTa cnefKa HaxaTa, naMna
            yr,reHbuleHilF gQQeKTa "K acHblx frra3" [d] earo aercn, Bcnuluxa
(eb  .l)fjrE,tg#)f F+tHWA6h+ l1tr"trid#riiiE  .
     o {,r -#,1*  f,l fft  ir't 1$,,Ji E,l6(d) rt,  i: L&i^  I'l  fl [.t!rl[ 1r* tu n  " -

USING THE FLASH MODE


             tn low light conditions, flash will automattcally  fire to obtain lhe correcr exposure,GD
 -     Whenremaintheilluminatedflash is tullyfor 30charged,secondstheandflashis thenindicatorextinguished[k] lights up.to preserveThis greenbatteryindicatorlile.  ltwillwill
           reilluminate when the shutter button is pressed hall way.
          1,FILL.IN
        When the main subject is in shadow the surrounding  light conditions are too strong for
            the autoflash to engage, the fill.in llash allows you to expose the subject properly.
        2,FLASH OFF
         Use this mode when you want to take pictures of sunsets or interiors without flash,
.        3.FlLL.lNUse this FLASHmode whenand RED-EYEyou take aREDUCT|ONpicture of a person in low light condition.
            I Use a tripod to avoid camera shake.
View original page 15Page 16 · Read text
ail  !|7   LorsqueEn faible lelumidreflash estchargdle flash fonctionnerale tdmoin deautomatiquementcharge [k]s'allume.pourceassurertdmornuneverts'eteindraexposition correcte.aprds 30
          secondespour dconomiserlespiles.llserallumerasileddclencheurestpressedmicourse.
                 1. FILL-IN (flash en appoint)
              Lorsque le sujet prinbipal est dans l'ombre,  si les condrtions d, dclairement de  l,
              environnement sont trop lorles pour que le flash ddclenche automatiquement.  le mode filfin
              assurera alors une exposition correcte du sujet,
              2. FLASH.0FF  (flash anetd)
                 Utilisez ce mode lorsque vous souhaitez prendre des couchers de soleil ou des scdnes
                  d'int6rieur sans flash,
              3. FLASH EN APPOINT ET REDUCTION D' EFFET D'YEUX ROUGES
                 Utilisez ce mode lorsque vous photographiez une personne en faible lumidre.
            o Utilisez un lrdpied pour stabiliser  I' appareil.


                          belichtete Aufnahmen zu erzielen, wird bei ungrinstigen Lichtverhaltnissen GID Um korrekt
  -       automatischsobald der Blitzder vollstindigBlitz oezundet,getaden ist, leuchtet die Blitzanzeige  [k] auf. Diese griine Anzeige
             leuchtet frjr 30 sekunden, bevor sie zur schonung der Batterie automatisch  erlischt. wird der
            Ausloser angetippt, erscheint sie wieder
                  1. AUFHELLBUTZ  (FtLL-tN,
          Wenn sich das Hauptmotiv im Schatten befindet und das Umgebungslicht so stark  ist, daB
               sich der Blitz nicht automatisch zuschaltet,hilft  der Aufhell-Blitz, das Foto konekt zu belichten.
             2. BLtrZ AUS (FLASH oFF)
            Verwenden Sie diese Betriebsart, wenn Sie Sonnenuntergange  oder Innenrdume ohne
                  Blitz aufnehmen wollen.
               3. AUFHELL.BLITZ UND REDUZIERUNG ROTER AUGEN
            Verwenden Sie diese Betriebsart  liir portrAtaufnahmen  bei wenig Umgebungslicht.
             o Veruenden Sie ein Stativ, um Verwacklungen zu vermeiden.

(l)     con ooca tuz, el flash se drsparara automdticamente para conseguir una exposicion cofrecta.
         uuan00  et ltasn esta totalmente cargado, el indicador del flash (k) se encenderd, Este indicador
         verde permanecerd iluminado durante 30 segundos y a continuacion se apagard para ahonar
          energia. Cuando se vuelva a presionar  el disparador hasta la mitad, se volvere a encender.
                          relteno             1.              flash oe              {FlLL.lN)                                                                                                            l
          cuando                            el                        sujeto                                 principal se encuentre en una zona de sombras, las condiciones de luz que
                 le rodean podrian ser demasiado intensas como para que el flash automdtico se dispare, En
            estos casos, el flash de felleno  le permitird exponef correctamente  el suieto.
           2. llash oesconectado (0FF)
          use este modo cuando quiera hacer fotos de, por ejemplo, puestas de sol o en interiores sin
              flash.
           3, FLASH DE RELLENO Y BEDUCCIoN  DE LOS OJOS HOJOS
              Utilice este modo cuando tome una lotografia de un sujeto en condiciones de luz escasa.
            .Utilice un kipode para evitar la trepidacion de la cdmara.
View original page 16Page 17 · Read text
www.butkus.us

              In condizioni di scarsa luminosita',   il flash si attiva' automaticamente per otlenere  la giusla
           esposizionell)
         Quando  il flash e'completamente  carico, I'indicatore flash (k) si accende, Questa spia verde
           rimarra'accesa  per 30 secondi e poi si spegnera' per preservare  la batteria. Essa si illuminera'  .
         nuovamente quando   il pulsante di scatto viene premuto a meta',
              1, FILL.IN
          Quando  il soggetto principale e' in ombra e la luce dell'ambiente  circostante e'troppo  lorte
             perche' intervenga   il flash automatico,  la funzione  lill-in consente una buona esposizione
            del soggetto.
            2. FLASH.OFF
           Usare questa funzione oer scattare folo di tramonti o di interni a luce naturale.
            3. FLASH FILL-IN e RIDUZIONE 0CCHI ROSSI
           Usare qugsto modo di funzionamento per fotogralare una persona  in condizioni di poca
               luce.
            r Utilizzare un lreppiede per evitare di scuotere  la macchina.


       Omdat de flitser bij weinig licht automatisch ontsteekt, bent u altijd vezekerd van een juisle1[fll
 -      Zodrabelichtino.de flitser zich helemaal heeft opgeladen, gaat de flitserparaat-LED  [k] branden. Deze
         groene LED blijft ongeveer 30 seconden branden en doofl dan, 0m de batterijen te sparen,
         Drukt u de ontspanknop  half in, dan gaat de flitserparaat-LED weer branden.
            l.lnvulflitsen
           Als het hoofdonderwerp  in de schaduw staat en het omringende  licht te sterk is om de
             autoflitser te laten ontsteken, dan kunt u met Invulllitsen voor een goede belichting van het
          ondenrerp zorgen.
           2,Flitser urt
          Deze functie gebruikt u voor het fotograteren van een zonsondergang  of voor een
            ongef litste interieuropname.
        3.INVULFLITSEN MET ONDERDRUKKEN VAN RODE OGEN
         Deze tunctie gebruikt u om personen  bij weinig licht te fotograferen
            r Gebruik een statief om beweoenryan de camera te voorkomen,


                                 luminosidade, o       Em condigoes                    de                          baixa                                                       flash automaticamente                                                                                            ird                                                                              obter                                                                     a                                                                             exposigao                                                                                                        correta.l']$;
                                                                                                              (k)                 o flash       Quando                            estiver                             completamente                                           canegado,                                                  o indicador de                                                                                  flash                                                                               acenderd.                                                                                        Este
-       indicador verde ird se manter iluminado por 30 segundos e entao se apagard para preservar a
         vida da bateria. lrd reacender ouando o botao do obturador lor oressionado at6 a metade.
            1. FLASH EMBUTIDO
         Quando o principal assunto estd na sombra e as condiqoes de luz ao redor dele s6o muito
             fortes para o auto{lash  ser acionado, o Flash Embutido permite que vocd exponha o
            objeto oe modo aproPnado
          2, FLASH DESLIGADO
         Use este modo quando voc6 quiser tirar fotos de por-do-sol ou de inleriores sem o flash.
          3, FLASH EI/BUT|Do E REDUQAO DE 0LH0S VERI/ELHOS
         Use este modo quando voc6 quiser tirar uma de pessoa em situagdo de luz traca.
         o Use um tripd para evitar que a camera trema.
View original page 17Page 18 · Read text
I svagt lius kommer blixlen automatish  att gd av 16r rdtt expnering. ,iQU, Ndr blixten er helt uppladdad si lyser blixtindikatorn  [k]. Denna grona indikator lyser  i 30 sekunder
         och slocknar sedan for att spara pA batteriet. Daen lyser upp igen nar avtryckaren trycks ner
         halwags.
             1. Uppldttningsblixt
           Nar motivet befinner sig  i skugga och omgivande  ljus er for star'ld fdr att auto bliftn skall gA av
            si hjdlper uppldtlningsblixten  dig att ld en bra bild.
 '         2. AnvdndBLIXTAVdenna lunktion nar du vill ta bilder av solnedgangar  eller interiorer utan blixt,
           3. UPPLATTNINGSBLIXT och R0DA-0G0N REDUCERING
          Anvend detta lege nar du ska lotogralera en person  i svagt ljus.
        oAnvand  stativ for att undvika kameraskakninoar.


                               ocBeuleHHocTr4            n regocrarorroi                                         BcnbtuKa aBToMaTr4L{ecK[ c a6aruaaer I o6ecneqrsaerG.:llf n                 gKcnoH[                                     oBaHfie.       n aBtl,lbHoe
 -       KorAa BcnbruKa nonHocTbp 3a FXeHa, uHgrxaro acnuuxt [k] saro aercn. 3eleHui
         rlHArlKaTo  ocTaercs 3afieHHuM  I TeL{etue 30 cexytg r norou racHer glR roro, wo6u
      n oAn[Tbc orcryx6sr6ara elr,l4Hguxaro cHoBa3aro aercs,xorlaBucnerKaHa(xMaere
       HaxHonKy3aTBo aQoToanna aTa.
        l.Pexuu n rHyAilTenbHofo c a6arusaFiils  scnuuxt4
          Korgao6uerrcueur!4HaxoiqfiTcffBTeHfi,a ycnoB!4qgKcnoH[  BaHuqraxobt,'.troBcnb[u(aHe
        c a6orararasror,raT[tecK[,  exuMn !tHyAilTenbHoroc  a6arusaH[rscniluKilnffiBolt4l
         -aM n aB[,rtbH0 ocBerrrs o6uexr cueuxr
           2, Pex[M 6eg ecnsruxil
           l4cnorusyire sror exr,ru, rorga Bu *l.t'.laere gaxog ConHUa  t4nfi xoT[Te cAenarb
         00T0r  aoilri BHyr I noueqeHun  6et acnuuxlr
       3.Bu aarreanqar ocBeqeHl4e BcnHUKa  c yMeHbueHfieM g00eKTa "K acHbtx rna3"
           l4cnonusyire  eror exrv, xorgaBu Qoror a$r yire venoaexa a ycroennx cra6oi
           0cBeqeHH0cT14.
            r lro6ur r:6exaru g oxarnn Qoroanna ara, ucnolusyire  urarue.

aCh               /r, E  fii tr fi  flc T, hl'R;Hrlifi H *,  f{ if  'ffi E 4h #yE "      l,!*tFtffit"F+,  Pq)E{ii4itEft)ri  .
                                                                  ,€.ifi .-,    /r,fR#;tiu; di, !&.FSti 3o f,tf,:, H fi
        fi- -+f n i+Hi;*,r6                                                                     jl1f EfiiFJ E .
           r.lfifitllu tf *rt
             t[  lint ttil lr:  rrfr r€, H F  tft E t4,  t,t )trit +f rl H 4i t* )r F.i E id t4 I{  "] r){ lt  ifi ffi
                         fli1l i4 tlirtii/r,   riil n* )t  .
         2. i,:1f d{)ttlfr                                             l
      E fr ffAi+*.Et^1\1i   t|] r+,,fi  f L r'  fi C nl E r,q )t,xH T # )t(b)  .
         3. f^1jEl6tE EiH  )t & i'SlhfiI [R                            -                       .E u*.fh                                  /'.{'*                                              ;ii|Jrrt.ffl              Lffi .f                                       ilx+Hffi        t                                                                          "         r tE                    EitJEi                            th                ft,{fltr                                                    . A'i H                                                                      .                                                  -' ft*+fiffi
View original page 18Page 19 · Read text
www.butkus.us
SELF.TIMER


ff   ov   o YouYou cancan selecltake a thispicluremodeof yoursetfby presingby usingthe MODEthis mode.button(b)3 times.
     o When you pres lhe shutter button, the self-timer lamp blinks slowly lor 7
           seconds. Ihen the lamp blinks rapidly lor 3 seconds and the shutter
            butlon  is released.
     o The self-time can be released by closing the lens cover.

all  a Vousllt   o vous pouvezbouvez choisirvous photographierce mode en presantvous- m6mela toucheen ulilisantMODE(b)ce mode.3 fois.
     o Lorsque vous pressez  le ddclencheur,  le t6moin du retardaleur  clignote
           lentement pendant 7 secondes,  puis rapidement pendanl 3 secondes  el la
          photo est pnse.
     o Le Dateur peur Otre en lonction mdme  si le cache esl en place.

@   .r,?Jttiiryodus konnen Sie durch dreimaliges  Drucken der MoDE Taste(b)
     o Mit dieser Betriebsart k6nnen Sie Aulnahmen  von sich selbst machen.
     a Bei Druck auf den Ausloser  blinkl die Selbstausldser'Lampe   f0r 7
         Sekunden langsam, danach  tur drei Sekunden  schnell und schlieBlich  losl
            die Kamera aus.
     o Der selbstausloser  kann durch &hileBen der ObjehivaMeckung
            ausgeschaltet  werden.

Gh o Podrd seleccionar\rP o Podrd tomar una fotografiiaeste mododesipresionandomismo utilizandoel bot6n esteMODE(b)modo. tres veces.
     o Cuando presione  el disparador,  la ldmpara del aulodisparador  parpadead
           despacio duranle 7 segundos. A continuaci6n  comenzard a parpadear
           rdpidamente durante 3 segundos y el obturador se liberard.
     o El autotemporizador no lunciona cuando se ciene la tapa del lente.
View original page 19Page 20 · Read text
U
all  Orz     M0DE(b)Siselezionerd(AUTO)3questovolte.modo dilunzionamento premendo    il pulsante
     o Usare questo modo di funzionamento  per autofotografarsi.
     O Quando  si preme   il pulsante  di scatlo,  la spia dell'autoscatto  lampeggia
          lentamente per 7 secondi e, quindi, rapidamente  per 3 secondi prima dello
           scatto dell'otturatore.
    a L'autoscatto puo'essere  tolto chiudendo    il copriobiettivo,

         Deze functie  stelt u in door driemaalop de knop MODE(b)te drukken.6D  I     o Met de zelfontspanner  kunt u ook zelf in beeld verschijnen,        G -   o Voordat de sluiter ontspant,  knippert de zelfontspanner-LED  gedurende 7
         seconden langzaam en knippert daarna nog eens gedurende 3 seconden
              snet.
     o In het geval dat u de ingeschakelde  zelfontspanner  niet wilt gebruiken,  kunt
          u hcm uitschakelen door de lensbeschermer  te sluiten.


              pode                                                           (b)pessoal         Vocd                       selecionar                             modo                                  este                                           apertando                                                                 3 vezes.                                                o botio
         Vocd                                    vocO              pode tirar                    uma toto                               de                                 mesmo usando                                                              este                                                         modo,Gh\-z oo
    a Quando vocd pressionar o bot6o do obturador, a ldmpada do disparador
           automdtico  piscard lentamente  por sete segundos.  Entao a ldmpada
            piscara rapidamente por 3 segundos e 0 botao do obturador serd solto.
    o 0 disparador automdtico pode ser tirado com a tampa da lente fechado.    G

        Du kan vdlja detta ldge genom  att trycka pe MODE(b) knappen 3 gAnger.6i[il o    o Du kan ta bilder av dio siilv med denna funktion.
-   o Nar du trycker ner avt-ryikaren,  Blinkar sjiilvutlosarlampan      i 7 sekunder.
         Sedan blinkar lampan snabbt   i 3 sekunder innan bilden exponeras.
    o Sjdlvutl0saren kan utlosas ndr man stdnger linsskyddet.

                                               MODE(b)                      aTb oT0T                           exrM, HaxMnTe xnonry                                    3 asa.
                                                          aSr,t                    exnu,VuuoxerecQoror                                                  oaarucauoro(cauy)aEf,lv   aa Hro6urlcnolusyqsrorsur6
         ce6o.
    a KorAa Vur HaxnMaeTe KHonKy cnycKa gaTBo a, naMna rariue a
         aBToMaTr4recKofo cnycKa 3aTBo a MeMeHHo  r,rhraeT B TereHfle 7 ceryHg,         3ateu urraer 6urcr o g reqeH[e 3 ceKyHA, !r nocne gTor0         a
   aocyqecTBnqeTcqexxM aaTocnycracnycKuoxer6ulru3aTB0  a,n eK au.leH nyreM 3aK brTt4s K bnuKt4,
       n [r ursaouerl o6uexr[e.
(lD .lri MoDE  $lr -'*ist+EttrHtFfr(b).
    o llrllif,ffi g+Ht$rt6H d+Hffi,.
    o ffi T H lH i+t, H  trtt ll*liE'18,6 Pi't* 7 fi','ffiF'l*$Dq'l*
               . t$&Ik+frt#  t';ifr".
    o  llfl F-${rti # ft  ull-lfitf.lr,?  fl +Hrrf8.
View original page 20Page 21 · Read text
www.butkus.us
USING THE FOCUS LOCK


                lf you want to focus on a subject that is not in the center ol your1$;
 -      oicture,1.Aim theusecamerathe focuswith lockthe lunctionautolocusdescribedframe superimbelow. posed over the
           taroet.
       2.Prdss the shutter button half way down. (The flash indicator goes
         out.)Be careful not lo press lhe shutter button all the way down to
         avoid taking an unwahted picture.
       3.Keeping the shutter button depressed, recompose your picture as
         desired.Hold lhe camera steadily and genlly press the shutter
         button complelely down.The focus lock can be released at any time
        by litting your finger from the shutter buton.


                                   point sur un sujet qui n'est pas au centre deGIf  Si vous voulez metlre au
-       la1. photo,Pointezutilisezle cadrele blocaoeautoldcusdedul'autofocusviseur surddcritle suiet.ci-dessous.
        2. Pressez le ddclencheur d mi-course  (le t6moin de flash s'dteint)
          Faites attention i ne pas presser la ddclencheur compldtement
         pour 6viler une photo involontaire.
        3. Composez votre clich6 selon vos souhaits tout en oardant  le
         ddclincheur pressd d mi-course. Tenez l'appareil iermement  et
         pressez doucement  le d6clencheur compldlement.
       A lout moment vous oouvez d6bloouer   I' autofocus en reldchant la
          pression sur le d6clencheur.


                                                                                                 in                                                  das sich nichtaiilhrre:' 6nWennBildmitteSie auleinbefindet,MotivteilveruendenscharfstellenSie denmochten,Schdrlespeicher                                                               wie folgt:
         l.Richten Sie die Kamera bzw. den Autofocus.Rahmen  mittio auf
        den gew0nschten  Motivteil,
         2.Dri]cken Sie den Ausl6ser halb. Achten Sie daraul, den Ausloser
           nicht zu lest zu drticken, um ungewollle Aulnahmen zu vermeiden.
        3.Halten Sie den Ausldser halb gedr0ckt und schwenken Sie wieder
       zum gew0nschlen  Bildausschnitt zurtick.Halten Sie die Kamera
           ruhig und dr0cken Sie dann den Ausldser vollstdndig.
          Sie konnen die Schdrfespeicherung jedezeit durch Loslassen des
          Auslosers wieder aufheben.
View original page 21Page 22 · Read text
GF)Yz   Siusedeseala funcionenfocarde unbloqueosujetodelqueenloqueno se encuentredescrita a encontinuacion.el centro de la imagen,
         l.Sitie el recuadro de autofoco de la cdmara sobre el sujeto que
         desea enfocar.
        2.Presione el disparador hasta la mitad. (El indicador delflash
         desaparace),Tenga cuidado de no presionar hasta el londo el disparador,
         oara evitar hacer una foto no deseada.
        3.Mientras que mantiene presionado sin soltar el disparador hasta la mitad,
         reencuadre la escena a su gusto, Sulete la cdmara firmemente y
          presione suavemente el disparador hasta el fondo.
            El blooueo del enfooue se ouede anular en cualouier momenlo con tan
          solo levantar el dedo del disoarador.

      Se si vuole mettere a fuoco un soggetto che non e'al centro dell'immagine,lll
-       sil.lnquadrareusera'la lunzionesovrapponendodel bloccola dellacornicemessadell'autofocusa fuoco descrittaal soggetto.qui di seguito.
       2.Premere   il pulsante di scatto fino a meta'.(L'indicatore  del flash si
         accende). Fare attenzione a non premere  il pulsante di scatto fino in
         londo per evitare di scattare foto non volute.
       3.Tenendo  il pulsante di scatto premuto, ricompone I'immagine come
          desideralo. Tenere Ia macchina ben ferma e premere con delicatezza   il
         oulsante di scatto fino in fondo.
                      ll blocco della messa a luoco puo' essere disattivato  in oualsiasi
       momenlo togliendo   il dito dal pulsante di scatto.
ath\Ir'   Wilts1331,u danscherpstellengebruikt uopheteenautofocusgeheugen.onderwerp dat nietzoalsin hetdatmiddenhierondervan hetis  beeld
        beschrevei.
        l.Richt de camera z0 dat het onderwero  in het autofocuskader  staat.
       2.Druk de ontspanknop half in. De flitserparaat-LED  dooft nu. Druk de
         ontsoanknoo vooral hiet helemaal  in. omdat u anders het verkeerde
        onderwero fotoorafeert.
       3.Kader  telwirl u'de ontspanknop  hall inqedrukt houdt, uw opname opnieuw
            af. Houd de'camera qoed stil en druk de ontspanknop helemaal  in.
       U kunt het autofocusinechanisme  oo elk oewbnst mciment uitschakelen
         door de ontsoanknoo los te laten.
GEI Se voc6 quiser localizar um objeto que nao estd no centro da sua folo, use a

         1.Mire a cdmera com a moldura do auto-foco sobreoosta oor cima do alvo.-      funcio de trava de foco descrita abaixo.
        2.Aperte o botdo do obturador pela metade. (0 indicador do flash se apagard).
       Tome cuidado para n6o apertar o botao do obturador totalmenle para evitar
         que uma loto nao desejada seja tirada.
        3,lVlantenha o botAo do obturador pressionado, recomponha a sua loto
         conforme o desejado.Segure a cdmera firmemente e gentilmente e aperte
          totalmente o botio do obturador.
        A trava de foco pode ser solta a qualquer momenlo,
           tirando o seu dedo do botdo do obturador
View original page 22Page 23 · Read text
www.butkus.us

Cr[D 0m du vill fokusera pd ett motiv som inte befinner sig  i mitten av bilden,
        anviind fokusl6set som beskrivs nedan.
 -      l.Rikta kameran med autofokusrutan over ditt motiv.
        2.Tryck ner avtryckaren halwdgs. (Blixtindikatorn slocknar.)
   .     Varen oonskadforsiktig sdbild.att du inte trycker ner avtryckaren for lAngt sd att du tar
      3.Med avtryckaren halwdgs nertryckt sd komponera om bilden som du
               vill ha den. HAll kameran stadigt och tryck forsiktigt ner avtryckaren  helt
         FokuslAset kan sldppas ndr som helst genom att sliippa avtryckaren.
ff,1 Eun Bur xorrre cQoxyo.r oBarbcn Ha o6rerre HaxoAerlr4Mcfl He I
      ueHt e BauerocHnvra,  ncnonusyilreQyHrqunQnrcr oaaHrR
-     Qoxyca, onrcanHyto Hrxe.         1, Han aeureQoroanna atnao6lerrcueMKhTaK,  qro6u aMra
       aaroQoxyca acnolaranacu 6ur surue o6uerra cbeMKil.
         2. Cnerxa HaxMnre KHonKy3arBo a00r0anna ara (uHgnraro
           BcnbruJK14 noracHer)
         Sygure ocro oxHbr  il HeHaxMnre KHonKy3aTBo a norHocrblo,
          ,rro6u he6exaru HexeraHHoro cnycKa 3arBo a.
      3.ype x[eac KHOnKy3arBO  a B noryHaxaror/ cocroflHr4r4,
       eu6e [rexenaeMyn KoMno3nqiln KaA a.Ae xhreQoroanna ar
         ycrongnBo, HecrnbHo HaxMilre KHonKy 3arB0 a A0 KoHqa
       Srrcn oeaHne Qoxyca uoxer 6brrb oTMeHeHo e nn6oe a eMs,
         ecrn au y6e eTe naneu c KHonKn 3arBo a
               /lr x 4 fi  1{:  il''l 1qt+i$ffi T /if   |] h + *s$,alh
                                                                                                                               :
 -     ;ili{Hr. #.tfl.tiliJliFJfllfi {,rSJa-P&titrhft1,i  li tEti'1 F] H t26,f$itlnilfi T"
           2. +-141*   f lilt(lru *1r    r' ai ffi id)
               rr[.i Ll tiH] .fi'6 +  fl.Jfti /i, HHiH2? +lnf &ffi  ,
           3. t6 ++ + ln t  ru iiilt'rrs, E'H ft  {,,  ifl fig 11 131   I ri e.q lfl il1 z E E,
             1* f,1 f tl fi( lii,E F ? 4i f4 f 1^  l'l fli "      FqlSf {FJA}#1*f  lfilrfr  ,rIffi  lft lti"sd#E  .
View original page 23From the M. Butkus archive. Original publisher and archive notices are retained.
Check the model and edition against your equipment.
PDF verified 2026-10-10.