Film cameras
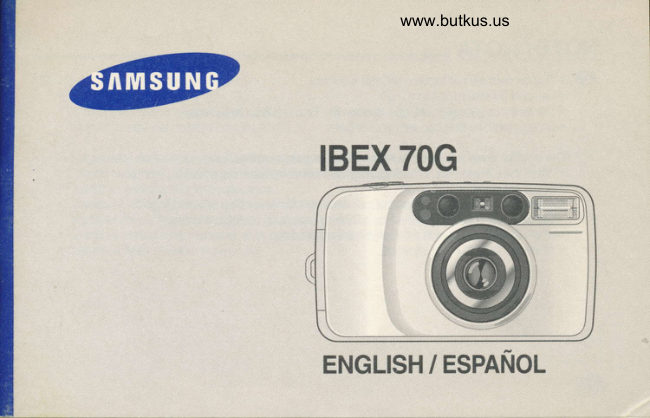
Samsung IBEX 70G User manual
User manual for Samsung IBEX 70G. 44 pages in Spanish. Read the original PDF, download or print a copy without registration.
44 pagesSpanish6.3 MB PDF
Loading your manual…Open PDF directly
Document details
- Brand
- Samsung
- Model / document
- Samsung IBEX 70G
- Document type
- User manual
- Language
- Spanish
- Pages
- 44
- File size
- 6.3 MB
- Category
- Film cameras
- Document date
- Not specified in catalog
Search available document text
Find a term, then jump to its page in the original PDF. Image-only pages may not be searchable; check the PDF for exact wording and diagrams.
Page 3 · Read text
Bitte spenden Sie 2,50 Euro, um diese Website über E-Bay zu unterstützen ... www.PayPal.me/butkusView original page 3
Page 4 · Read text
www.butkus.us


      @            @
  1    Mid-roll rewind button                       Bot6n de rebobinado a mitad de rollo
 2  Zoom button (WIDE)                        Boton del zoom (ANGULAR)
 3   Shutter button                                Disparador
 4  Zoom button (TELE)                        Boton delzoom (TELE)
 5   Self-timer lamp/Red-eye reduction lamp       Ldmpara del autodisparador
                                             lLAmparade reduccion de ojos roios
 6   Exposure sensor                           Sensor de exoosici6n
 7   Lens                                           Objetivo
 8   Autofocus window                               Ventanilla del autofoco
 I   Power button                               Boton de conexion/desconexi6n
10  MODE button                              Boton de MODOS
      (Self mode and Bulb mode selection button)    (boton de selecci6n de los modos Self y B)
11  FLASH button(Flash mode selection button)    Botdn del FLASH(bot6n  de seleccion  del modo delflash)
12   Flash                                        Flash
13  VieMinder                                      Visor
                                                                                                     ,.7  -t
View original page 4Page 6 · Read text
www.butkus.us


      @            @
1   Date selection button (QD modelonly)        Bot6n de selecci6n de la fecha
                                                     (solo modelo QD)
2   Flash indicator (Red LED)                      Indicador delflash (diodo rojo)
3   VieMinder                                    Visor
4   Tripod socket                           Rosca para eltripode
5   Date record window (QD modelonly)          Ventanilla de registro de fechas
                                                         (solo modelo QD)
6   Film check window                             Ventanilla de comprobacion de la pelicula
7   Back cover release knob                   Palanca de apertura del respaldo
8   Strap eyelet                            Enganche de la correa
View original page 6Page 8 · Read text
www.butkus.us

     @            @
Back cover
                                              Placa de presion de la pelicula
Film             roller                                Rodillo de presion de la pelicula

Film sensor                               Sensor de la pelicula
DX contacts   ,                             Contactos DX
View original page 8Page 9 · Read text
LCD PANEL/PANEL INFORMATIVO LCD
   @ Exposurecounter                                  Bulb mode(azra lP.40\
  GD Contador de exposiciones                           Modo B
       Film loading failure waming indicato(E)                                  Self-time($/P.38)
    Indicador de aviso de fallo en la                                                                   Autodisparador
           carga de la pelicula (E)
      Auto Exposure & Auto Flash                                                                Two-second delaved shutter release
EXP0SICI0N automdtico & Flash automdtico                                             (                                                                 s:/P.3e)
                                                                                                           dos segundm de retardo   Auto llasl/Red+ye reduclto( @ /P.35)                                        Antodspandor mn
     Reducci6n de ojos rojos/flash
                      automdtico

                 Fiil-infrash(     1P.36)                                       Battery condition indicato(P. 1 6)            +                   Flash de relleno                                        Indicador de la carga de la pila

                Flash off(€t/P.sz)                                       Film rewinding indicato(P.29)
               Flash desconectado                                              Indicador de rebobinado de la oelicula
View original page 9Page 10 · Read text
www.butkus.us
VIEWFINDER / VISOR


                    @Pictrre area frane
                 @RecuaOro de la imagen

                  @focustrame
                  @Recuadro del enfoque
View original page 10Page 11 · Read text
LOADING THE BATTERY / COLOCACION DE LA PILA-


         Open the chamber cover by sliding the battery chamber cover. @ 1.
          2. Insert a new battery and be sure to place  it in the conect position.
          3. Close the chamber cover.

  G)  1, Abra el compartimento de la pila deslizando la tapa del mismo.
          2. Inserte una nueva pila y asegrlrese de colocar,la en la posici6n correcta.
           3. Ciene la tapa delcompartimento de la pila.

ffi
View original page 11Page 12 · Read text
www.butkus.us


   NOTE@          . Use one CR-2 battery.
             ' The camera will automaticalty tum the power off when not used after 3 minutes. Remove the
        battery from the camera when the camera  is not used for an extended period. When the power is
      tumed off, all indicators on the LCD panelwill disappear.
@ norns
          . Utilice una pila CB-2.
            ' La cdmara se desconecta automdticamente  si no se usa durante 3 minutos. Extraiga la pila de la
      cdmara cuando no la vaya a usar durante un largo periodo de tiempo. Cuando desconecte  la
       cdmara, desaparecerdn todos los indicadores del panel informativo LCD.


                                                            ffi
View original page 12Page 13 · Read text
CHECKING THE BATTERY / COMPROBACION DE LA PILA
      . You can check the battery  life on the LCD panel.
     . Es posible comprobar la carga de la pila en el panel informativo LCD.
          @           @
                        1. Normal operation                                       1. Funcionamiento  normal
                                  - The battery condition indicator does not appear.    - El indicador de la carga de la pila no aparece.

                       2. The ihdicator appearc half way.                      2. El indicador aparece por la mitad.
                                  - The battery  life is low; a new battery should be    - La carga de la pila estii baja; en este caso
                     purchased  at this point in preparation.                deberd adquirir una pila nueva en prevision.  z

                       3. The indicator blinks.                                    3. El indicador parpadea.
                                  - The battery  is exhausted Load a new battery.       - La pila estd agotada, cargue una pila nueva.     =


ffi\
View original page 13Page 14 · Read text
www.butkus.us

@ NOTE
           . Do not remove the battery while the camera is operating, because  it may cause the camera to
         malfunction.
          . Battery performance is reduced in low temperatures (under -10t(14T') ) ; Try to keep the
      camera warm between shots.(The battery will operate normally again when the temperature
        returns to normal.)
          . Please dispose of the exhausted battery with care.
             ' Some local authorities may require batteries to be disposed of separately from other refuse.
@ NorAS                @          . No extraiga la pih mientras est6 utilizando la c6mam, ya que puede provocar un mal                                               D(                                                 v    funcionamiento.                                                        re '          .        El rendimiento de la pila se reduce a bajas temperaturas (por debajo de -10'C (14"F) ) '
        trate de mantener  la cdmara a temperatura normal entre disparos. La pila volverd a funcionar
       normalmente cuando la temperatura vuelva a estabilizarse.
         . Por favor, deseche las pilas gastadas con precaucion.
         . En algunas casos la normativa vigente exige desechar las pilas en contenedores dedicados
       exclusivamente a ellas y separadas de otros desechos.

                                                                             rTf,
View original page 14Page 15 · Read text
LOADING THE FILM / COLOCACION DE LA PEL1CULA


   Gtf  1. Open the back cover by sliding the back cover release knob as shown above,
           2. Insed a roll oflilm in the chamber. Do not force the film into position.
           3. Pull the film under the film sensor as shown above. The film should  lie flat.(Refer to below illustrations)

                  t . Deslice la palanca de apertura del respaldo para abnrlo tal y como se muestra en el dibujo sobre estas lineas. @
          2. Inserte un rollo de pelicula en el compartimento  de la pelicula. No tuerce  la pelicula al introducirla.
            3. Tire de la pelfcula hasta que descanse sobre el sensor de la pelicula,  tal y como se muestra en el dibujo, La
             pellcula debera permanecer  plana, tal y como aparece en los dibujos de mds abajo.


fi4
View original page 15Page 16 · Read text
www.butkus.us


4


GD 4. Close the bdck cover.  lt will close with a'blicK'.
       5. The film will automaticallv advance  until the film counter reads "1".
      6. 11a film is loaded incone6tly, the LCD panel will display an "E" waming signal.
       Reload the film lollowing the steps shown above.
(p  4. Cieneel respaldo. Se cerrara con un "clid'. -    5. La pelicula avanzar6 autom6ticamente hasta que aparezca "l" en el contador.
       6. Si la pelicula g.e ha cargado incorrectamente, aparecerd  la sefral de adveftencia "E'en el panel
        inlormativo LCD.
       Vuelva a cargar la pelfcula siguiendo los pasos mostrados anteriormente.

                   @
View original page 16Page 17 · Read text
@ ruore
                . The camera automatically adjusts for ISO 50-1600DX film.
               . When you use non-DX film, the camera will set the film speed at ISO 100.
              . Load the film in subdued lighting.
 G) NOTAS              . La cdmara ajusta automdticamente  la sensibilidad de la pelicula en peliculas con c6digos DX
          entre 50y 1600 lSO.
               . Cuando utilice pelfcula sin codigos DX, la cdmara ajustard automdticamente  la sensibilidad de la
           pelicula a 100 lSO.
              . Cargue la pelicula en condiciones de luz suave.


'"2F,                  i*
View original page 17Page 18 · Read text
www.butkus.us
ATTACHING THE STRAP/COLOCACION DE LA CORREI


 @   . neteirto the above illustrations.
          Col6quela  tal y como indican las ilustraciones de mds arriba. @   .


                                                                              *

                                                                                         rgi"
View original page 18Page 19 · Read text
USING THE CAMERA / COMO UTILIZAR LA CAMARA--


        . Press the Power button to turn the power on. The indicators will appear on the LCD panel. @        .  lf the camera ishot used for 3 minutes, the power will be turned off automatically.
         . While looking through the viewfinder, aim the camera at the subject and,.operate the zoom buftons.
                                                                 "@"(Wide) button to move the        . Press tre" @"(Tete) button to move the lens out @ and press the
           lens in @.

                                                       conectar la c6mara. Se activard el panel informativo @   . Pulse el botdn de conexion/desconexion  para
         LCD.
                 ' Si no utiliza la cdmara durante 3 minutos, 6sta se desconectard autom6ticamente.
             . Mientras mira por el visor, apunte la cdmara al sujeto y haga funcionar los botones del zoom.
             . Pulse el botori "@" (Tele) para aumentar la longitud focal y asiacercar los sujetos alejados O^, o
          pulse el bot6n "@" (Angulai) para disminuir la longitud focaly ampliar la cobertura de la imagen @.
,i$
View original page 19Page 20 · Read text
www.butkus.us
HOLDING THE CAMERA  / COMO SUJETAR LA CAMARA
                                                               shake, hold the camera steady,          @ N In order to avoid camera
                                                 especially, when using longer focal lengths(Tele).
                                                               . Place the camera strap over your wrist.
                                                                    . Both elbows (horizontal picture) or one elbow (vertical
                                                  picture) should be held close to your body.
                                                                   . Keep your eye close to the viewfinder when using the
                                        camera. This ensures correct framing. Ensure you can see all
                                                four sides of the viewing frame when composing your shot.

                      NOTE
                                                                      . Avoid obstructing of the lens when you take a picture. Pictures
                                     can be spoiled when a finger, hair or camera strap lalls in front
                                                    of the lens, exposure sensor or autofocus windows.
                                                                                        ' When you take vertical pictures with flash, the flash should be
                                     above the lens.

                                                        ffi
View original page 20Page 23 · Read text
@ ruore
                                                                             ' The Red LED blinks rapidty when the ftash is not fuily charged.(shutter tocks
                                         automatically)
                                                                             ' when the Red LED blinks slowly, use a tripod or steady support to avoid camera
                                     shake.
                                           In order                                                                   '                                                     to avoid camera                                                             shake,                                                                       hold                                                                              the camera                                                                                                   steadily and press the shutter button              ,:,@::.,.i1r,:.::.::,::i*::iii::,,i:i:F                                                     particularly                                                 g.gnfly,                                         when using                                                                       longer                                                                                     focal                                                                                               lengths.(tele)-
                    ' After taking pictures, tum off the.camera. This-will proteit the" lens ano pieverii unrntended shots.  (ln case of not
         used in 3 minutes, the camera  will be turned off auiomatically)
                                                                                                                                shutter         ll.:*l^*t^".rtllpgry.touron rs operate. n mrs occur,willpleasebe turntumoff thewithpowerzoomonlensandni6vetake aintopicturethe cameraagain.  automaticaly white the
@ NOTAS                 ' El             .diodo                     rolo parpadea rdpidamente cuando el flash no estd totalmente cargado (el disparador se bloquea          automdticamente).
                   '                                                                             sujete la cdmara firmemente para evitar la           trepidacion9rqfq el dediodola misma.rojo parpadee lentamente, utilice un tripode o
                  ' Para evitar la trepidaci6n de la cdmara,. suj6tela firmemente y presione el disparador con cuidado,
           particularmente cuando  utilice longitudes focales iargas (tele).
           5rP,t:!Y9,:,_qql"lgqgfigr,,desc.onecteno utrtrza ta camara durante 3 minutos,la cdmara.6sta seEsto-proiegeradesconectard elautdmiitichmente.objetivo y evitard reatizar disparos invotuntarios.
                ' En este caso, la cdmara se desconectaray  el zoom retrocederd hacia la cdmara automaticamente mientras  er
         disparador est6 en funcionamiento.  Si eilo ocurriera, por favor conecie iJ eiimara v uueiui i iorir srs            fotografiias.CE,
View original page 23Page 24 · Read text
www.butkus.us
  USING THE FOCUS LOCK / UTILIZACION DEL BLOQUEO DEL ENFOQUE
                                                                    lf you want to focus on a subject that is not in the centre of your picture, use        @  .
                                  the focus lock function described below.

                                      1. Aim the camera with the autofocus frame superimposed over the subject.
                                2. Press the shutter button half way down.
                        Be careful not to press the shutter button all the way down to avoid taking an
                           unwanted picture.
 t                               3. Keeping the shutter button depressed, recompose your picture as desired.
                            Hold the camera steadily and gently press the shutter button completely down.  l                                  '
                       The focus lock can be released at any time by lifting your finger from the
      I                                shutter button.
t
                   Some subjects are ditficult to focus on.
                                                       ' ltems that have a bright light in the background.
                                              . Fireworks and smokes.
                                              . Shining or glossy surfaces such as a car body or the surface of water.
                                                           ' Subjects taken through windows.  ffiffiffi
                    @
View original page 24Page 25 · Read text
@ . Si desea enfocar un                    -     utilice la funcion desujetobioqueoque delno seenfoqueencuentratal yencomoel centrose describede la foto,a
                                 continuaci6n.
                                    1. Apunte la cdmara con el recuadro del autofoco sobre el sujeto.
                                 2. Presione el disparador hasta la mitad,
                        Tenga cuidado de no presionar el disparador hasta el fondo para evitar
                             tomar una fotograf ia involuntariamente.
                                 3. Mantenga el d-isparador pulsado hasta la mitad y vuelva a encuadrar la
                           imagen de la forma deseada.
                                Sujete firmemente la cdmara y presione el disparador suavemente hasta
                                         el fondo.
                                  El bloqueo del enfoque podrd cancelarse en cualquier momento con s6lo
                                  levantar el dedo del disparador.

                       Algunos motivos son dificiles de enfocar.
                                                   . Motivos con una iluminaci6n muy brillante alfondo.
                                                       . Los fuegos artificiales y el humo,
                                                         ' Supedicies  brillantes y pulidas, como puede ser la superficie de un coche ffiffiffi       o la superficie del agua.
                                                       . Motivos que se encuentran tras una ventana.ffi
View original page 25Page 26 · Read text
www.butkus.us
                                     pEliculnREWTNDTNG THE FILM / coMo REBoBINAR lA
 1. Automatic rewinding / Rebobinado automdtico
            GD  . Rtter taking all the pictures on a roll of film, the camera will automatically
                             rewind the film. The motor stops when the rewinding is completed.
                                                 . When the rewinding is completed, the icon (                                                 ==O ) will blink. After 5                           seconds the icon will no longer be displayed. You may remove the film at
                                    this point.

       @  . Cuando se acabe de exponer la pelicula, la cdmara la rebobinard
                            automdticamente.  El motor se detendr6 cuando se haya completado  la
                             operaci6n de rebobinado.
                      .Cuando se haya completado el rebobinado, parpadeard el indicador
                         ( *O  ). Transcurridos 5 segundos, el indicador desaparecerd. En ese
                        momento podrd extraer la pelicula.


                   @
View original page 26From the M. Butkus archive. Original publisher and archive notices are retained.
Check the model and edition against your equipment.
PDF verified 2026-10-10.